The Java Transformation in Informatica allows one to write custom Java code within the transformation. If you are familiar with Java programming, you can write complex code inside this transformation.
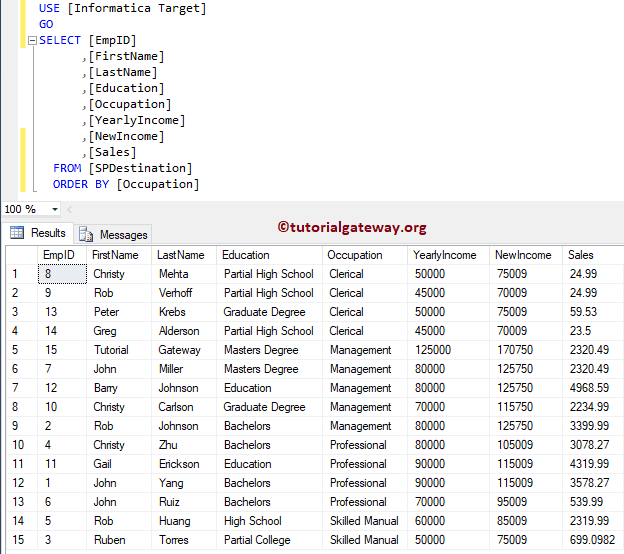
For this Informatica Java Transformation example, we will use SP Source and Destination tables. The screenshot below shows that the Source table has 15 records, and the Destination table is Empty.
Java Transformation in Informatica Example
This example shows how to create and configure Java Transformation. Before configuring, First, let me connect with the Informatica repository service.

To do so, we have to provide the Admin Console credentials. So, Please provide the appropriate Username and Password you specified while installing the Server.
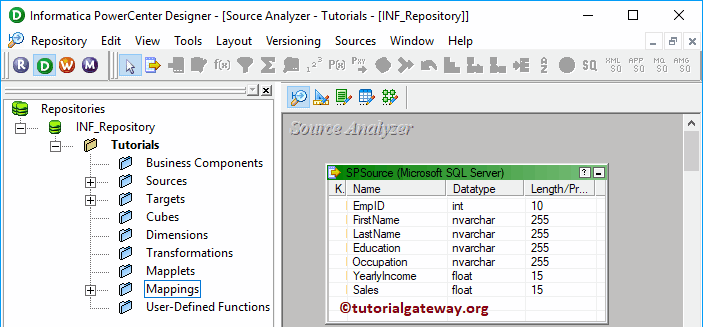
Create Source Definition for Java Transformation in Informatica
Once you connect successfully, navigate to Source Analyzer and define your Sources. In this Java Transformation example, we use the SP Source table from the SQL Server database as our source definitions. Please refer to Database Source to understand the steps in creating a source definition.
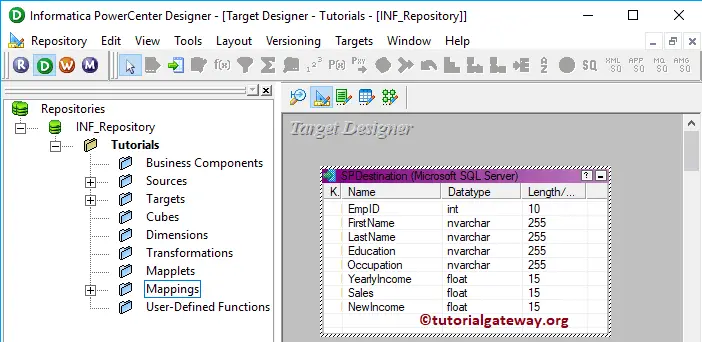
Create Java Target Definition
Please navigate to Target Designer to define the Target. In this Informatica Java Transformation example, we use the existing SQL table (SP Destination) as our target definition. You can refer to the Create Target table using Source Definition to understand the creation of a target definition.
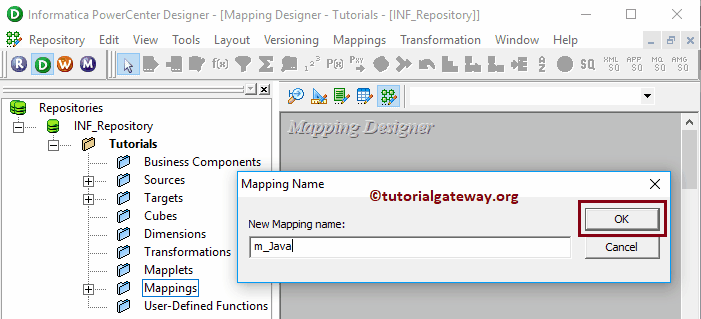
Create Informatica Java Transformation Mapping
To create a new mapping for Java Transformation, Please navigate to the Mappings menu in the Menu Bar. Next, select the Create.. option.
Once you select the Create.. option, a new Mapping Name window opens. Let me provide m_Java as the mapping name and click the OK button.
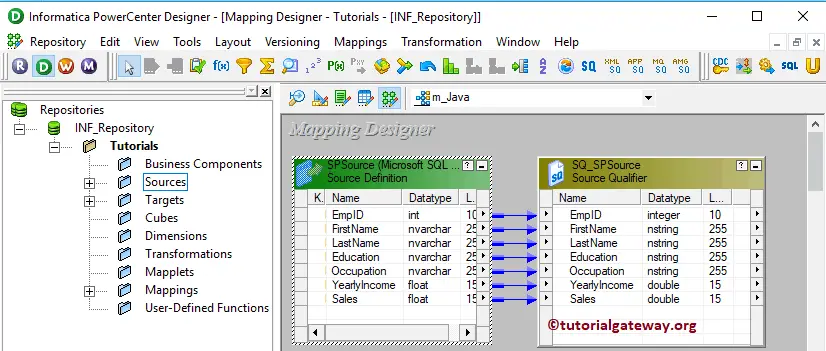
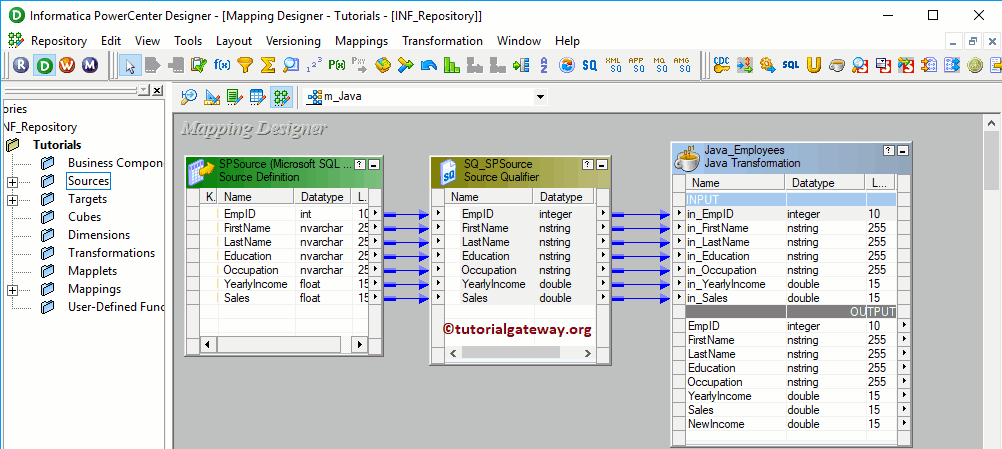
Drag and drop the SP Source from the Sources folder to the mapping designer. Once you drag the source, Power Center Designer automatically creates the Source Qualifier Transformation (default transformation) for you.
Create Informatica Java Transformation
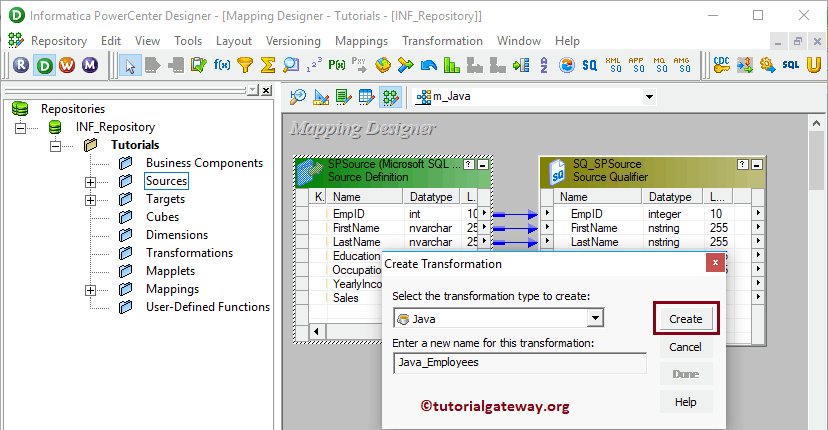
To create Java transformation, Please navigate to the Transformation menu in the Menu Bar. Next, select the Create.. option.
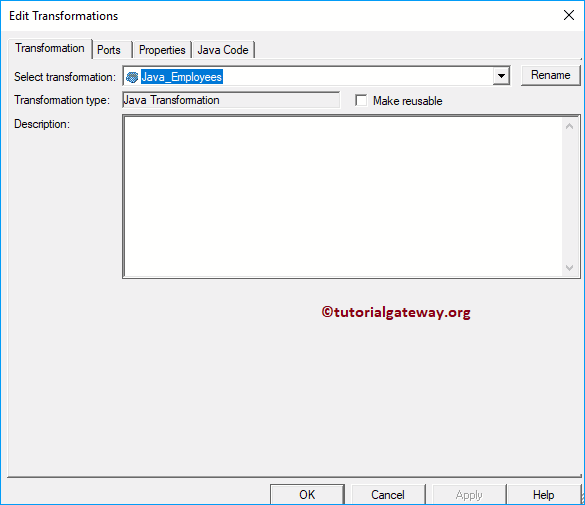
Selecting the Create.. option opens the Create Transformation window. Please select the Java Transformation from the drop-down list, provide the unique name (Java_Employees) for this transformation, and click the Create button.
Clicking the Create button will open a new window called Active or Passive. Please select whether you want to use this Informatica Java Transformation as an active or passive Transformation.
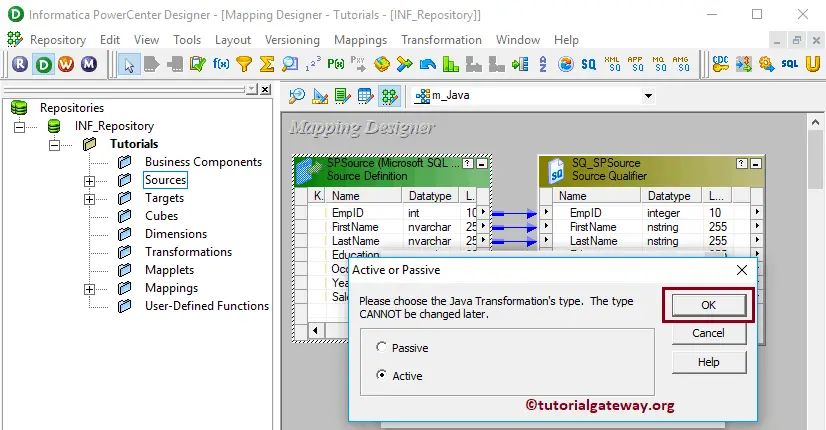
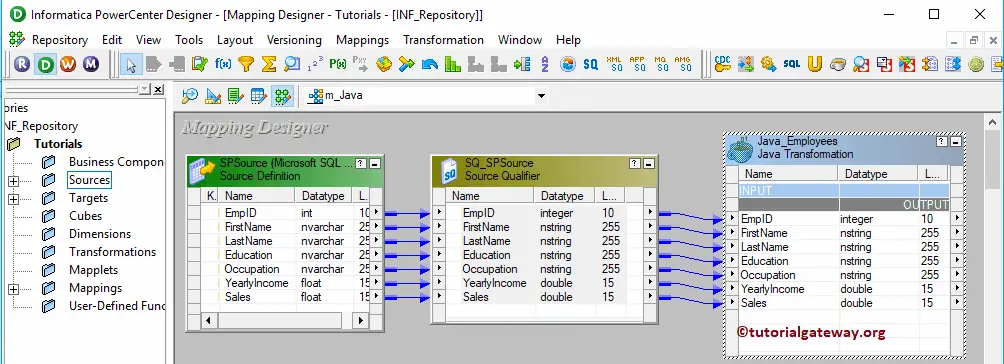
Clicking OK will create a Java Transformation for you. Let me drag all the fields available in the source definition to Java transformation.
Double click on the Informatica Java transformation to see and alter the properties. The below screenshot shows you the list of available properties in the Transformation tab:
- Select Transformation: By default, it selects the transformation you selected (or clicked on).
- Rename: This button helps you to rename the transformation name.
- Description: Use this place to provide a valid description.
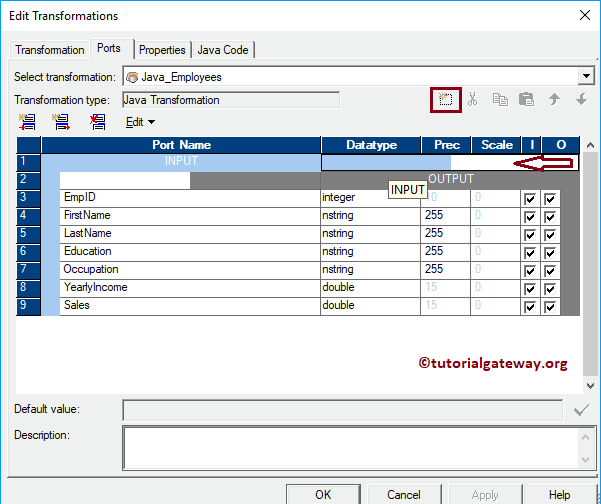
The below screenshot shows you the list of available columns in the Ports tab. As you can see, all the columns dragged from the source definition are in the OUTPUT section.
TIP: Few people may not drag fields from the Source Qualifier. They will create both Input and Output fields on their own, and then they point them to the Source Qualifier.
To create new fields under the input section, select INPUT and click the New field button.
In our Informatica Java Transformation source definition, we have 7 columns. So let me create 7 new fields under the INPUT section. We also need an extra output column for the New Income filed in our target table.
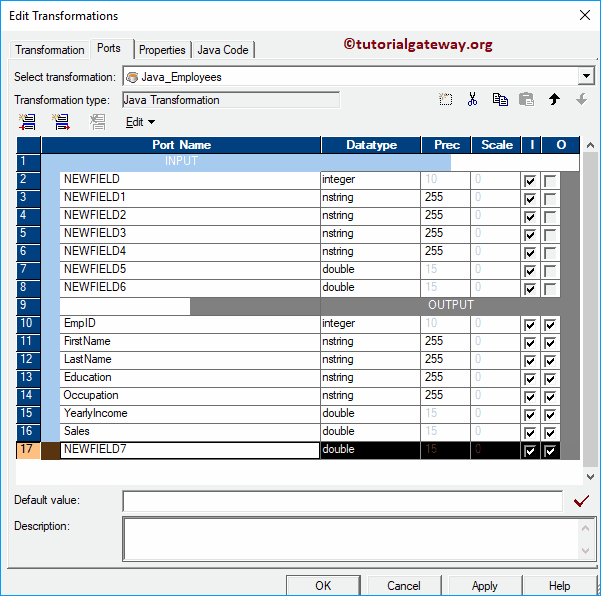
Let me rename the Field names as per the Source Definition
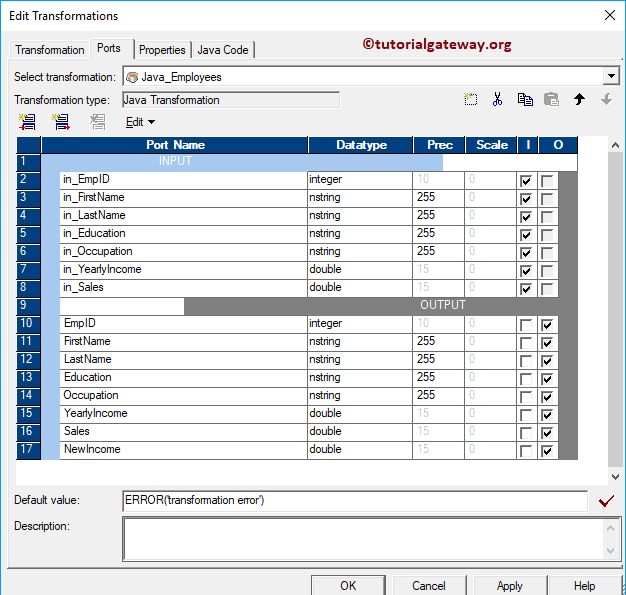
Java Code Tab: This is used to write custom Java code. Here, the Left side window is a Navigator window – Which holds all Input and Output ports available in Java transformation and a few regularly used functions. Let me write a simple code for this Java Transformation
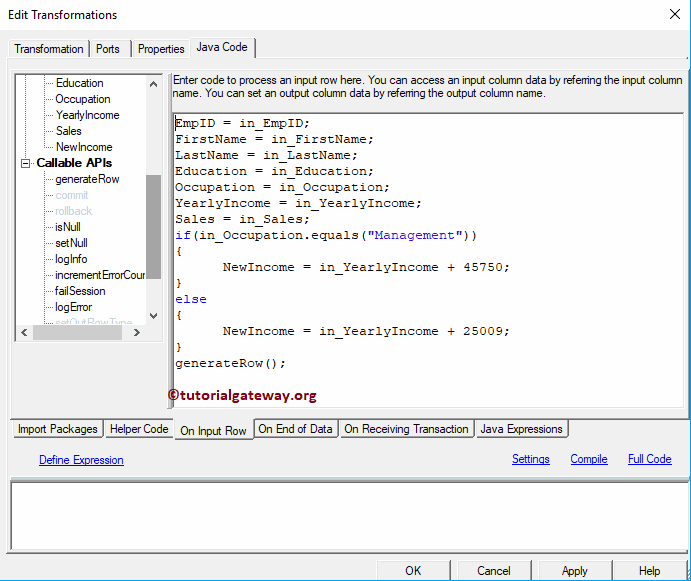
Within the above code, we used the If Else Statement and the Equals method to check whether an employee’s Occupation is Management or not. If it is TRUE, we add 45750 to the yearly income; otherwise, we add 25009. The code that we used is:
EmpID = in_EmpID;
FirstName = in_FirstName;
LastName = in_LastName;
Education = in_Education;
Occupation = in_Occupation;
YearlyIncome = in_YearlyIncome;
Sales = in_Sales;
if(in_Occupation.equals("Management"))
{
	NewIncome = in_YearlyIncome + 45750;
}
else
{
	NewIncome = in_YearlyIncome + 25009;
}
generateRow();
Once you finish configuring the Informatica Java Transformation, you must map the Source qualifier with the Java Transformation Input fields.
Next, Drag and drop the target definition (SP Destination) from the Targets folder to the mapping designer. Next, connect the Output Fileds of a Java Transformation with the target definition using the Autolink.. option.
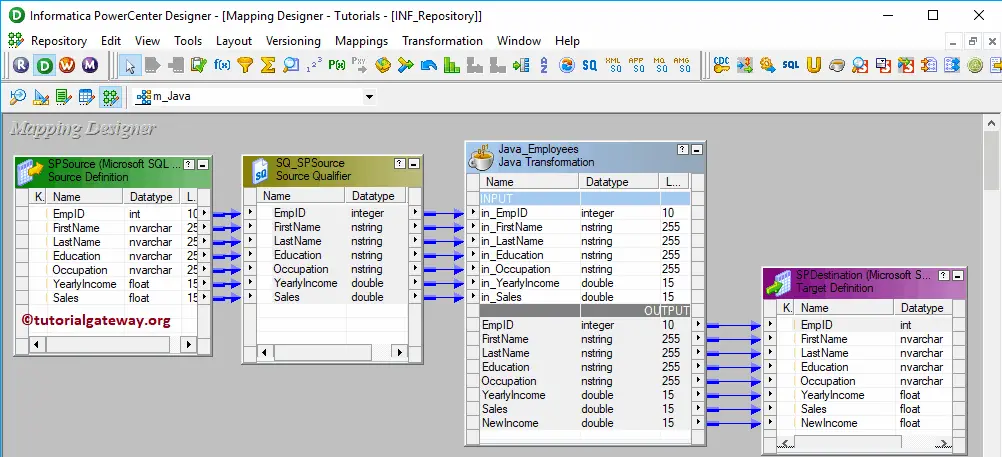
Before we close the Mapping, Let us Save and Validate the mapping by going to the Mapping Menu bar and selecting the Validate option.
Create Java Workflow
After you finish creating the Informatica Java Transformation Mapping, we must create the workflow. PowerCenter Workflow Manager provides two approaches to creating a workflow.
In this Java Transformation example, we will create the Workflow manually. To do so, navigate to the Workflows Menu and select the Create option. It opens a Create Workflow window. Please provide a unique name (wf_JavaEmp) and leave the default settings.
Once we have created the workflow, our next step is to create a session task for our mapping.
Create a Java Transformation Session
There are two types of sessions:
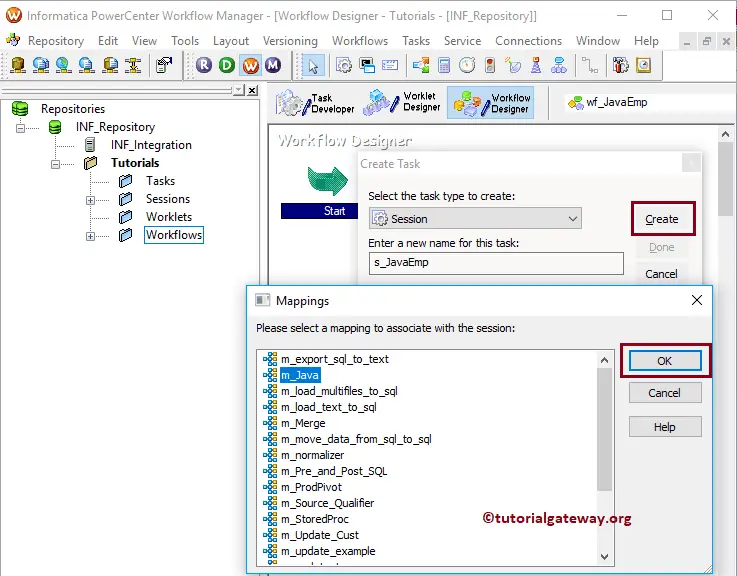
For this Informatica Java Transformation example, we created a Non-reusable Session. To create a Non-reusable Session, Please navigate to the Tasks Menu and select the Create option as shown below.
Please provide a unique name (s_JavaEmp) for this session. Once you click on the Create button, a new window called Mappings will open. You must select the mapping you want to associate with this session, i.e., m_Java.
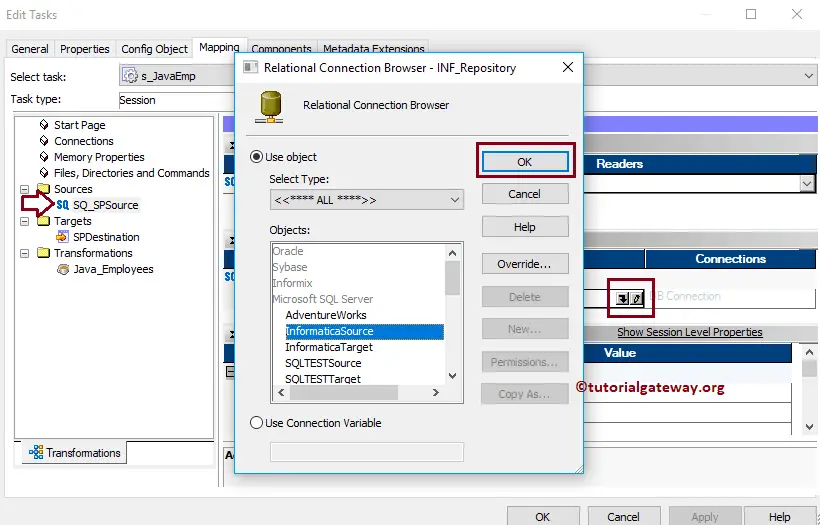
Double click on the Session task and open the Edit Tasks window. We have to configure the Source and Target Connections within the mappings tab.
First, configure the source connections by clicking on the SQ_SPSource source in the Sources folder. Within the Connections, click on the Arrow button beside the Relational type, and select the Database Object (Database Name), i.e., Informatica Source.
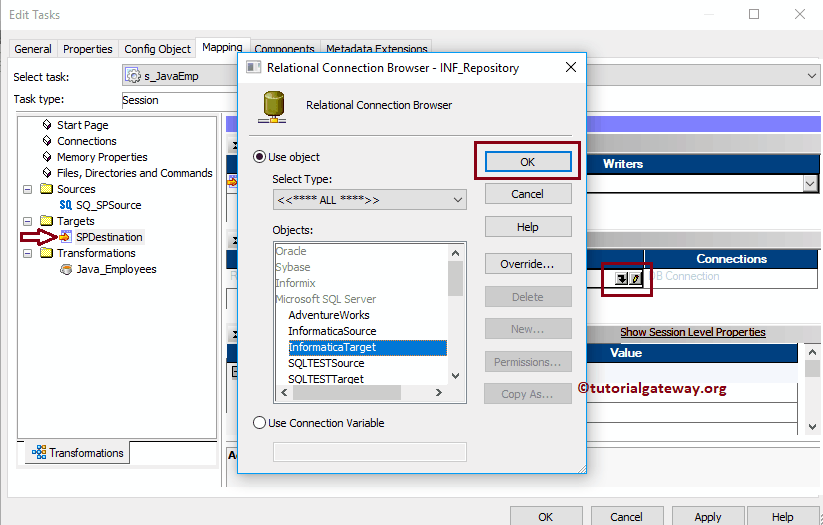
We have to configure the Target Connection for this Informatica Java Transformation. So, click on the SPDestination present in the Targets folder. Within the Connections, click on the Arrow button beside the Relational type. Next, select the Database Object (Target Database Name), i.e., Informatica Target.
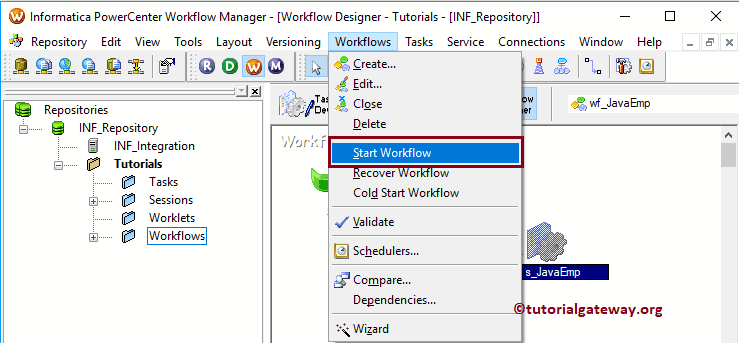
Next, navigate to the Workflows Menu and select the Validate option to validate the Workflow. Now, Let me start the Java Transformation Workflow. To do so, navigate the Workflows menu and select the Start Workflow option.
Let us open the SQL Server Management Studio and write the following SQL Query.