In this article, we will show you how to import data from relational databases such as Microsoft SQL Server, Oracle, Teradata, etc., and use them as Database sources in Informatica Source Analyzer.
Relational Database Source in Informatica
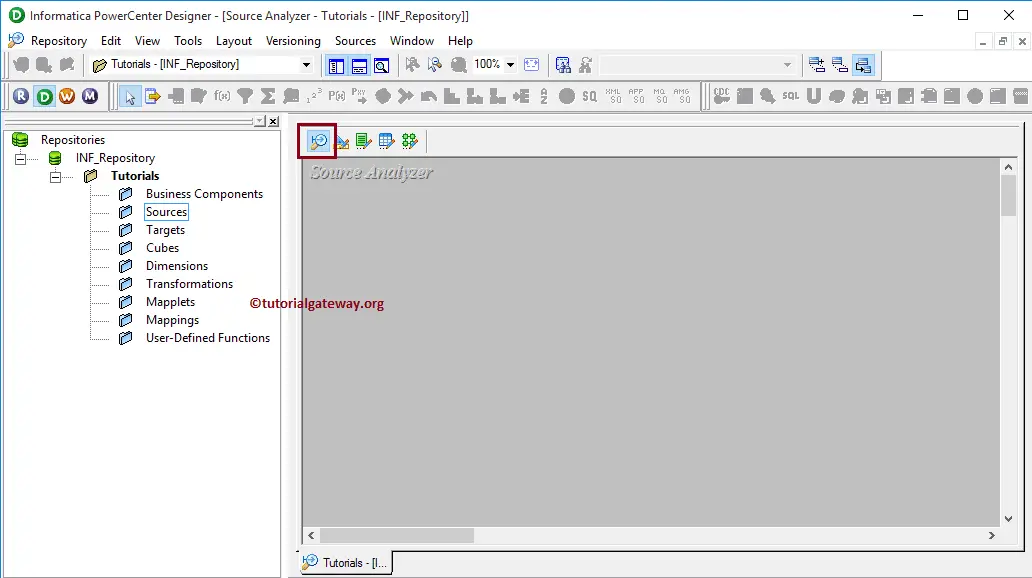
Before we start explaining the database sources, First connect to the repository service with your Admin credentials and then Navigate to Source Analyzer.
Please refer Source Analyzer article to understand the Informatica Source Analyzer. From the below screenshot, you can observe that we are in the Source Analyzer.
NOTE: The source Menu in the Menu bar will be available only when you are in the Source Analyzer section; otherwise, it hidden
Once you are in Informatica Source Analyzer, Please navigate to the Source menu and select the Import from Database.. option as shown below
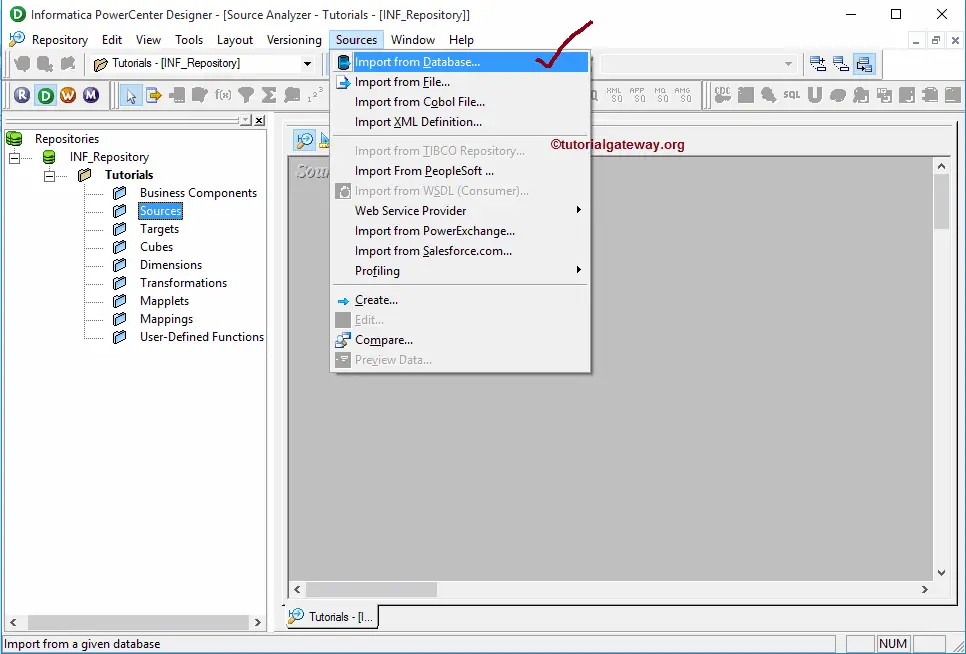
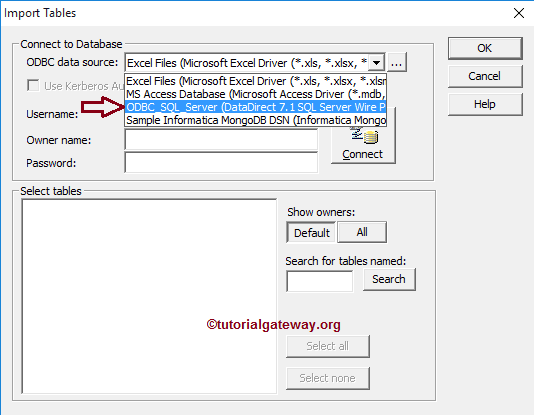
Once you choose the Import from Database.. option, a new window called Import Tables will open. Please select the ODBC connection that we already created in our previous article from the drop-down list. To create a new one, please refer to the ODBC Connection article.
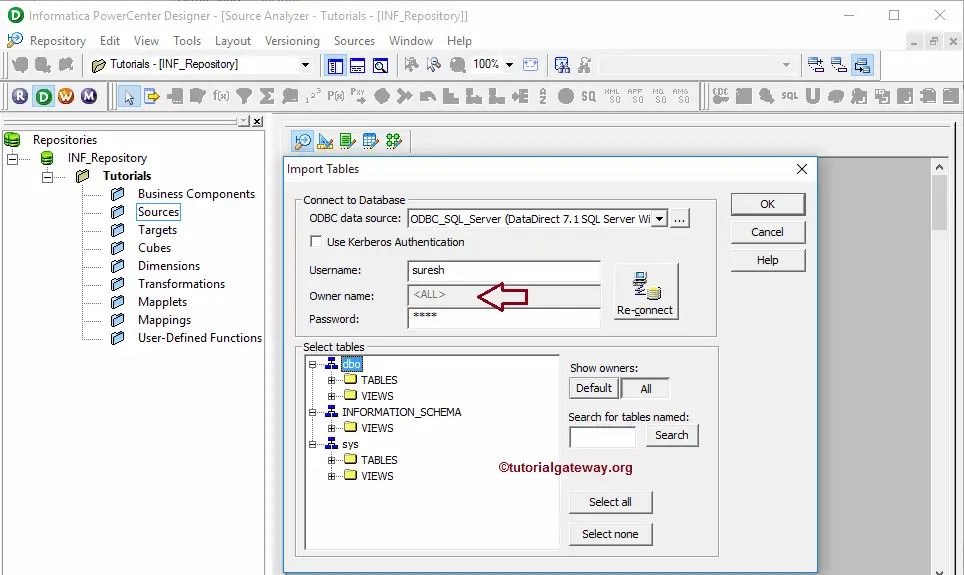
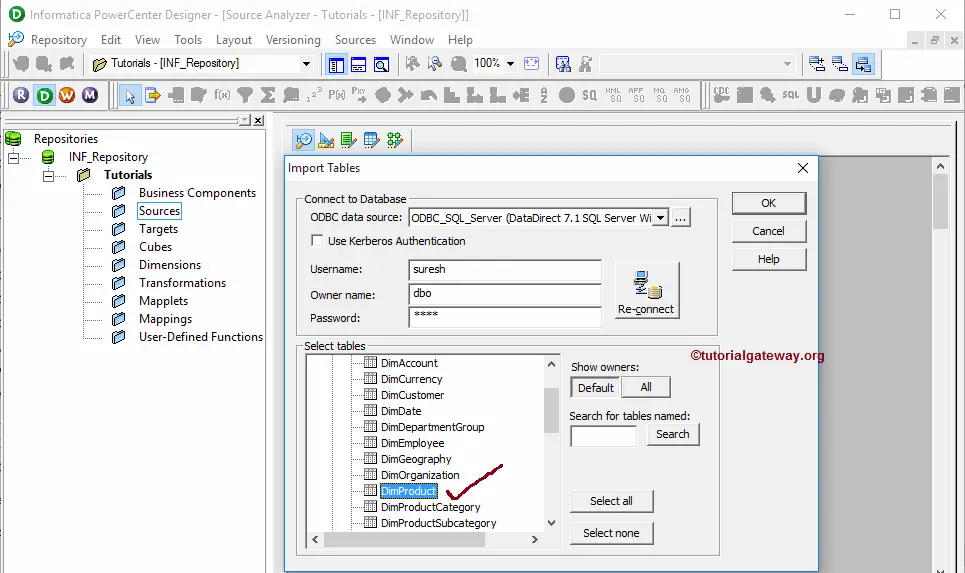
Next, We have to provide the credentials required to connect with the respective database. Here we are providing the Username and password of our Microsoft SQL Server 2014 and the owner name as dbo.
Once you fill in the details, please click on the connect button. It will connect the database and display the tables and Views present in the database.
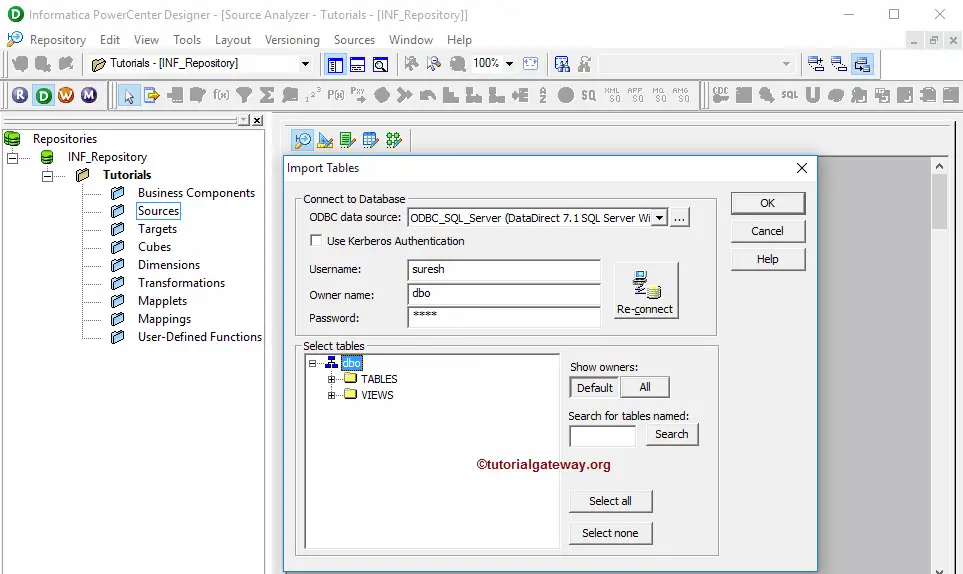
If you want to see the data from all owners, Please change the owner name from dbo to default All. We can do this by clicking the All button below the Show Owners section.
From the below screenshot, you can observe that we are selecting the DimProducts table from our Adventure Works DW 2014 database. Here you can choose more than one table also.
TIP: If you find it difficult to track your required table(s), type the table name under the Search for tables named and click on the search button
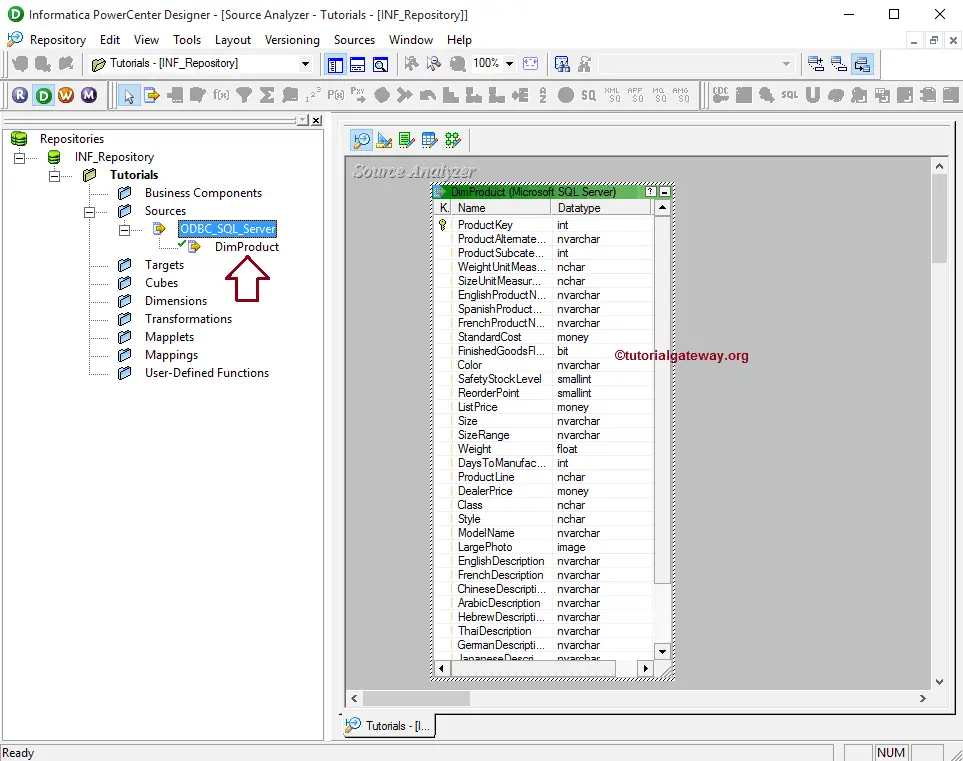
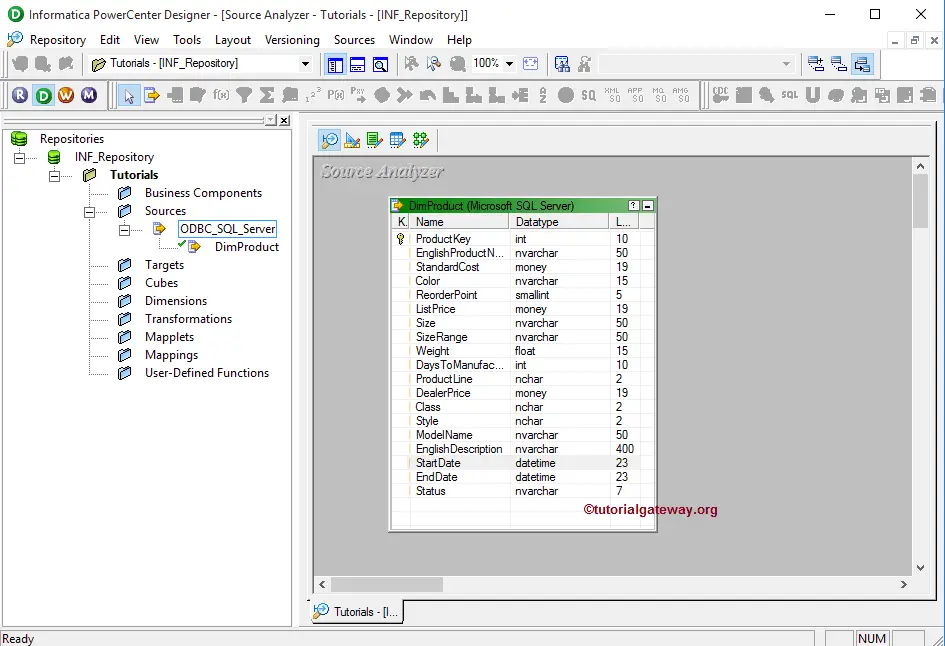
From the below screenshot, under the Source subfolder, you can see our newly created database source in Informatica and the table definition (Column Names and appropriate data types) inside our workspace.
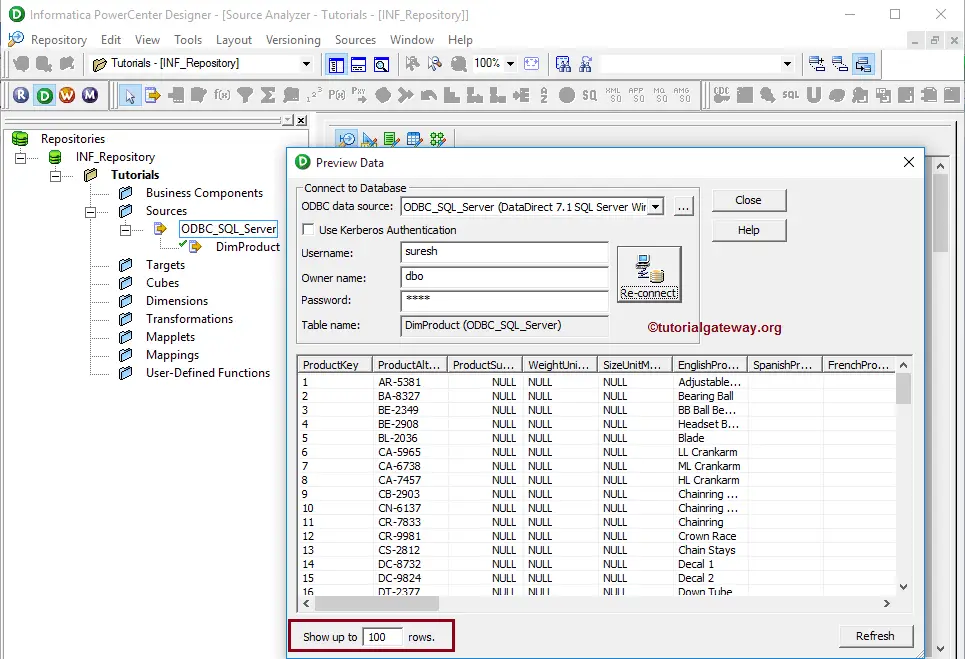
Preview Source Data
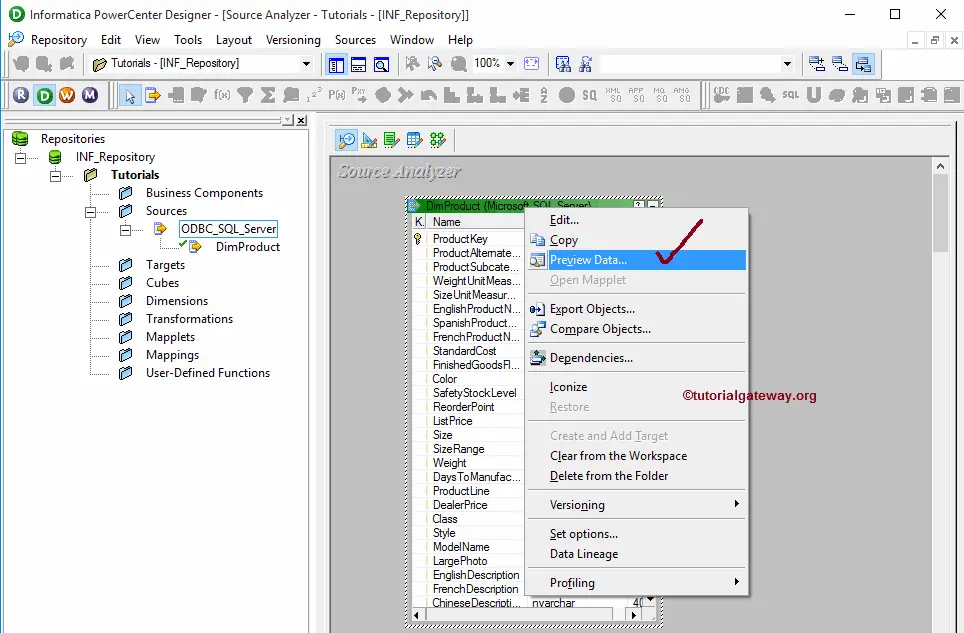
Although we imported our source from the SQL database, before we proceed further, we should preview our data. To preview the Database Source data, Right-click on the table definition and select the Preview data.. option from the context menu.
Once you select the Preview data.. option, the Preview data window will be opened. Here, you have to provide the credentials (username and password) required to connect with the respective database and click the connect button. Once you successfully connect to your database, data inside the table (here DimProducts) will display.
Edit existing Database Source in Informatica
Although we selected the DimProducts, we may not require all the columns present in that table. We can edit the table by right-clicking on the table definition to resolve this. Then select the Edit.. option from the context menu.
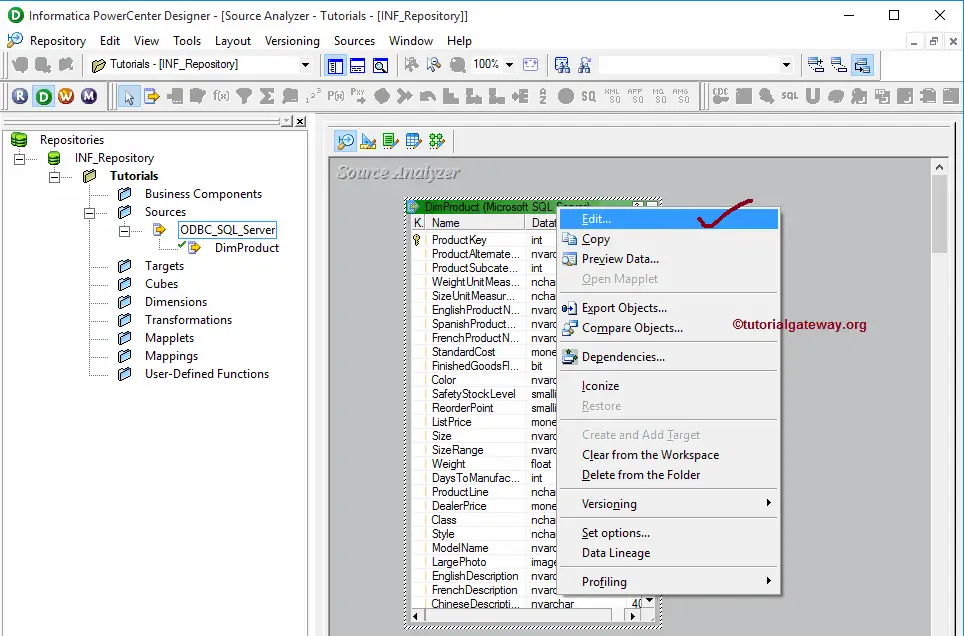
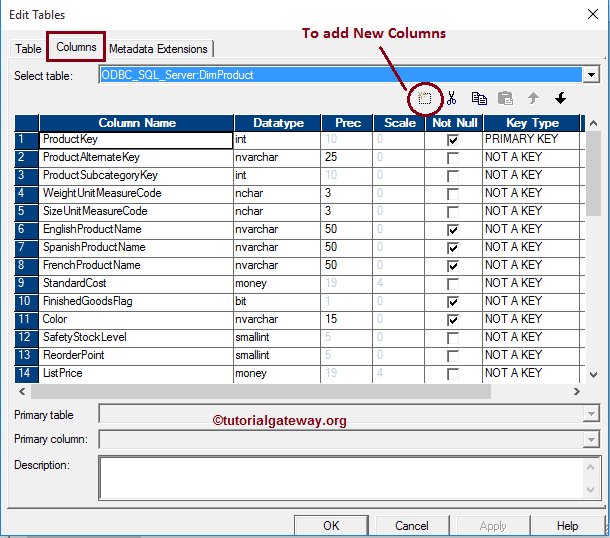
Once you select the Edit.. option, a new window called Edit tables will open. To alter or change the existing Informatica Database Source table, we have to navigate to Columns Tab.
For example, if you want to add new columns, then Please select the below-shown button. And then add Column Name, Data Type, Precision (if required), and Scale (if needed). IIf it is a primary key, then change the Key type to primary and checkmark the Not Null option (if your column doesn’t allow null values)
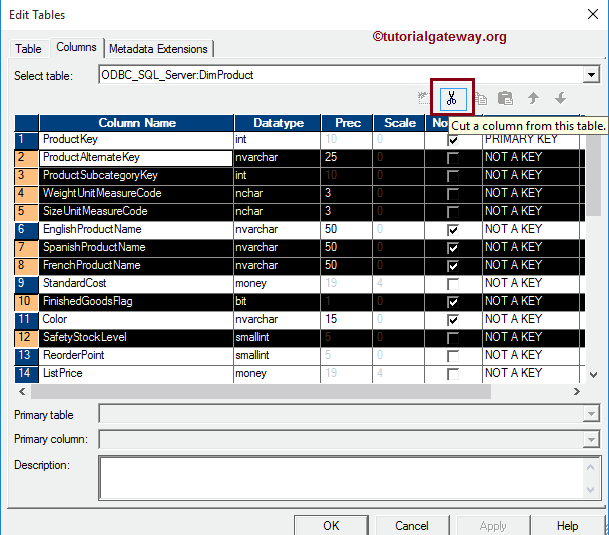
If you want to delete a few columns, then select the unwanted columns and click the scissors button. Here we are removing a few columns for demonstration purposes. Once you complete editing, Click OK to close the Edit Tables window
From the below screenshot, you can observe that we successfully deleted the unwanted columns from the Informatica Database source definition.
NOTE: We are removing the columns only from the Informatica Source Analyzer. It will not reflect the underlying database data.