In SQL Server, there are two types of table partitions they are Horizontal and vertical. This article will show you what Horizontal Table Partitioning is and how to create it with an example.
SQL Server Horizontal Table Partition: Dividing a table into multiple tables is called Horizontal. It is helpful to organize data for quick access. For this example, dividing the Sales into Monthly or Quarterly partitions will help the end user select records quickly.
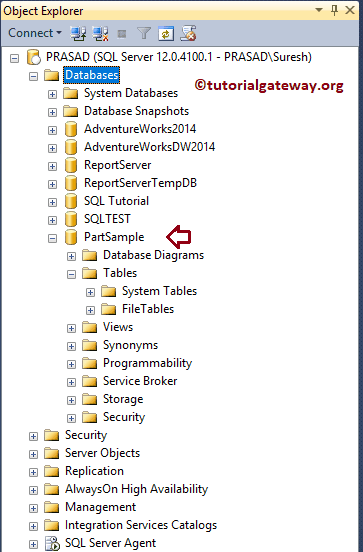
Remember, all the partition tables contain the same number of columns. Before we start creating Table Partitioning, let me show you the list of databases available in our local file system.

See the available databases on our server. For this SQL demonstration, we created a new database called PartSample.
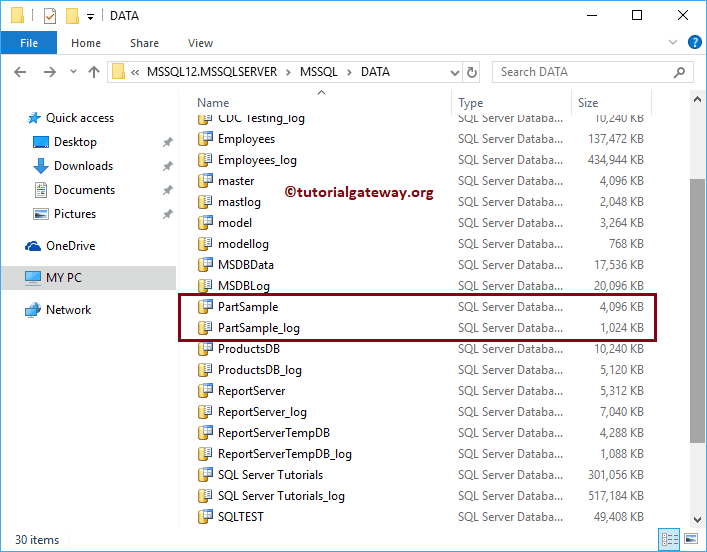
Now you can see our newly created database PartSample in our file system.
Create Table Partitioning in SQL Server
In this example, we will create a table partition to store data month-wise. I mean, orders or sales in each month will be stored in separate filegroups (files with ndf extension).
To achieve the same, we must create 12 separate file groups for 12 months, from January to December. To create a filegroup, we have to use the Alter Database command.
ALTER DATABASE PartSample
ADD FILEGROUP January
GO
ALTER DATABASE PartSample
ADD FILEGROUP February
GO
ALTER DATABASE PartSample
ADD FILEGROUP March
GO
ALTER DATABASE PartSample
ADD FILEGROUP April
GO
ALTER DATABASE PartSample
ADD FILEGROUP May
GO
ALTER DATABASE PartSample
ADD FILEGROUP June
GO
ALTER DATABASE PartSample
ADD FILEGROUP July
GO
ALTER DATABASE PartSample
ADD FILEGROUP August
GO
ALTER DATABASE PartSample
ADD FILEGROUP September
GO
ALTER DATABASE PartSample
ADD FILEGROUP October
GO
ALTER DATABASE PartSample
ADD FILEGROUP November
GO
ALTER DATABASE PartSample
ADD FILEGROUP December
GO
Messages
--------
Command(s) completed successfully.
Get System File Groups
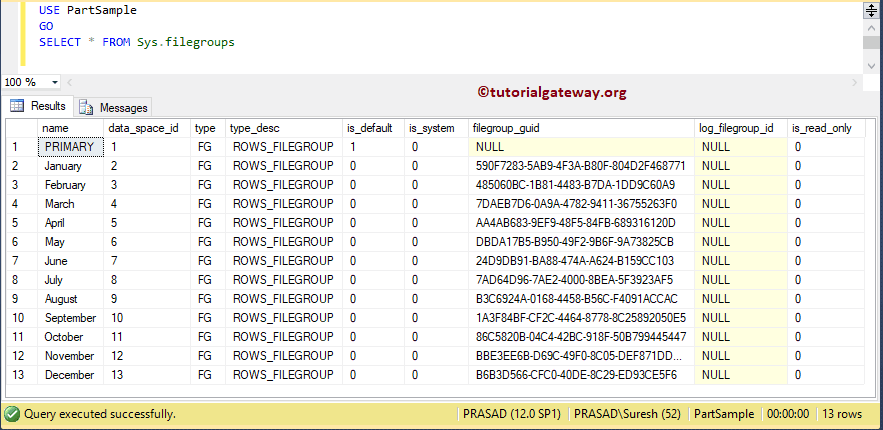
Use the below query to check or see the list of file groups available in this table partitioning in the sql server database.
USE PartSample
GO
SELECT * FROM Sys.filegroups
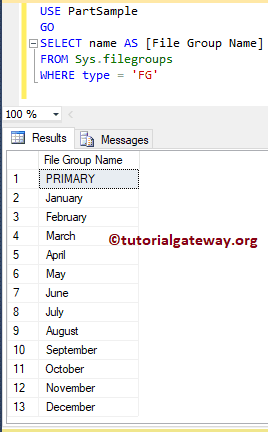
The below Table partitioning query returns the file group names
USE PartSample
GO
SELECT name AS [File Group Name]
FROM Sys.filegroups
WHERE type = 'FG'
Add ndf files to File Groups to Table Partitioning in Sql Server
Once you create the filegroups, you have to add or assign, or create ndf files. The below query will add the ndf file to the January File group. Remember, we are not given the actual path, so please replace …. with the actual database path.
ALTER DATABASE [PartSample]
    ADD FILE
    (
    NAME = [PartJan],
    FILENAME = 'C:\Program Files\..........\DATA\PartJan.ndf',
        SIZE = 5080 KB,
        MAXSIZE = UNLIMITED,
        FILEGROWTH = 2040 KB
    ) TO FILEGROUP [January]
Execute the Table partition query
Messages
--------
Command(s) completed successfully.
Use the below query to add ndf files for the remaining 11 months. Remember, this is the physical location where monthly data is going to be stored.
-- Adding ndf for February File Group
ALTER DATABASE [PartSample]
    ADD FILE
    (
    NAME = [PartFeb],
    FILENAME = 'C:\Program Files\...............\DATA\PartFeb.ndf',
        SIZE = 5080 KB,
        MAXSIZE = UNLIMITED,
        FILEGROWTH = 2040 KB
    ) TO FILEGROUP [February]

-- Adding ndf for March File Group
ALTER DATABASE [PartSample]
    ADD FILE
    (
    NAME = [PartMarch],
    FILENAME = 'C:\Program Files\...............\DATA\PartMarch.ndf',
        SIZE = 5080 KB,
        MAXSIZE = UNLIMITED,
        FILEGROWTH = 2040 KB
    ) TO FILEGROUP [March]

-- Adding ndf for April File Group
ALTER DATABASE [PartSample]
    ADD FILE
    (
    NAME = [PartApril],
    FILENAME = 'C:\Program Files\...............\DATA\PartApril.ndf',
        SIZE = 5080 KB,
        MAXSIZE = UNLIMITED,
        FILEGROWTH = 2040 KB
    ) TO FILEGROUP [April]

/-- Adding ndf for May File Group
ALTER DATABASE [PartSample]
    ADD FILE
    (
    NAME = [PartMay],
    FILENAME = 'C:\Program Files\...............\DATA\PartMay.ndf',
        SIZE = 5080 KB,
        MAXSIZE = UNLIMITED,
        FILEGROWTH = 2040 KB
    ) TO FILEGROUP [May]

-- Adding ndf for June File Group
ALTER DATABASE [PartSample]
    ADD FILE
    (
    NAME = [PartJune],
    FILENAME = 'C:\Program Files\...............\DATA\PartJune.ndf',
        SIZE = 5080 KB,
        MAXSIZE = UNLIMITED,
        FILEGROWTH = 2040 KB
    ) TO FILEGROUP [June]

-- Adding ndf for July File Group
ALTER DATABASE [PartSample]
    ADD FILE
    (
    NAME = [PartJuly],
    FILENAME = 'C:\Program Files\...............\DATA\PartJuly.ndf',
        SIZE = 5080 KB,
        MAXSIZE = UNLIMITED,
        FILEGROWTH = 2040 KB
    ) TO FILEGROUP [July]

-- Adding ndf for August File Group
ALTER DATABASE [PartSample]
    ADD FILE
    (
    NAME = [PartAug],
    FILENAME = 'C:\Program Files\...............\DATA\PartAug.ndf',
        SIZE = 5080 KB,
        MAXSIZE = UNLIMITED,
        FILEGROWTH = 2040 KB
    ) TO FILEGROUP [August]

-- Adding ndf for September File Group
ALTER DATABASE [PartSample]
    ADD FILE
    (
    NAME = [PartSept],
    FILENAME = 'C:\Program Files\...............\DATA\PartSept.ndf',
        SIZE = 5080 KB,
        MAXSIZE = UNLIMITED,
        FILEGROWTH = 2040 KB
    ) TO FILEGROUP [September]

-- Adding ndf for October File Group
ALTER DATABASE [PartSample]
    ADD FILE
    (
    NAME = [PartOct],
    FILENAME = 'C:\Program Files\...............\DATA\PartOct.ndf',
        SIZE = 5080 KB,
        MAXSIZE = UNLIMITED,
        FILEGROWTH = 2040 KB
    ) TO FILEGROUP [October]

-- Adding ndf for November File Group
ALTER DATABASE [PartSample]
    ADD FILE
    (
    NAME = [PartNov],
    FILENAME = 'C:\Program Files\...............\DATA\PartNov.ndf',
        SIZE = 5080 KB,
        MAXSIZE = UNLIMITED,
        FILEGROWTH = 2040 KB
    ) TO FILEGROUP [November]

-- File Group for December
ALTER DATABASE [PartSample]
    ADD FILE
    (
    NAME = [PartDec],
    FILENAME = 'C:\Program Files\...............\DATA\PartDec.ndf',
        SIZE = 5080 KB,
        MAXSIZE = UNLIMITED,
        FILEGROWTH = 2040 KB
    ) TO FILEGROUP [December]
Once you execute the query, the message will be
Messages
--------
Command(s) completed successfully.
From the below screenshot you can see, that ndf files have been created for each file group.
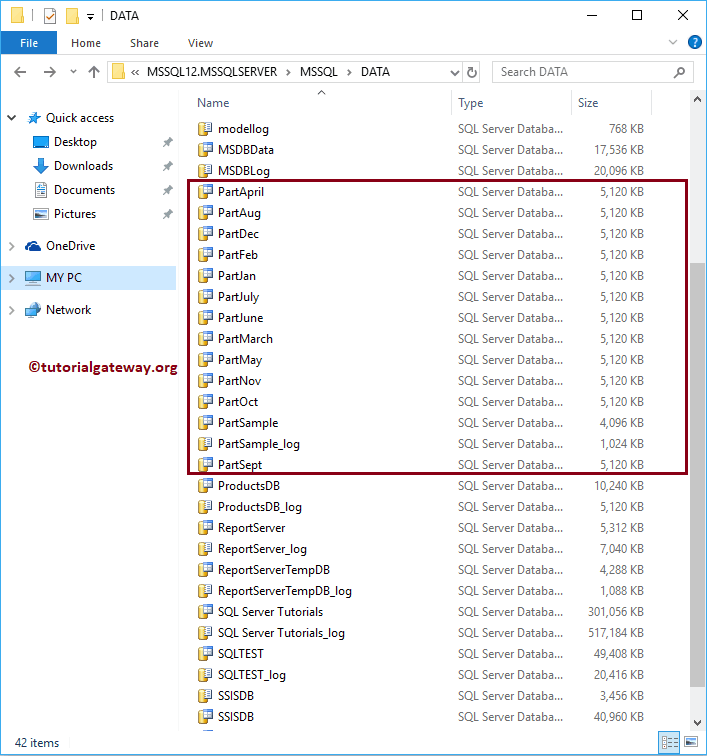
View File groups and respective ndf files of SQL Table partition
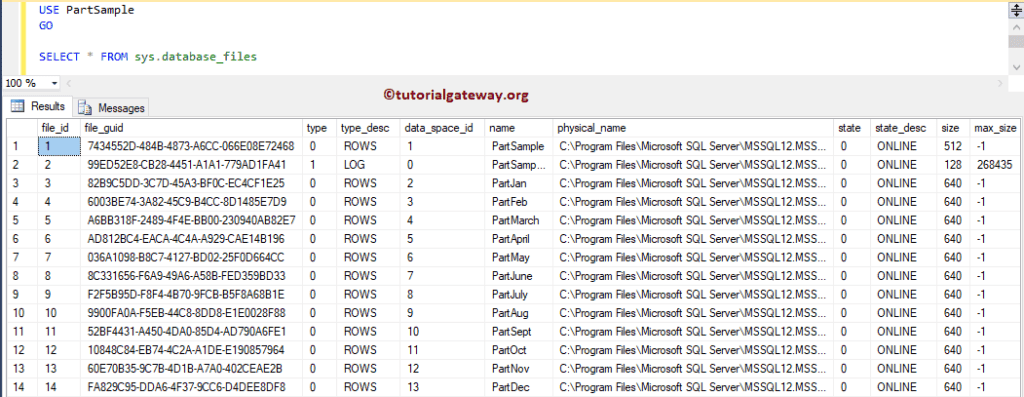
Use sys.database_files to get information about file groups and their physical locations.
USE PartSample
GO

SELECT * FROM sys.database_files
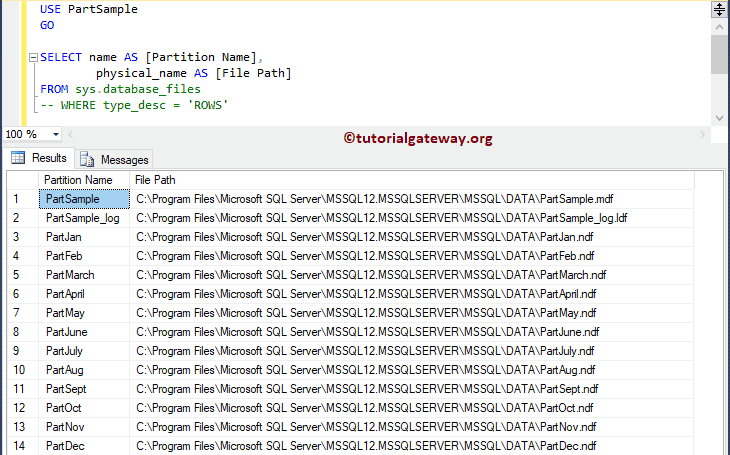
You can also use more specific columns in the select statement
USE PartSample
GO

SELECT name AS [Partition Name],
		physical_name AS [File Path]
FROM sys.database_files
-- WHERE type_desc = 'ROWS'
Create Partition Function for Table in Sql Server
This function will map the rows from the original to the partition tables. For this, the SQL partition function will use one column to identify the filegroup.
The below function will map the original table to file groups based on each month. This function compares the insert date value and map to one of the partitions based on the values we specified within the brackets ().
USE PartSample
GO

CREATE PARTITION FUNCTION [MonthlyPartition] (datetime)
AS RANGE RIGHT FOR VALUES ('20180201', '20180301', '20180401',
               '20180501', '20180601', '20180701', '20180801',
               '20180901', '20181001', '20181101', '20181201');
Execute the above query
Messages
--------
Command(s) completed successfully.
Create a Partition Scheme
This will map the partition tables with the file groups. The below scheme will map 20180201 to February etc.
USE PartSample
GO

CREATE PARTITION SCHEME MonthWisePartition
AS PARTITION MonthlyPartition
		TO (January, February, March, April, May, June, July,
			August, September, October, November, December
			);
Execute the above query.
Messages
--------
Command(s) completed successfully.
Create a Table with Partitioning
Let me create a table using the newly created Table partitioning schema. I suggest you refer to Create a table and Identity Column to understand the below code.
USE [PartSample]
GO

CREATE TABLE [dbo].[Insert](
	[EmpID] [int] IDENTITY(1,1) NOT NULL,
	[FirstName] [nvarchar](255) NULL,
	[LastName] [nvarchar](255) NULL,
	[Occupation] [nvarchar](255) NULL,
	[YearlyIncome] [float] NULL,
	[Sales] [float] NULL,
	[InsertDate] [datetime] NULL
) ON MonthWisePartition (InsertDate);
Messages
--------
Command(s) completed successfully.
Let me insert a few records into the newly created table. Please refer to the Insert Statement article to understand the insert operations.
USE [PartSample]
GO

INSERT INTO [dbo].[Insert]
VALUES ('Imran', 'Khan', 'Skilled Professional', 15900, 100, GETDATE())
      ,('Doe', 'Lara', 'Management', 15000, 60, GETDATE())
      ,('Ramesh', 'Kumar', 'Professional', 65000, 630, DATEADD(month, 1, GETDATE()))
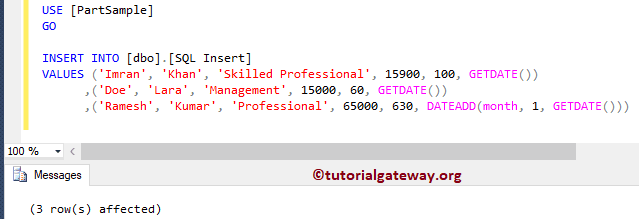
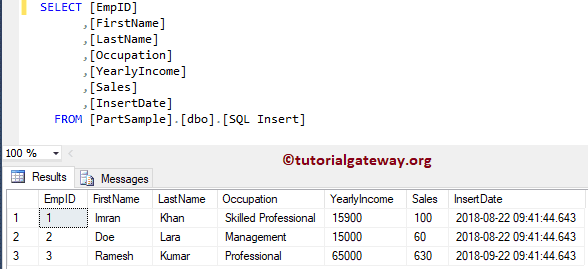
From the below screenshot, you can see those records.
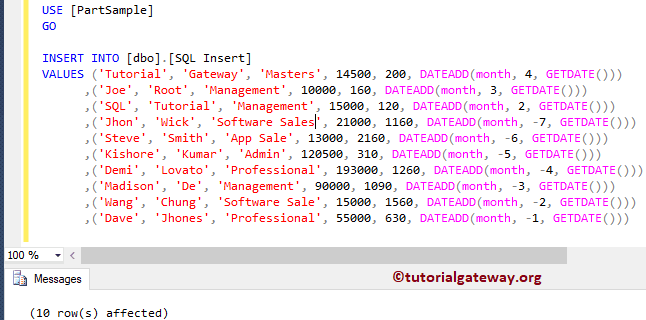
Next, we inserted a few more records with different dates. Notice, that we used the DATEADD function to add or delete months from the current date.
USE [PartSample]
GO

INSERT INTO [dbo].[Insert]
VALUES ('Tutorial', 'Gateway', 'Masters', 14500, 200, DATEADD(month, 4, GETDATE()))
      ,('Joe', 'Root', 'Management', 10000, 160, DATEADD(month, 3, GETDATE()))
	  ,('SQL', 'Tutorial', 'Management', 15000, 120, DATEADD(month, 2, GETDATE()))
	  ,('Jhon', 'Wick', 'Software Sales', 21000, 1160, DATEADD(month, -7, GETDATE()))
	  ,('Steve', 'Smith', 'App Sale', 13000, 2160, DATEADD(month, -6, GETDATE()))
	  ,('Kishore', 'Kumar', 'Admin', 120500, 310, DATEADD(month, -5, GETDATE()))
	  ,('Demi', 'Lovato', 'Professional', 193000, 1260, DATEADD(month, -4, GETDATE()))
	  ,('Madison', 'De', 'Management', 90000, 1090, DATEADD(month, -3, GETDATE()))
	  ,('Wang', 'Chung', 'Software Sale', 15000, 1560, DATEADD(month, -2, GETDATE()))
      ,('Dave', 'Jhones', 'Professional', 55000, 630, DATEADD(month, -1, GETDATE()))
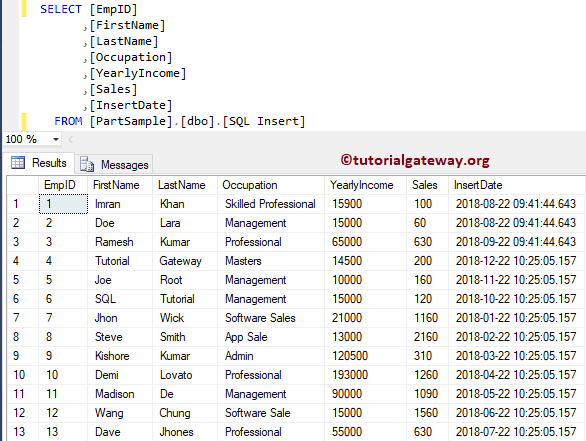
From the below screenshot, you can see all the records. If you observe the insert dates, each month had one record, and August had 2 records.
View Records in SQL Table Partitioning
Use the below query to see the total number of rows per file group.
SELECT partition_id AS ID,
       partition_number AS [Partition Number],
	   rows AS [Number of Rows]
FROM sys.partitions AS part
WHERE OBJECT_NAME(OBJECT_ID) = 'Insert'

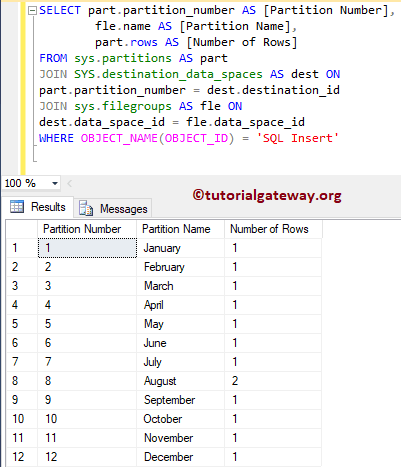
You can use the below query to see the File Group name along with the total number of rows in the table partitioning.
USE PartSample
SELECT part.partition_number AS [Partition Number],
		fle.name AS [Partition Name],
		part.rows AS [Number of Rows]
FROM sys.partitions AS part
JOIN SYS.destination_data_spaces AS dest ON
part.partition_number = dest.destination_id
JOIN sys.filegroups AS fle ON
dest.data_space_id = fle.data_space_id
WHERE OBJECT_NAME(OBJECT_ID) = 'Insert'