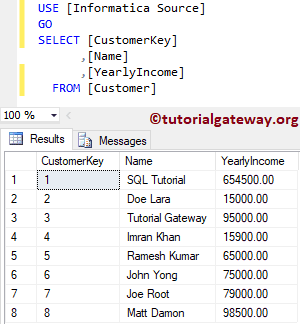
In this article, we are going to explain how to configure Update Strategy in Informatica with an example. For this Informatica Update Strategy example, we are going to use the below show data (Customer table)
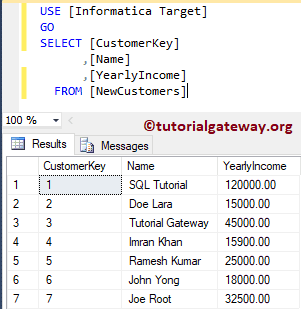
And the destination table is:
Update Strategy in Informatica Example
In our previous article, we already explained the Update Strategy Transformation. In this example, we will show you another way of using this Informatica Update Strategy Transformation.
First, let me connect with the repository service. To do so, enter the Admin Console username and password you specified while installing the Server.
Create Source Definition for Update Strategy in Informatica
Once you connect successfully, Please navigate to Source Analyzer and define your Sources. In this Informatica Update Strategy example, we are using the Customer table from the SQL Server database as our source definitions. Please refer Database Source article.

Create Target Definition for Informatica Update Strategy
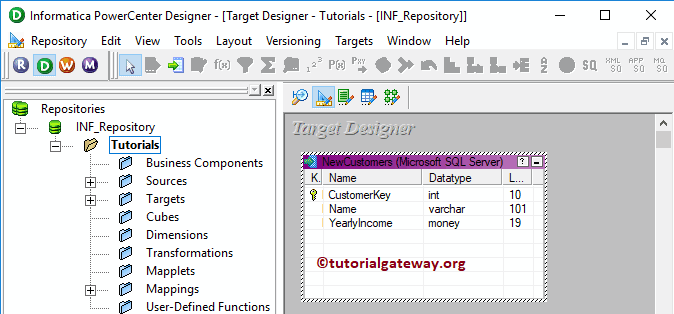
Please navigate to Target Designer and define the Informatica Update Strategy Target. In this example, we are using the already created SQL table (New Customers) as our target definition. Please refer Create Target table using Source Definition to understand the target definition
Step 3: Create a Mapping for Update Strategy in Informatica
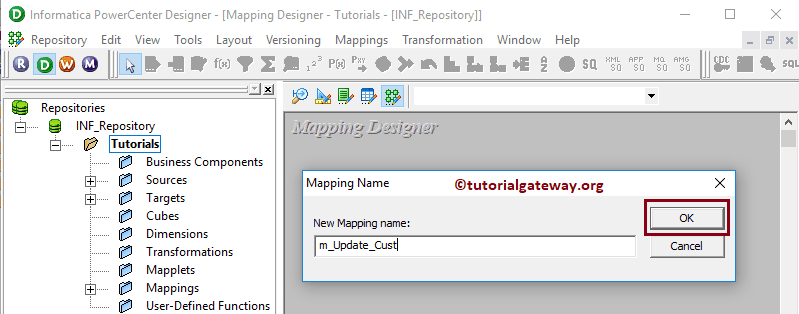
To create a new Informatica Update Strategy mapping, Please navigate to the Mappings menu and select the Create.. option.
It opens the Mapping Name window to write a unique name (m_update_Cust) for this mapping and click OK button.
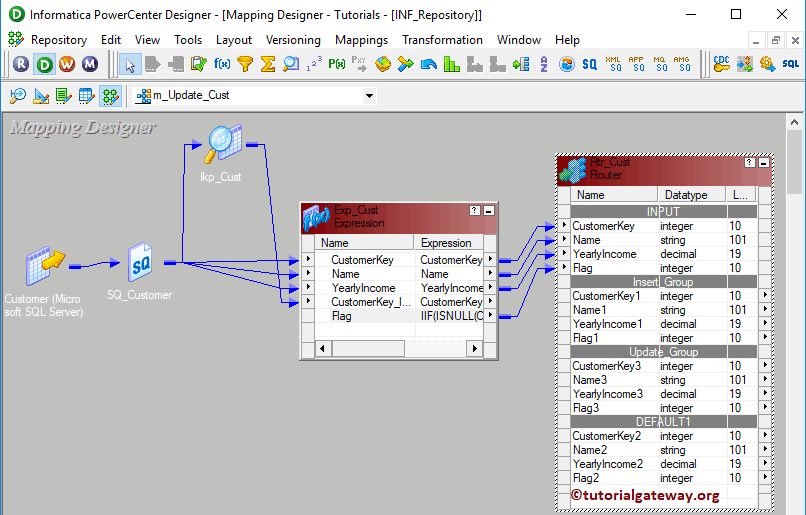
Drag and drop the Customer record source definitions from the Sources folder to the mapping designer. Once you drag the source, the Power Center designer will automatically create the Source Qualifier for you.
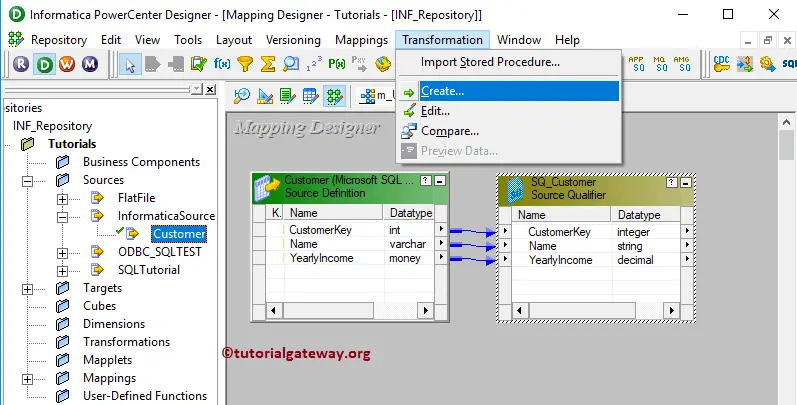
Step 3(a): Create a Lookup Transformation
To create a Lookup Transformation, Please navigate to the Transformation menu and select the Create.. option.
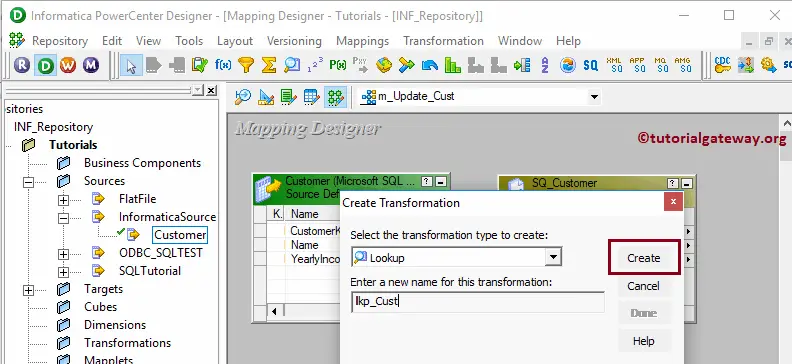
Once you click on the Create.. option, the Create Transformation window will open. Please select the Lookup Transformation from the drop-down list specify the unique name (lkp_Cust) and click on the Create button
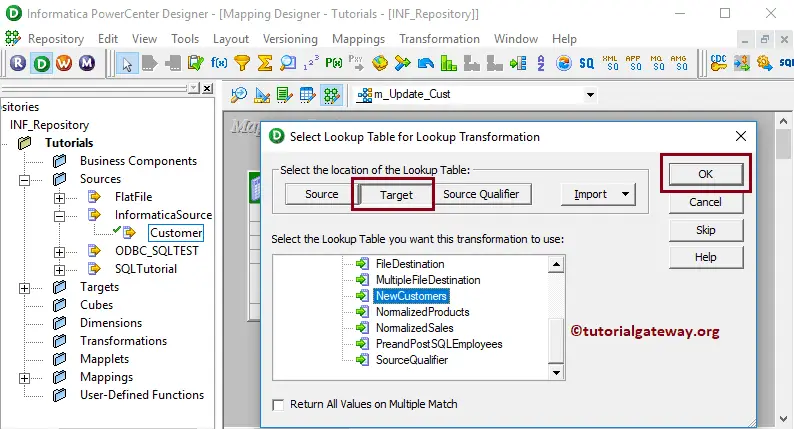
Once you click on the Create.. button, a Select Lookup Table for Lookup Transformation window will open. Here, we want to use the Target table as the lookup source.
TIP: If your lookup table is present in Source, then select Source. Here, you can also Import from an external source.
Clicking the Create button adds the Lookup Transformation to the mapping designer. Next, drag and drop the Customer key from the Source Qualifier.

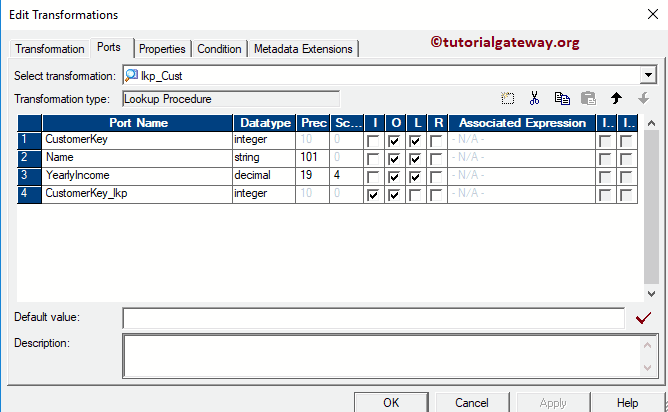
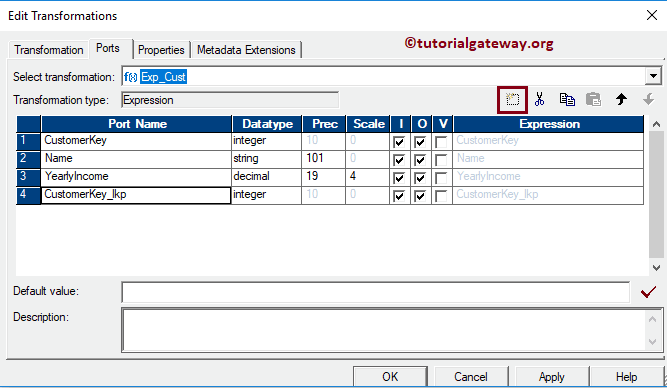
Double click on the lookup transformation to configure its settings. The below screenshot will show you the list of available options in the Ports tab. From the below screenshot, you can observe that We changed the Input port name (CustomerKey_lkp).
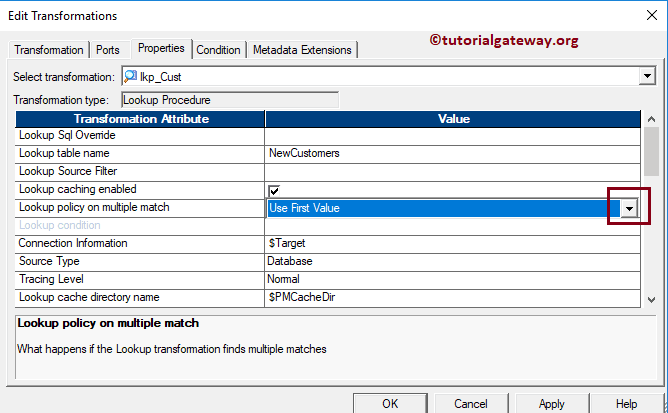
Within the Properties section, we changed the Lookup Policy on Multiple Match to Use First value.
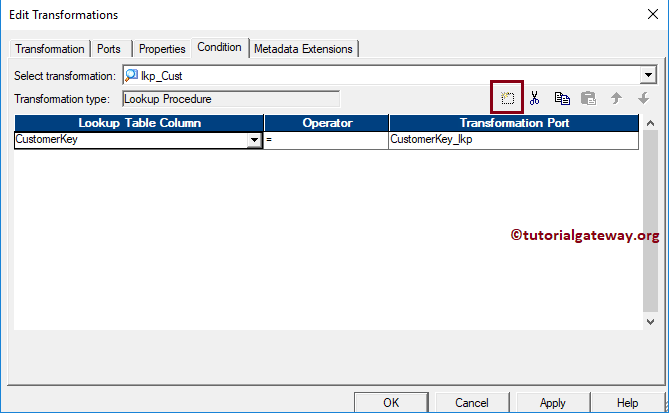
Within the condition tab, we added one condition CustmerKey = CustmerKey_lkp. The below condition states that the Lookup transformation will check whether the lookup input source (i.e., Customer Key) is equal to the existing Customer Key or Not.
Step 3(b): Create an Expression Transformation
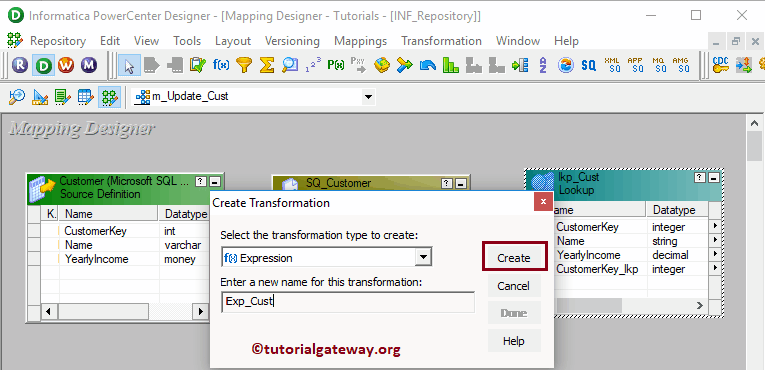
To create an Expression Transformation, select the Create.. option from the Transformation menu. As you can see, we assigned the name as Exp_Cust
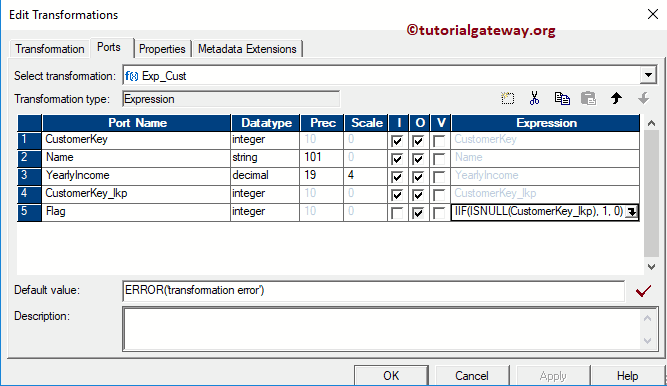
Now let me add all the fields from Source Qualifier to Expression Transformation and the Key column from Lookup Transformation.
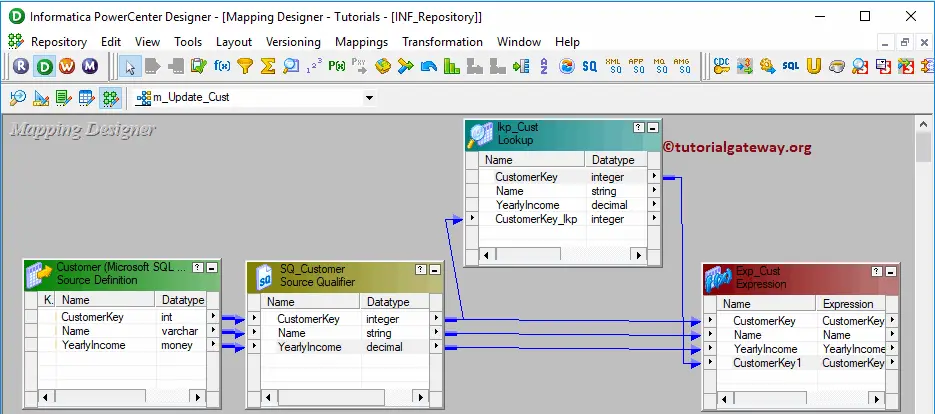
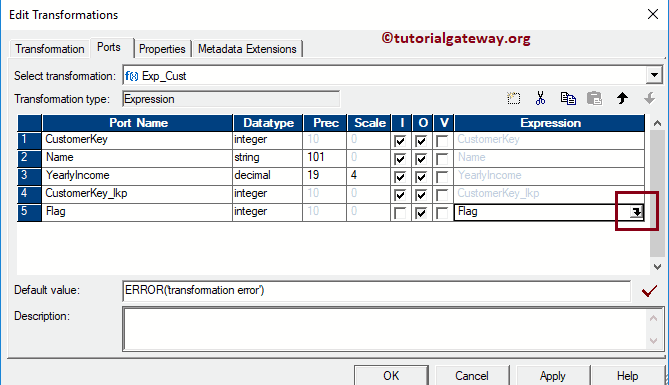
As you can see, we changed the column name (column added from lookup). Next, we would like to add one Flag field using New Column button
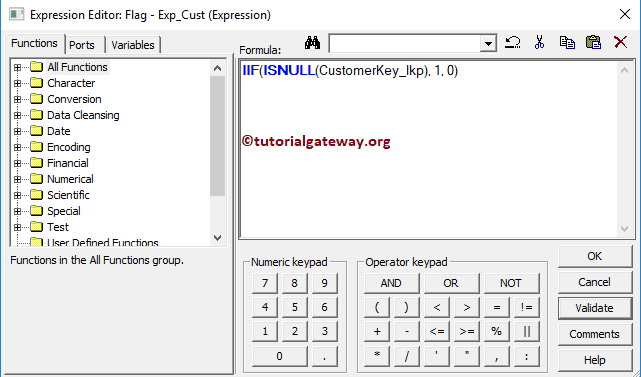
For this flag field, let me write an expression by clicking the Arrow. Remember, If you want to perform Delete or some other operation based on some condition, then use multiple Tags.
Here, the ISNULL is to check whether it is Null or not
Below the specified expression check whether the Customer key column coming from the lookup field is Empty or not. If it is empty, one will return otherwise 0. And the expression is IIF(ISNULL(CustomerKey_lkp), 1, 0). Please refer to IIF to understand the syntax of an IIF.
Click OK to Apply the setting
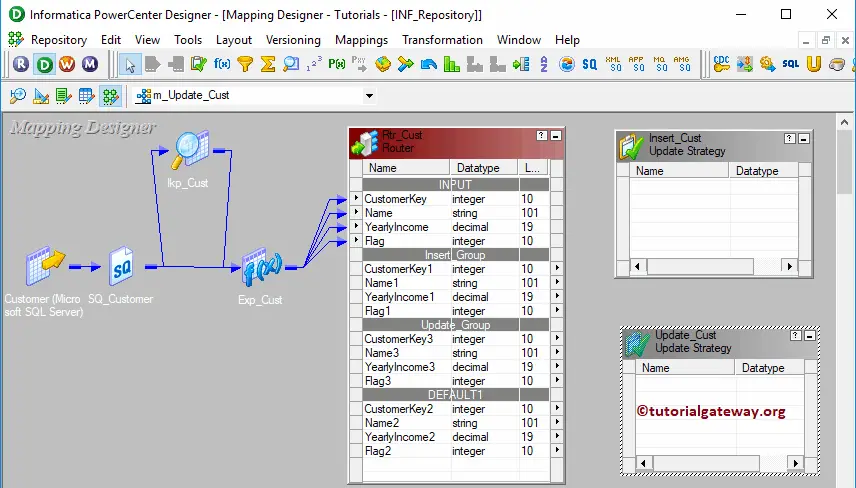
Step 3(c): Creating Router Transformation
Please refer to Router Transformation article to understand the steps involved in creating it.
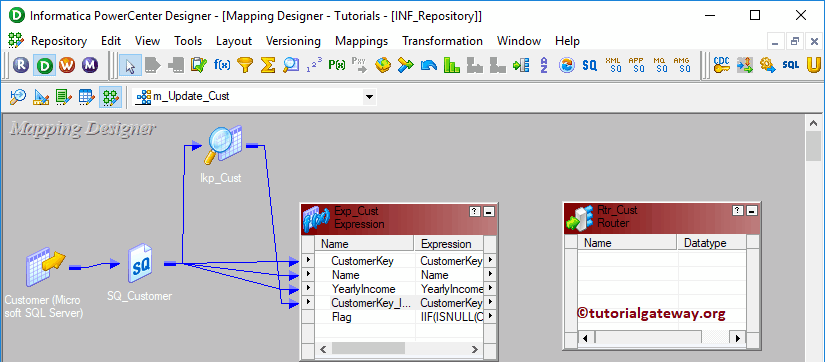
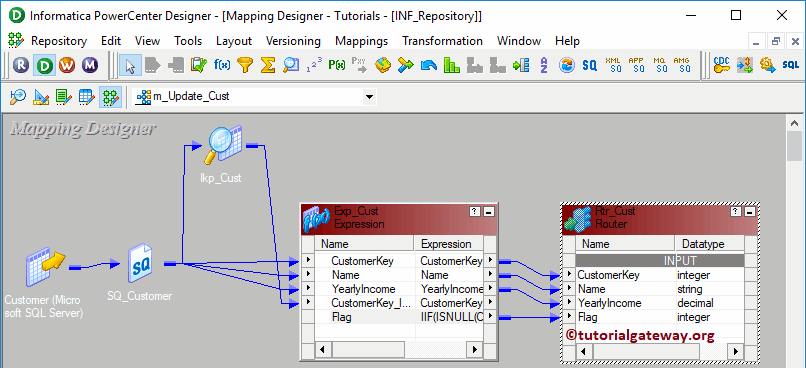
Once you created it, Please connect the Expression Transformation with the router transformation by dragging the required fields. From the below screenshot, you can observe that we are adding all the fields except the lookup column field.
Double click on the Router transformation to add Groups. Use Add New Group button to add required groups
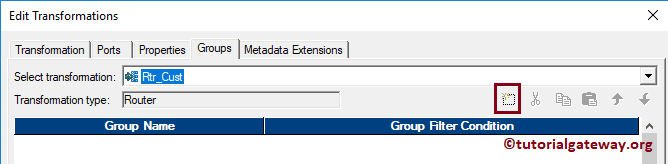
From the below screenshot, you can observe that we created one group for Inserting New Records and another for Updating existing records.
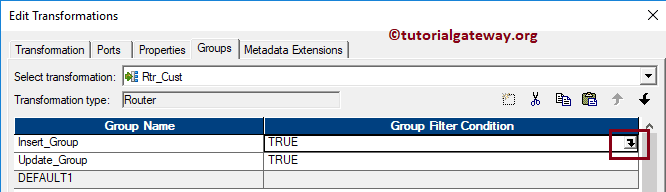
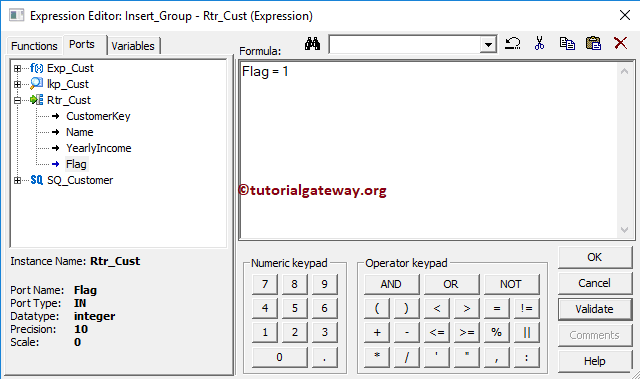
Let us provide the expression or condition for the First group by clicking the arrow button. It opens the Expression Editor to write a custom expression. Here, we want the Customers whose Customer key is Null which means, non-existing records
For Update group, we have written the expression as Flag = 0 which means, all the existing records
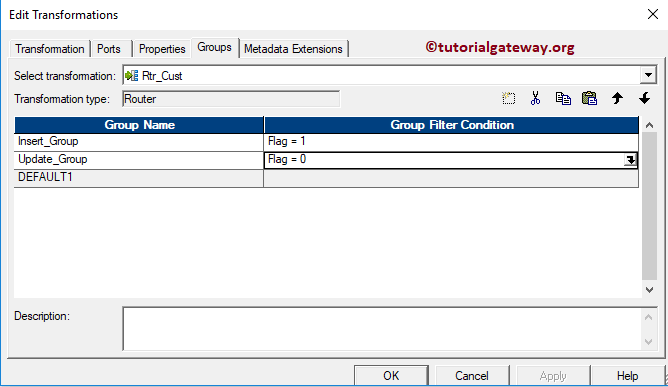
Once you finish configuring the properties, Click OK to close the transformation window.
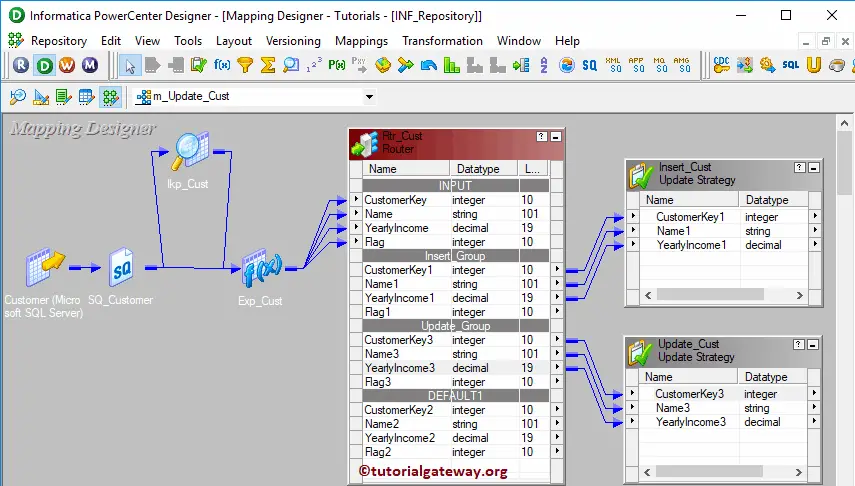
Step 3(d): Create Informatica Update Strategy Transformation
Please refer to Update Strategy Transformation in Informatica to understand the steps involved in creating it. Let me add two Update Strategies:
- Insert_Cust: This is for inserting New records into a target table.
- Update_Cust: This is to update existing records in a target table.
Drag the fields from Insert group (Flag = 1) to Insert_Cust and drag fields from Update group (Flag = 0) to Update_Cust
Double click on the Insert_Cust Update Strategy to configure it. Let me change the Update Strategy Expression to 0 or DD_INSERT
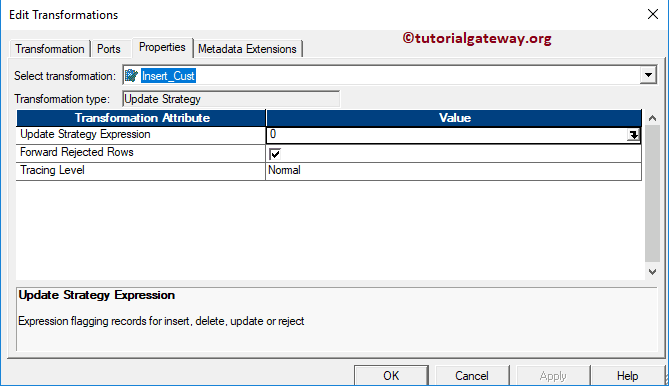
Double click on the Update_Cust Update Strategy to configure it. Let me change the Update Strategy Expression to 1 or DD_UPDATE for an update

Next, Drag and drop the target definition from the Targets folder to the mapping designer. Repeat the same one more time and Auto link fields.
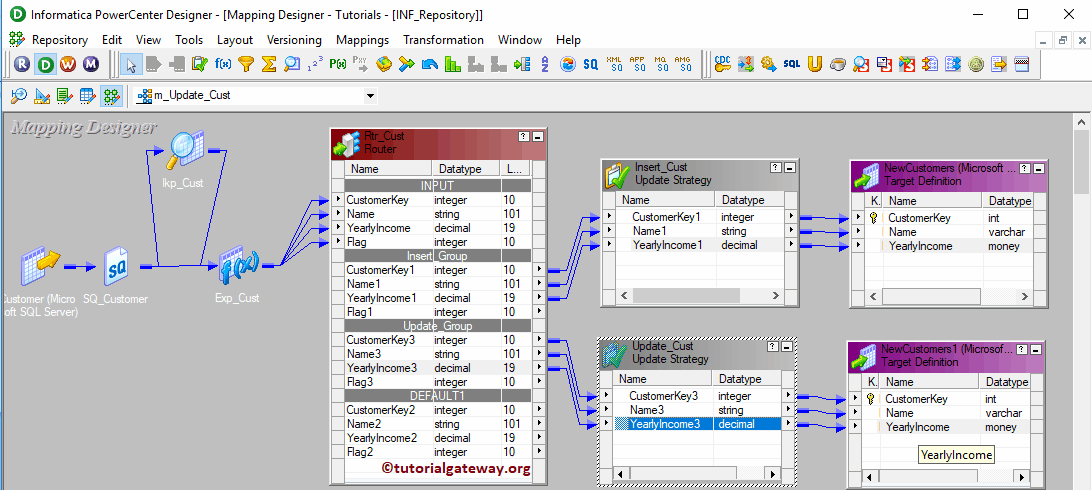
Before we close the mapping, let us validate it by going to the Mapping Menu bar and selecting the Validate option.
Step 4: Create a Workflow for Update Strategy in Informatica
After we finish creating the Informatica Update Strategy Mapping, we have to create a workflow for it. Power Center Workflow Manager provides two ways to create a workflow.
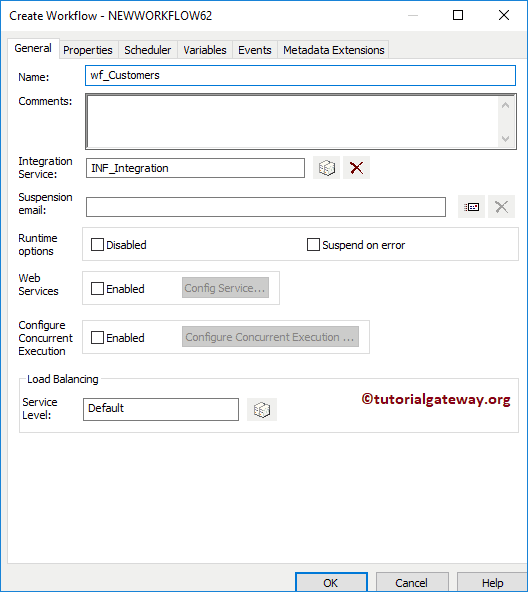
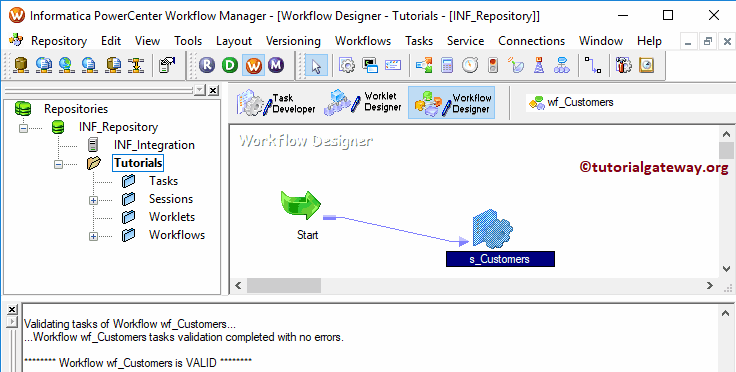
In this example, we will create the Workflow manually. To do so, Please navigate to the Workflows Menu and select the Create option. It opens the Create Workflow window. Provide a unique name (wf_Customers) and leave the default settings.
Once we created the workflow, our next step is to create a session task for our mapping.
Step 4(a): Create a Session for Update Strategy in Informatica
There are two types of sessions:
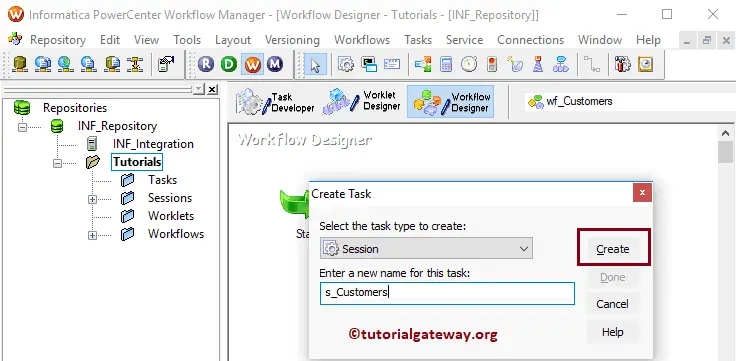
For this Informatica Update Strategy example, we will create a Non-reusable Session. Select the Create option from the Tasks Menu.
Please provide a unique name for this session (s_Customers). Once you click on the Create button, a new window called Mappings will open. Here, we are selecting the m_update_Cust
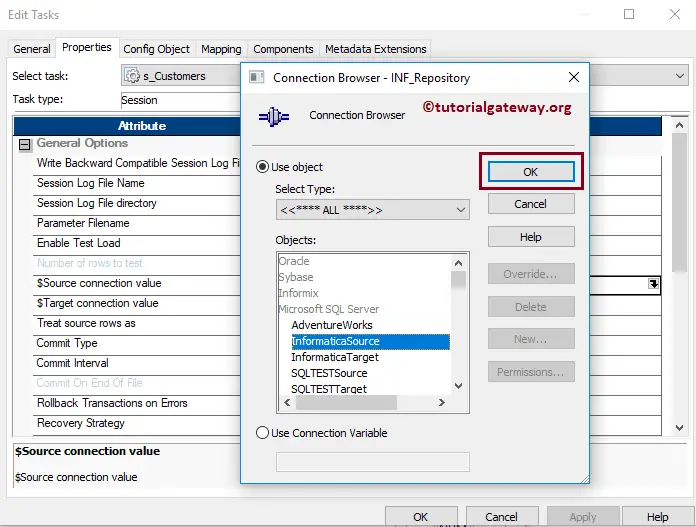
Double click on the Session task will open the Edit Tasks window. Within Properties Tab.
$Source connection value: This property will store the relational source information in the $Source variable. So, click on the Arrow we marked below, and select the Source as the source information.
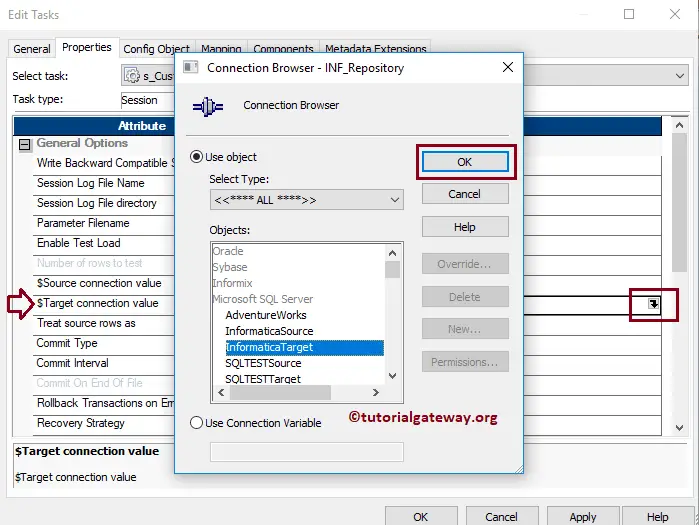
$Target connection value: This property will store the relational target information in the $Target variable. So, click on the Arrow we marked below, and select the below Target as the Target information.
Within the Mappings tab, we have to configure the Source and Target Connections for Informatica Update Strategy. First, let us configure the source connections by clicking on the SQ_Customer source present in the Sources folder.
Within the Connections, click on the Arrow button beside the Relational type, and use the Connection variable that we created before, i.e., $Source
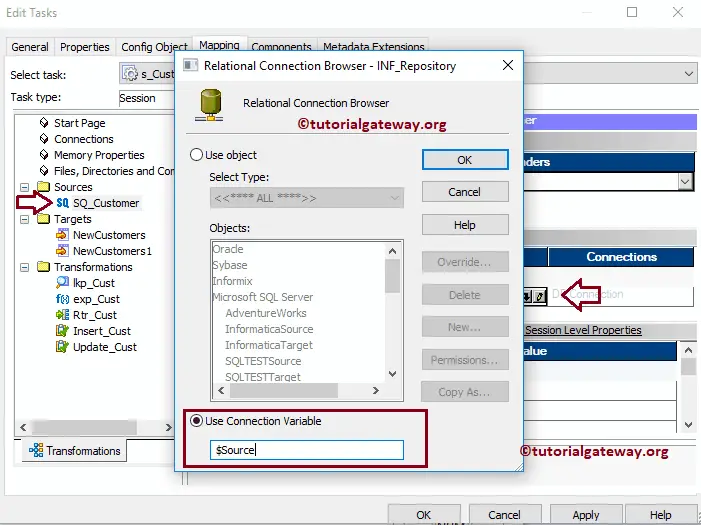
Now, we have to configure the Target Connection. So, click on the NewCustomers present in the Targets folder. Within the Connections, click on the Arrow button beside the Relational type, and use the Connection variable $Target. Repeat the same for NewCustomers1

Next, Let me start the Informatica Update Strategy Workflow. To do so, navigate to the Workflows menu and select the Start Workflow option.
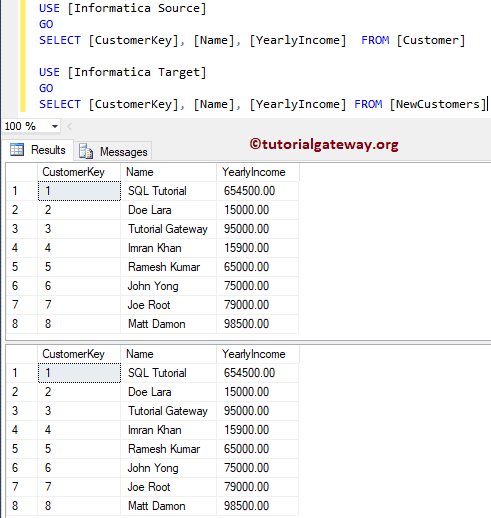
Let us open the SQL Server Management Studio to verify whether we successfully performed the update strategy or not.