Tableau Set is a custom field used to hold the subset of data based on some condition. A Tableau set can be created in real time by selecting members from the list. Or By writing custom Conditions or Selecting Top or Bottom records based on Measure value.
Tableau Sets can be beneficial, and this article will show you how to create a Set with an example. For instance, to create the Top 10 States by profit, Sales Amount greater than the minimum threshold, Products with negative profits, etc.
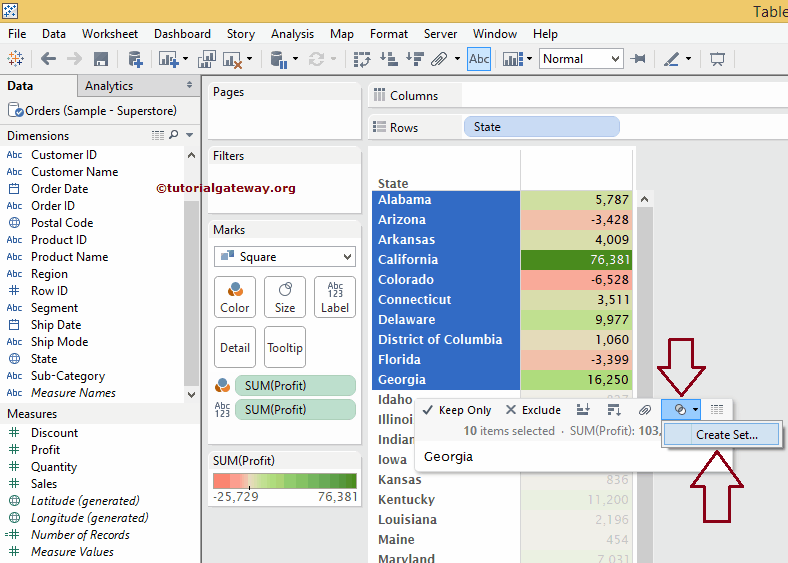
This example will show you how to create Tableau Sets, Constant, and Computed ones. First, drag and drop the State Name from the Dimension Region to the Rows Shelf and Profit from the Measures region to the Columns Shelf.
How to Create a Constant Set in Tableau?
For this set demo, we will use the Super Store sample Excel file downloaded from the website. Please visit the Connecting to Excel Files article to understand how to connect and extract data from Excel files in Tableau.
The Constant members mean fixed; they don’t change once created. To create a Tableau Constant Set, select the members you want to include. Next, select the icon in the tooltip and click the Create Set… option, as shown below.
Once you click on the Tableau Create Set option, a new window will open.
- Name: Please specify the Unique name for this set. Make sure that the name reflects the functionality. For now, we named this Random 10 States.
- Members: Members we selected in our previous step. If you want to remove any member, please select the member value and click on the cross button.
- Add to Filters shelf: Please check mark this option If you want to add this set to the Filters Shelf.
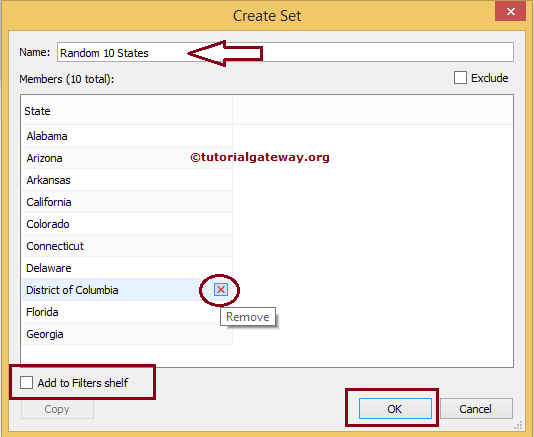
Click OK to finish creating our first one. The screenshot below shows that our newly created Set is positioned within the Data pane.
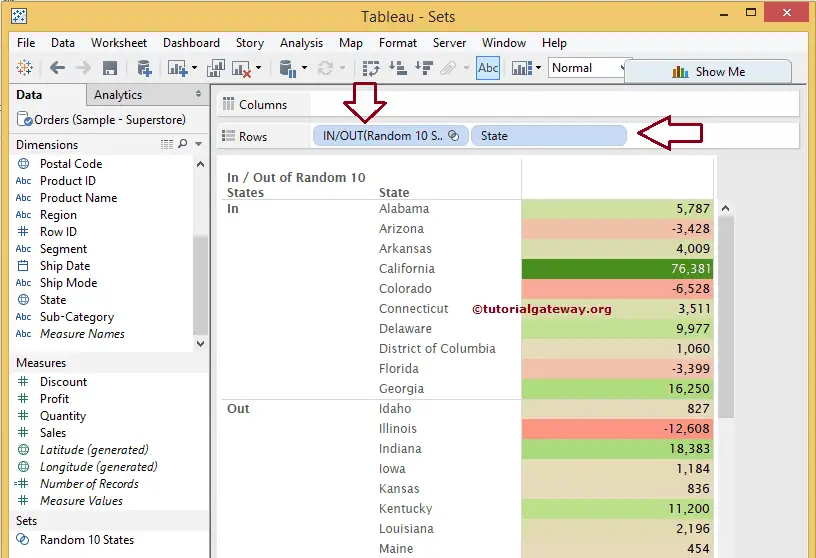
Please drag and drop the newly created Random 10 States from the Sets region to the Row Shelf. Next, remove the existing State names from the Row Shelf.
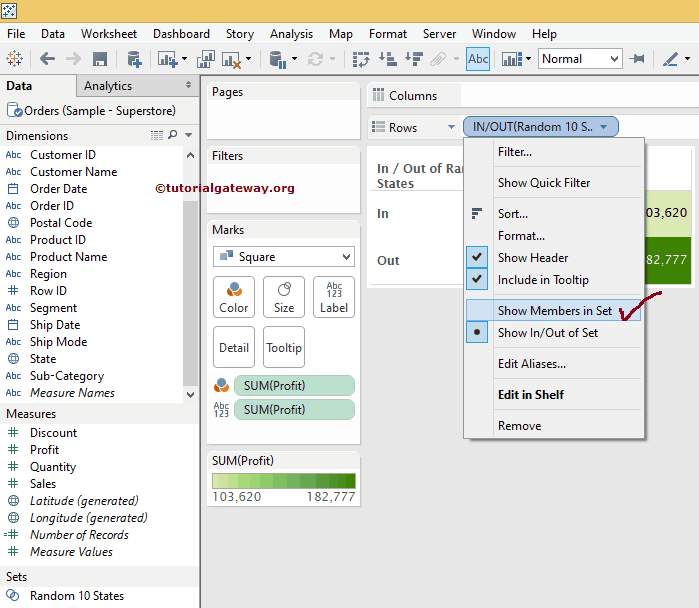
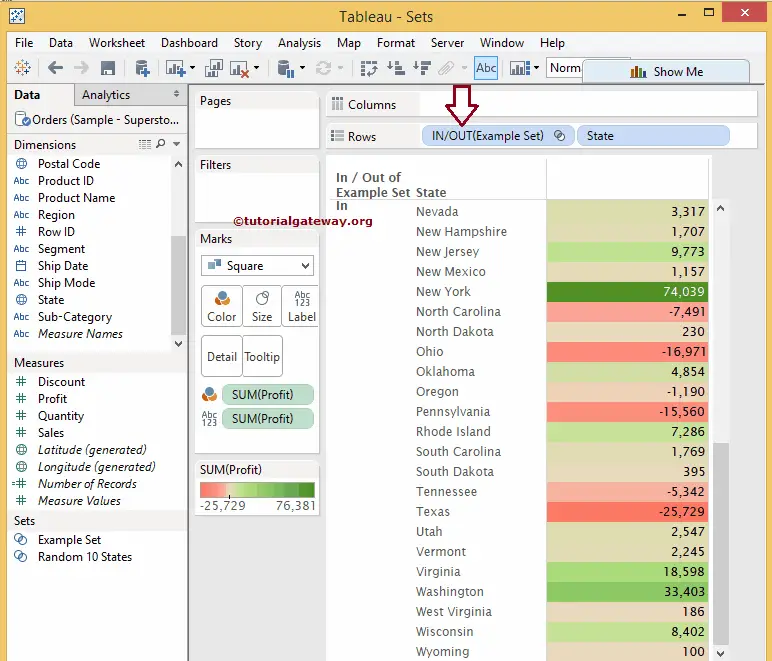
From the screenshot below, you can observe that our report only displays the In and Out rows. It is because, by default, Tableau will display the set values as:
- IN: All the members we selected to create the Set will be in the IN field. It means 103,620 is the total profit of our randomly selected 10 states
- OUT: Remaining members will be placed in the OUT file.

To show the state names (or Set members), click on the Dropdown arrow in the upper right corner of the IN/OUT (Random 10 States) member present in the Tableau Row Shelf. Next, select the Show Members in the Set option from the Dropdown menu.
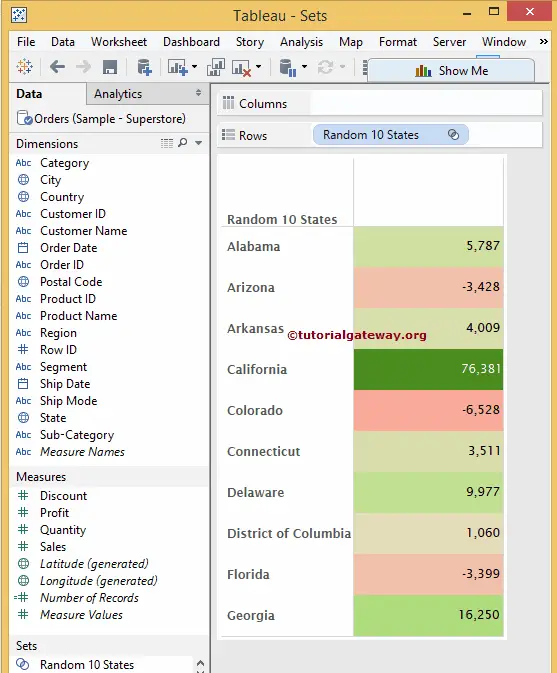
Now, you can see the State members present in the Set.
If you want to check the State’s names inside the IN field and OUT field, then please drag and drop the newly created Random 10 Products from the Sets section to the Row Shelf. Next, drag and drop the State field from the dimension region to the Row Shelf.
How to Create a Computed Set in Tableau
The Computed Set members are dynamic and change when the underlying data changes. To create a Computed Set, select the Dimension on which you want to create and Right-click on it to open the context menu. Please choose the Create option and then select the Set.. option from the context menu.
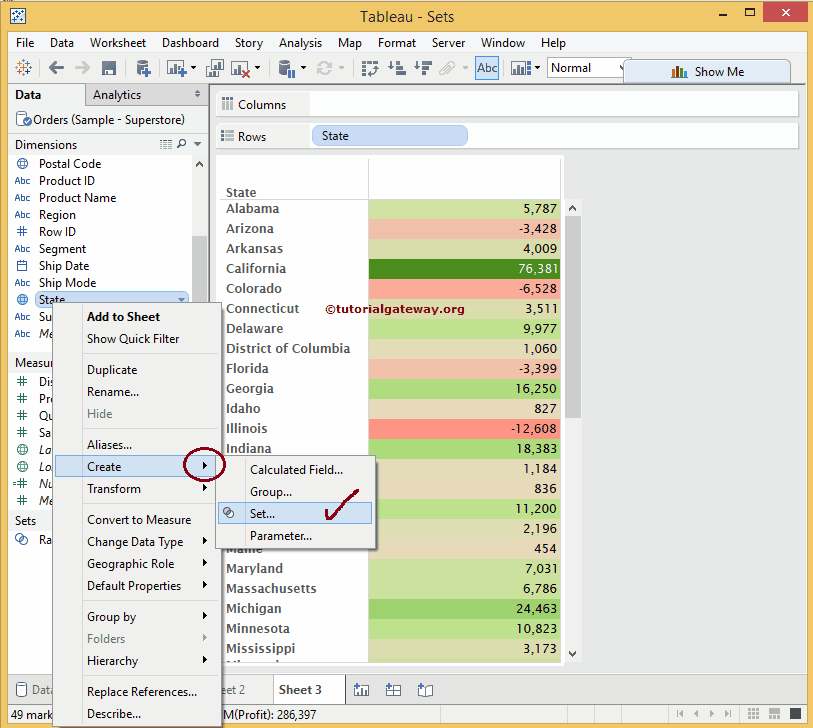
Tableau Computed Set Option
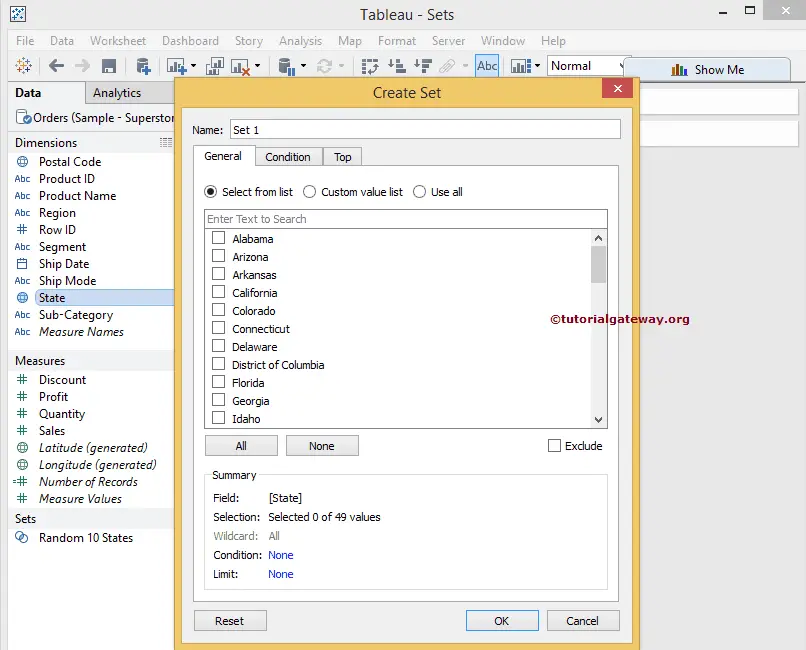
Once you select the option, a new window called Create Set is opened to create a Computed one. We have multiple options in this window, as shown below.
- Name: Please specify the Unique name for the set. Make sure the name reflects the functionality.
- General Tab: Use this tab to select the required members from the available list.
- Top: This is to select all the Top and Bottom records. For instance, the Top 10 or bottom 10 records are based on Profits.
- Condition: Use this tab to write the custom condition. For instance, Profit greater than 10000, etc.
- All: This selects all the available members from the list.
- None: Use this to deselect all the selected members.
- Summary: It will display the information regarding the set. This includes the Field name, the Condition we used, the number of records we selected from the Total number of records, etc.
General Tab
Within the General tab of Tableau sets, we have three more options:
- Select from List: This option allows you to choose the required members from the available list.
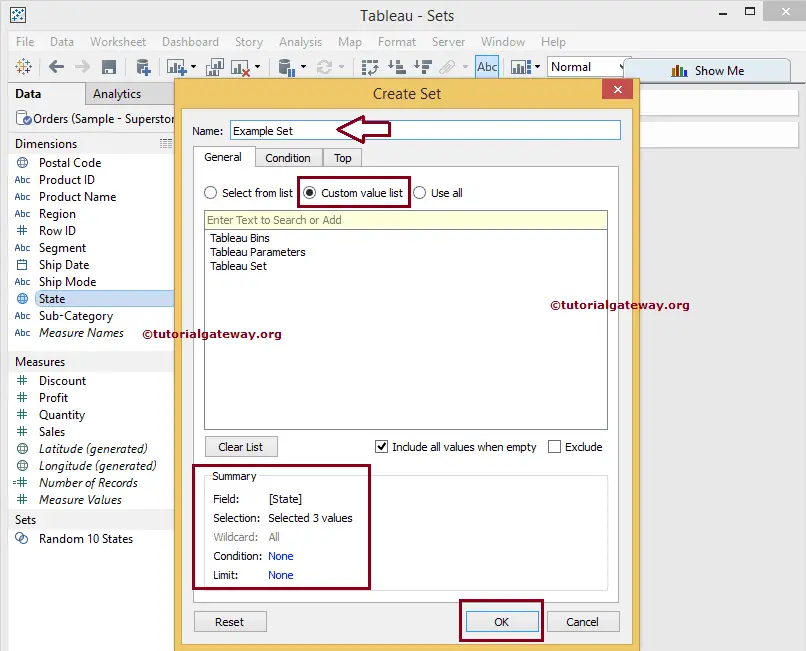
- Custom Value List: This option allows you to write Custom members.
- Use all: This option allows you to select all the available members from the list.
Custom Value List option – We just added three random records here. In real-time, you have to write the existing values only. Next, click OK to finish creating our Set.
How to Edit Set in Tableau?
To edit the existing one, click on the Dropdown arrow in the upper right corner of the name and select the Edit Set… option from the context menu, as shown below. Once you choose the option, a new window will be opened to edit the existing set.
Use All section option
Once you select this option, there is nothing you can do because this option will select All the available members from the list.
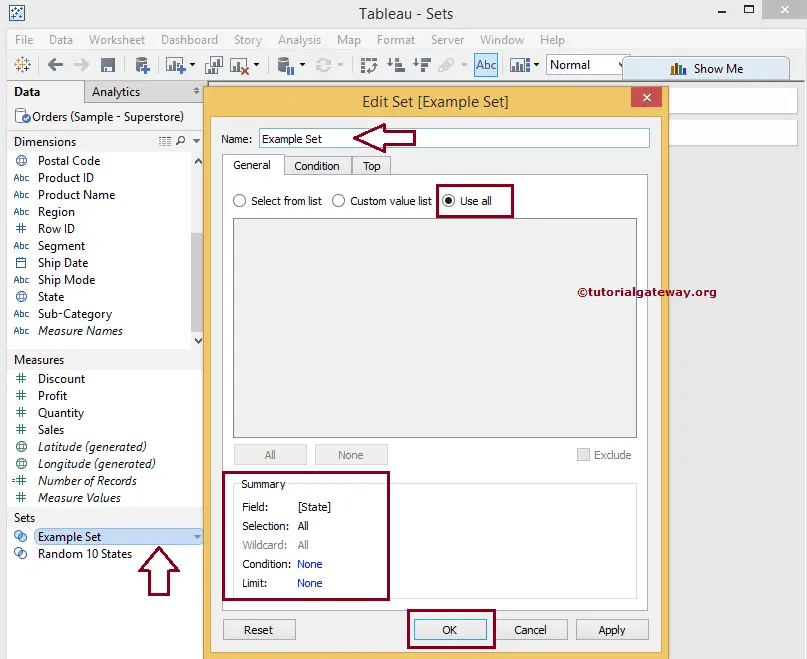
Click OK to finish editing the existing one. Please drag the newly created one from the Sets region to the Row Shelf and place it before the State field, as shown below.
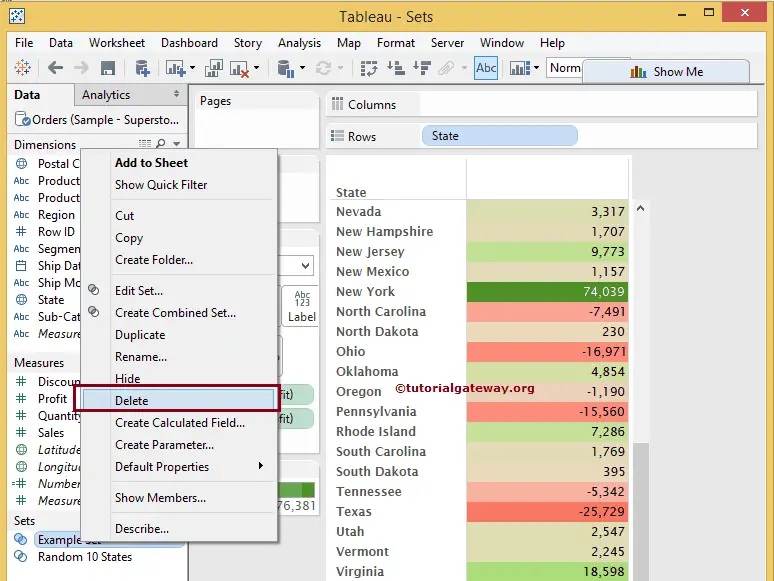
How to Delete a Tableau Set?
To delete the existing one, click on the Dropdown arrow in the upper right corner of the Set name and select the Delete option from the context menu.
List of Tabs and Options in Tableau Set
This section explains the options and tabs available in the window, along with an example.
Select From List
In this example, we will create one more set to choose the random 6 States from the available state members. To do this, please navigate to the General tab, select the Select from List radio button, and select the required state members from the available list.
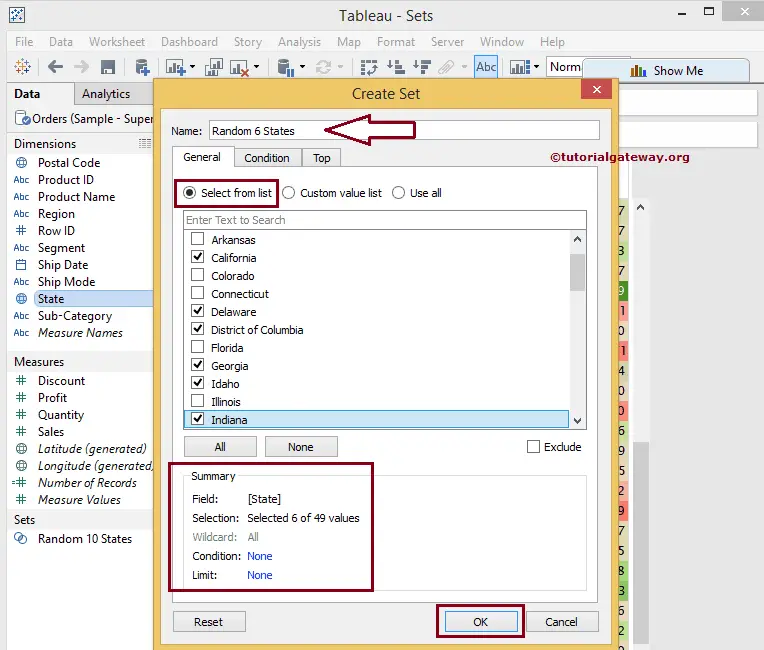
Please drag the newly created Random 6 States from the Sets region to the Row Shelf and place it before the State field.
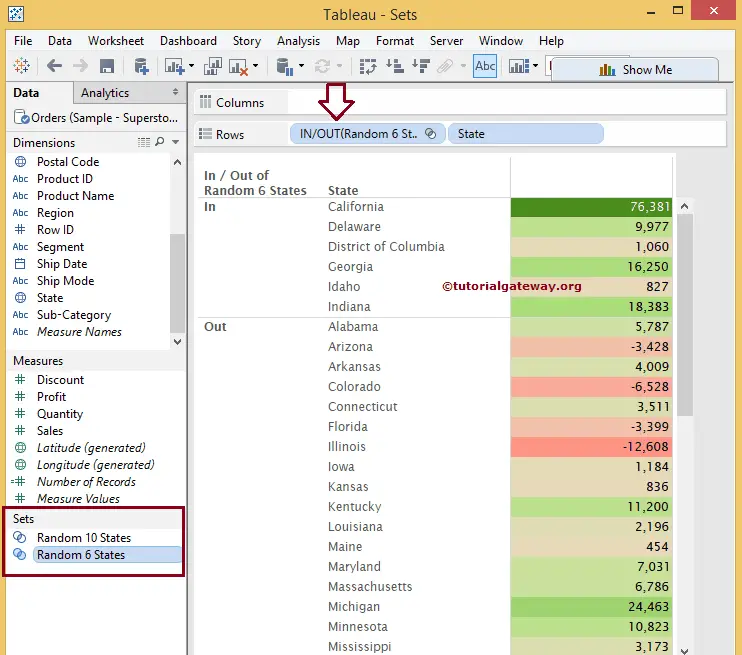
From the above listing, you can observe that California, Delaware, the District of Columbia, Georgia, Idaho, and Indiana are listed in IN section because these are the states we selected when we created our Set.
Condition Tab
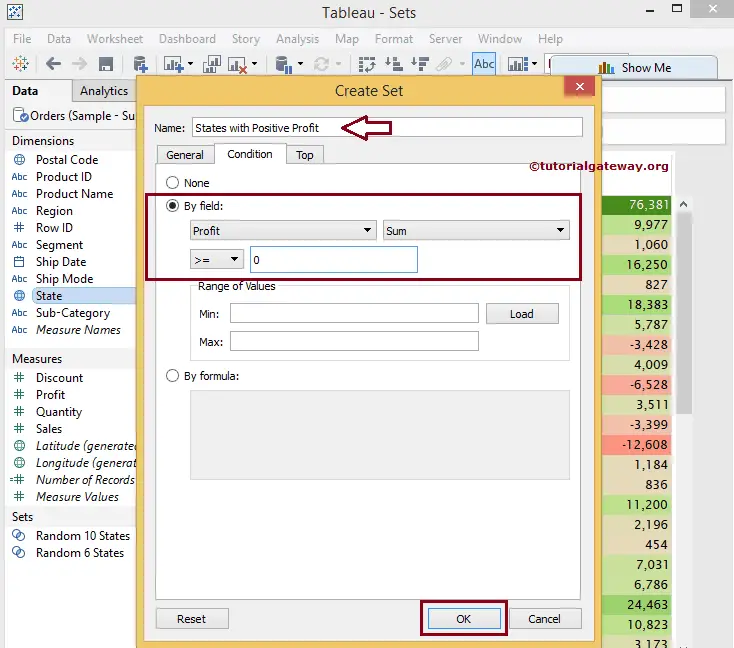
In this Tableau condition tab example, we will create one more set to find the States generating Positive Profits. To do this, navigate to the Condition tab, select the By Field radio button, and select SUM of Profit greater than or equal to 0.
Click OK to finish creating a new one. Let us replace the Random 6 States with our newly created set, called States with Positive Profits, and see the result.
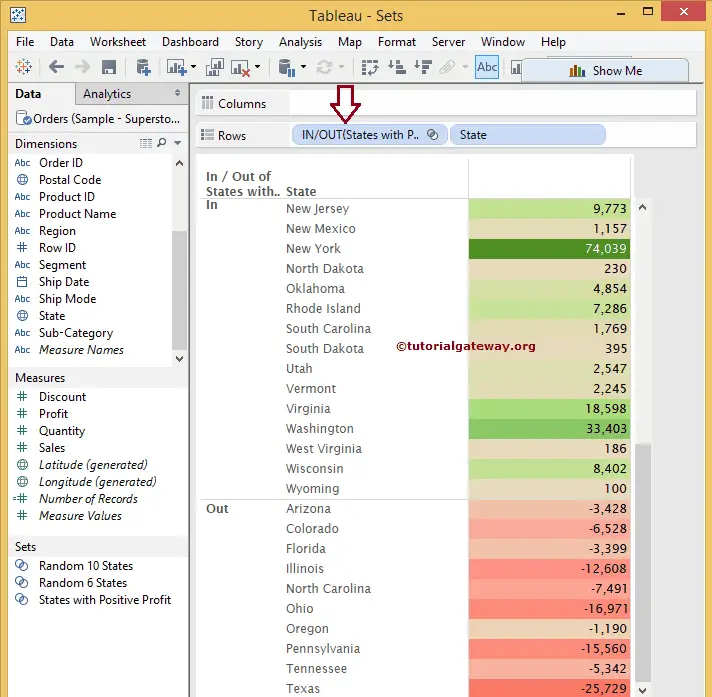
From the above listing, you can see all the states with positive profits in the IN field and Negative profits in the outfield.
Set Top 10 Tab
In this Tableau example, we will create one more set to find the Top 10 States generating the highest Profits. To do this, please navigate to the Top tab, select the By Field radio button, and add the constant value 10, as shown below. To make this dynamic, replace the value 10 with the Parameter name.
Please refer to the Parameters article to understand the creation and use of parameters.
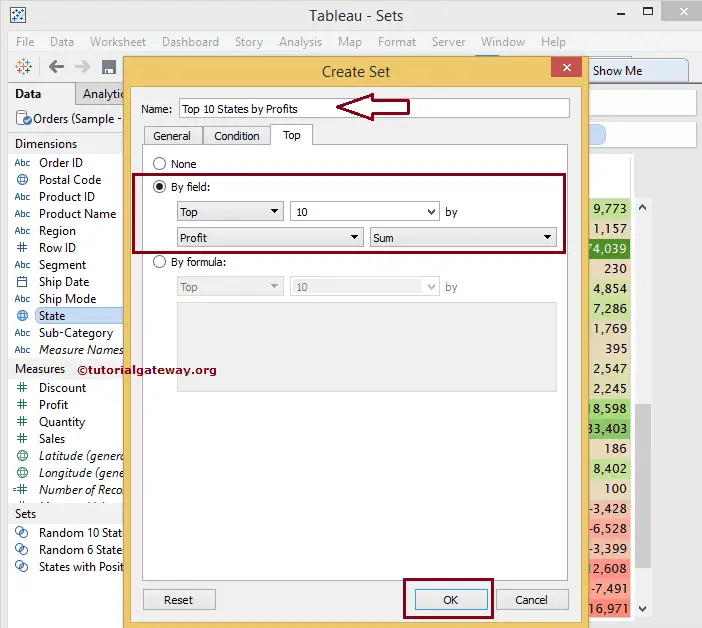
Click OK to finish creating a new Set. Let us replace the States with Positive Profits with our newly created one, called Top 10 States by profits, and see the result.
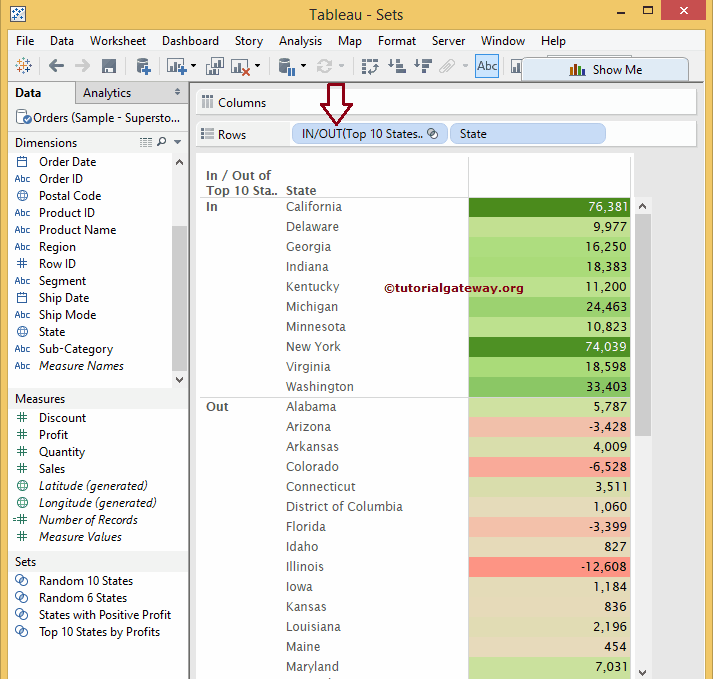
The above listing shows that, according to their profits, California, Delaware, Georgia, Indiana, Kentucky, Michigan, Minnesota, New York, Virginia, and Washington are in the Top 10 list. Please refer to the Combined article to understand the creation of Combined Sets.