Report Parts in SSRS help you to reuse the reports or Report Items in multiple reports. In this article, we will show you how to create and Publish Report Parts in SSRS, How to reuse them, and How to update the existing report parts with an example.
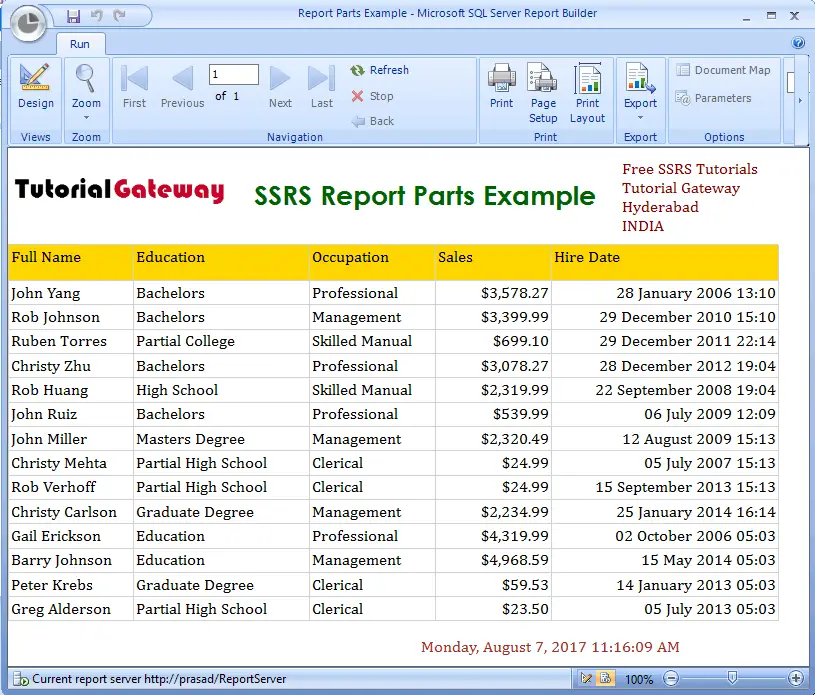
To demonstrate the steps involved in creating Report Parts in SSRS, We are going to use the previously generated report that we have shown below. Please refer to the Formatting Date and Time article to understand the report data and see the Add Rectangle article to understand the rectangle configuration.
Let me show you the report preview. As you can see, it is a pretty ordinary Table Report with formatted date and time, and it has the Address (inside the rectangle) on top of the report. If you find any difficulty in creating a report in Report Builder. Please refer to the Create New in Report Builder article to understand the same.
Publish Report Parts in SSRS
It was very easy to publish report parts from the Report Builder. To do so, click on the Publish Report Parts option from the Menu.

Selecting the Publish Report Parts button opens the pop-up window with two options. It is always advisable to choose the second option because it gives you more control over what you are doing.
- Publish all report parts with default settings.
- Review and modify report parts before publishing.
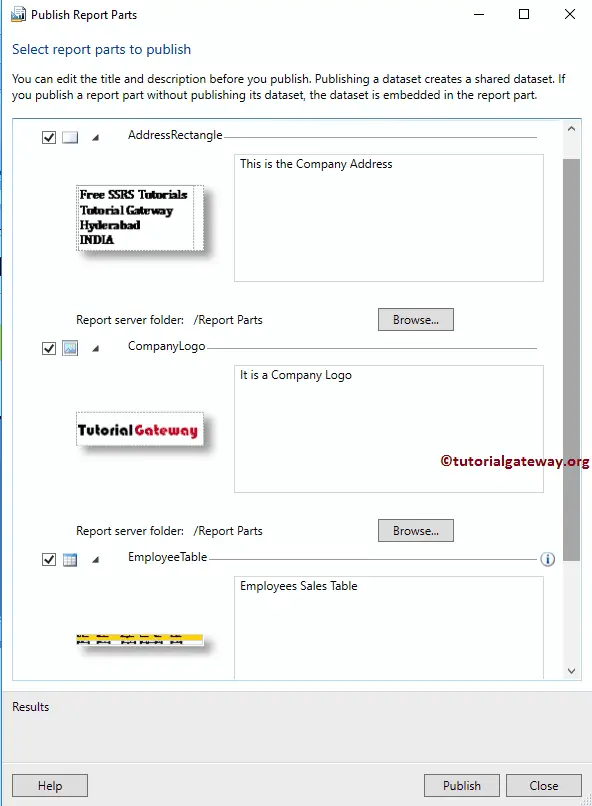
After you select the second option, a new window called Publish Report Parts will be displayed. Here, it will show you the list of available report parts in SSRS. The above report is a combination of the Logo, Table (Employee Info), and a rectangle (address).
Let me expand every report part. So that you can preview them. Please add an accurate description that describes the report part functionality. Once you completed the review, please checkmark the required report parts and click the Publish button. Here, we choose all three of the available ones.
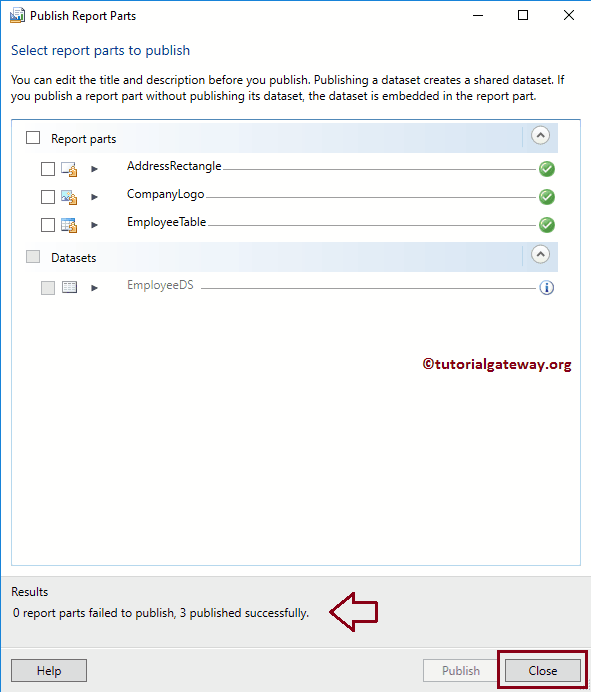
Once you click the Publish button, a message will be displayed. It writes the number of report parts that are successfully published and failed.
Use Report Parts in SSRS Reports
In this example, we will show you how to use the report Parts. To demonstrate the same, we need an empty or blank report. So Please open the Report Builder, and select the New Report tab, and then select the Blank Report option.
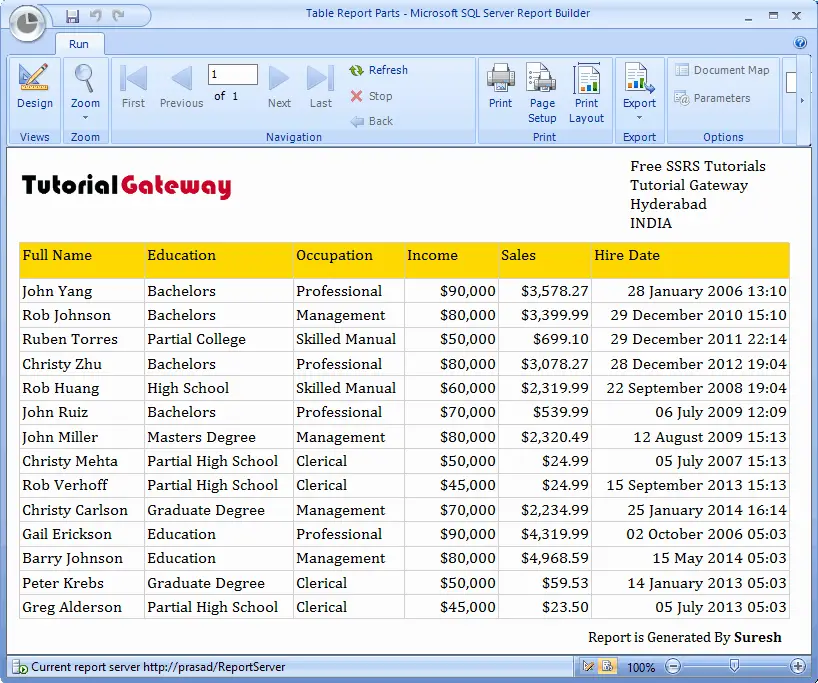
As we showed below, we added a title as SSRS Report Parts Example, and an Execution time in Page Footer. Apart from that, we also formatted the text
To use the existing report parts or Report Items, Please go to the Insert Tab, and click the Report Parts button
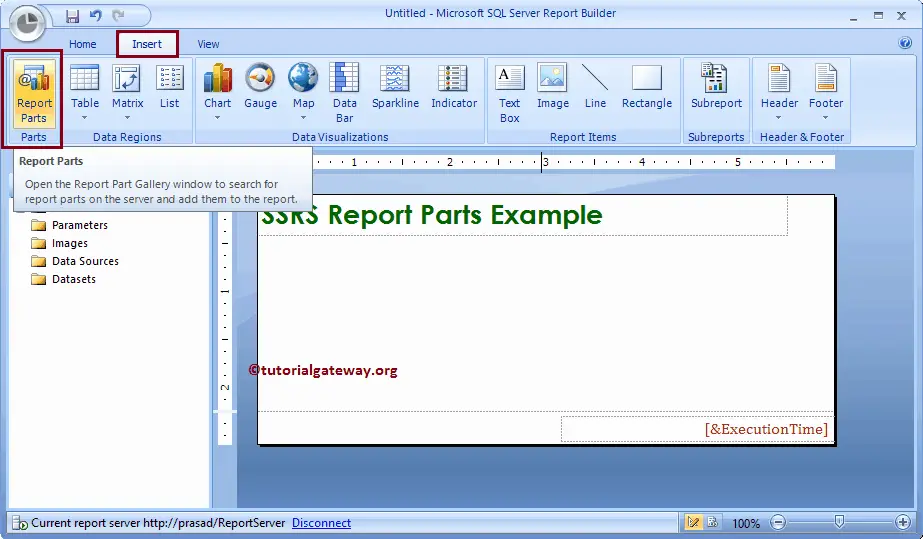
Click on the Report Parts tab opens a new window called Report Part Gallery. You can use this window to search the report parts present in the Report Manager.
Let me search for the Employee table. Once you get the required report part, double-click on it will automatically add that report part into a designer window.

You can search for the Company also!
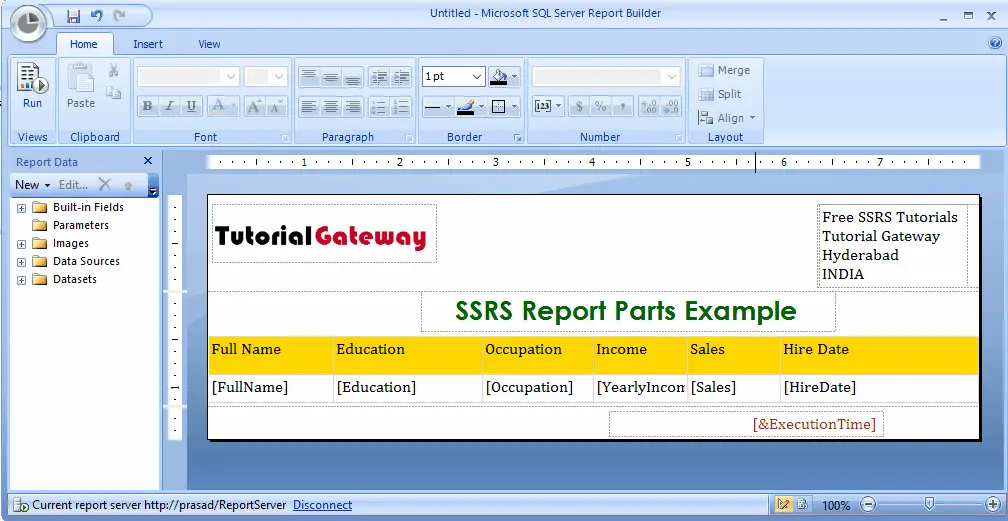
As you can see from the below screenshot, we just added all the existing report parts (table, rectangle, Image) to this new blank report.
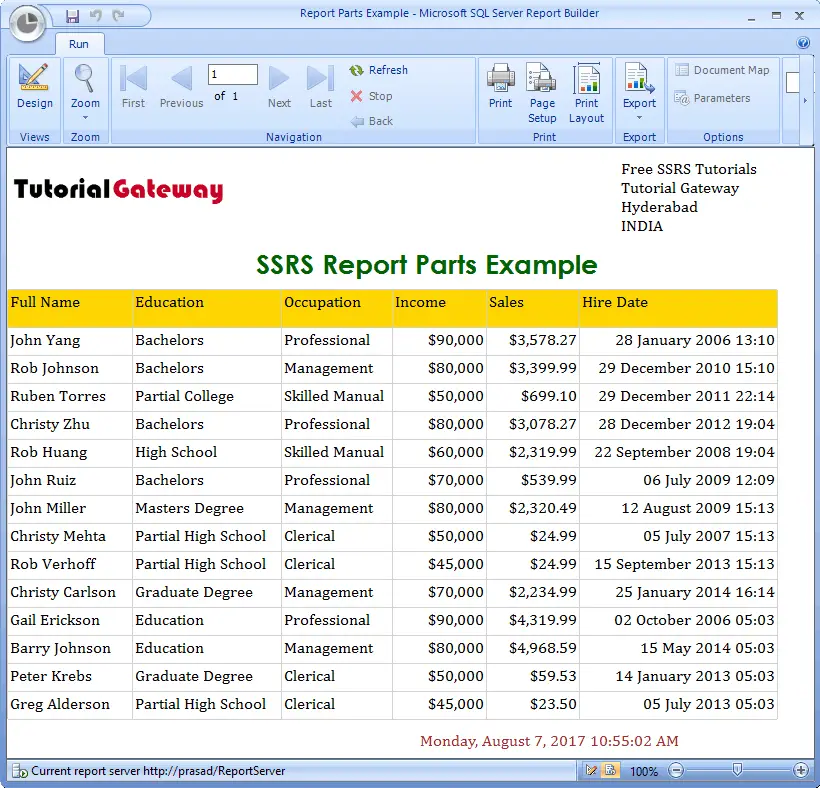
let me show you the report preview.
Let me show you what will happen if I change the Address color. Remember, whatever changes you have made in this report belong to this only. But, if you publish the report parts, then the main report part will be updated.

Now, let me show you what will happen if I publish the report part from this report.

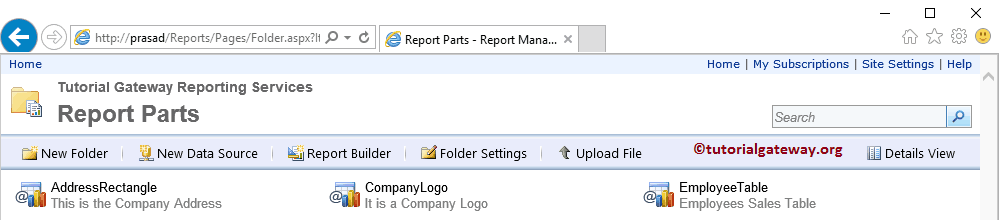
I think I forgot to mention the Report Parts folder. When you publish a Report Part for the first time, then the Report Manager will automatically add a new folder called Report Parts. This folder will hold all the report parts that we publish in a lifetime.
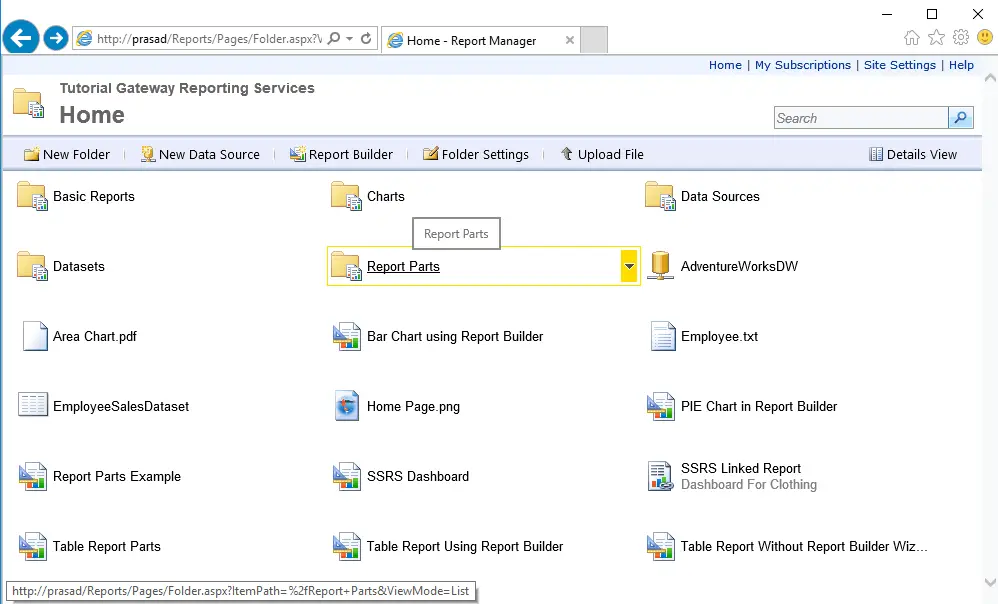
Let me show you the report parts inside the Report Parts folder.
Let me add the address report part to check whether the report part is updated or not. As you can see from the following screenshot, it is displaying the updated address (the text color is red).

Update Report Parts in SSRS
Let me open the original one. In this example, we will make some changes to this table and show you what will happen to the dependent report. As you can see, we have deleted the Yearly Income Column. Next, we published the SSRS report parts.

If you want that update to reflect in the dependent report. Within the second one, please click on the Check For Updates option from the main menu.

Clicking the Check For Updates option displays a new message. If there are any report part updates, then the View Updates button will display. Otherwise, it shows a message – 0 updates are available.

Once you click on the View Updates button, a new window called Update Report Parts will open. It will display the available report part updates.
If you checkmark Notify me when this report part is updated on the server option, then the report Builder automatically asks you for updates. Please select the report Parts that you want to update. Here, we are selecting all the report parts in SSRS.

As you can see from the below screenshot, the Employee table updated with the new report part ( No yearly Income Column). Let me show you the SSRS report parts preview.