In this article, we will show you how to create a New Report in SSRS Report Builder without using Wizard. Or we can say the steps involved in creating a New Table or Matrix report using Report Builder.
For this Create a New Table in SSRS Report Builder demo, we will use the Shared Data Source and the Shared Dataset we created in our Early examples.
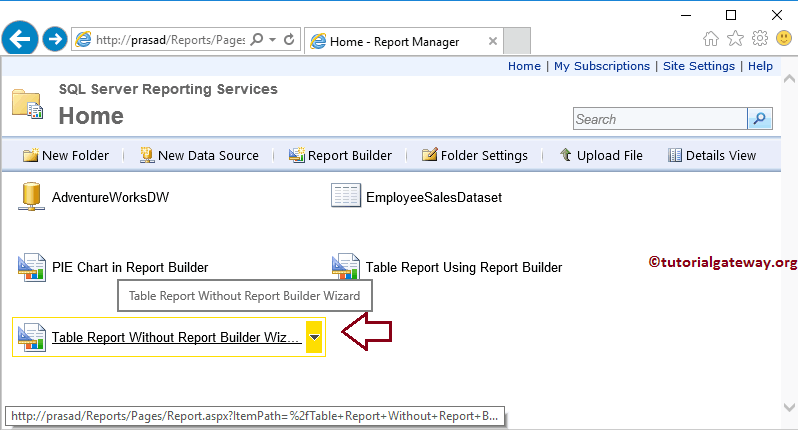
To create a New Report in the SSRS, we have to open the report builder. To do this, Please open your report manager and click the Report Builder button.
Create a New Report in SSRS Report Builder
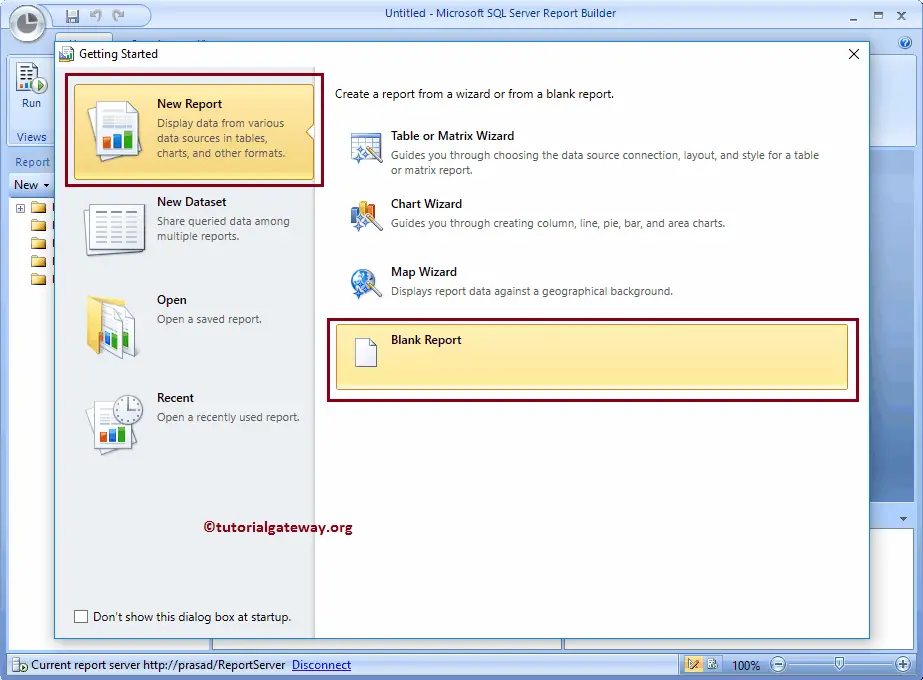
Once you click on the Report Builder button, SQL Server Report Builder will open with a starting page. In this example, we want to create a new report in SSRS without using Report Builder Wizard so Please select the New Report tab and then select the Blank Report option as shown below.
After you select the Blank Report option, the SSRS report builder will create and display the Blank Report. We already explained the Panes in our previous article, so please refer to Create a New Report article.
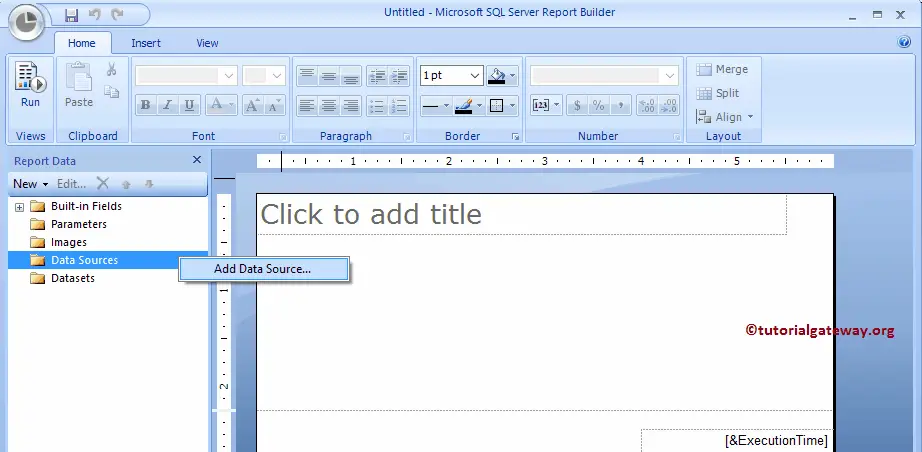
To create a data source, Right-click on the Data Sources folder present in the Report Data pane and select the Add Data Source option from the context menu
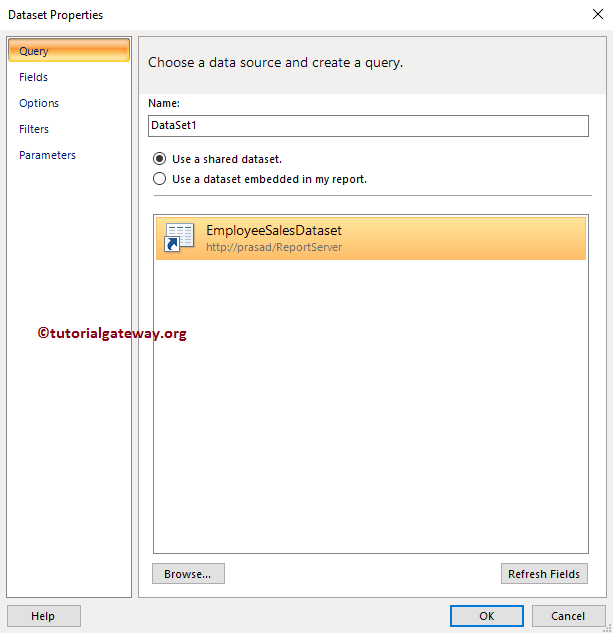
Once you click on that option, the report builder will open the Data Source Properties window to configure the Data Source. In this example, we are selecting the Shared Data Source that we created earlier.
Please refer to Create Shared Data Source in Report Manager to understand the steps involved in creating a Data Source.

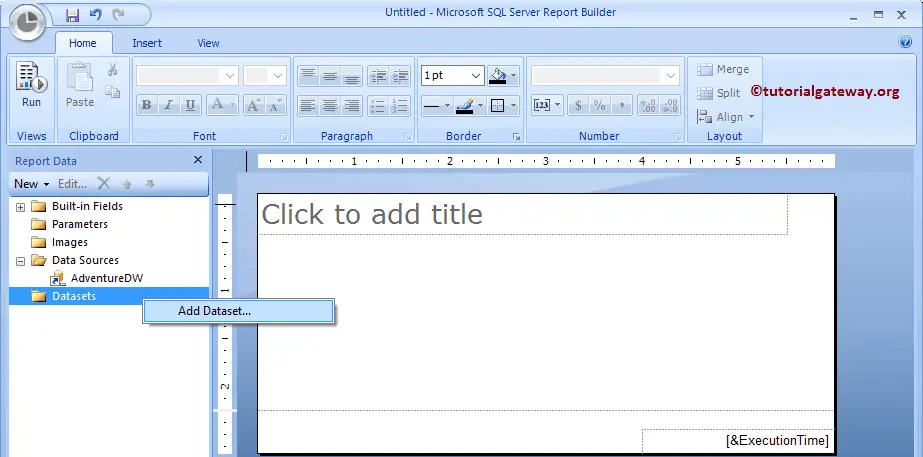
To create a dataset for this report, Right-click on the Datasets folder present in the Report Data and select the Add Dataset option from the context menu. It opens a new window, and from that window, you can choose the New Dataset option
It will open a new window called Dataset Properties. Here you can select the first option to select the Shared Dataset that we created earlier, or by choosing the second option, we can create a new dataset also.
For this Create New Report in SSRS Report Builder demo, we are selecting the first option. I suggest you refer to the Create a New Dataset article to understand the steps involved in creating the shared dataset.
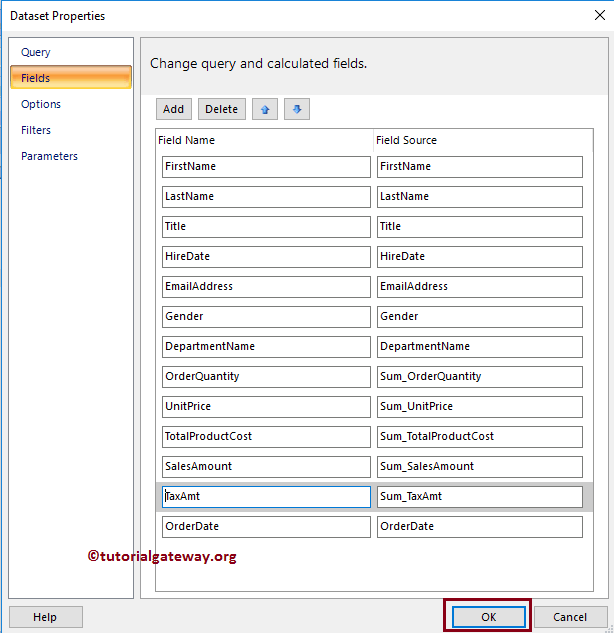
Let me check the fields that the Dataset is returning.
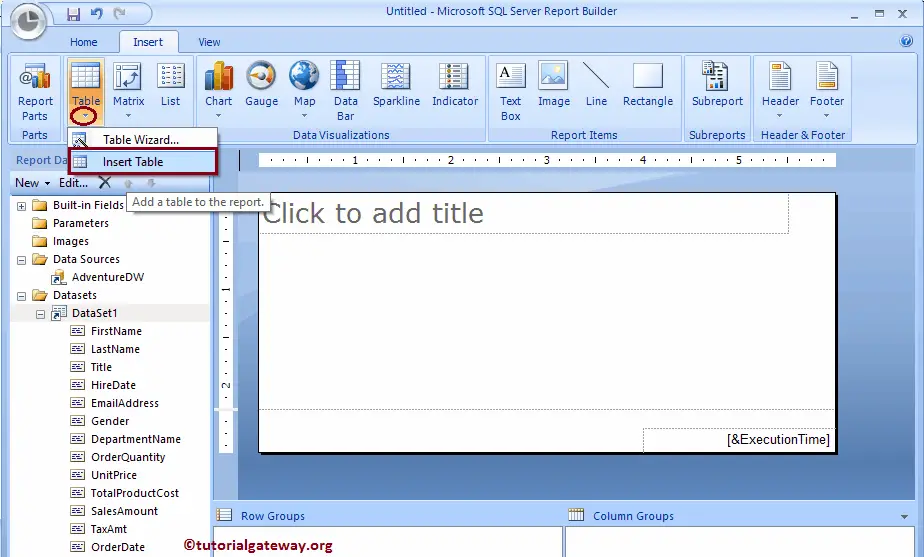
Add Table
Within the SSRS Report Builder, please select the Insert Tab to create or insert the table into the designer. Please click on the down arrow below the table button, and select the Insert table option to add the Table to the report region.
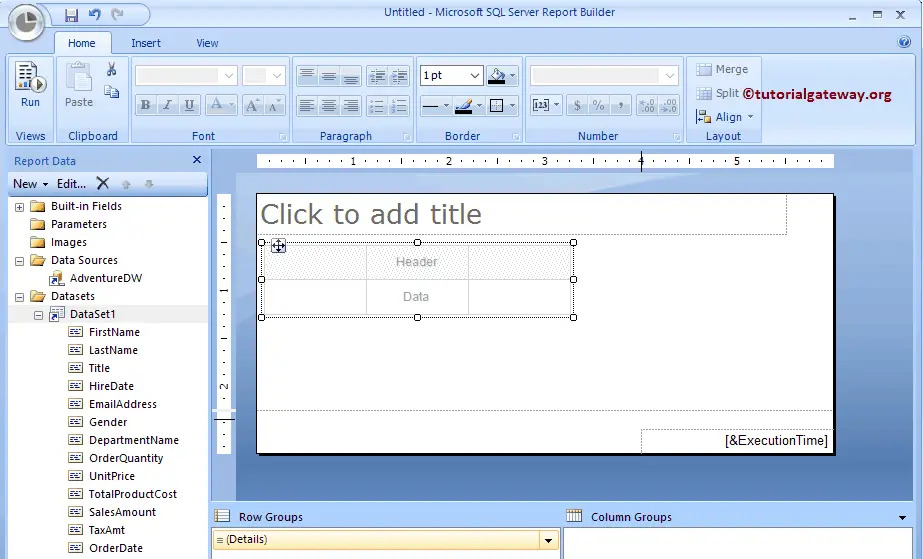
Drag and drop a table to the Data region.
Next, add the Columns to the Table. We already explained the steps involved in adding the Columns to the table fields in the Create New Table Report. So, please refer to the same. The following screenshot will show you the Columns that we added to the Table report.
Format Newly Created Report in SSRS Report Builder
Let me format the table report to change the overall look. I suggest you refer to the Format Table Report to understand the list of available formatting options.

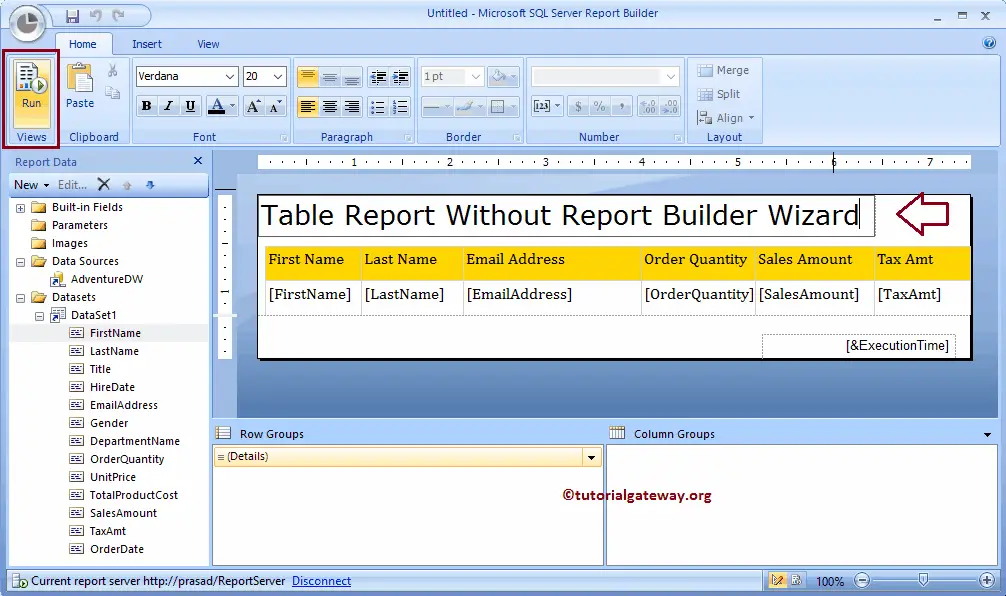
Please check the formatted final table report. Please adjust the width and height of all the Columns in a table. Let me change the report name to Table Report without using the SSRS Report builder wizard, and click the Run button.
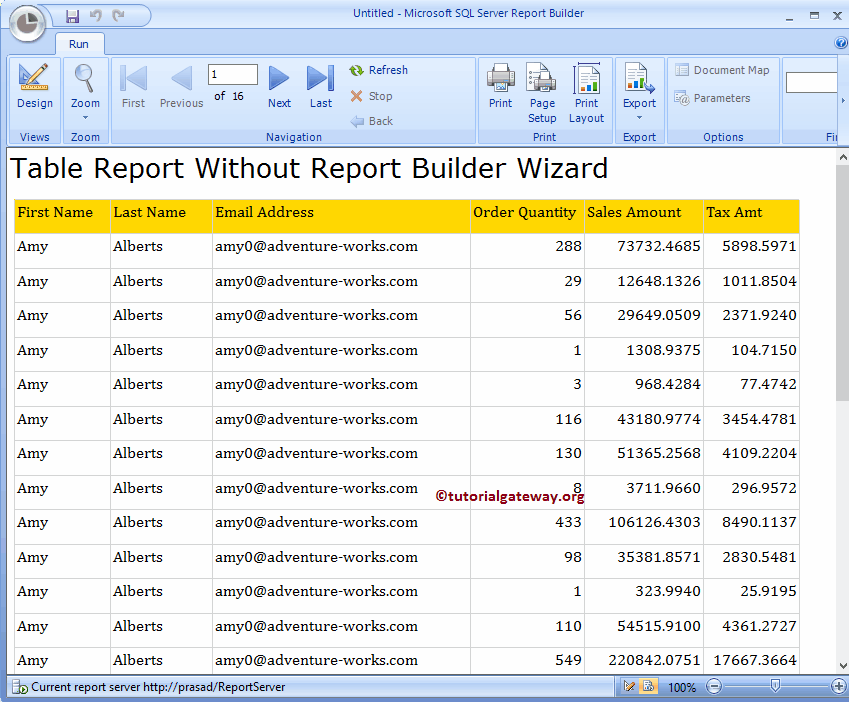
Once you click the Run button, the following report will be generated. From the below screenshot, you can see that the report is showing the Formatted Table report with the given fields.
Let me click on the Save button to save the report on the report server.
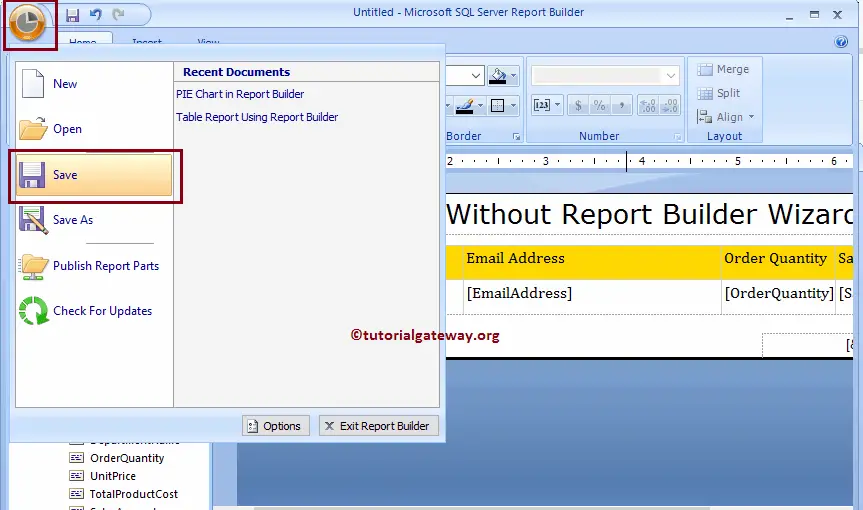
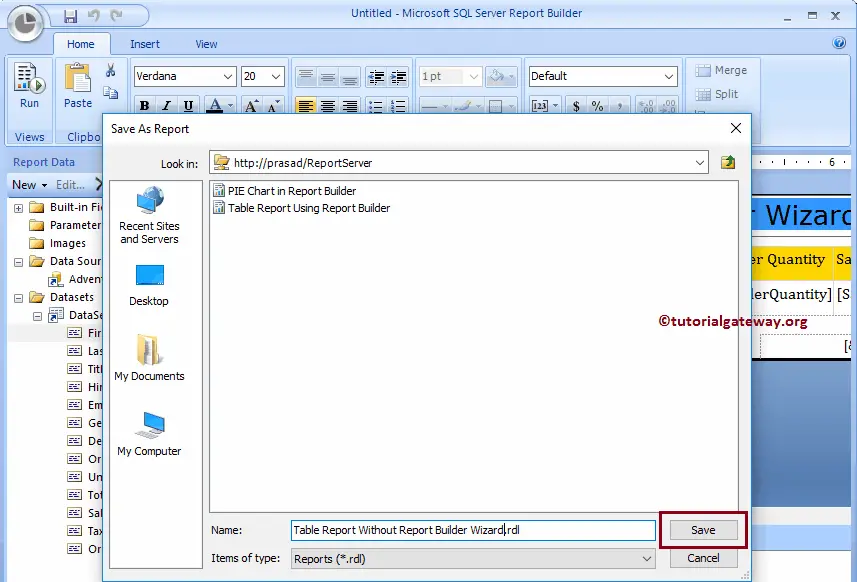
After you click on the Save option, a new window called Save As Report will open. Here you have an option to select the local file system or the Report Server. Let me select the Report Server
Let me open my Report Server to show the newly created Table Report. Here, If you want to see the report preview, or Run the report, then you don’t have to access the Report Builder or BIDS. Just click on the Table report will run the report. If you select the SSRS report builder in the Report Server saved previously and click on it. will open the same report in which we have shown two images before.