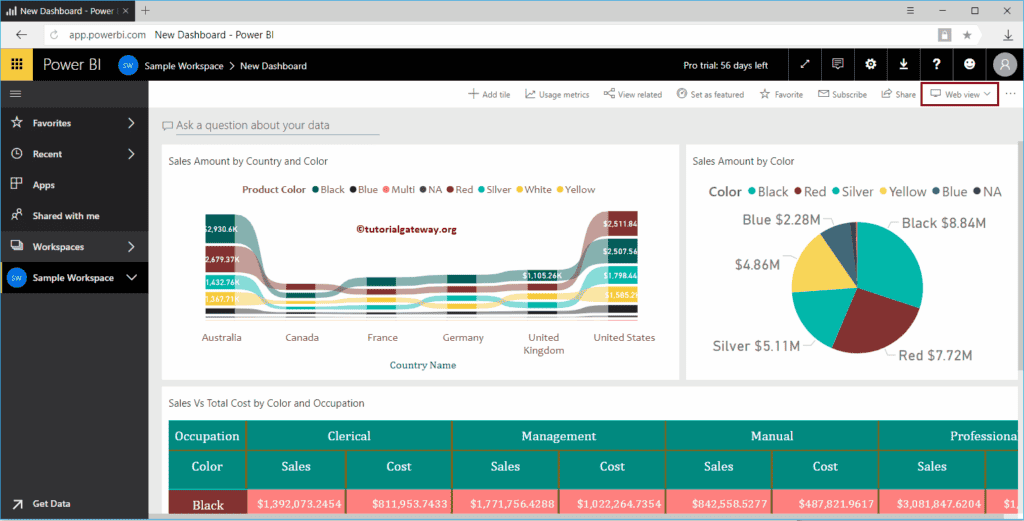
Let me show you the step-by-step approach to Publishing an App in Power BI, editing it, and viewing the app with a practical example. Before we start publishing the app, let me show you the existing dashboards in my workspace.
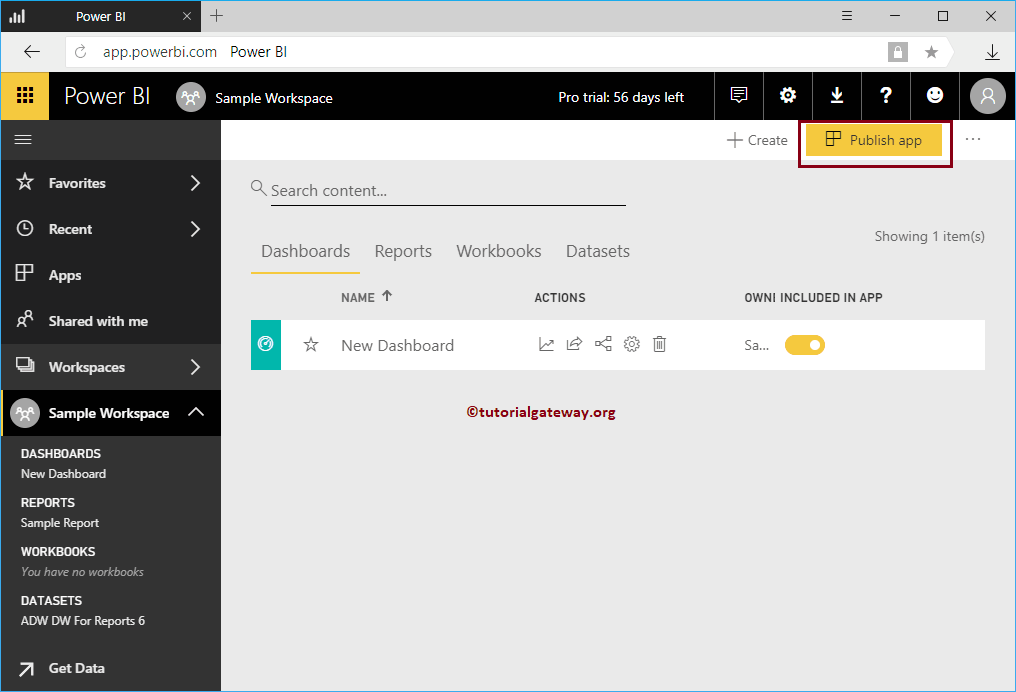
For this Publishing App in Power BI demonstration, we are using Sample Workspace. Please click on the Sample Workspace and then go to the dashboards tab to see the list of available dashboards. As you can see from the screenshot below, there is currently only one dashboard in this workspace.
How to Publish an App in Power BI?
To publish an App, please click the Publish App button in the top right corner. I suggest you refer to the Dashboards and Create a Workspace article to understand the Power BI workspace creation.
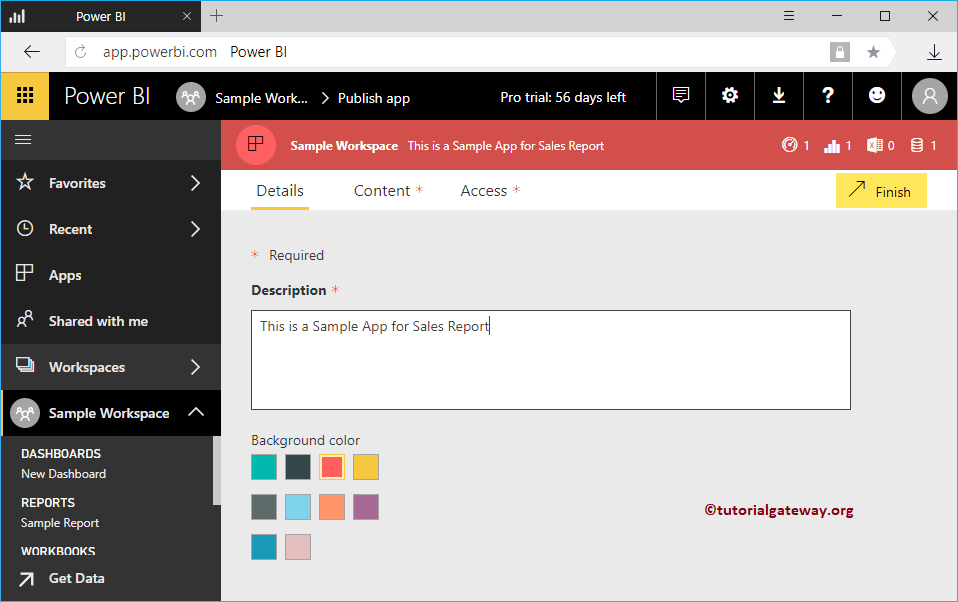
Clicking the Publish App button opens the following Power BI window. Under the Details section,
- Description: Please provide a valid description of this App. It is a required field, so you have to fill something in here.
- Background Color: Please select the background color of this App. By default, Green is selected.
Here, we added the description and changed the App color to red.
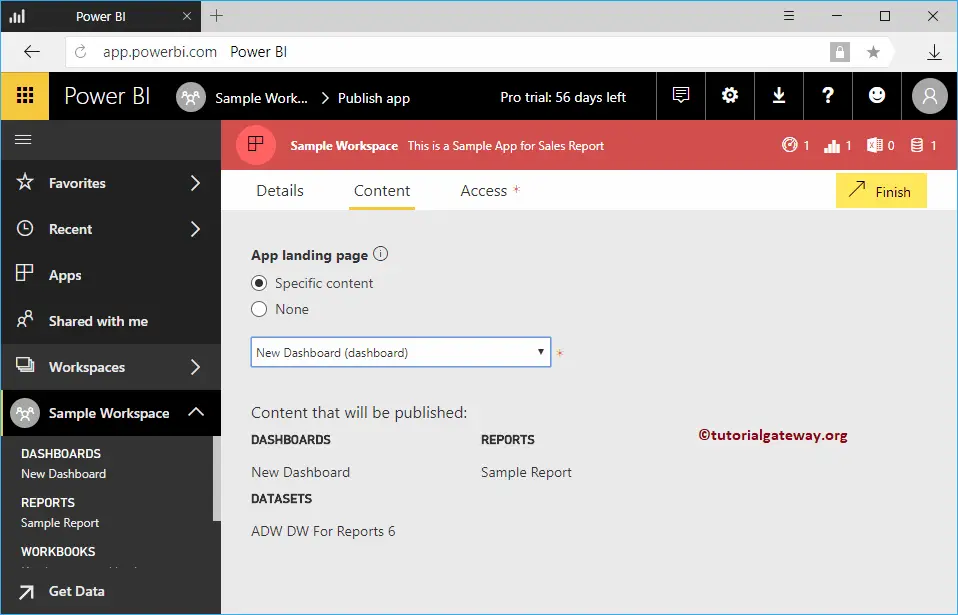
Under the Content tab, specify the published Power BI App landing page.
- Specific Content: If you select this option, then use the dropdown list to choose the dashboard.
- None: There is no landing page.
Let me select the New dashboard as the landing page.
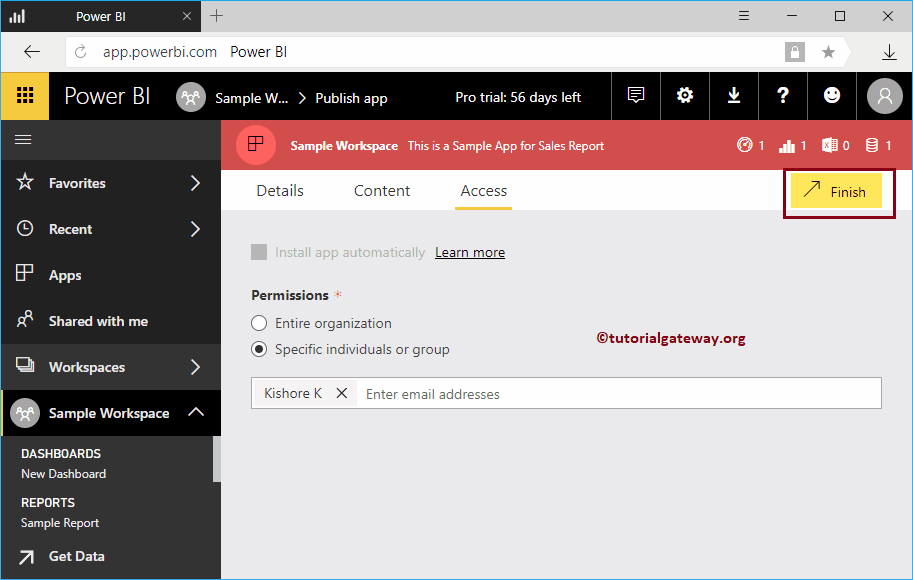
Under the Access tab
- Permissions: You can give access to the entire organization or a few individuals or groups.
We selected specific individuals or groups for this Power BI publish app demo and added Kishore. Once you have completed it, please click the Finish button.
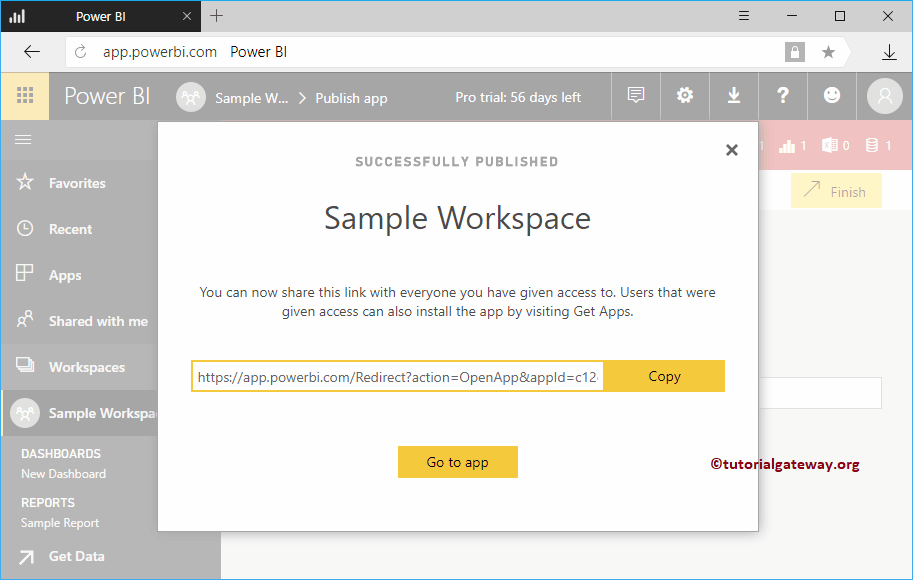
It opens a pop-up window, please click the Publish button to publish the app. Please save the link. This link helps you to open the App. For now, let me click the Get App button.
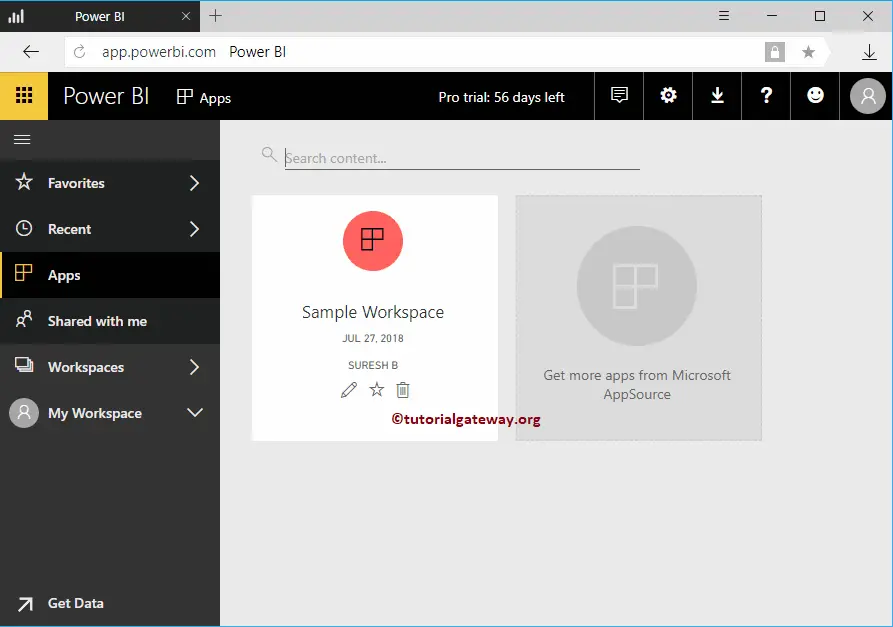
Clicking that button takes you to the following window. If this is not the case, click on the Apps tab inside the left navigation bar.
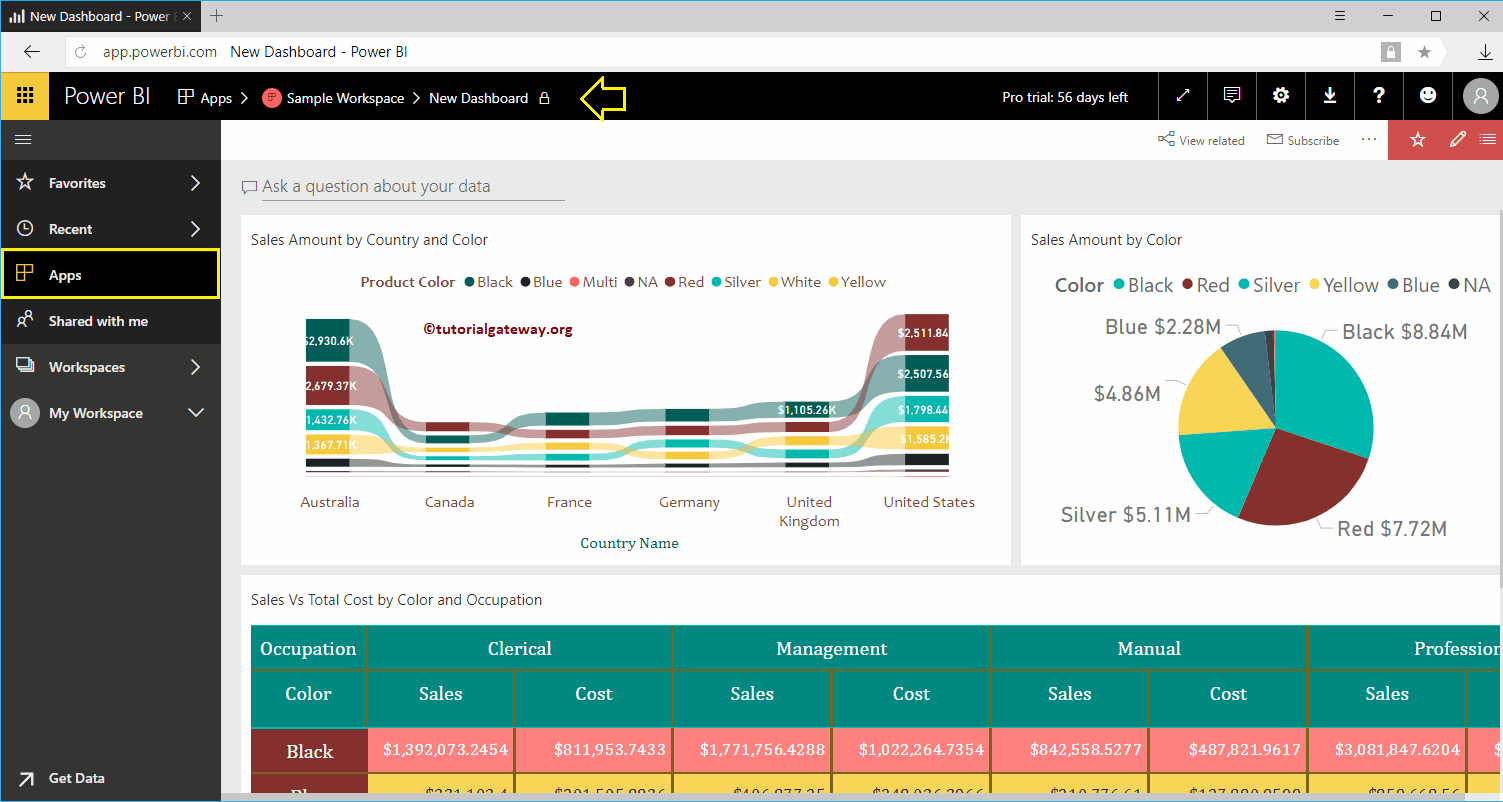
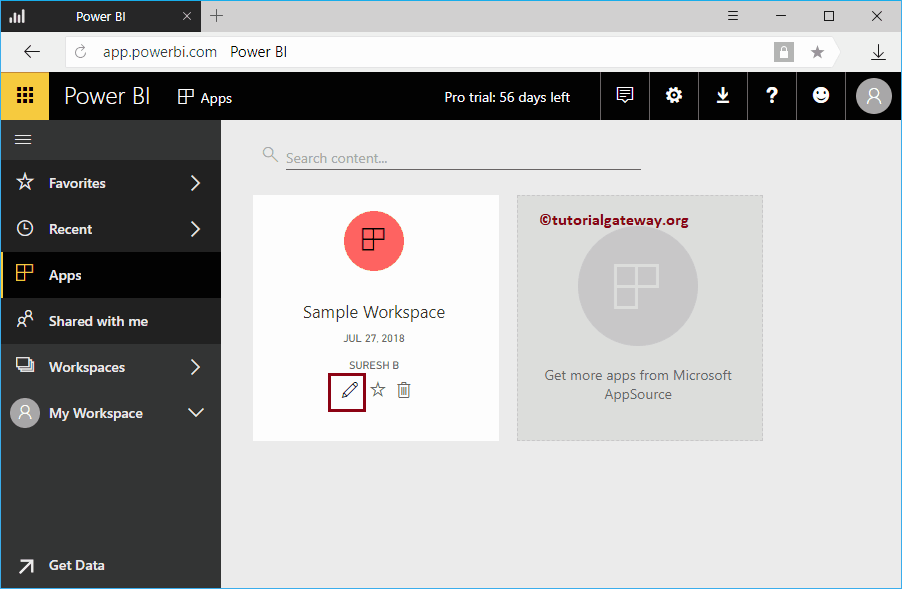
Sometimes it may open like the one below. Here, you can click Sample Workspace and see the dashboard inside it. Hovering over this Sample Workspace app will show the options to edit, delete, and add to favorites.
Open Power BI Published App using Mobile
Let me open the URL that we copied on my IOS device. Remember, you must download the app from the App Store or Google Play Store.
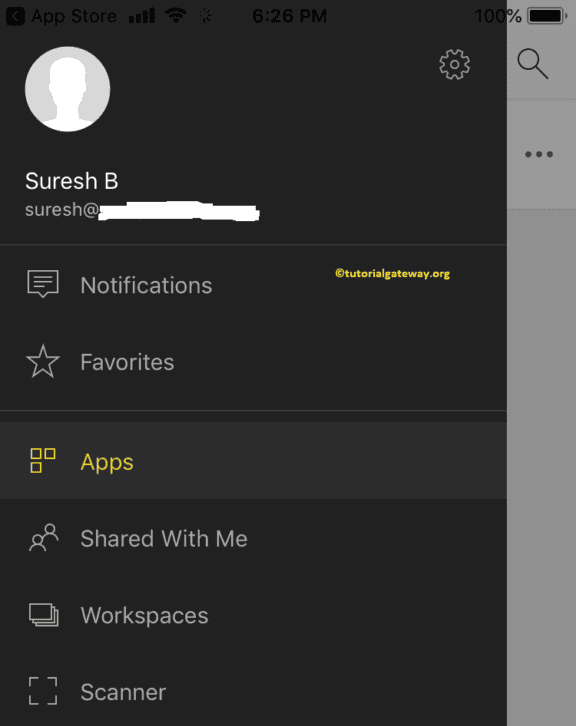
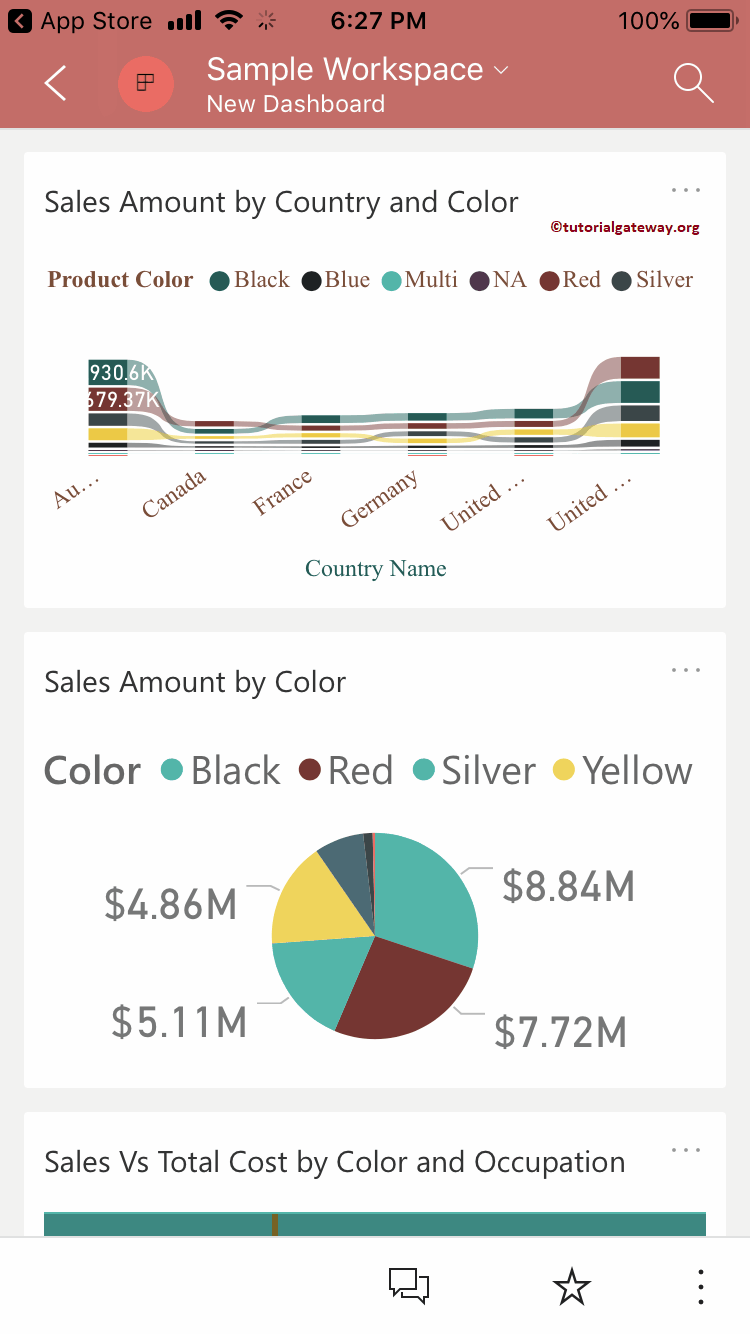
You can see the Sample Worksheet inside our Apps. Click that app to find the data. Check the dashboard inside our mobile.
How to view Published App in Power BI?
Let me show you the step-by-step approach to viewing the published App with a practical example. If you are the Admin/owner of it, then you can Go to the Apps tab, and click on the required one. If not, then ask your admin to give access to that App.
We use the Sample Workspace we created earlier for this View Published App in the Power BI demonstration. As you can see, we had permitted Kishore. It means he can access this one.
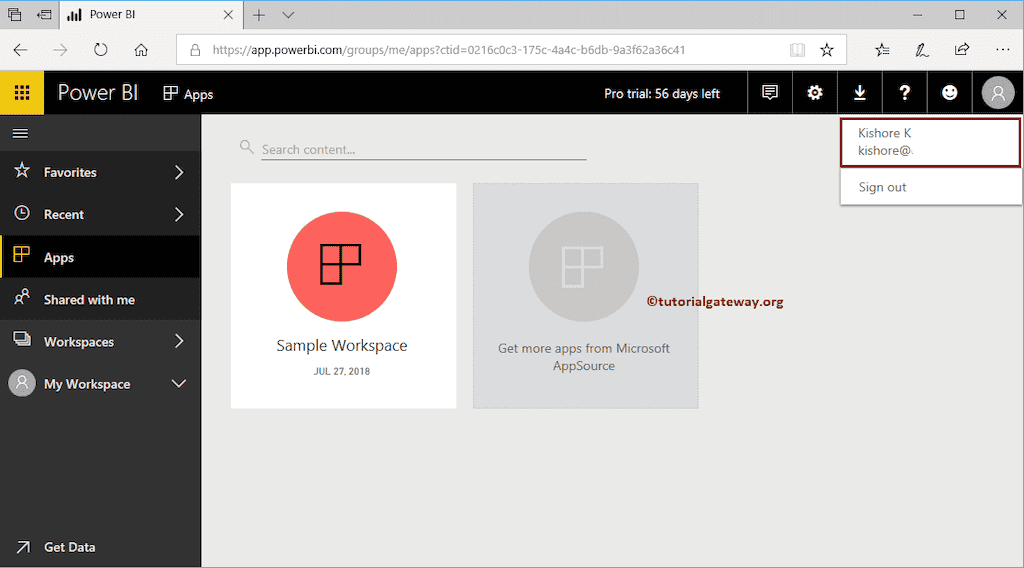
Let me open the service with the Kishore account. From the screenshot below, you can see the published App inside his section.If that is not the case, then Click on the Get Apps button.
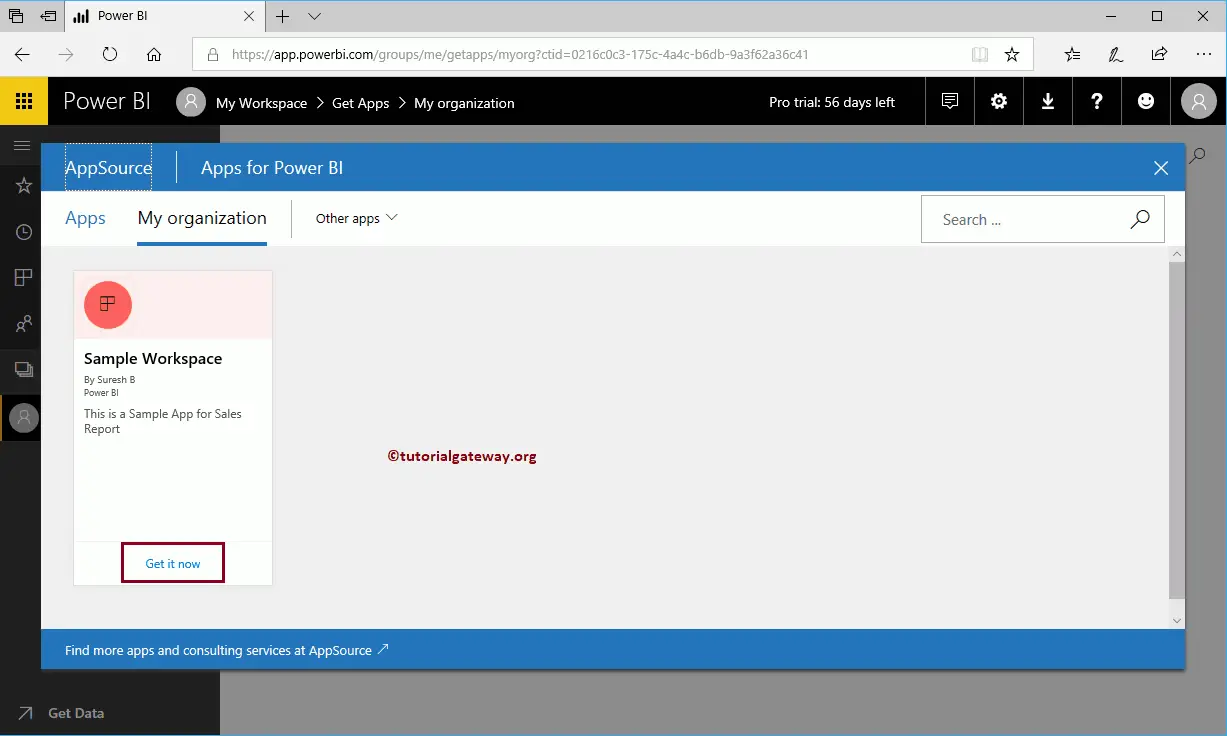
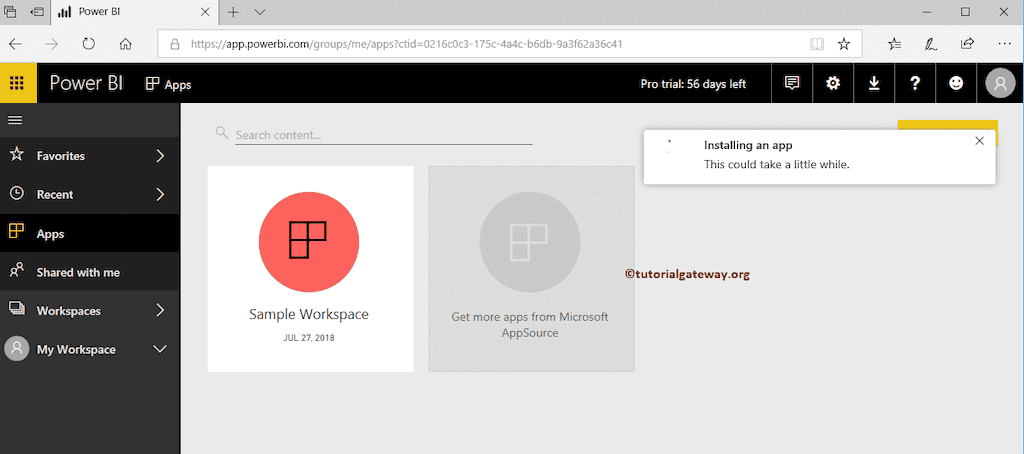
If your page is empty, then click the yellow background Get Apps button at the bottom.
Click the Get Apps button to open the following window. Here, you can select the required App to view from the already published. Let me select the Sample Workspace and click Get it Now.
It installs the App into your workspace. After that, you can see or view the published App.
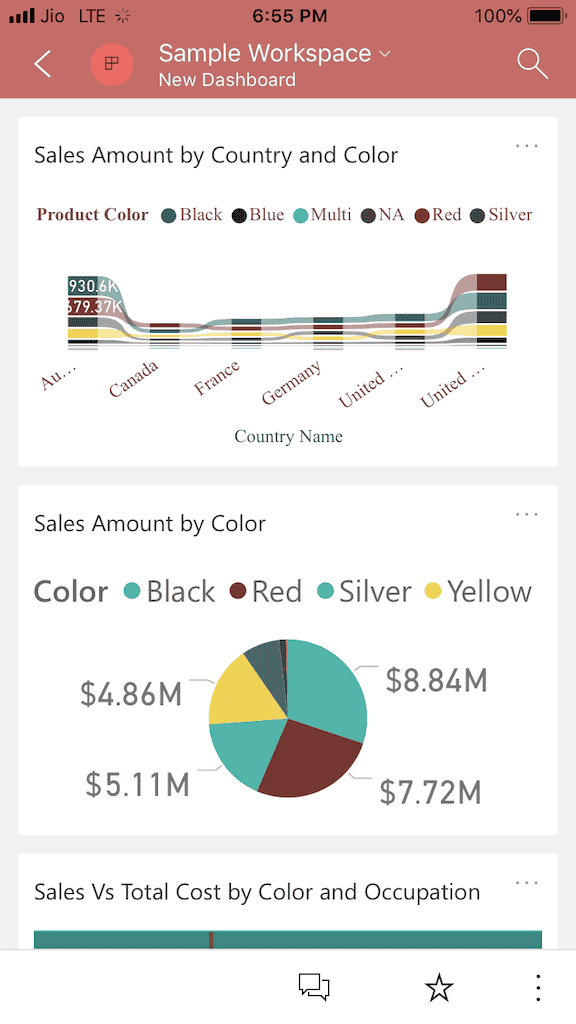
Let me log into my IOS device and log in as Kishore K. I am clicking the apps tab to open the following window. Now you can see the dashboard.
How do you edit the Power BI App?
Let me show you the step-by-step approach to editing the App with a practical example. Before we start editing the app, let me show you the existing App in my workspace.
We use the Sample Workspace App we created earlier to edit the App demonstration. Please hover over your App, and click the edit button.
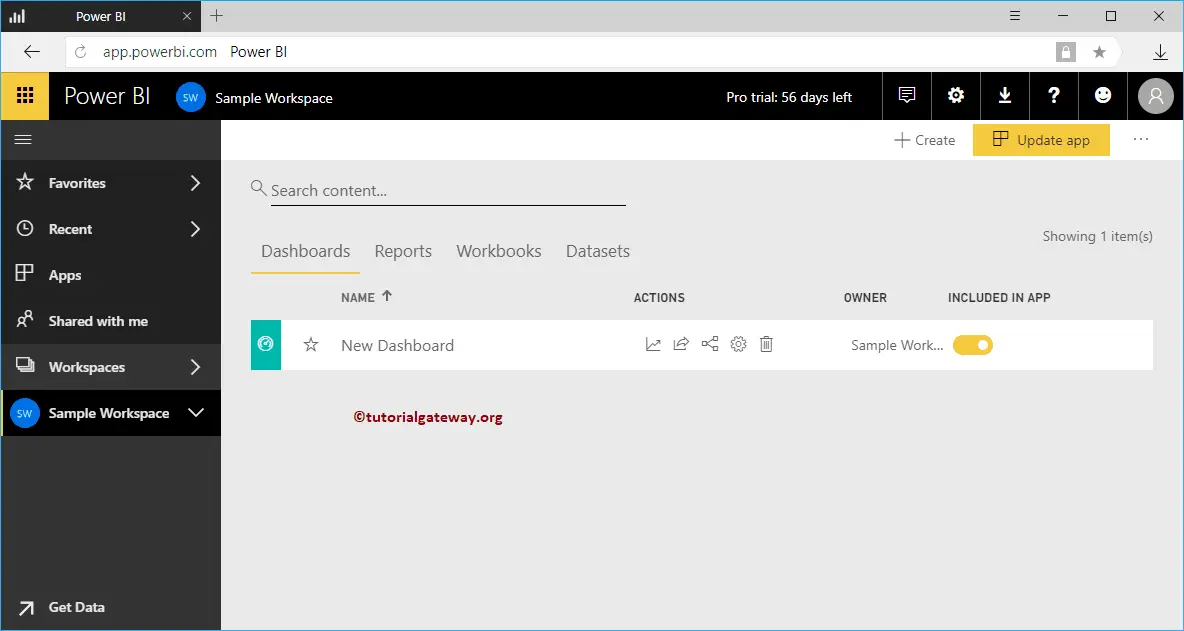
Clicking that button opens the following window. Click on the dashboard to edit the tiles, reports, etc.
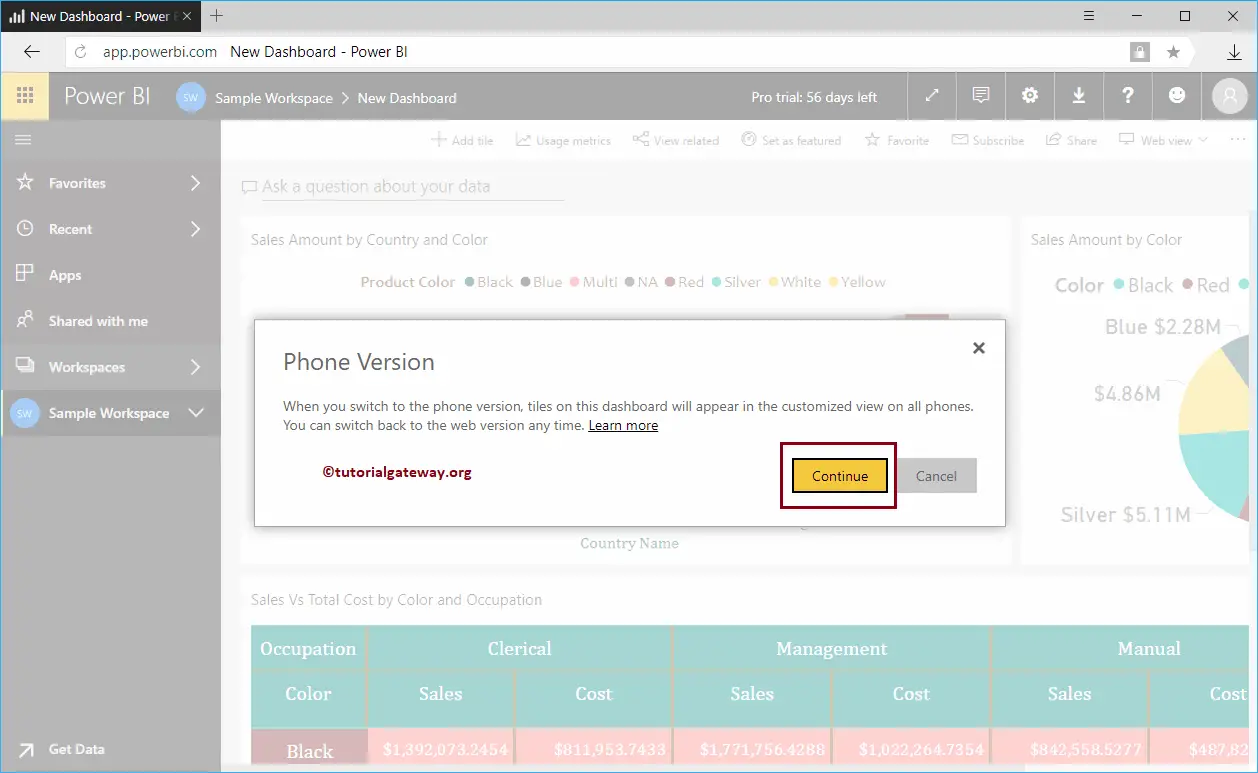
From the screenshot below, you can see the dashboard. By default, it shows the Web Preview. It means whatever changes you made here apply to the web preview. Clicking that little down arrow changes it to phone preview. So, let me hit the phone preview.
Selecting the Phone preview pops up a new window, and click continue.
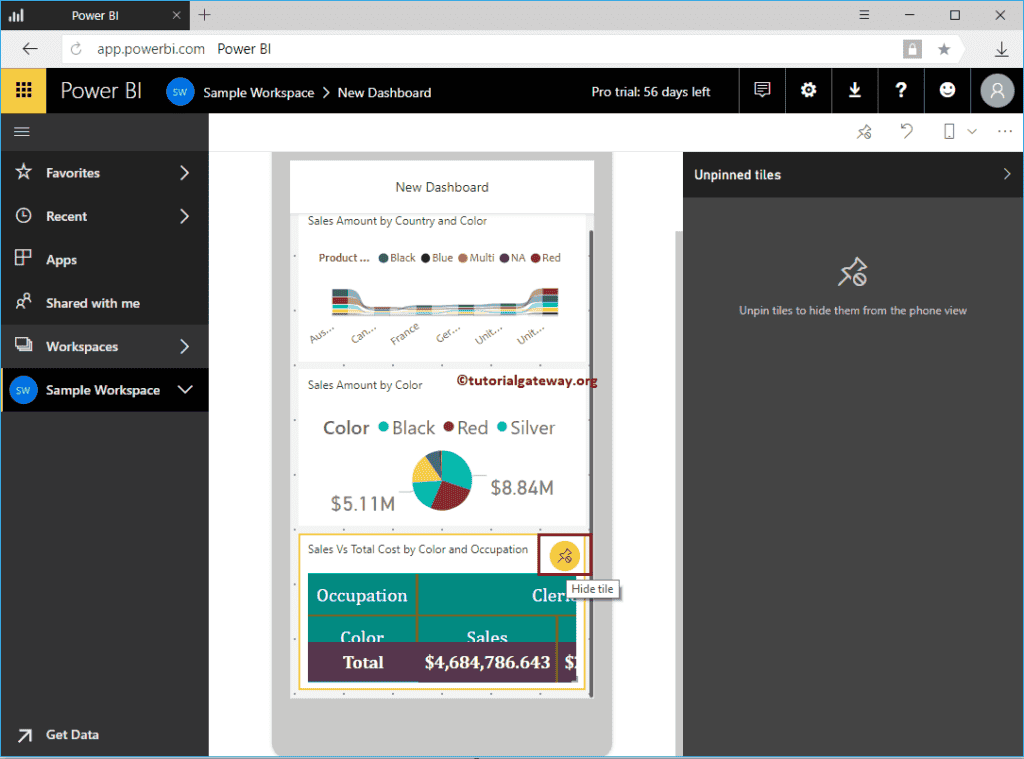
Now you can see the Phone preview. You can use this window to change the size and location of each tile as per your requirement.
By clicking the little Hide tile button, remove that tile from the dashboard and place it in the Unpinned Tiles. Let me hit that button.
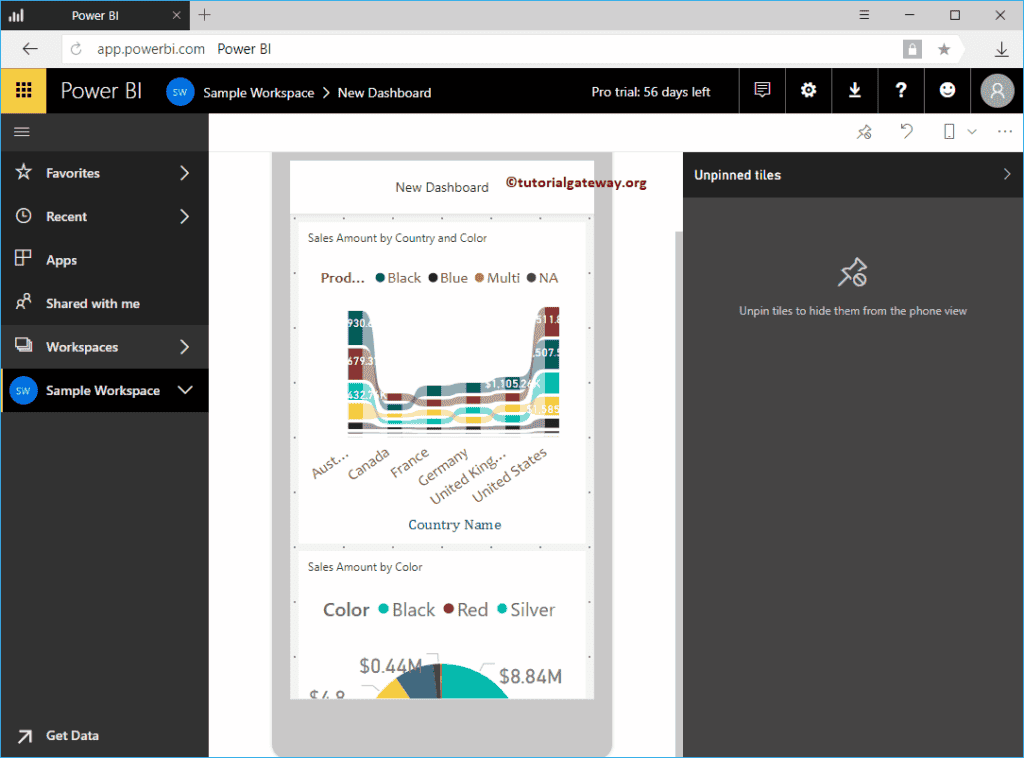
You can see that the report was removed from the dashboard. By clicking the Add tile button, you can place it inside the dashboard. Let me hit that button.

You can see that there are no unpinned tiles.
Use the below button to remove all Tiles from the dashboard.
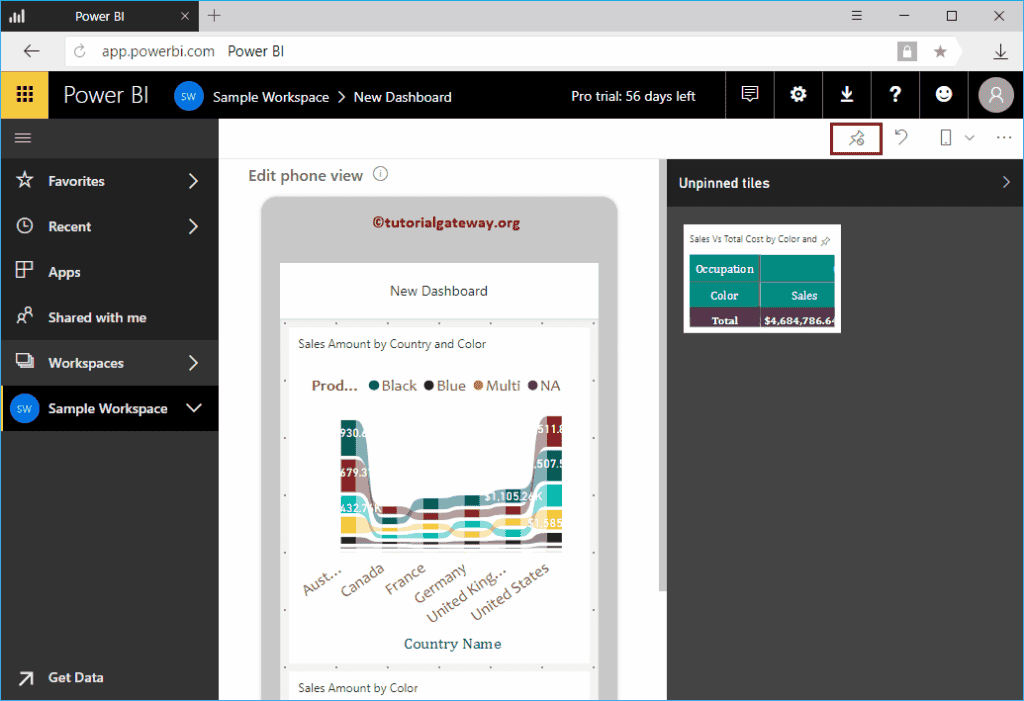
Once you completed editing the Power BI app, click the Update App button. Remember, we removed the Matrix from the Phone View.
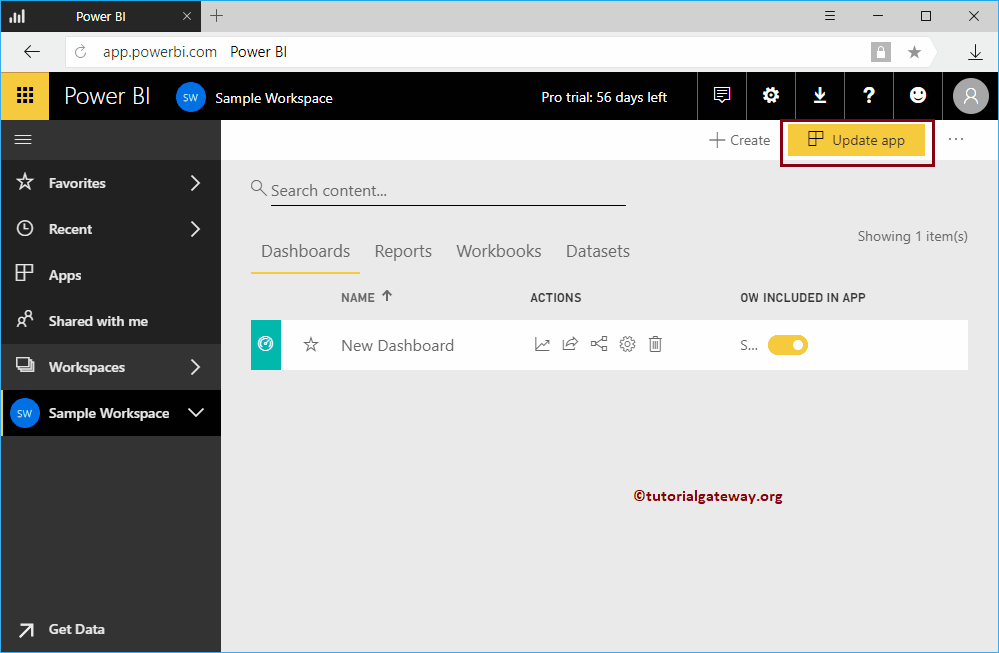
By Hitting the Update App button, it shows you the Details window. If you want, you can change these settings as well; otherwise, hit Update App. Click the Update button.
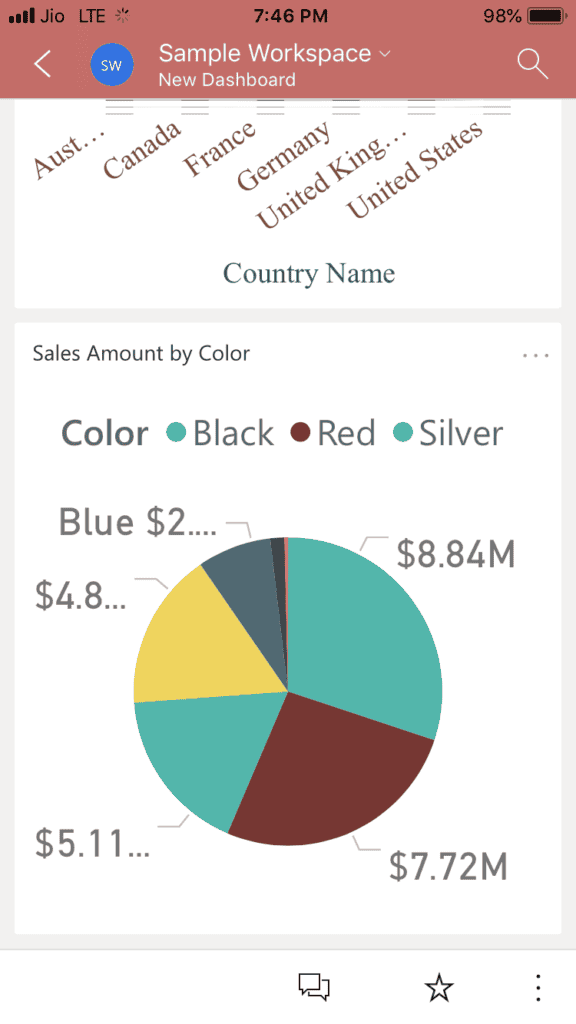
Let me open the App in IOS. From the screenshot below, you can see no Matrix in the Phone view.