In real-time, you might get the data that has merged columns (one column with too much information). In that situation, you can use Power BI Split Columns option to split that column into multiple columns. This article shows you how to Split Columns in Power BI with example.
How to Split Columns in Power BI
To demonstrate this Power BI split columns option, we are going to use the Text Employee table that we imported in Enter Data article.
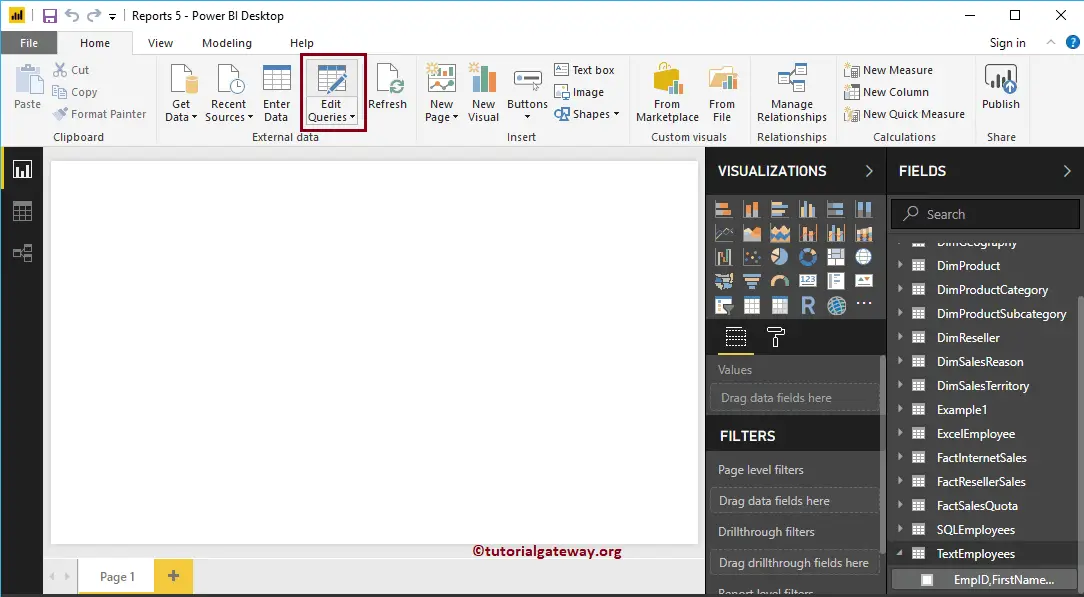
To split columns in an existing table, please click the Edit Queries option under the Home tab.
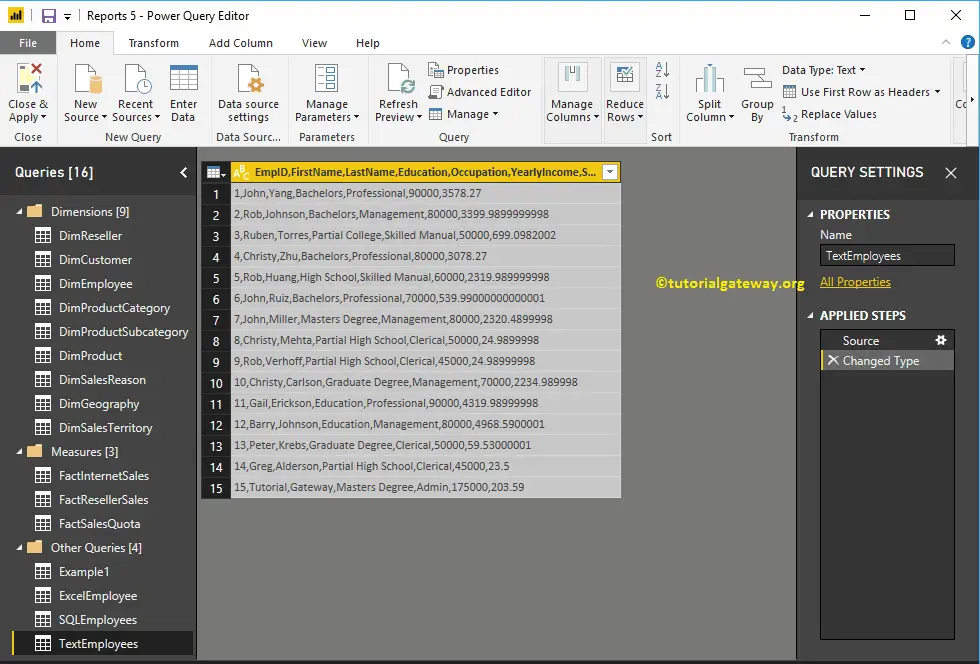
Clicking Edit Queries option opens a new window called Power Query Editor. From the screenshot below, you can see that the Power BI table has only one column.
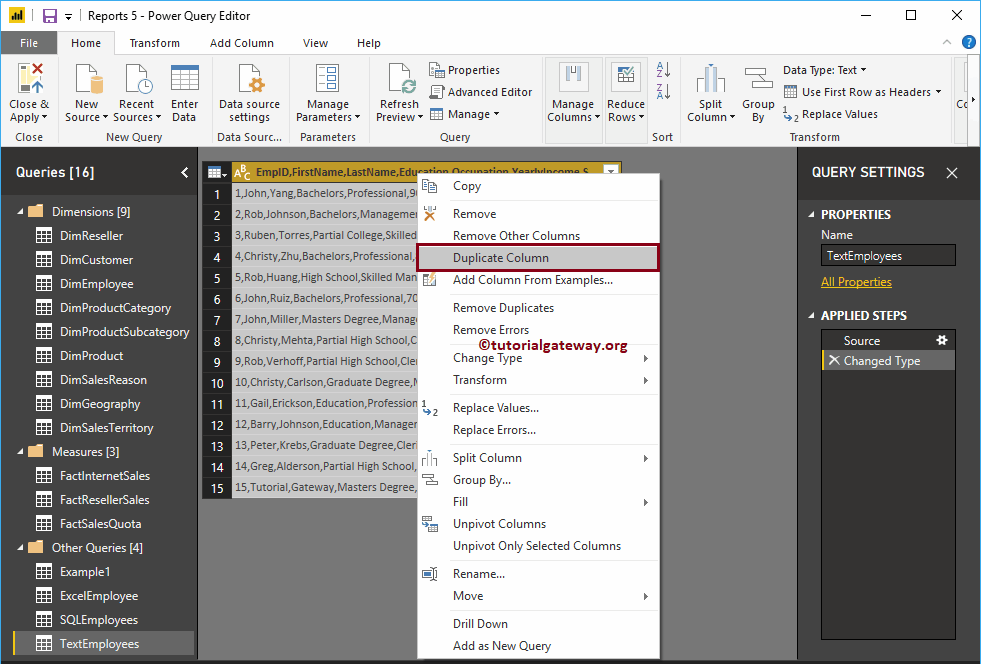
Before we start splitting the columns in Power BI, let me duplicate this column. To do so, right-click on the column name and select Duplicate Column option from the context menu.
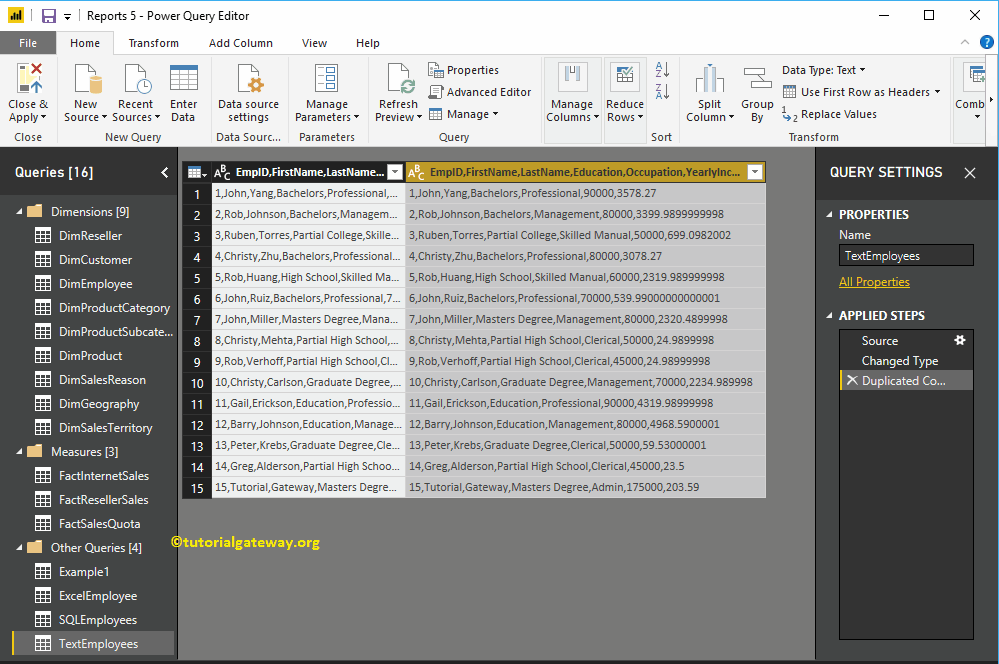
Now you can see the Duplicate column
To split the columns in a Power BI table, right-click on the column that you want to split open the context menu. Please select the Split Columns and then select By Delimiter option.
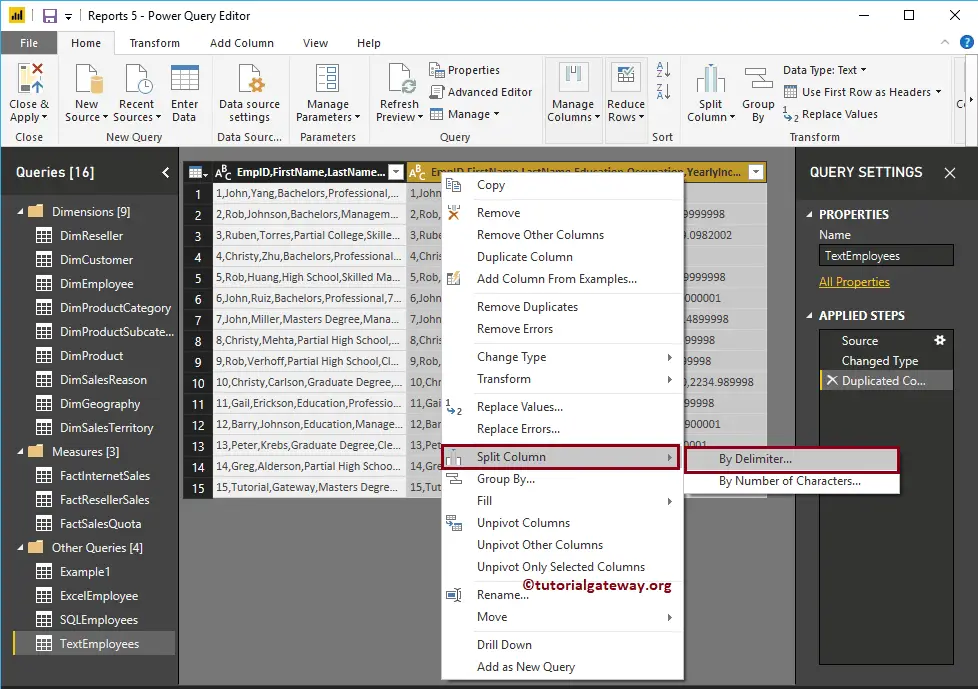
Selecting the By Delimiter option opens the following window.
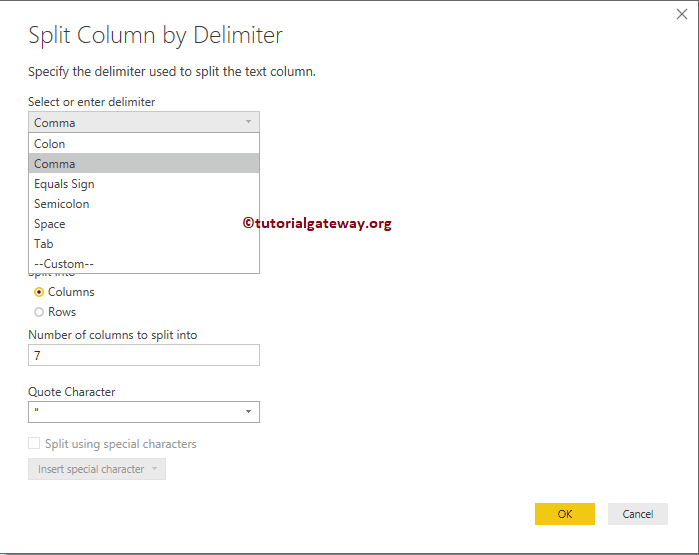
- Select or enter delimiter: From the drop-down list, please select the delimiter that you want to use as the split character. If it is not there in the list, then select the Custom option and specify that custom character.
- Left most delimiter: This option split the leftmost string before the first delimiter.
- Right most delimiter: This option split the right-most string after the last delimiter.
- Each Occurrence of the delimiter: The text split at each occurrence of a delimiter.
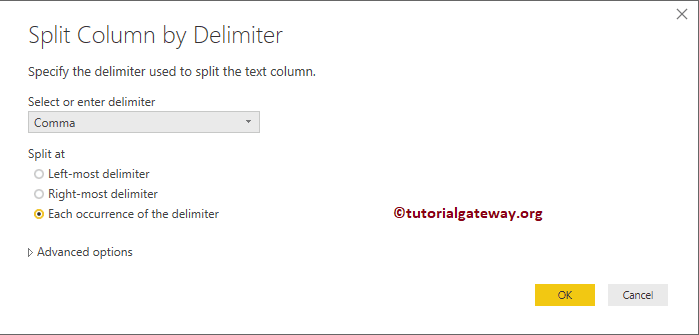
We are selecting Comma as the delimiter. Remember, under the Advanced section, you can specify the Number of Columns or Rows.
Let me select the Left Most delimiter option, and click OK
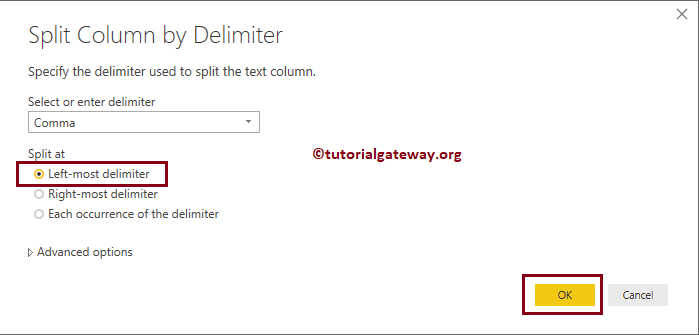
Now you can see that the Employee ID’s are separated from the original column and placed in the new column.
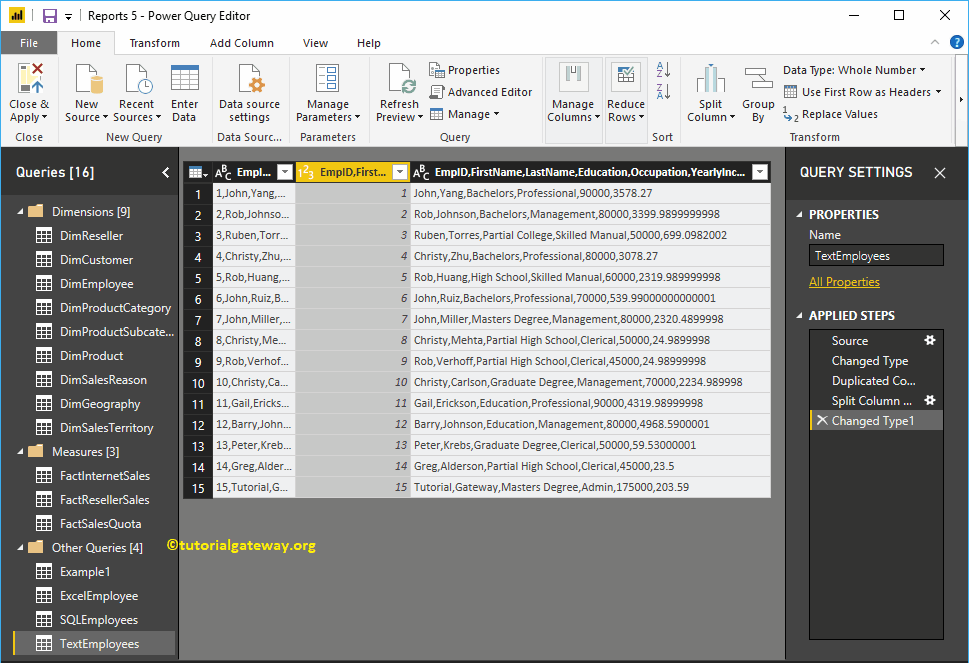
This time we select the Split at each occurrence of the delimiter option.
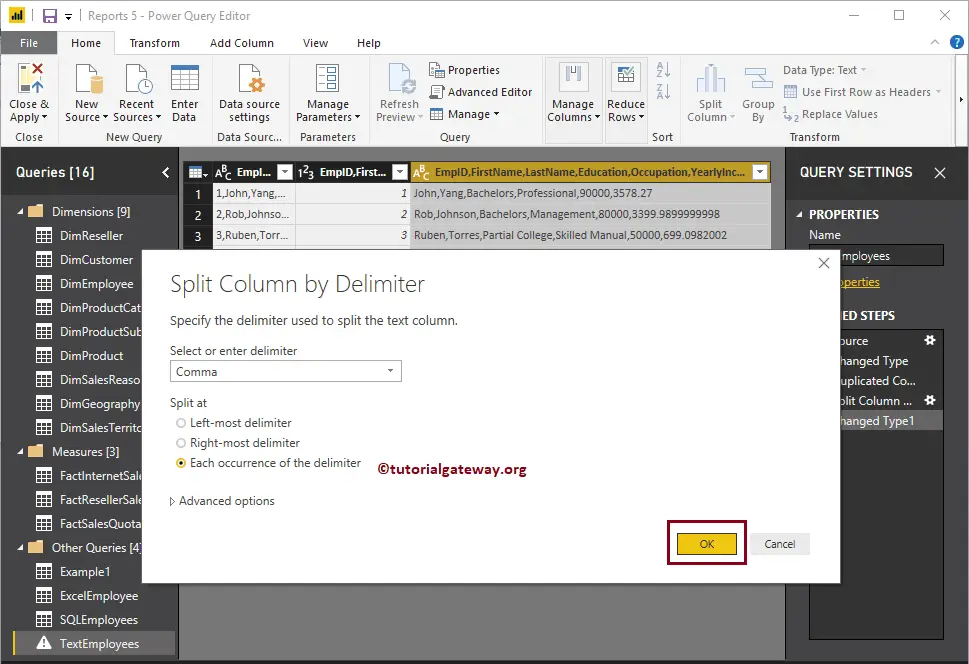
Now you can see, text at each occurrence of the comma is separated from the original column and placed in a new column.
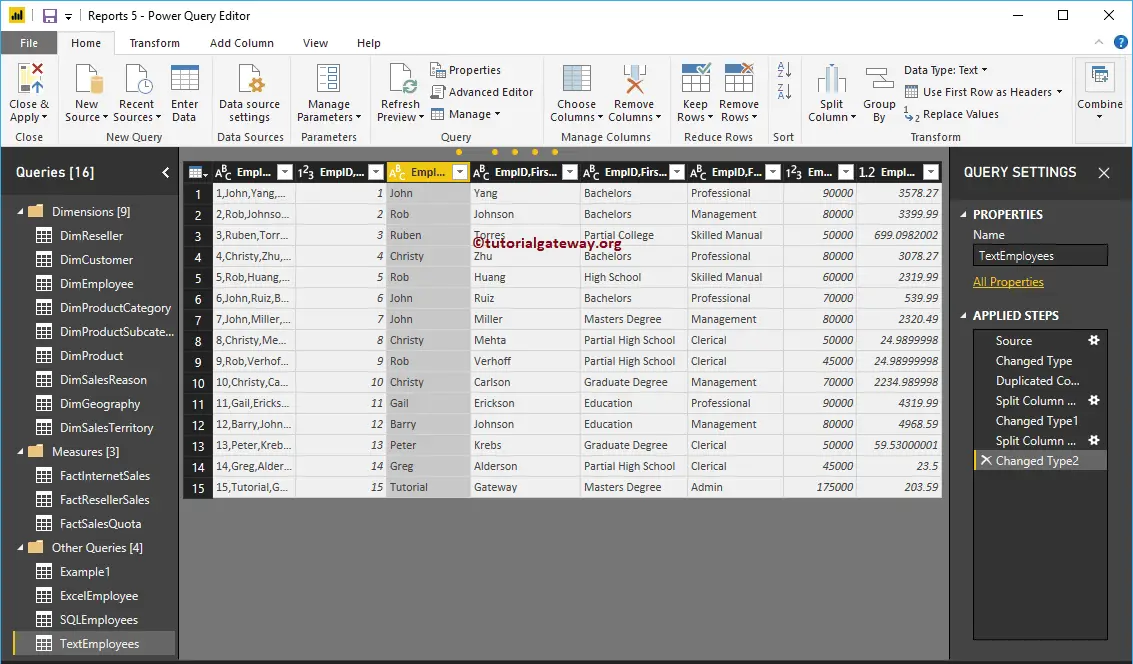
Let me try another delimiter. For the Power BI Split Columns demonstration, we are selecting the following column and split that column using the Space delimiter.
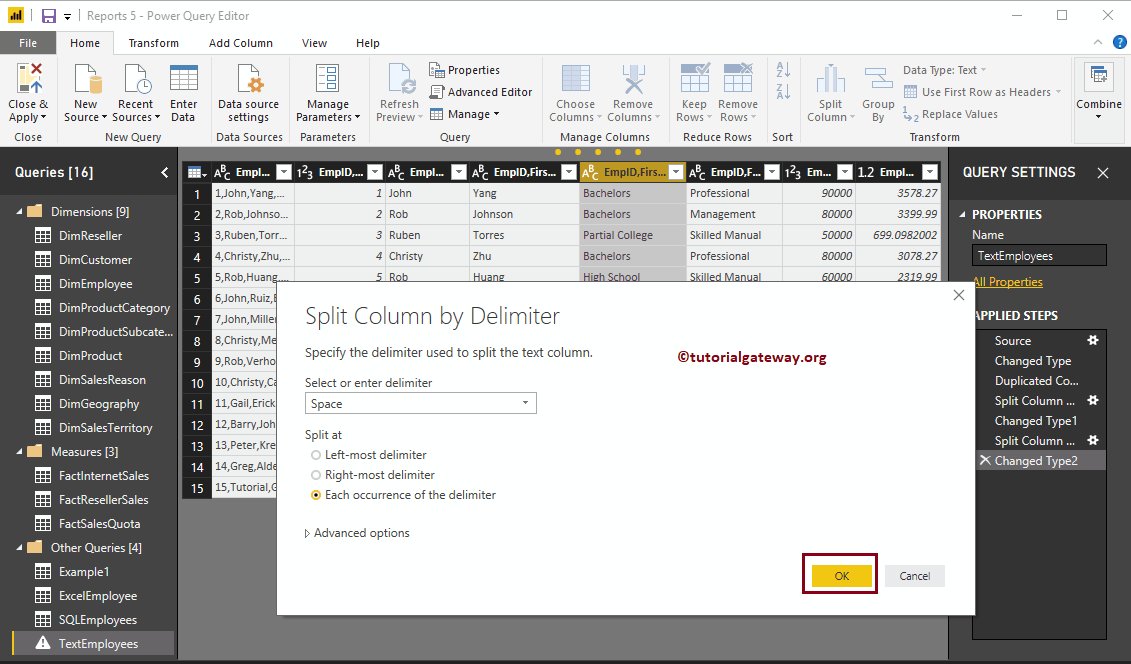
Now you can see the different columns that stored the split text at each occurrence of space.
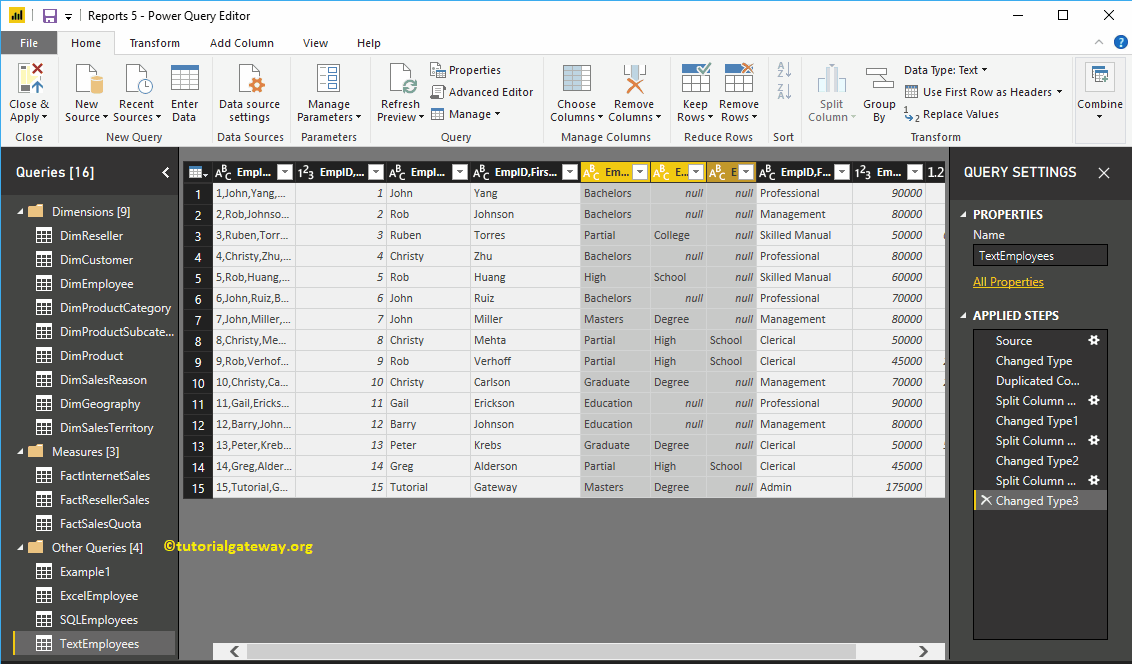
Power BI Split Columns by Number of Characters
Right-click on the column that you want to split will open the context menu. Please select the Split Columns and then select the By Number of Characters option.
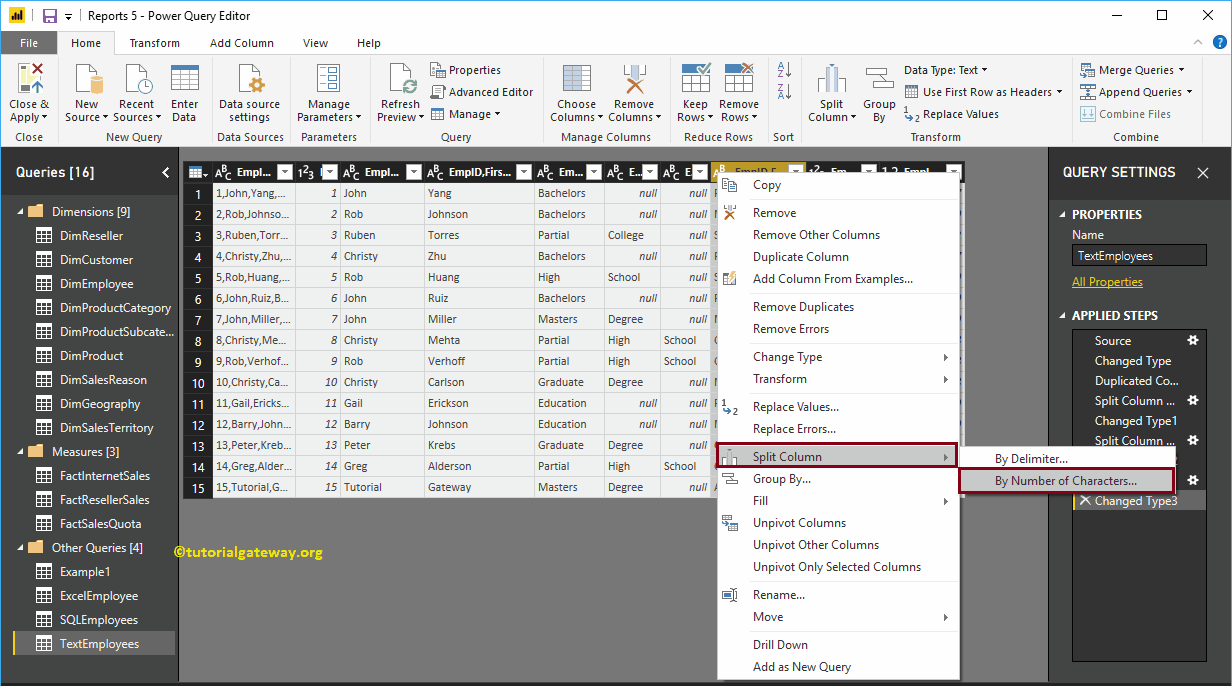
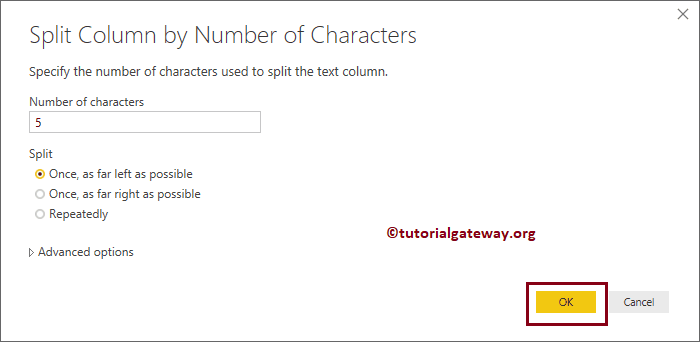
Selecting the By Number of Characters option opens the Split Column by Number of Characters window.
- Number of Characters: Please specify the number of characters used to split the column.
- Once, as far left as possible: This option split the leftmost string before the number of characters.
- Once, as far right as possible: This option split the right-most string after the number of characters.
- Repeatedly: The text split for every 5 characters.
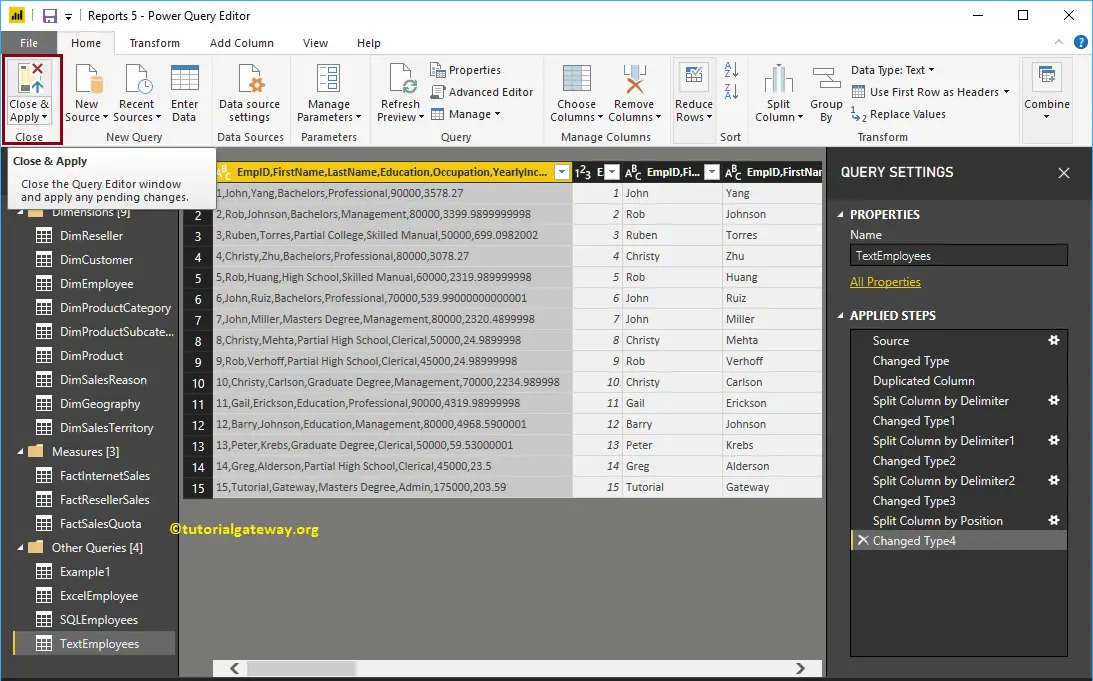
Now you can see the split columns in Power BI query editor
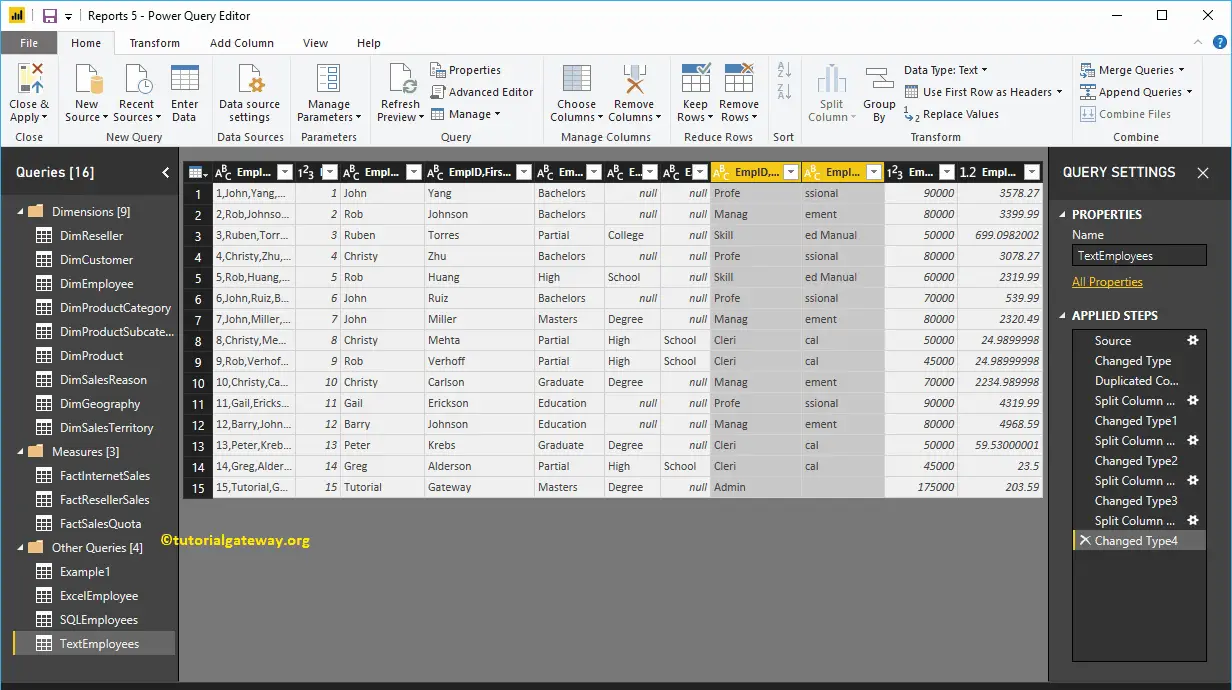
Whatever the changes you made (Split Columns in Power BI) won’t affect until you hit Apply. Let me hit the Close & Apply option under the Home tab.
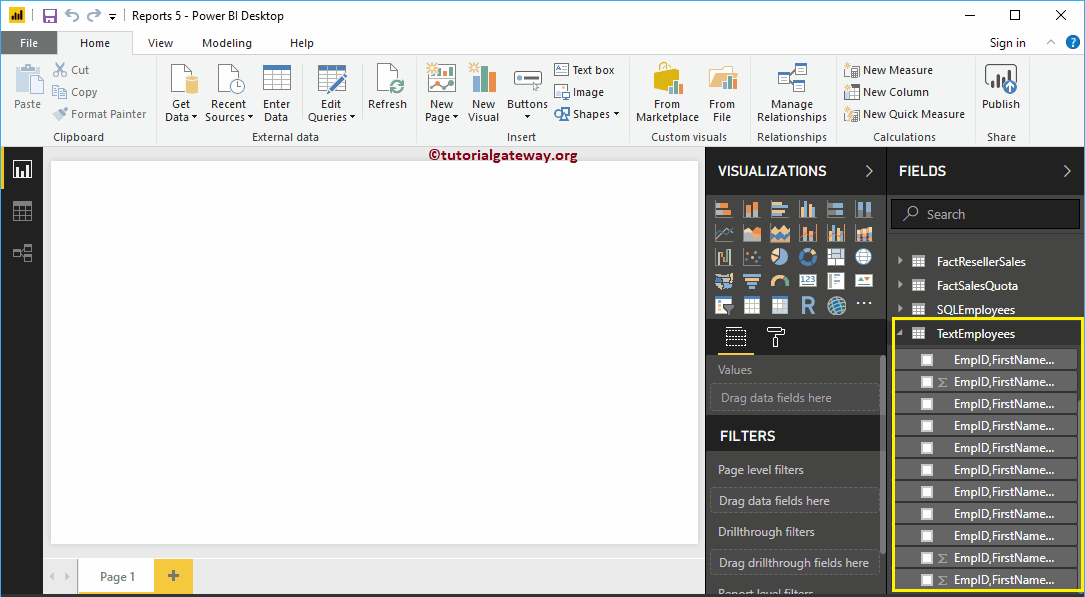
Now you can see 11 columns inside the Text Employees table.

Comments are closed.