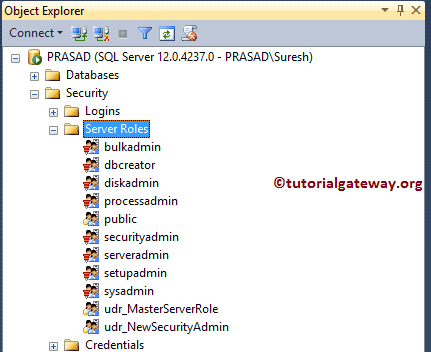
The step-by-step approach to creating SQL Server Roles using Management Studio and Transact query. Before we start configuring new, let me show you the list of default Server Roles in our Management Studio.
The following is the list of Server Roles available in SQL.
- bulkadmin: Members of this can run the Bulk Insert Statements.
- dbcreator: Members of this can Create, Alter, Restore, and Drop any Database.
- diskadmin: The disk admin users are used to manage disk files.
- processadmin: This role can end all the running processes in an Instance.
- public: By default, every login belongs to Public Server.
- securityadmin: Member of this Grant, Deny, Revoke both Server level permission and Database level permissions. They can also reset all Logins.
- serveradmin: The admin members can shut down the server, or they can change the server-wide configurations.
- setupadmin: Members with this can remove or add linked servers using the Transact queries.
- sysadmin: Member can perform any activity on the server. This member bypasses any restrictions provided by others too.
Create SQL Server Roles using SSMS
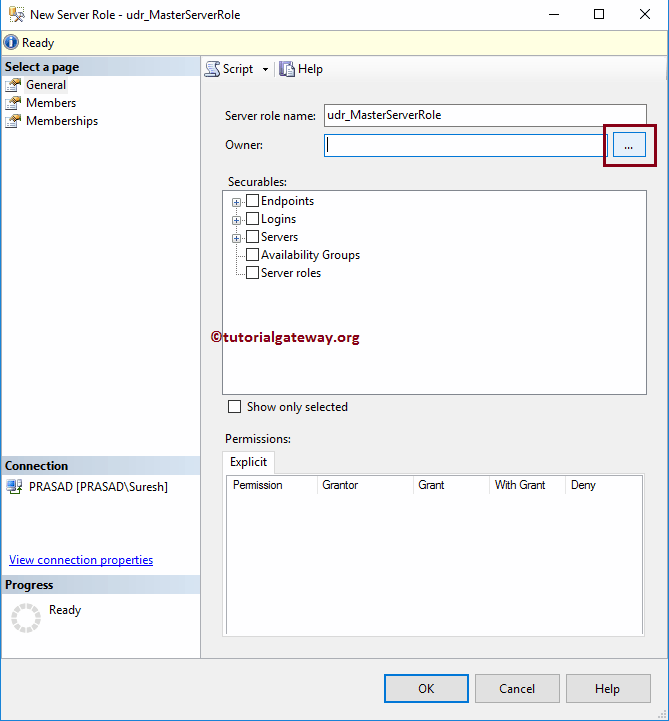
To create a new one, please expand the Server Roles folder and right-click on the folder to open the context menu. Please select the New Server Role.. option. Once you select the New option, the following window will open.
- Server role name: Please use a unique name. By seeing the name, you have to understand its functionality.
- Owner: You have to specify the owner’s name. This person can change this as per his/her requirements.
- Securables: Please specify the securable that this has to handle. For example, you use Endpoints, logins, etc.
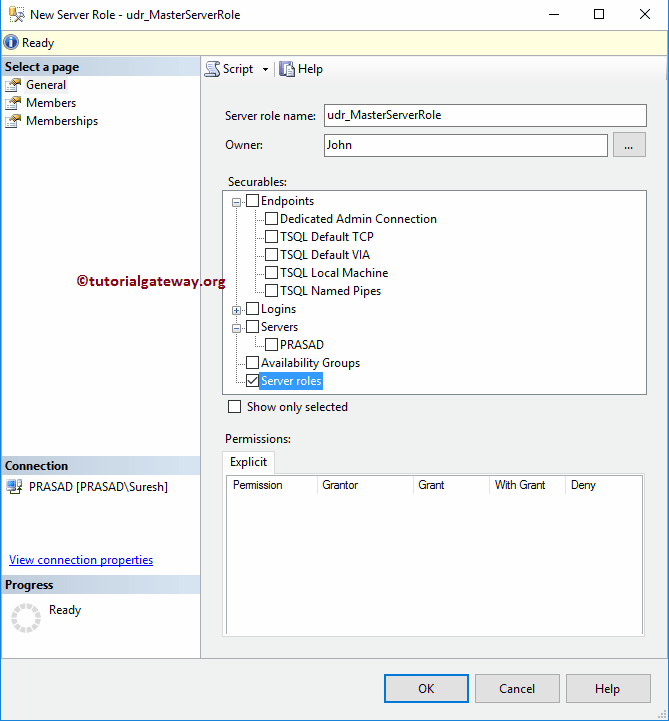
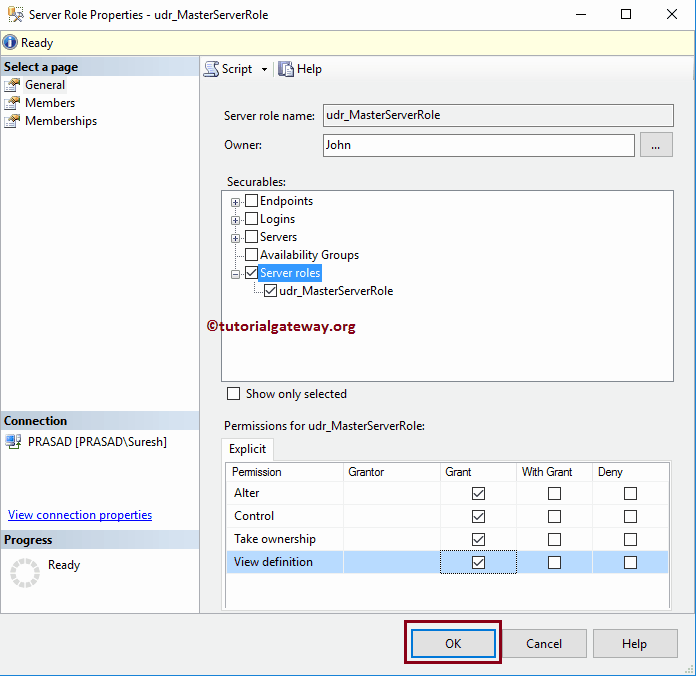
As you can see from the below screenshot, we assigned udr_MasterServerRole as the name. Let me click the … (Browse) button to select the Owner. Please refer to Create Windows Logins or Create Server Logins to understand the steps involved in creating logins.
Choose User
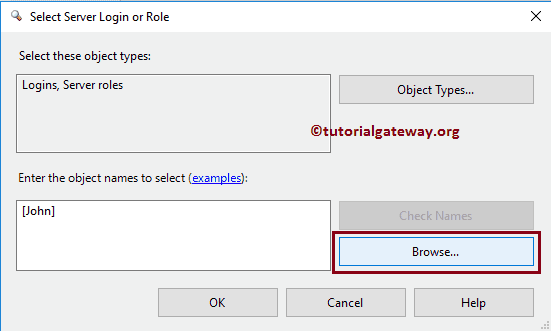
Once you click on the …. button, the following window opens. If you know the name, write the name in the textbox and click the Check Names button.
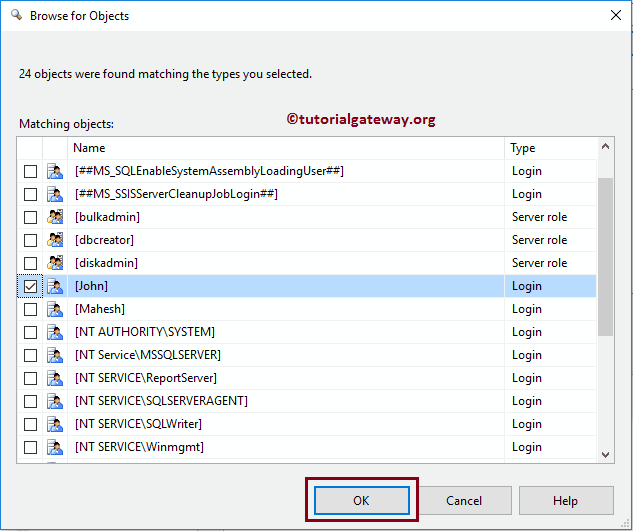
As you can notice, it has automatically recovered the account information. If you don’t remember the name, click the Browse button.
It showcases all the existing users. Please pick the User from this list.
Click OK to close this SQL Select Server Login or Roles window. For now, we are selecting the Server roles as the securable.
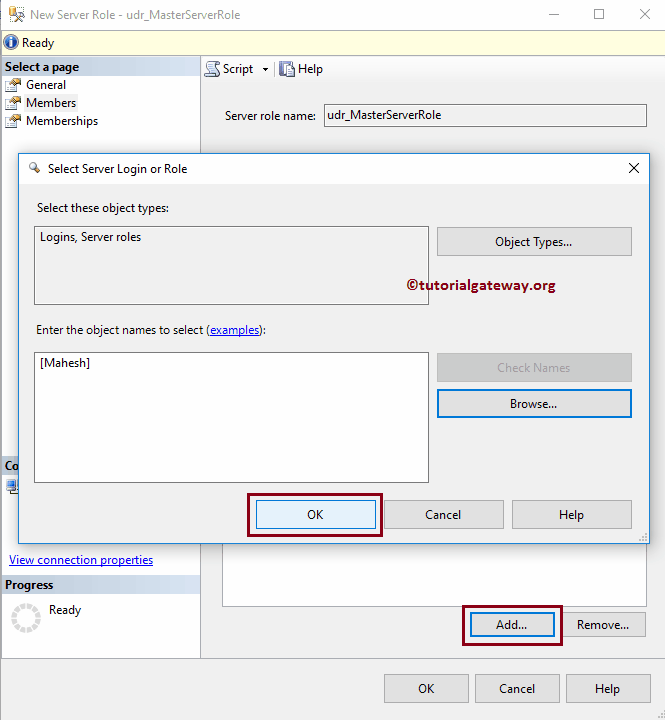
Within the Members tab, you can add members to it. Something like adding your Team members. So, please click the Add button at the bottom.
Use the above-specified technique to add members. As you can see from the below screenshot, we are adding Mahesh’s login.
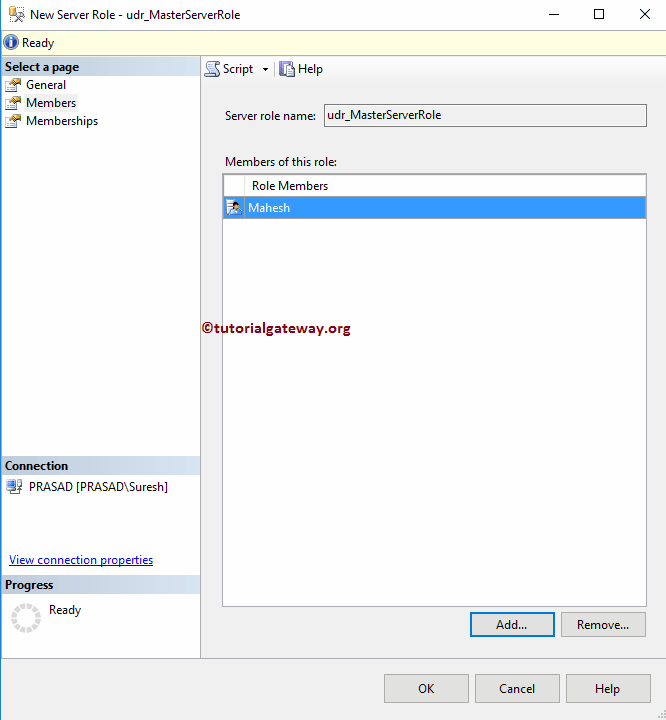
Now you can see our new Role member.
Within the Memberships tab, you can assign one or more default SQL Server Roles to this. For now, we are selecting all of them.

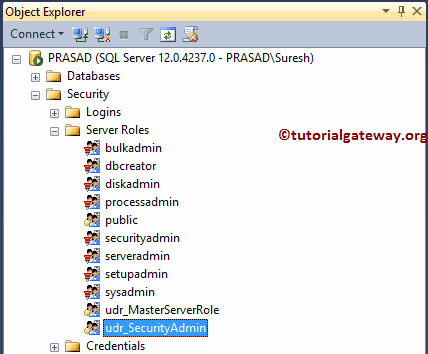
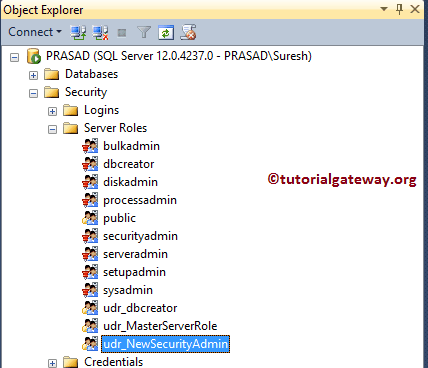
From the screenshot below, you can see our newly created one in the Management Studio Object explorer.
SQL CREATE SERVER ROLE
The Server provides a CREATE SERVER ROLE command to create a new one. The below code snippet shows its syntax.
USE [master]
GO
CREATE SERVER ROLE [Role Name] [ AUTHORIZATION User_Name];
GO
The below code snippet will create a new one named udr_SecurityAdmin.
USE [master]
GO
CREATE SERVER ROLE [udr_SecurityAdmin];
GO
Run the above query
Messages
--------
Command(s) completed successfully.
See our newly created Server role in object explorer in the following screenshot.
Please go to its properties to edit or view the role settings. By default, it has assigned the current user as the owner because we haven’t provided the information about the owner in our statement.

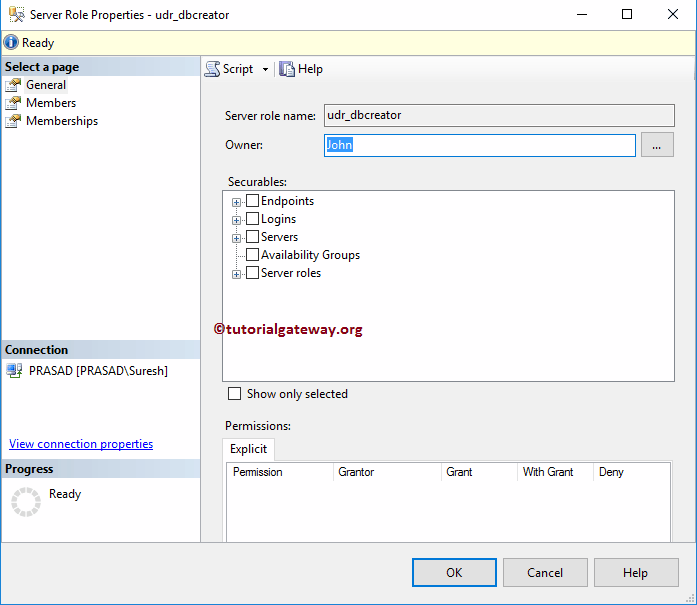
Let me provide the Owner as John
USE [master]
GO
CREATE SERVER ROLE [udr_dbcreator]
        AUTHORIZATION John;
GO
Run the above query
Messages
--------
Command(s) completed successfully.
You can see the new one. From the properties, you can see the owner as John.
Edit SQL Server Roles using SSMS
Please go to the Roles folder to edit the existing one to select the required name. Right-click on the name you want to edit and select the Properties option from the context menu. Here, we will use the udr_MasterServerRole.
Once you select the Properties, the following window opens. Use this to alter the Owner, Securables, Members, and memberships.
How to edit ort Alter SQL Server Roles using query
Use the ALTER SERVER ROLE command to edit the properties. The below code snippet will rename the udr_SecurityAdmin to udr_NewSecurityAdmin.
USE [master]
GO
ALTER SERVER ROLE [udr_SecurityAdmin]
WITH NAME = [udr_NewSecurityAdmin]
GO
Execute alter query
Messages
--------
Command(s) completed successfully.
You can see the updated one.
Add Role Members
The below code snippet will add a new member to the existing Server Role: udr_NewSceirutyAdmin.
USE [master]
GO
ALTER SERVER ROLE [udr_NewSecurityAdmin]
ADD MEMBER [Mahesh];
GO
Run add a member to server query.
Messages
--------
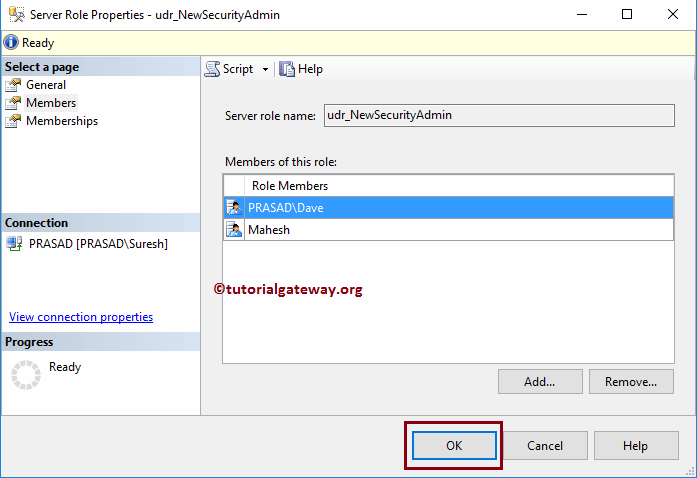
Command(s) completed successfully.The below code will add new Windows login [PRASAD\Dave] to the existing Server Role: udr_NewSceirutyAdmin.
USE [master]
GO
ALTER SERVER ROLE [udr_NewSecurityAdmin]
ADD MEMBER [PRASAD\Dave];
GO
Run the above new Windows login query.
Messages
--------
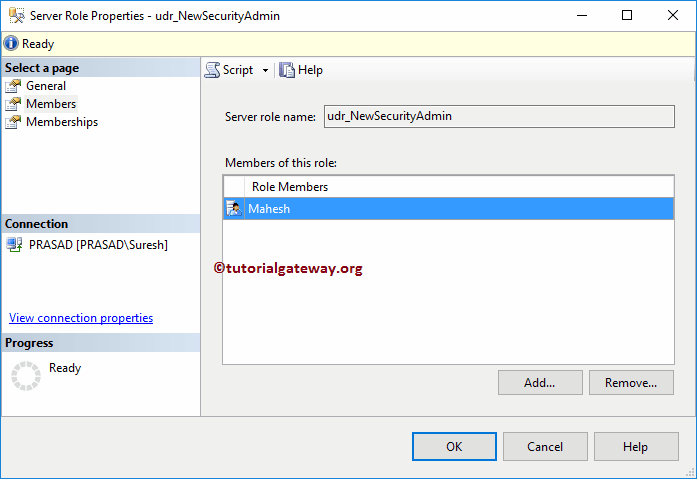
Command(s) completed successfully.From the properties, you can see the new Role members that we added before.
Drop Role Members
The Below code will remove the PRASAD\Dave server role member from the udr_NewSecurityAdmin.
USE [master]
GO
ALTER SERVER ROLE [udr_NewSecurityAdmin]
DROP MEMBER [PRASAD\Dave];
GO
Execute drop member’s query.
Messages
--------
Command(s) completed successfully.
you can find the same in properties.
You can also grant permission to use the query. We will write a dedicated article about permissions.
USE [master]
GO
GRANT ALTER ON
	SERVER ROLE::[udr_NewSecurityAdmin] TO [PRASAD\Dave];
GO
Run grant permissions query
Messages
--------
Command(s) completed successfully.
Delete Roles using SSMS
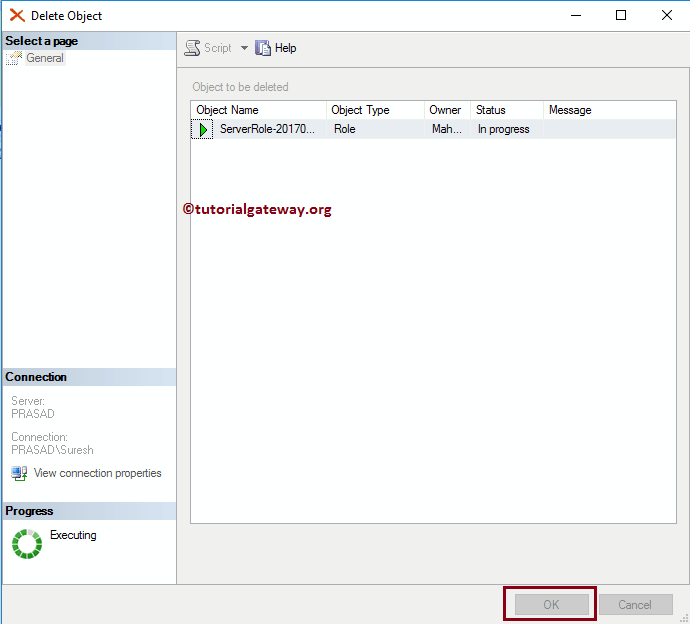
Please expand the Server Roles folder to select the required name to delete the existing ones. Right-click on the name that you want to delete, and select the Delete option.
Once you select the Delete option, the following window will open. Click OK to delete the server role.
SQL Delete or Drop Server Role
It provides the DROP SERVER ROLE command to delete or drop the existing.
USE [master]
GO
DROP SERVER ROLE [udr_dbcreator]; -- This is Role Name
GO
Messages
--------
Command(s) completed successfully.
Now you can see there is none with the name udr_dbcreator.