In this article, we will show how to use the SSIS Script Component as a Source with a practical example. You can also look into the following links:
Configuring SSIS Script Component as Source
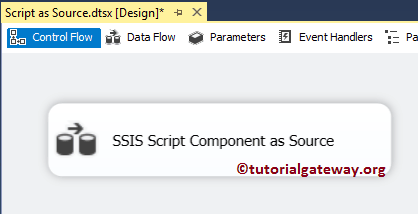
STEP 1: Drag and drop the Data Flow Task from the toolbox to control flow region, and rename it as the SSIS Script Component as Source.
Double click on it will open the data flow tab. For more Transformations >> Click Here.
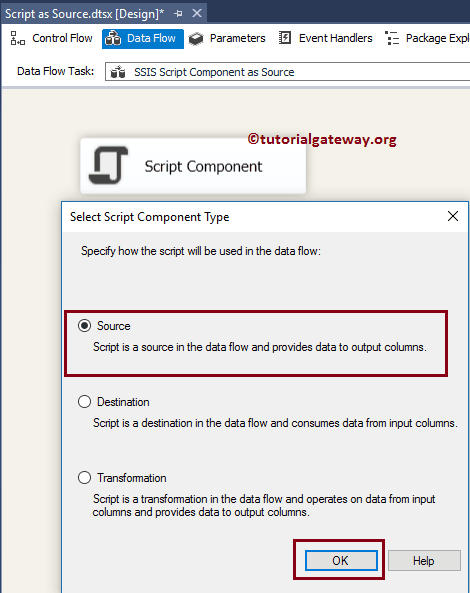
STEP 2: Drag and drop the Script Component from the SSIS toolbox to the data flow region. Once you drop the Script component on the data flow region, a new pop-up window called Select Script Content Type will open. In this example, we want to demonstrate the SSIS script component as a source, so we are selecting the Source option.
STEP 3: Double click on the Script component, which will open the following editor to configure the properties. Please see Script Component as a Transformation to understand these properties.

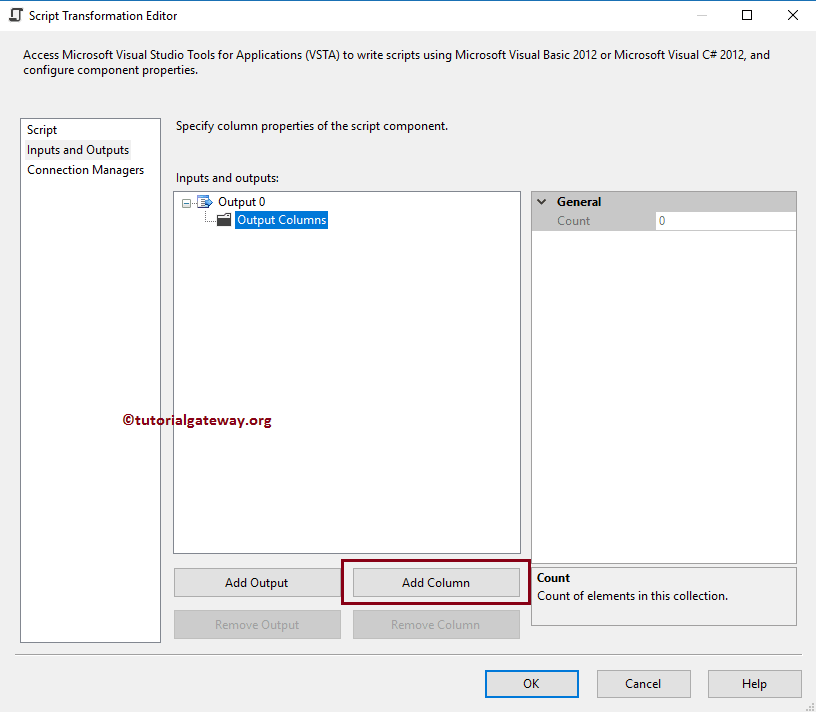
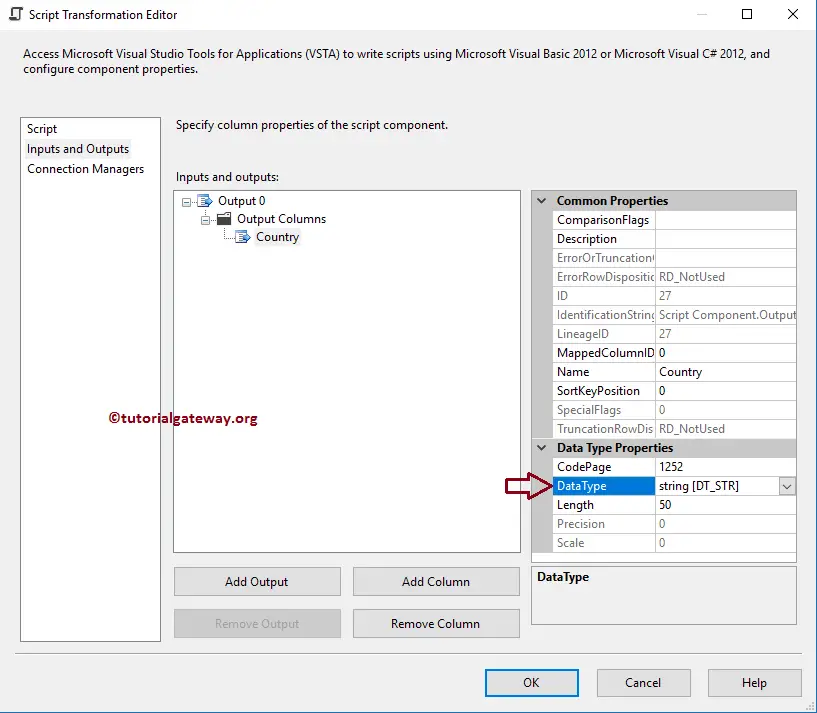
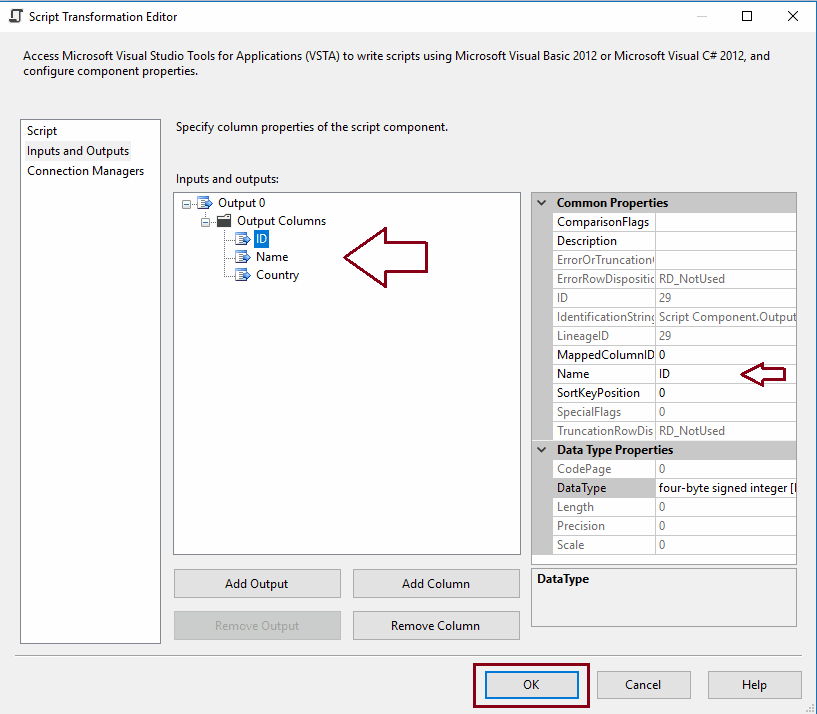
STEP 4: Within the Input and Outputs tab, Go to Output Columns, and under output columns, we will add these columns: ID, Name, and Country using the Add Column button.
First, we added the Country Column and then changed the Data type from Integer (default) to string [DT_STR]
Similarly, we added the remaining columns. Remember, you can use the Name property to change the Column names as needed.
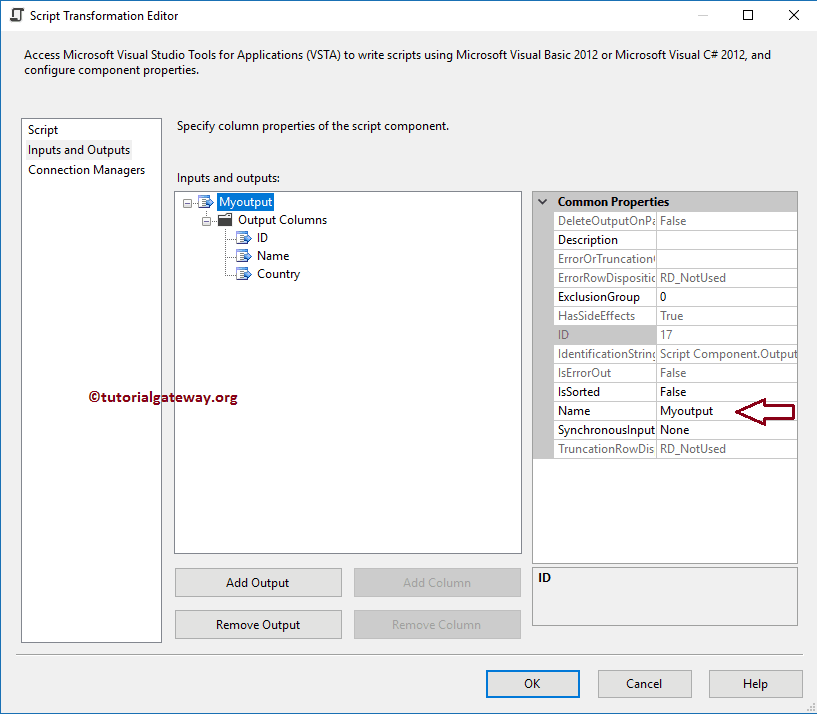
Next, we change the Output name to Myoutput using the Name property. It is not mandatory to change, and it is up to you.
STEP 5: Within the Script tab, please click on the Edit Script.. button to write the actual C# Script
TIP: You can change the language to VB.Net using the ScriptLanguage property.
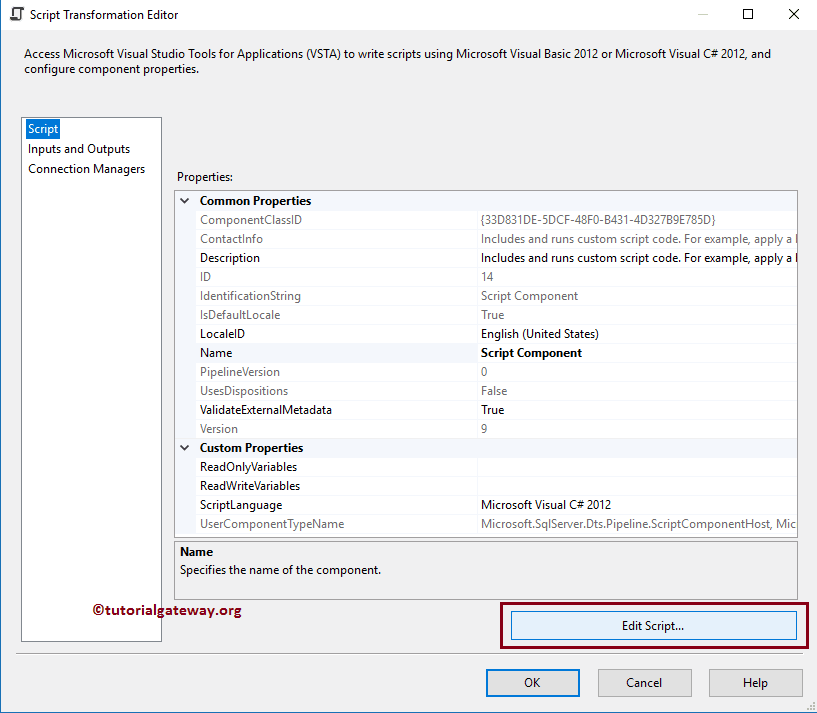
Once you click on the Edit Script, it will open the main.cs class file to write the C# code. To send some code, we have to write our custom code inside the CreateNewOutputRows() function.
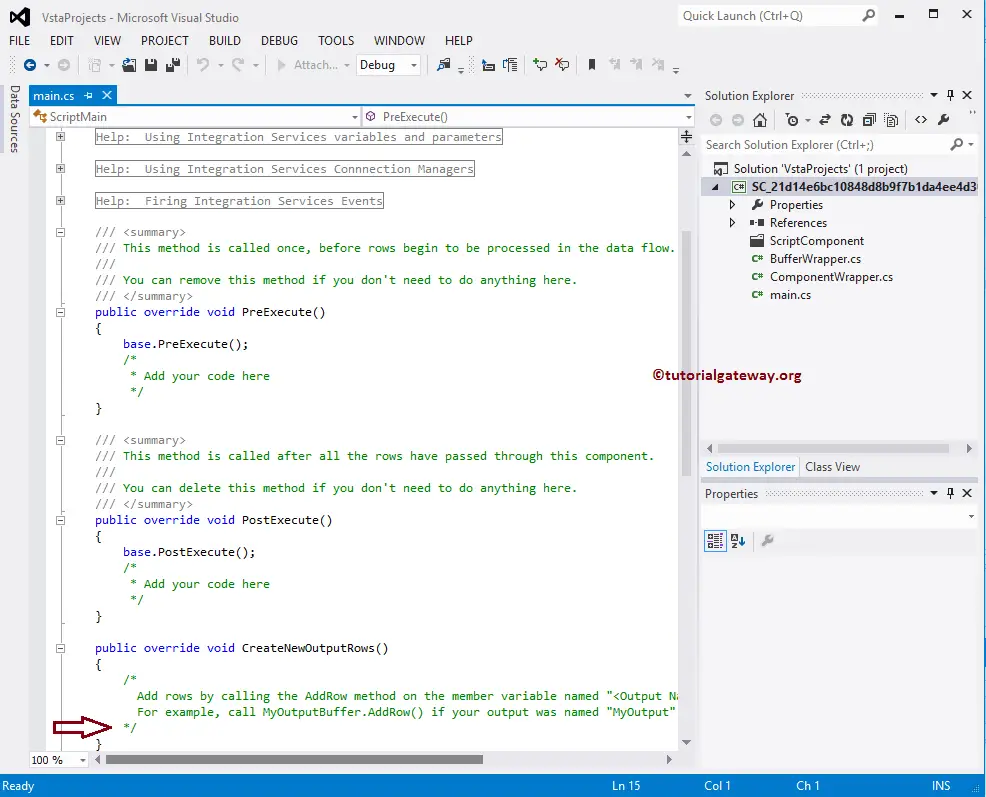
STEP 6: Add your custom C# code here. For this example, we declared two string arrays, and then we used the for loop to assign each array element to an individual row.
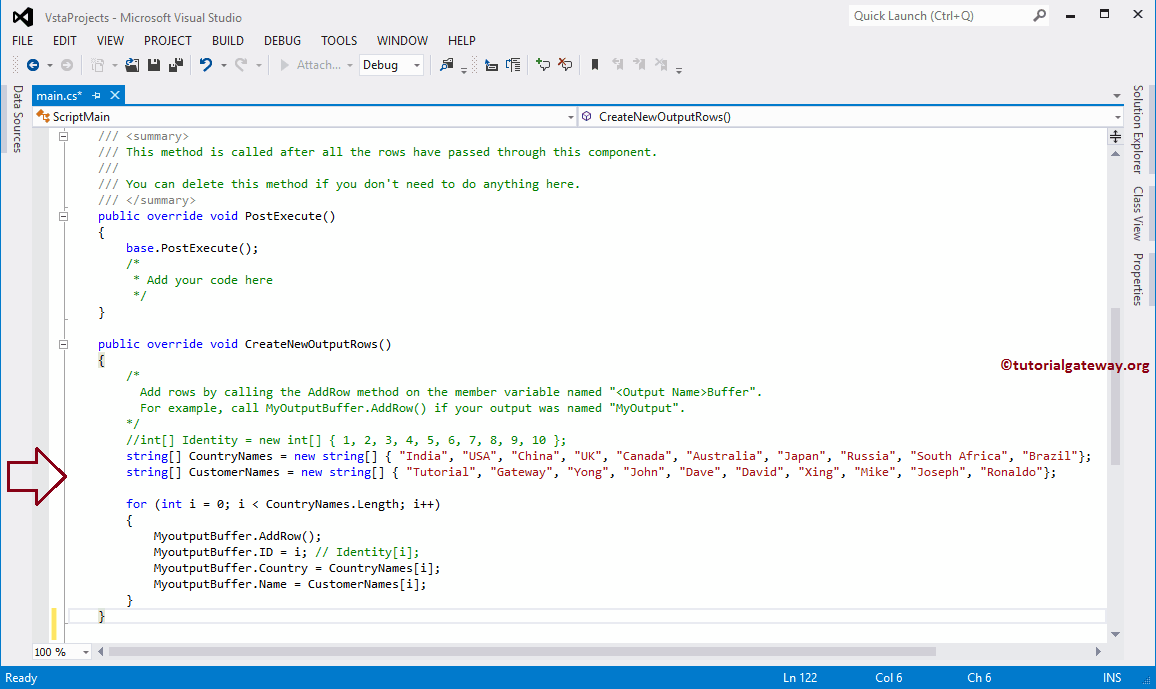
The code that we used in the above screenshot is:
C# CODE
public override void CreateNewOutputRows()
 {
   /*
      Add rows by calling the AddRow method on the member variable named "<Output Name>Buffer".
      For example, call MyOutputBuffer.AddRow() if your output was named "MyOutput".
   */
   //int[] Identity = new int[] { 1, 2, 3, 4, 5, 6, 7, 8, 9, 10 };

   // Creating String array holding the Country Names
   string[] CountryNames = new string[] { "India", "USA", "China", "UK", "Canada",
                                         "Australia", "Japan", "Russia", "South Africa", "Brazil"};
   // Creating String array holding the Names
   string[] CustomerNames = new string[] { "Tutorial", "Gateway", "Yong", "John",
                                           "Dave", "David", "Xing", "Mike", "Joseph", "Ronaldo"};

   for (int i = 0; i < CountryNames.Length; i++)
   {
      /* Myoutput is the Name that we given in Script component.
         Please provide the name that you see, or assigned in Script Component
      */
      MyoutputBuffer.AddRow();
      MyoutputBuffer.ID = i; // Identity[i];
      MyoutputBuffer.Country = CountryNames[i];
      MyoutputBuffer.Name = CustomerNames[i];
   }
 }
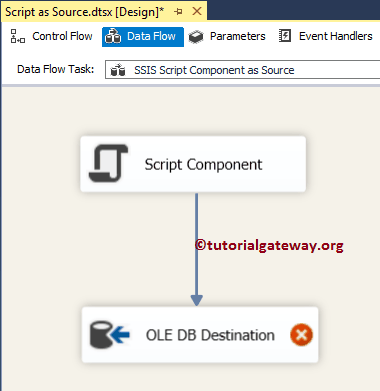
STEP 7: After editing the Script, Please close the main.cs file. Next, drag and drop OLE DB Destinations onto the data flow region, and then drag the script component Output Arrow to this new OLEDB Destination.
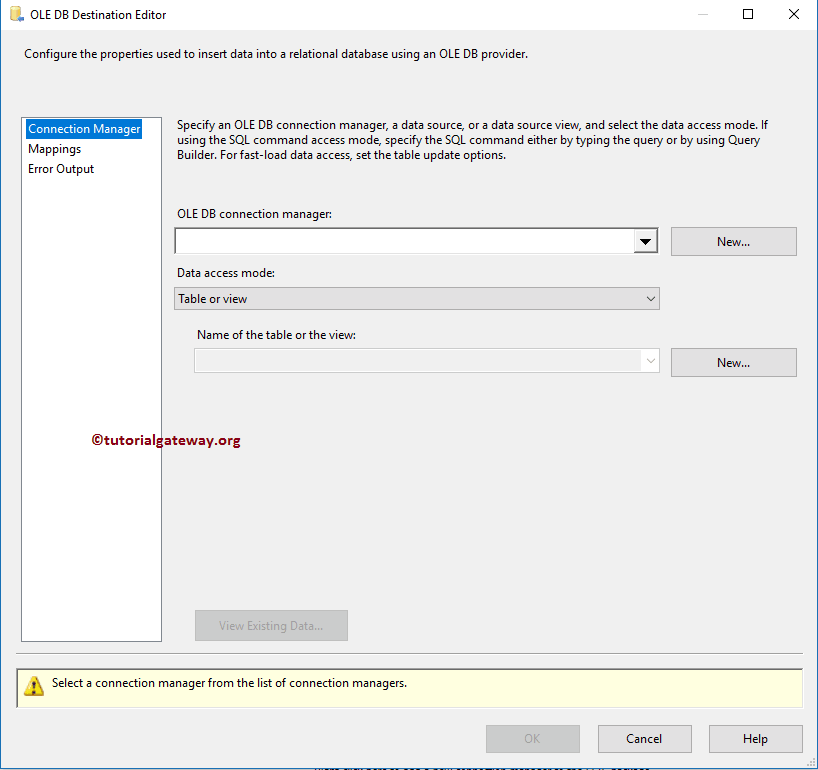
STEP 8: Double click on OLE DB Destination will open the OLE DB Destination Editor.
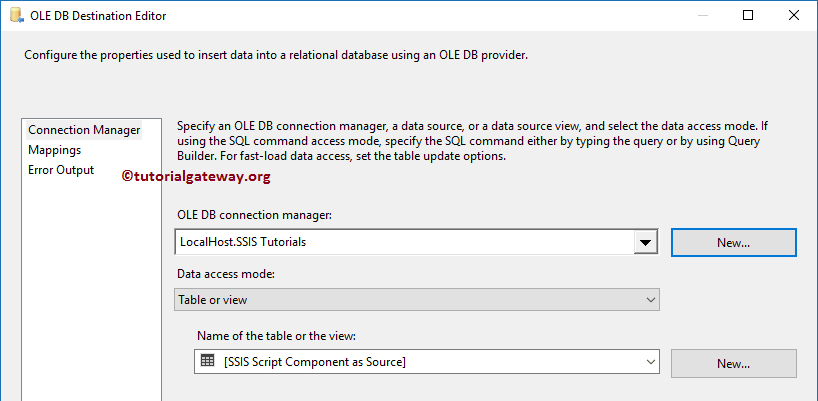
STEP 9: Select the OLE DB Connection manager you already created (if not, create a new one using the New button). Here, we are selecting the [SSIS Script Component as Source] table present in the Database.
STEP 10: Click on the Mappings tab to check whether the source columns are mapped to the destination columns.
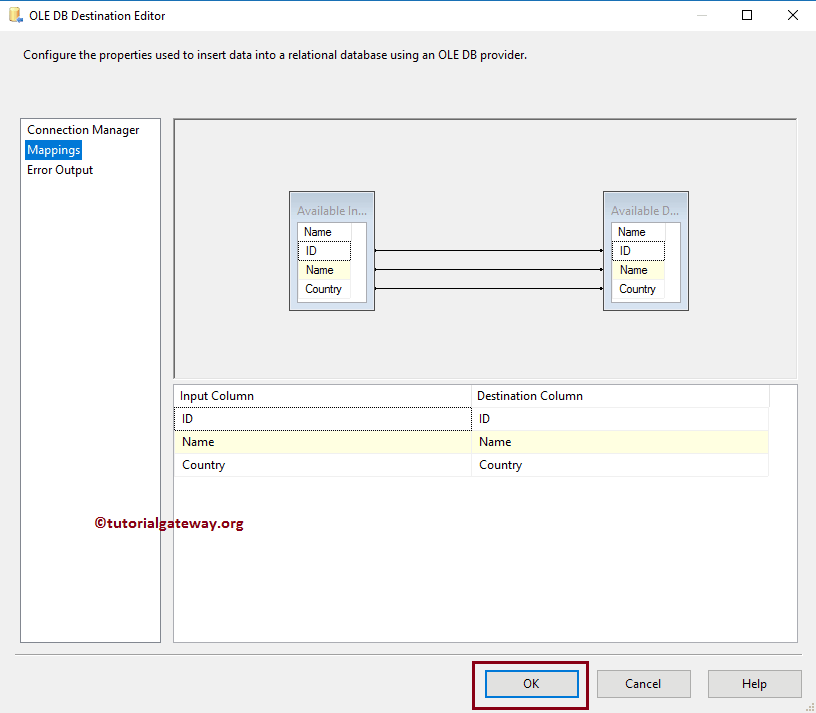
Click OK to finish creating our SSIS Script Component as Source Package.
STEP 11: Right-click on the SSIS Script Component as Source Package in the Solution Explorer, and select Execute Package.
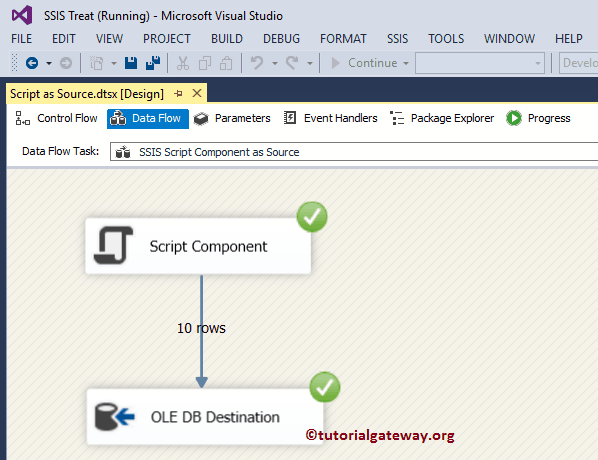
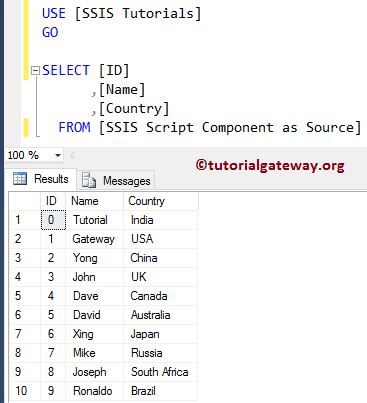
From the above screenshot, you can observe that our Package has been executed successfully. Let’s open the Management Studio and write the following query to view the data.
SELECT [ID]
      ,[Name]
      ,[Country]
  FROM [SSIS Script Component as Source]
OUTPUT
Comments are closed.