This article will show you the step-by-step approach for SSIS Package Deployment using BIDS or SQL Data Tools.
For this demonstration, we use the following Integration Service project. As you can see, it has a one-and-only package. Before we start deploying the project, let me show you the configuration of the SSIS package.
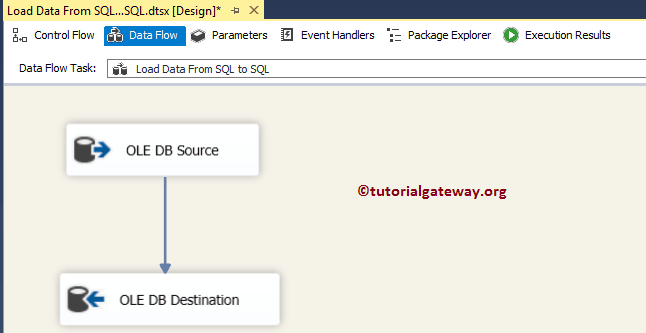
From the below screenshot, you can see that it has one Data Flow task. In the Data Flow region, it has one OLE DB Source and OLE DB Destination
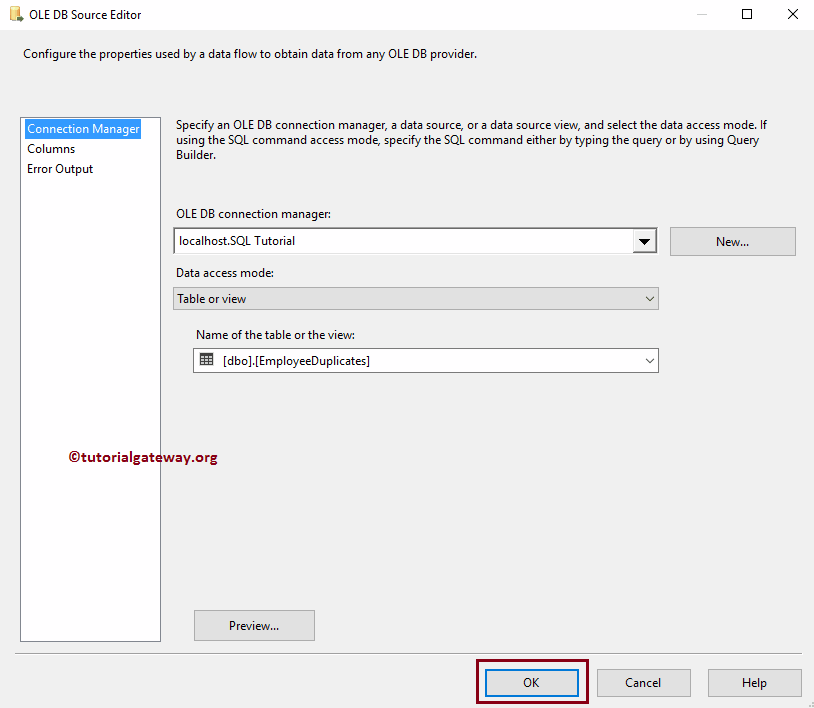
Let me double-click on the OLE DB Source so you can see the table we used as a source. From the below screenshot, you can see that we used the Employee Duplicate table present in the Database. I suggest you refer to the OLE DB Source article to understand the configuration settings.
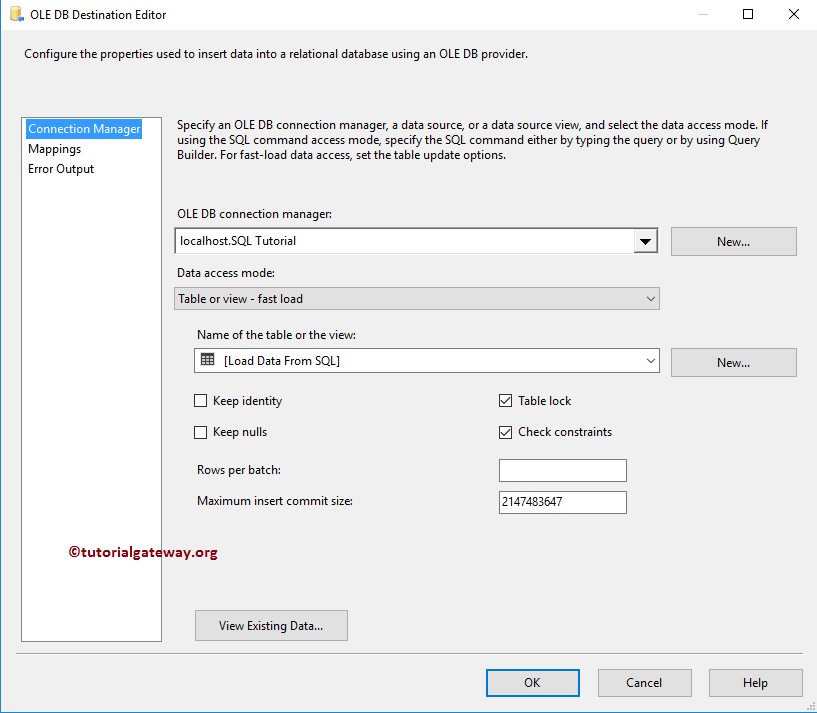
Let me double-click on the OLE DB Destination to see the destination Table we used. The screenshot below shows that we used the Load Data From SQL table present in the SQL Tutorial Database. Therefore, I suggest you refer to the OLE DB Destination article to understand the destination configuration settings.
SSIS Package Deployment using BIDS
To perform SSIS package Deployment using BIDS or Data Tools, navigate to the Solution Explorer window. Here, right-click on the Project and select the Deploy option from the context menu.

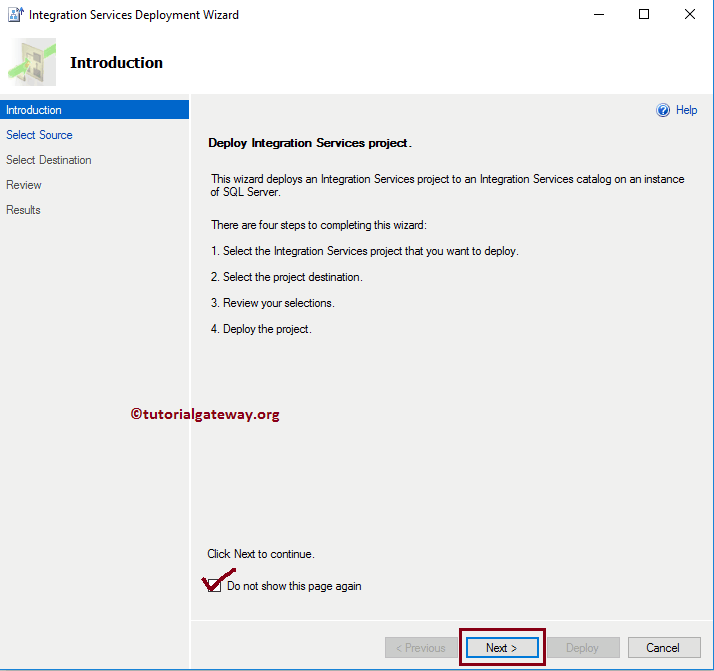
Once you select the Deploy option, a new window called Integration Services Deployment Wizard will be opened, as we have shown below. This is an introduction page, and by clicking the Do not Show this Page Again, you can avoid this page.
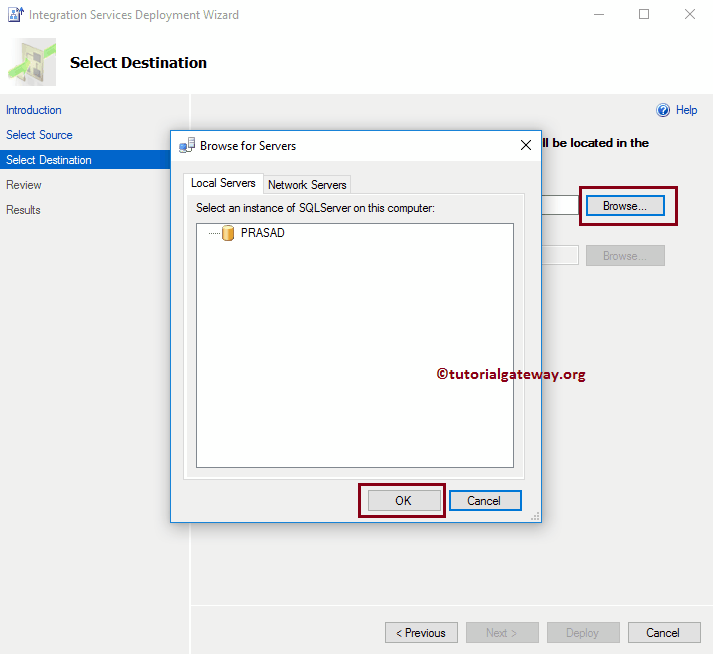
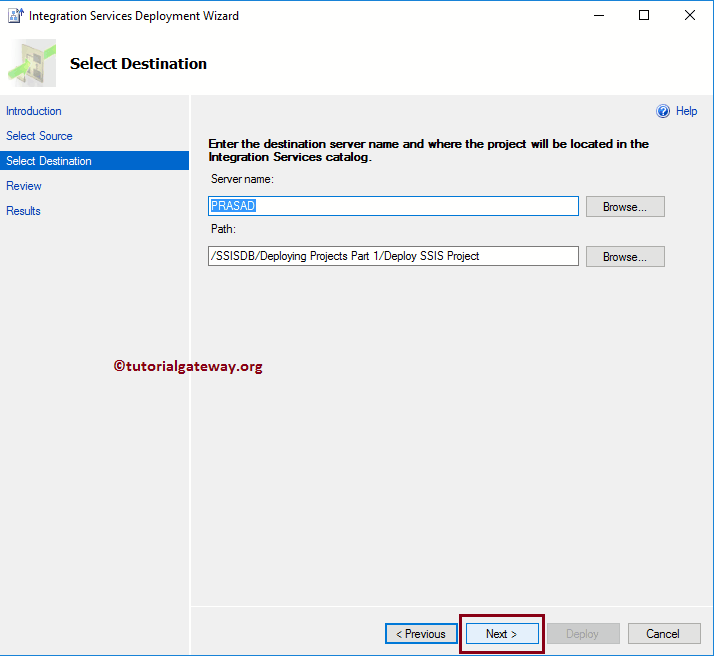
Select Destination: This page is used to specify the destination
- Server Name: Please specify the SQL Server instance. Named instance that you use while accessing the Database.
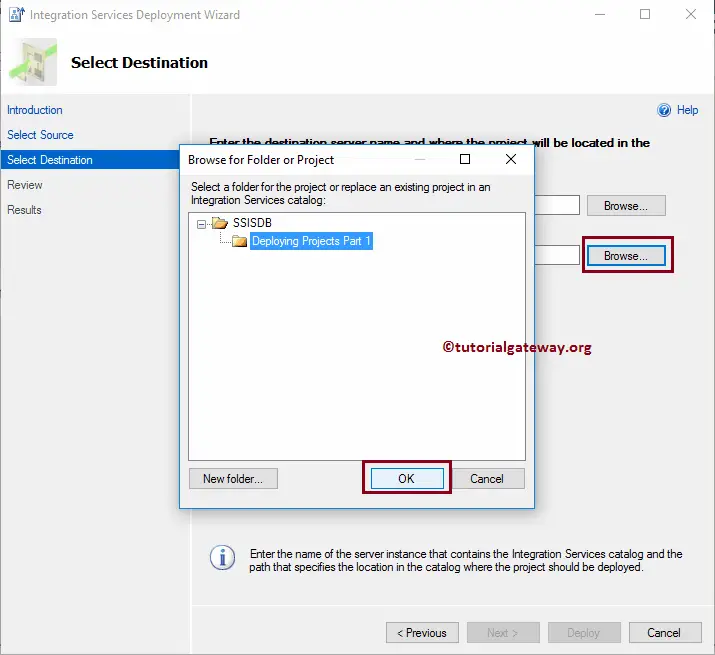
- Path: You have to specify the Integration Service catalog path. If you haven’t created a catalog, then please refer to the Create Catalog article to understand the steps.
Here, we are selecting the named instance PRASAD.
You can see that the Path is enabled automatically after selecting the Server name. We are selecting the Deploying Projects Part 1 folder under the SSISDB catalog as the project path. You can also use the New Folder.. button to create a new folder under the catalog.
Click Next button
Please cross-check all the information, and if you find anything wrong, then use the Previous button to go back.
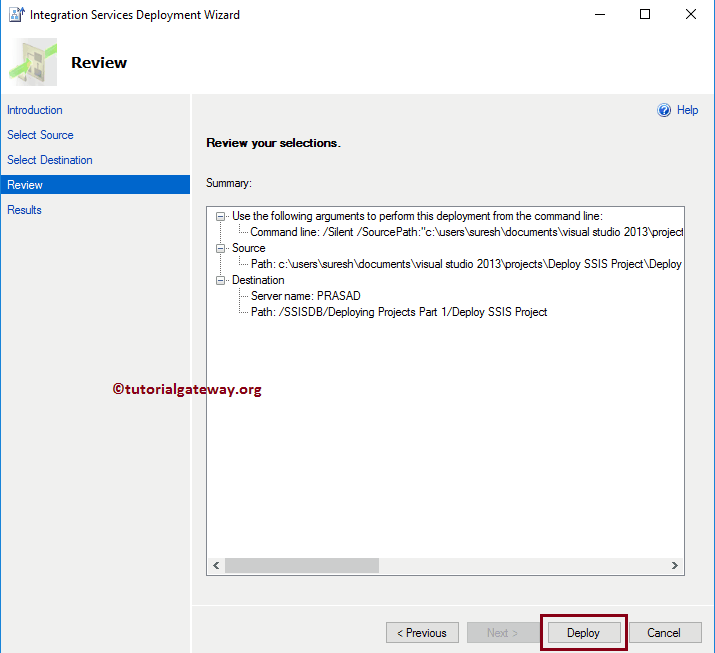
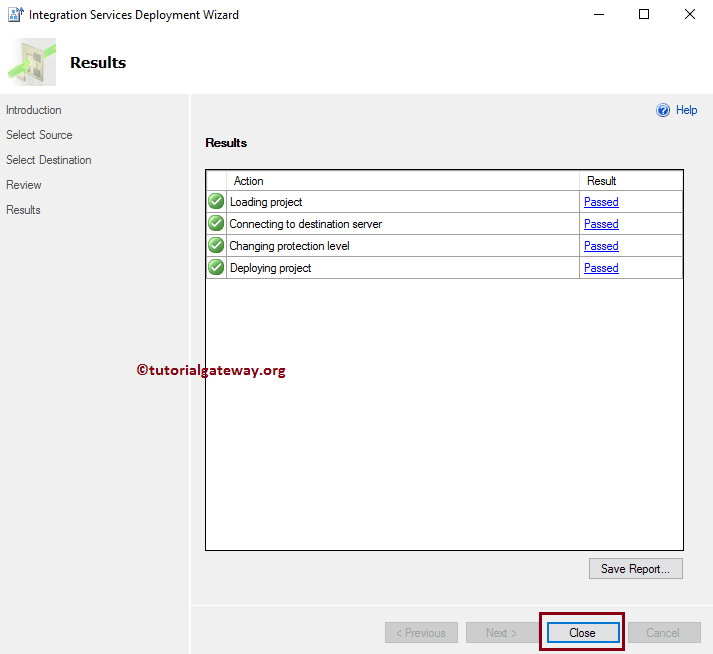
The Results page will show the result.
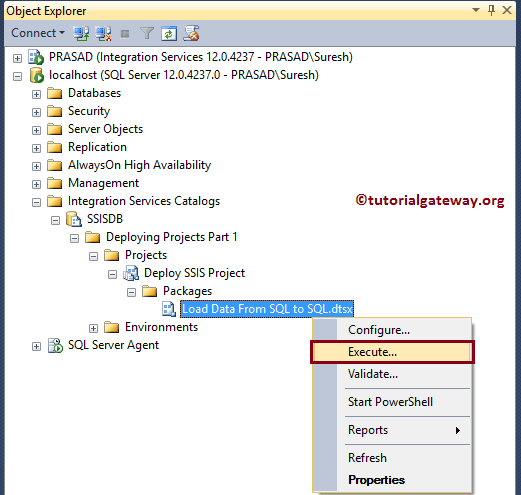
Let me open the Management Studio, and please navigate to Integration Services Catalog -> SSISDB -> Deploying Projects Part 1 -> Projects under the Object Explorer will show the newly deployed project.
You can Execute the package by right-clicking the Package and selecting Execute.. option from the context menu.
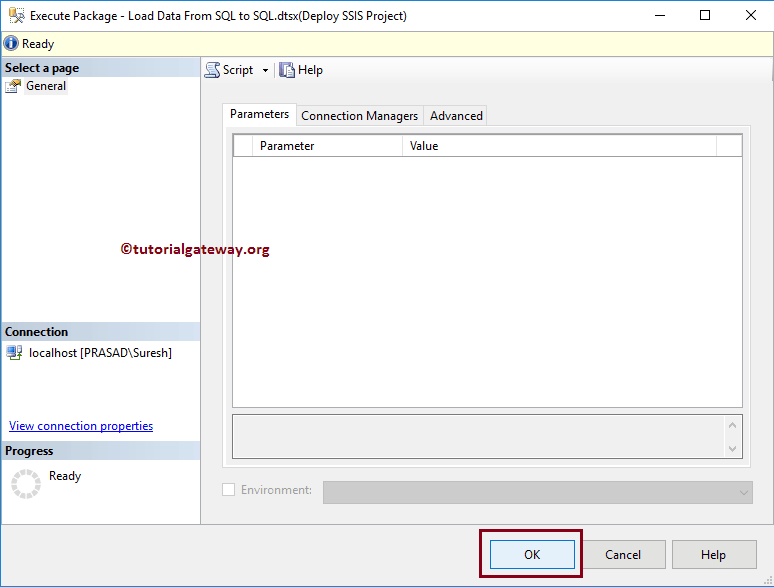
It will display the following window. If you have any parameters, it will show them here, and you can also check the connection manager setting.
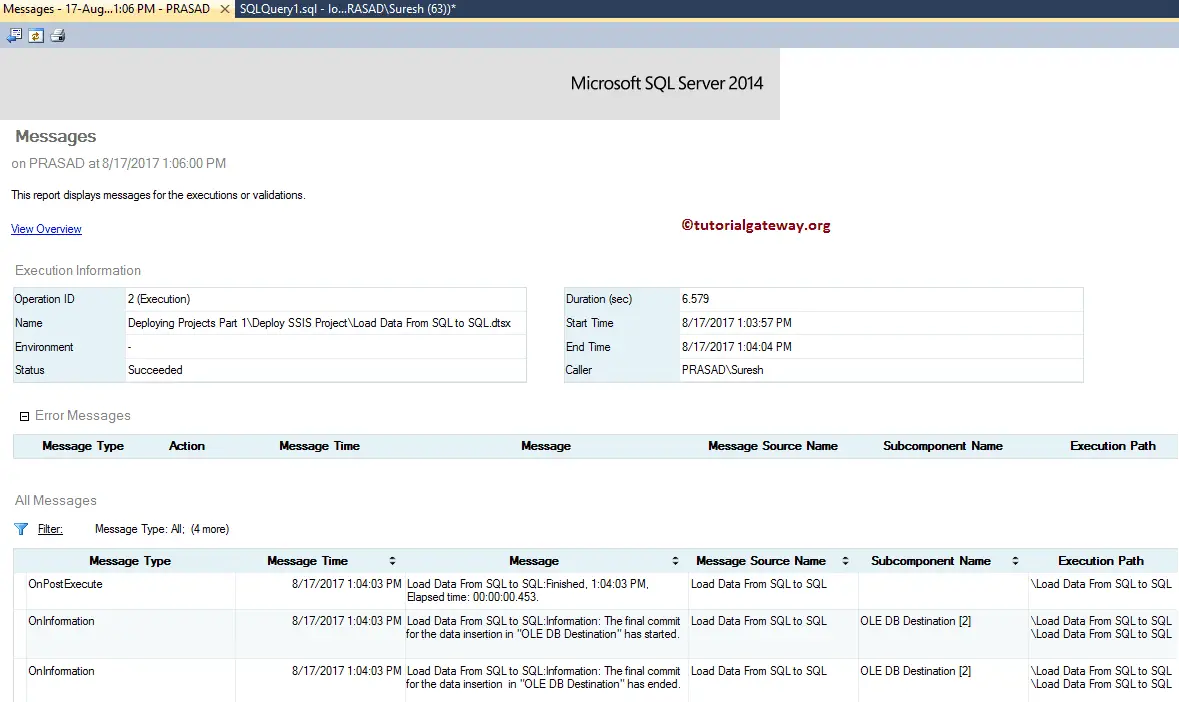
It will pop up a new message window asking you to open the overview report now. Click the Yes button because I want to see the performance report. You can see the performance report.
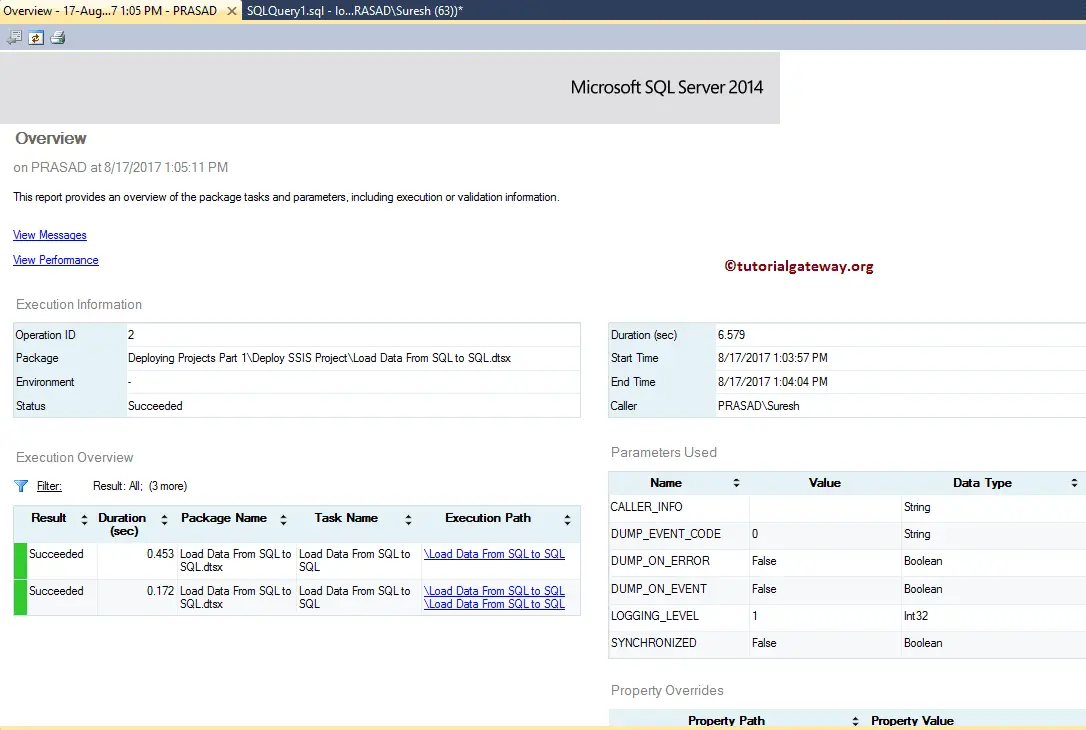
Click on the View Message hyperlink to see the messages at each event. For example, PreExecute, Posts Execute, etc.
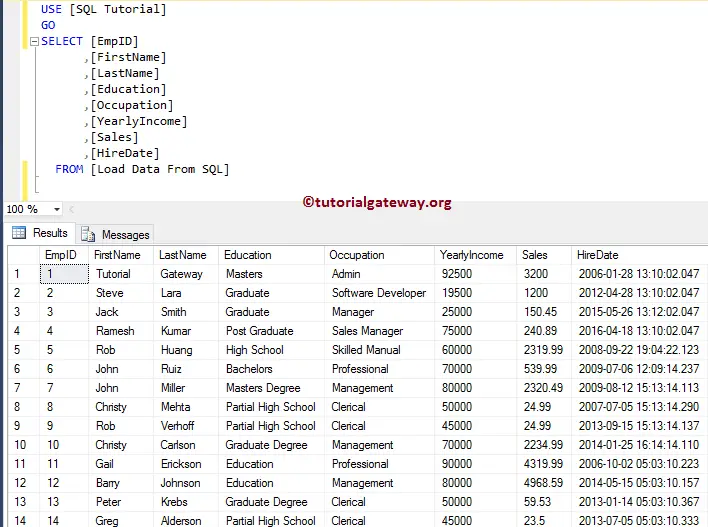
As we successfully executed the package from the server, let me open the destination table to see the result.
After the above step, use SSRS to generate a report.