The SSIS OLE DB Destination is used to load data into a variety of database tables or views or SQL Commands. OLE DB destination editor provides us the choice to select the existing table(s), View(s), or you can create a new table. In this article, we will show you how to configure SSIS OLE DB destination to load or store data into the SQL Server Database.
NOTE: The SSIS OLE DB Destination uses the OLE DB Connection Manager to create a connection with relational databases. For more information on data Loading >> Click Here.
Configuring SSIS OLE DB Destination
STEP 1: Drag and drop the data flow task from the toolbox to the control flow. Next, rename it to SSIS OLE DB Destination.
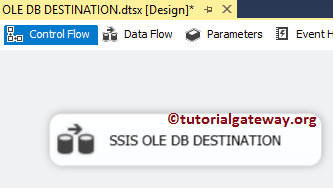
Double-click on it will open the data flow tab.
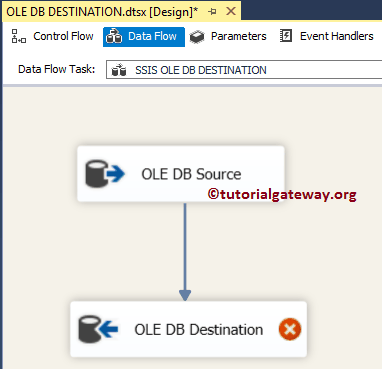
STEP 2: Drag and drop OLE DB Source and OLE DB destination onto the data flow region. In this example, we will explain the OLE DB destination only. So, please refer to the OLE DB Source article to understand the steps involved in creating it.
Before we start, please Double click on the OLE DB source to see the SQL Command we used. From the below screenshot, you can see that we are using the [Dim Products] and [Fact Internet Sales] tables present in the Adventure Works DW 2014 database
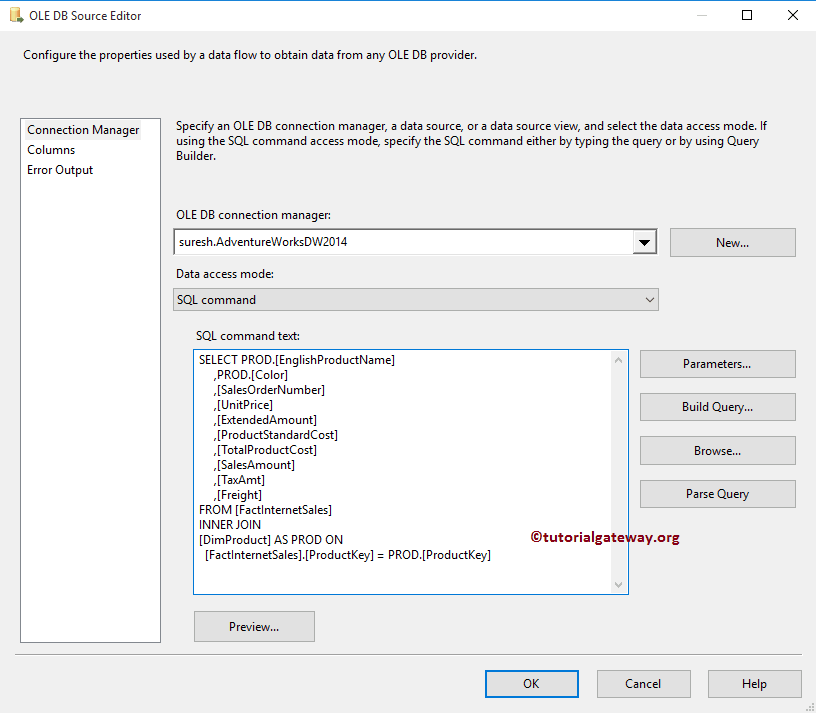
SQL Command we used in the above screenshot is:
USE AdventureWorksDW2014
GO
SELECT PROD.[EnglishProductName]
     ,PROD.[Color]
     ,[SalesOrderNumber]
     ,[UnitPrice]
     ,[ExtendedAmount]
     ,[ProductStandardCost]
     ,[TotalProductCost]
     ,[SalesAmount]
     ,[TaxAmt]
     ,[Freight]
FROM [FactInternetSales]
INNER JOIN
[DimProduct] AS PROD ON
  [FactInternetSales].[ProductKey] = PROD.[ProductKey]
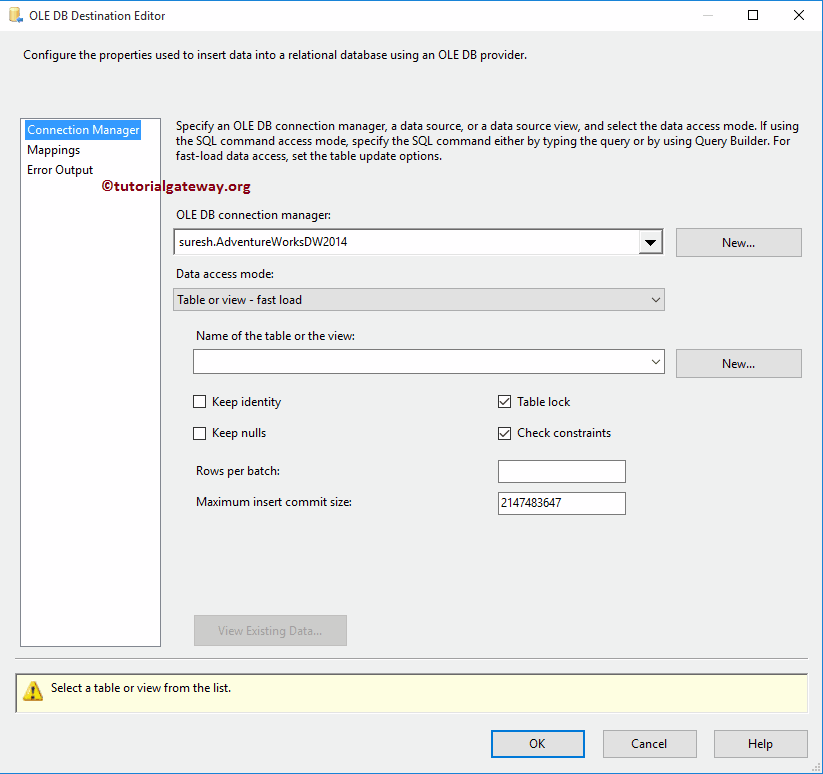
STEP 3: Double-click on the SSIS OLE DB Destination will open the OLE DB Destination Editor. Use this to configure the target database. The below screenshot will show you the list of available options in the Connection Manager tab:
- OLE DB Connection Manager: Here, you have to select the existing OLE DB Connection Manager (if any); otherwise, click on the new button to create one. For this example, we are using the already created Connection Manager.
- Name of the table or the View: Here, you have to select the existing table or view to store the data. Otherwise, click the New button to create a new destination table.
- Keep Identity: Please specify whether you want to load the identity values into the destination table or not by checking this option. This option is available only for fast loads, and it is unchecked by default.
- Keep Nulls: Please specify whether you want to load the NULL values into the destination table or not by checking this option. This option is available only for fast loads, and it is unchecked by default.
- Table Lock: While loading the data, Please specify whether you want to Lock the destination table or not
- Check Constraints: While loading the data, please specify whether the destination table checks constraints or not.
- Rows Per Batch: Please specify the number of rows you want to send per batch. In real-time, it is always advisable to specify the value which can improve your performance.
- Maximum insert commit size: Please specify the maximum batch size here.
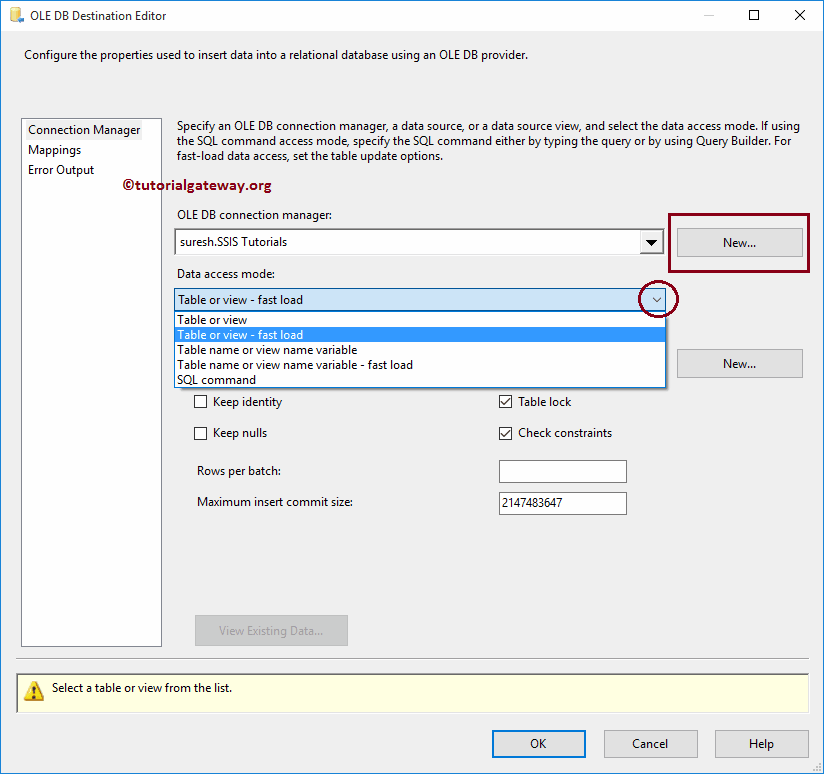
STEP 4: Within the Data Access Mode, we have multiple options. Here, we have to select one of the following options to load data into the OLE DB destination:
- Table or View: Select this option to load data into the table or View.
- Table or View – Fast Load: Select this SSIS OLE DB Destination option to load data into the table or View and use the fast load option.
- Table name or View name Variable: Select this option if you stored your destination table or View name inside the Variable and use the fast load option.
- Table name or View name Variable – Fast Load: Select this option if you stored your destination table or View name inside the Variable.
- SQL Command: Load the data into SSIS OLE DB destination using the custom Command
Remember, In your OLE DB Connection Manager
- If you are using Microsoft OLE DB provider to access the SQL Server, use the Fast load option. It means either you can use options 2 or 4.
- If you use SQL Server Native Client to access the Server, use either options 1, or 3.
STEP 5: If you click on the down arrow button beside the Name of the table or the View option. It will display the list of available Tables and Views present in the current connection manager.
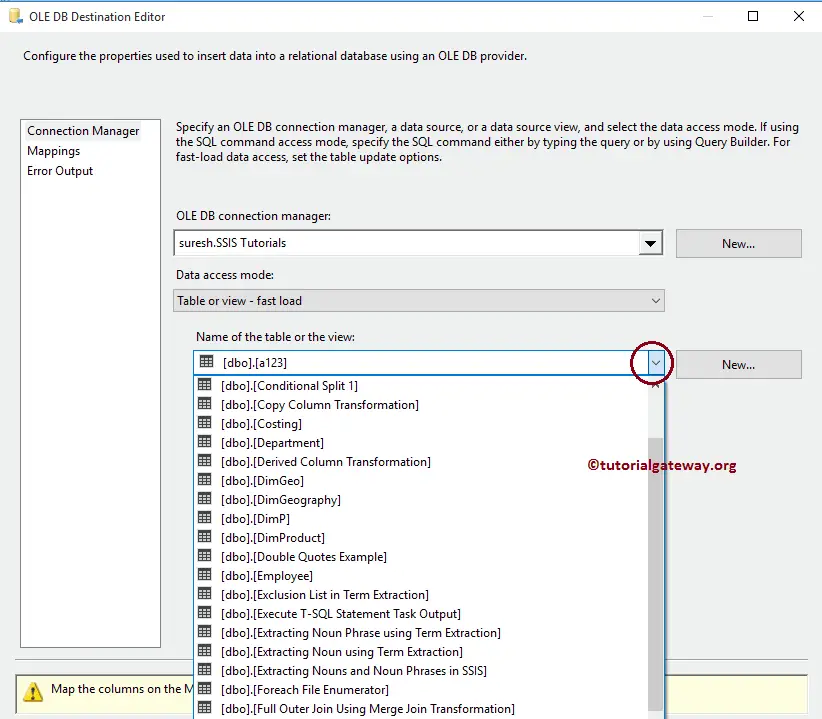
For the time being, we are selecting the existing table Table called [SSIS OLE DB Destination]. If you haven’t created the table before or want to create a new one, click the New button. It will open a new window to write your custom Query to Create a New table.
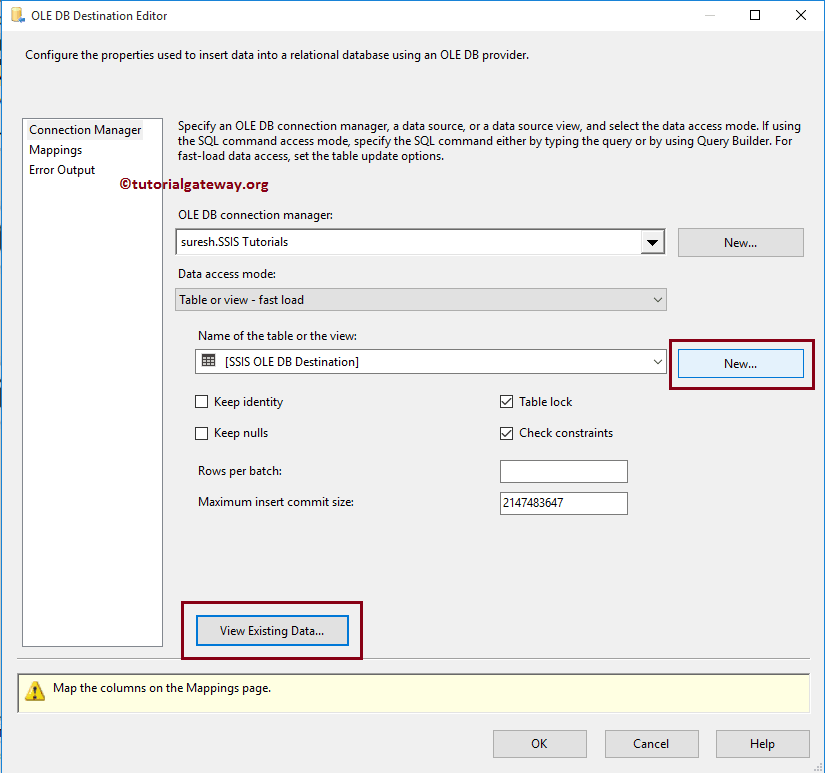
View Existing Data..: This button will help you to see the already existing data in your target table.
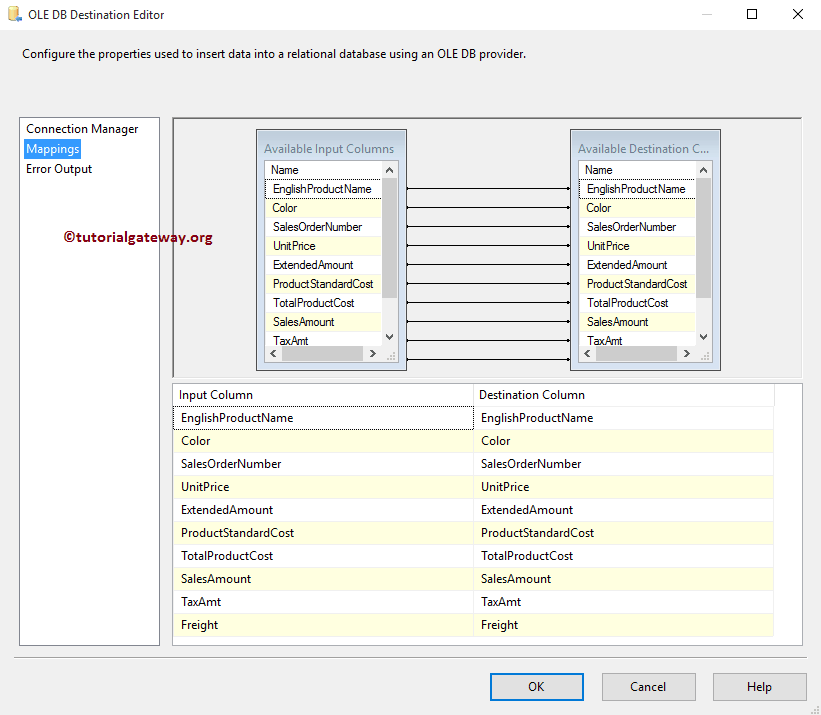
STEP 6: Click on the Mappings tab. Next, check whether the source columns are exactly mapped to the SSIS OLE DB destination columns.
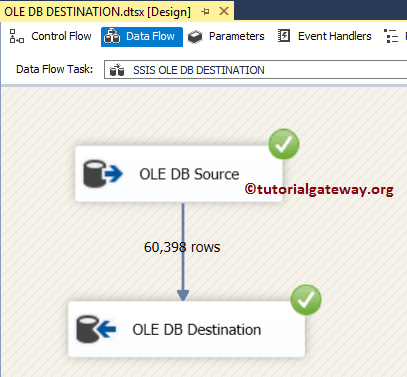
STEP 7: Click OK to finish configuring the SSIS OLE DB Destination package. Let us run the package and see whether we transferred the data from OLE DB Source to OLE DB Destination or not
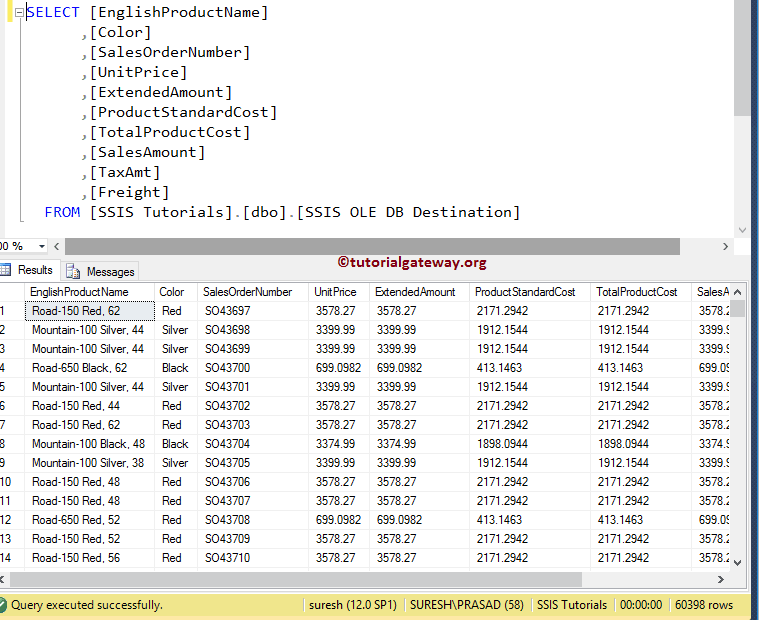
Let us open the SQL Server Management Studio Query window to Preview the data. From the below screenshot, you can see that we successfully loaded the incoming data into the table using OLE DB Destination.