The Merge Join Transformation in SSIS performs SQL Joins such as Inner, Left Outer, Full Outer, and Right Outer (indirectly achieved by Swapping the tables) in Integration Services. The Merge Join Transformation is very useful for loading data into the Dimension tables in the Data Warehouse.
NOTE: The Merge Join Transformation in SSIS will only work with Sorted data. So, Sort Transformation is mandatory before applying this. Please refer to the Sorting article to understand how to perform Sort Operations on the Source Data.
Merge Join Transformation in SSIS Example
In this article, we will perform Inner Join on two SQL tables using Merge Join Transformation in SSIS. Before creating the Package, look at our two source tables on which we will perform Inner Join.
This page cover the Inner Join and for the remaining SSIS Merge Join Transformation options, please use the below hyperlinks.
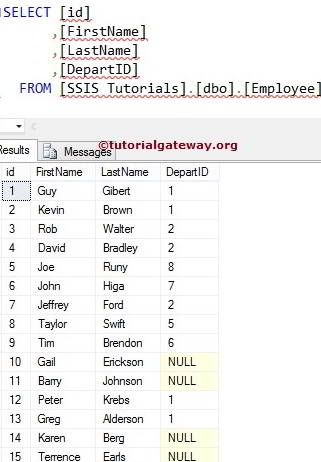
The Employees Table inside the Database is:
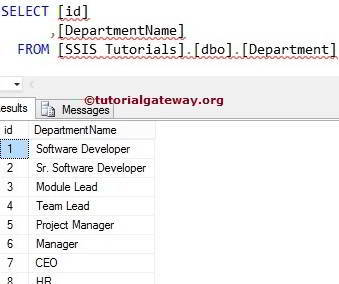
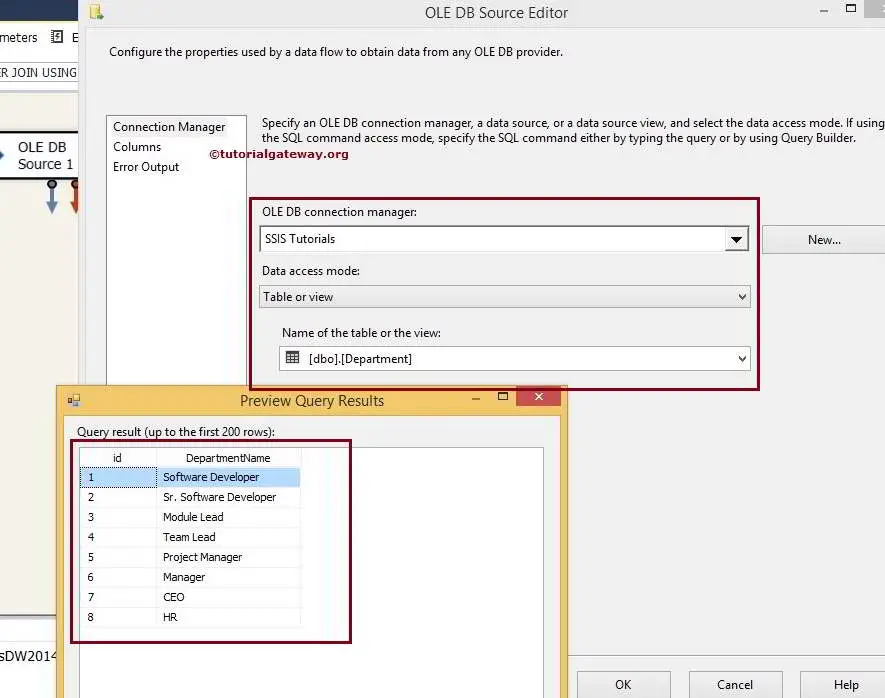
Department Table inside the Database is:
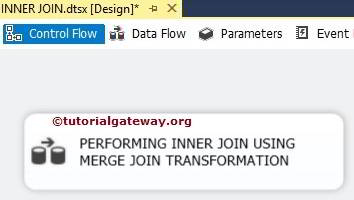
STEP 1: Drag and drop the data flow task from the toolbox to the control flow region and rename it as performing SSIS Inner using Merge Join Transformation.
Double click on the Merge Join Transformation data flow task will take us to the Data flow region.
STEP 2: Drag and Drop two OLE DB Sources from the toolbox to the data flow region. Then double-click on the first OLE DB source in the data flow region, which will open the connection manager settings and provide an option to select the table holding the source data. For more Transformations >> Click Here.
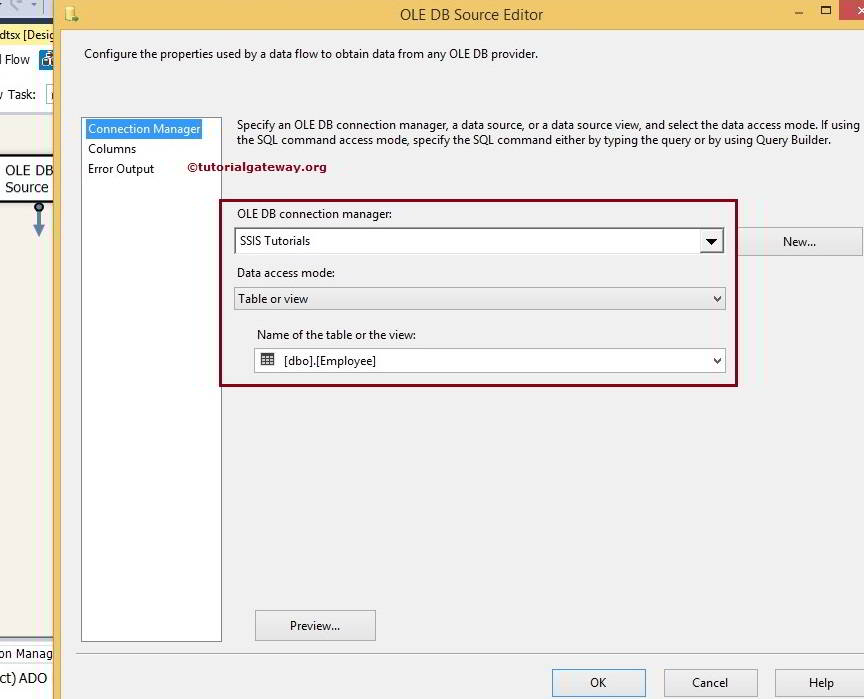
We selected the [Employees] Table from the Database from the above screenshot.
STEP 3: Click on the columns tab to verify the columns. In this tab, we can uncheck the unwanted columns.
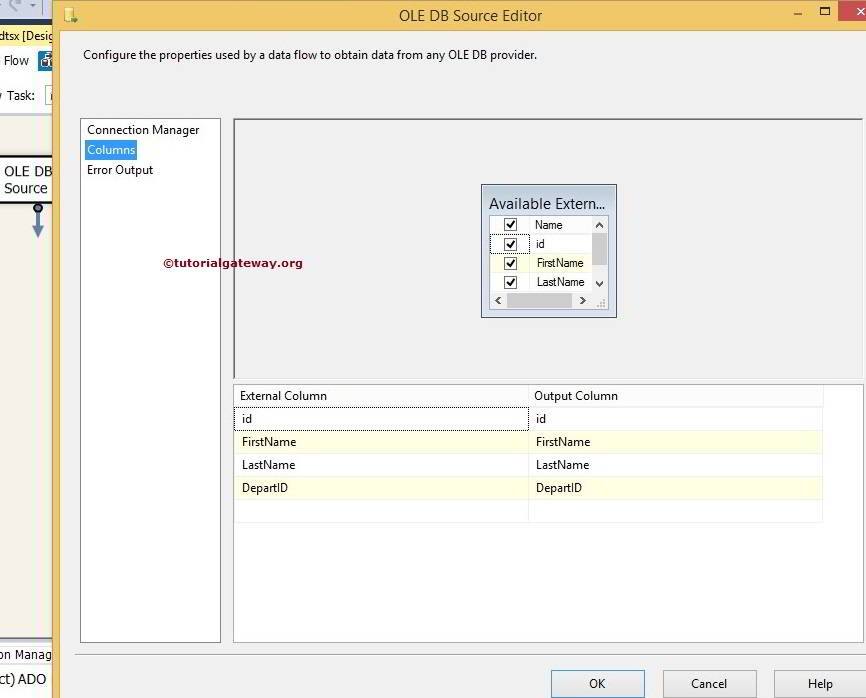
STEP 4: Double click on the second OLE DB source to configure the Second table to perform SSIS Inner Join using Merge transformation. Here, we are selecting the [Department] Table from the Database
STEP 5: repeat step 3

Sort Transformation
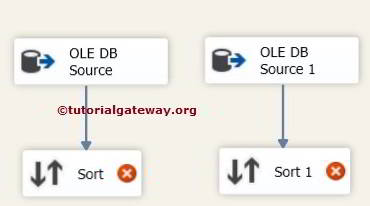
STEP 6: Drag and drop two Sort Transformations from the toolbox to the Data Flow region and connect the OLE DB Source output arrow to the Sort Transformation. We need this to be performed before the SSIS merge join transformation.
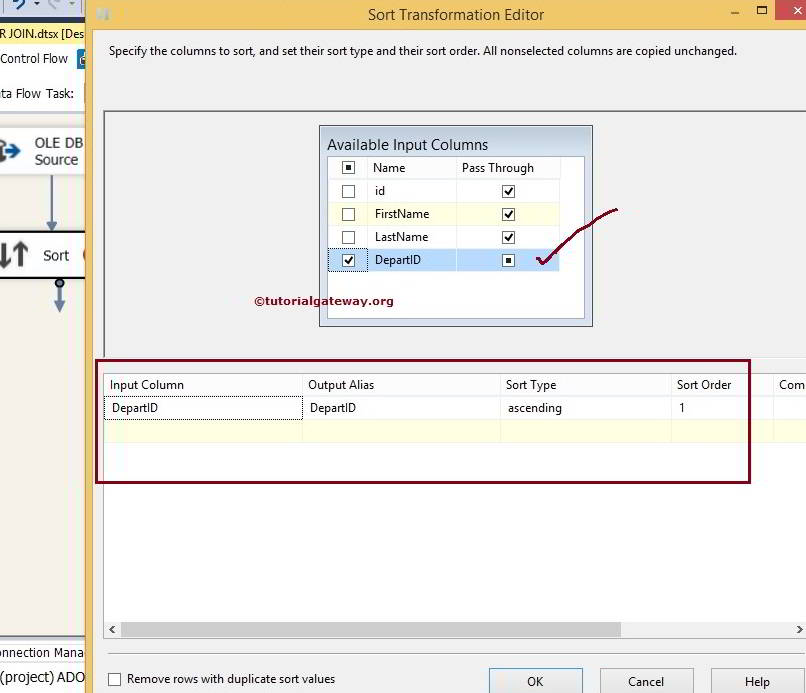
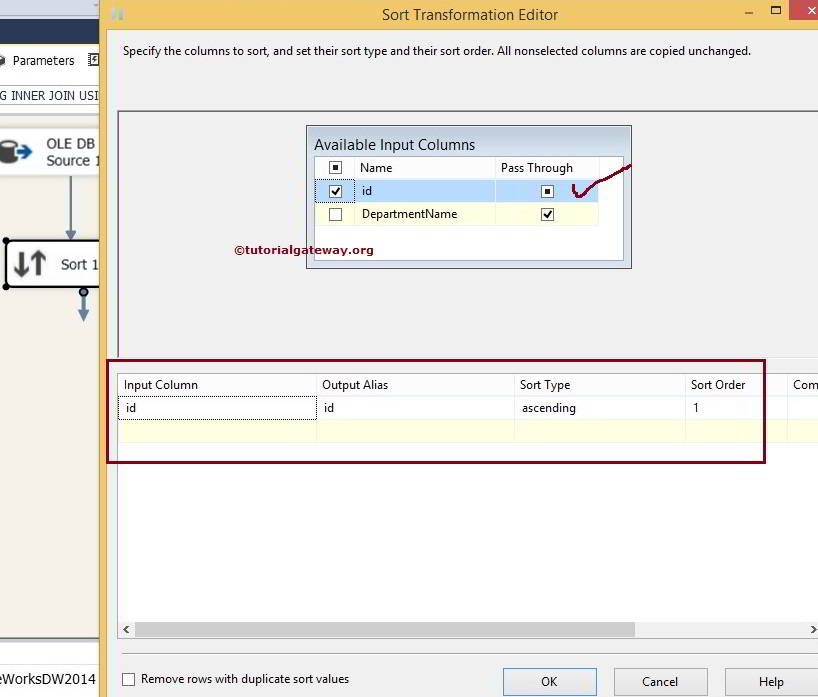
STEP 7: Double click on Sort Transformation to configure it. Check the columns we want to sort, and don’t forget to Pass Through the remaining column. If you fail to select the Pass Through, they won’t appear in the output columns.
The source data shows that DepartID is the Joining key between Employees and Department tables. So, we are sorting the Employees table by DepartID in ascending order.
Double click on Sort Transformation1 and sort the Department table using the id column in ascending order.
SSIS Merge Join Transformation Configuration
STEP 8: Now drag and drop the Merge Join Transformation into the data flow region to perform Inner on the sorted tables.
When you drag the output arrow of the Sort Transformation into Merge Join Transformation, an Input Output Selection window will appear to select whether it is Merge Left Input or Right Input, as shown in the screenshot below.
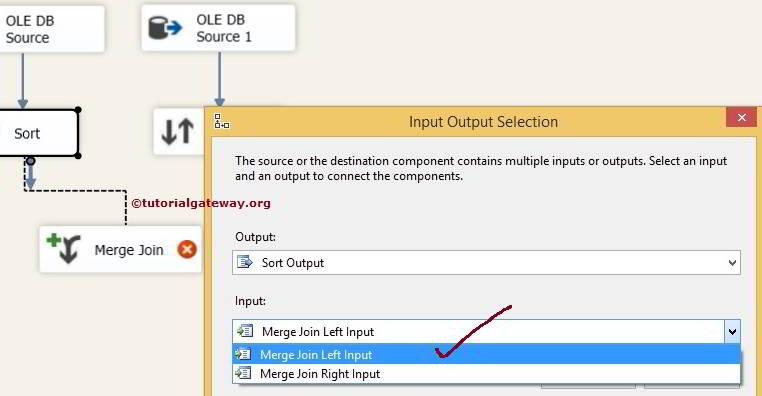
Here we selected Merge Join Left Input for the Employees table. Click ok and drag and drop the output arrow of the Sort Transformation 1. Here, the Right Input will automatically be selected by the intelligence.
STEP 9: Double click on SSIS Merge Join Transformation, which will open the Editor to configure it.
Join Type provides a drop-down list to select the type (such as Inner, Left Outer, and Full Outer) you want to perform on the source data. In this example, we were performing the Inner Join. So that’s why we selected the Inner from the Join Type option.
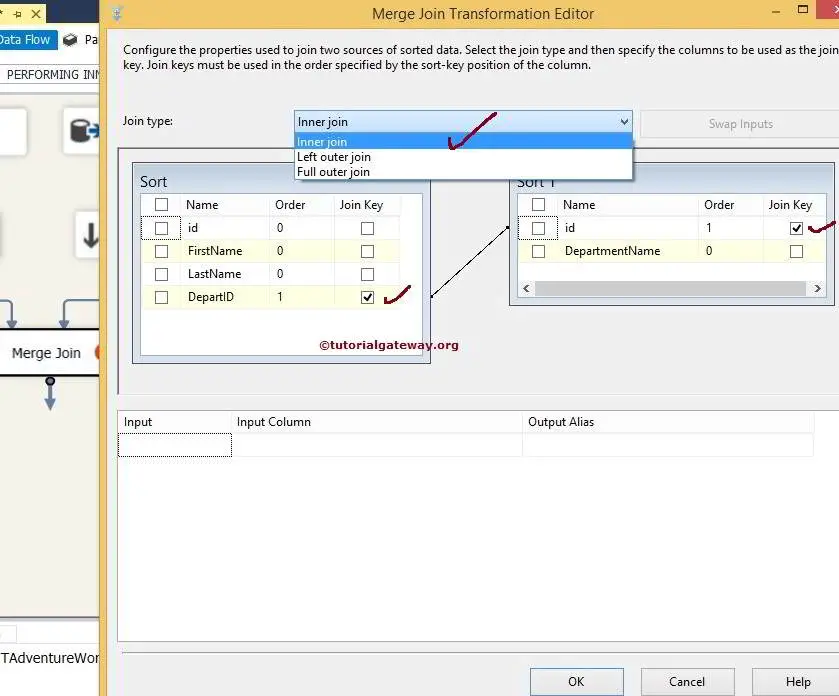
As you can observe from the source data, both Employees and Department tables joined using DepartID and id columns. Select them as keys by dragging the arrow.
Now, choose the columns to send to the destination table (Pass through columns) by check-marking the column names.
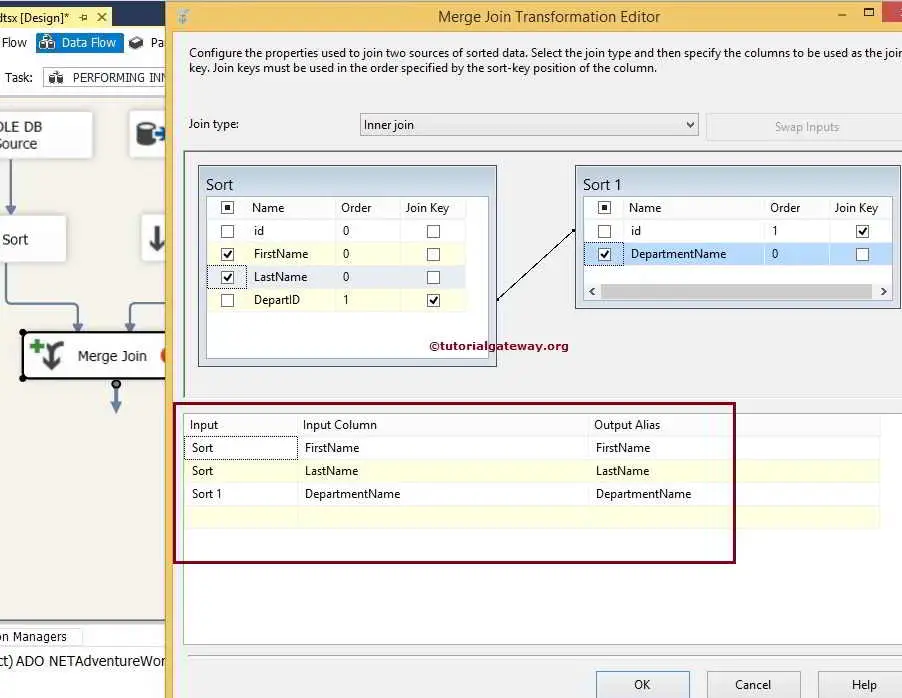
From the above screenshot, you can observe that We selected [First Name], [Last Name], and [Department Name] columns as output columns. It means SSIS Inner Join will produce output columns as [First Name], [Last Name], and [Department Name], where DepartID is precisely equal to any of the id column data.
TIP: Whatever columns you select here will only transfer to the destination table. So if you don’t want any column, uncheck that column.
STEP 10: Drag and drop the OLE DB destination into the data flow region. Next, double-click on it to configure the destination server and table to store the output.

Here, we selected the Database and [Inner Join Using Merge Join Transformation] as the destination table
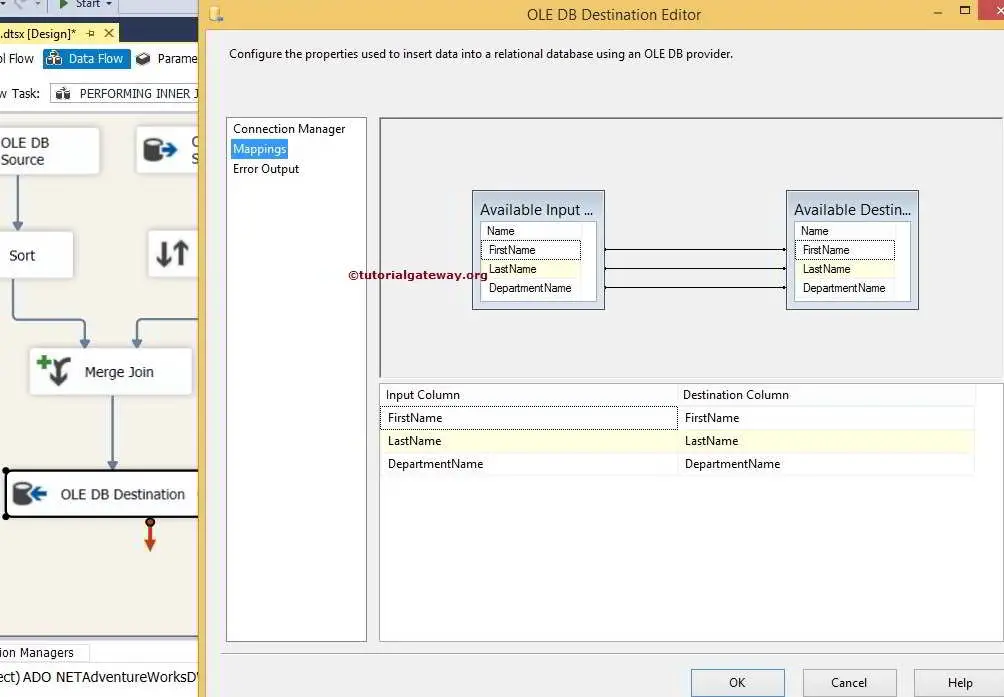
STEP 11: Click on the columns Tab to check whether the input columns match the destination columns. If not, Please assign the appropriate columns to the destination columns.
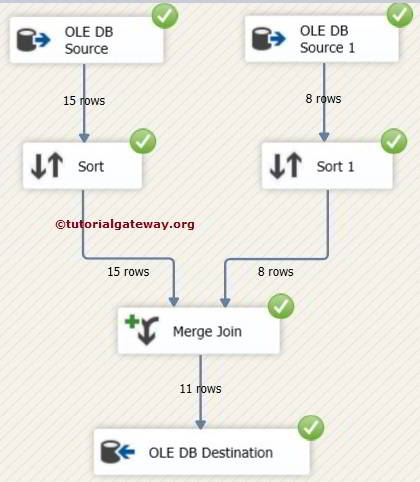
We finished designing the Performing Inner using Merge Join Transformation in the package. Next, let us execute the package.
Now, let’s open the Management Studio and select the columns from SSIS Inner using Merge Join Transformation in the table.

Comments are closed.