In this article, we will show you what will be the better approach to configure SSIS Incremental Load with example. We already explained the Incremental Load in our previous case, but we used OLE Db Command Transformation to update the records in the target table. Although this approach is suitable for a small amount of data, for large data sets, there will be a performance issue.
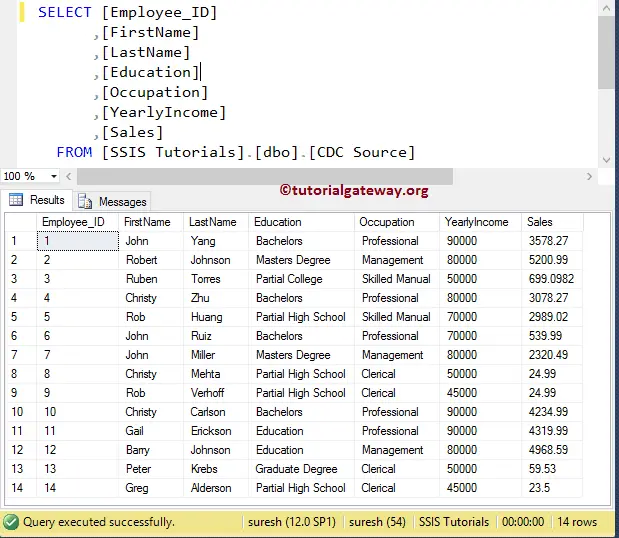
In this example, we will show you the steps involved in configuring the SSIS Incremental Load. Before we start creating the package, Let us see the Source data
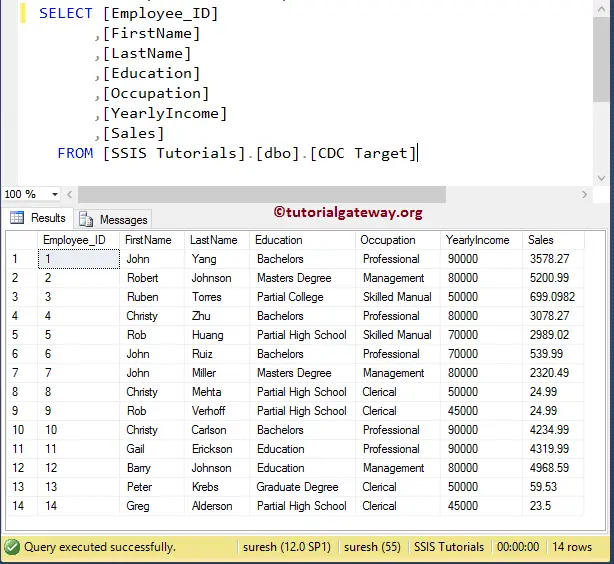
Now let’s see the data inside the target table as well.
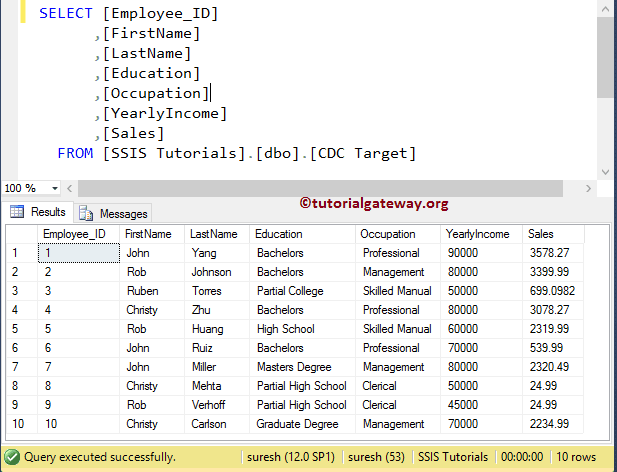
Here our task is to load extra 4 records into the target table and update data present in 2, 5, 10 rows.
Configuring SSIS Incremental Load
The OLE Db Command Transformation performs updates on Row by row bases, which is time-consuming. In this example, we will create a temporary table or staging table to store the updated information and then pass those records to the target table using the Execute SQL task.
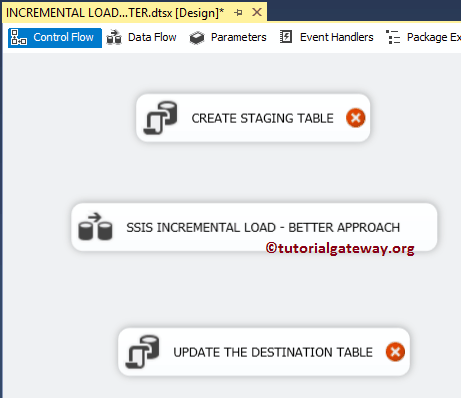
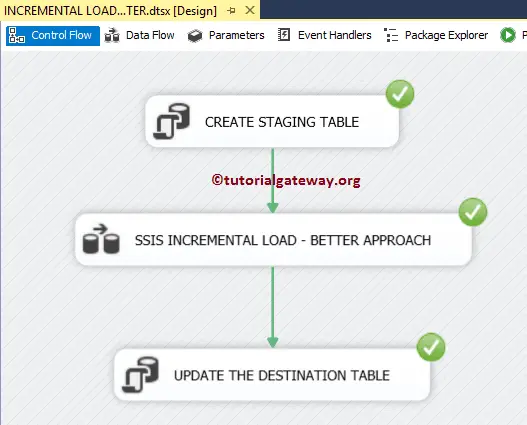
STEP 1: Drag and drop the Data Flow Task and two Execute SQL Tasks from the toolbox to control flow region and rename the First Execute Task as Create Stating table, Data Flow Task as SSIS Incremental Load and last task as Update the destination table.
- Create Staging table: This may be a global temporary table or any permanent table to store update information. For every package run, the existing table will be dropped and recreated. Remember, you can also use the Truncate statement to truncate the table rather than dropping and recreating.
- Data Flow Task: Loading data from Source to Destination
- Updating Destination Table: Update the target table data with the data present in the Staging table
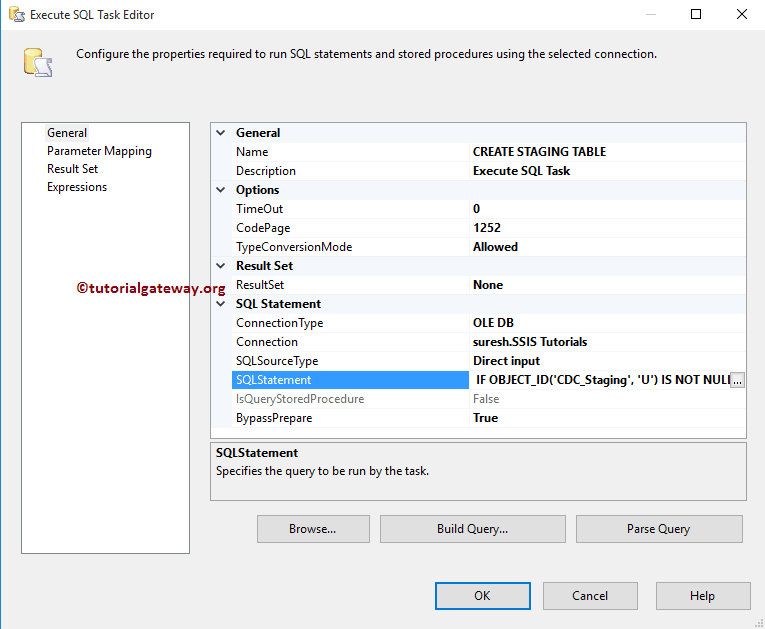
STEP 2: Double click on the Execute SQL Task will open task editor. Here, we are creating a staging table on our target database so, we selected the already created OLE DB Connection Manager pointing to the database. Please click on the browse button beside the SQL Statement property to write the custom SQL statement
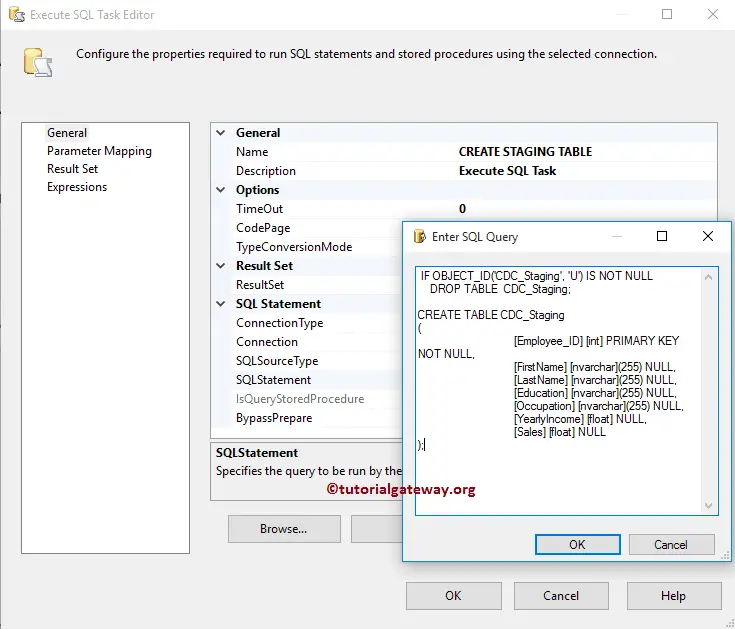
SQL Command we used in the above screenshot is:
-- DROPPING EXISTING TABLE
IF OBJECT_ID('CDC_Staging', 'U') IS NOT NULL
   DROP TABLE  CDC_Staging;

-- CREATING NEW TABLE
CREATE TABLE CDC_Staging
(
 [Employee_ID] [int] PRIMARY KEY NOT NULL,
 [FirstName] [nvarchar](255) NULL,
 [LastName] [nvarchar](255) NULL,
 [Education] [nvarchar](255) NULL,
 [Occupation] [nvarchar](255) NULL,
 [YearlyIncome] [float] NULL,
 [Sales] [float] NULL
);
Click OK to finish creating staging table
Next, Double click on the Data Flow Task to open the data flow tab.
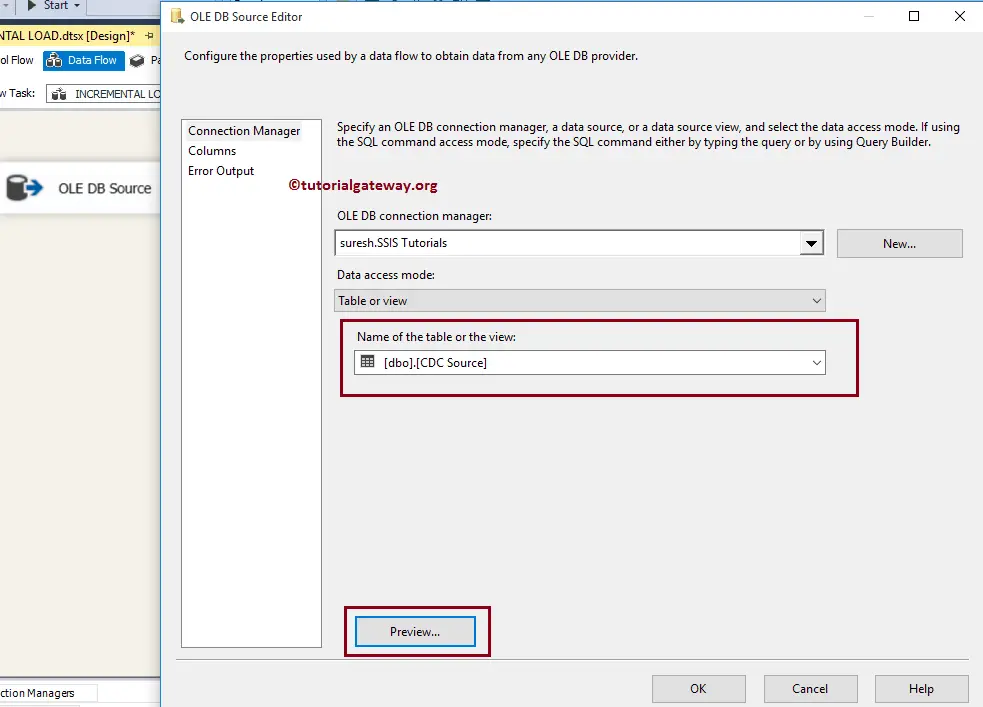
STEP 3: Drag and drop OLE DB Source from the toolbox to the data flow region. Double click on OLE DB source in the data flow region will open the OLE DB connection manager settings. From the below, you can observe that We selected the following Database as a source database and [CDC Source] as a source table
STEP 4: Click on the columns tab to verify the columns. You can uncheck the unwanted columns here (if any).
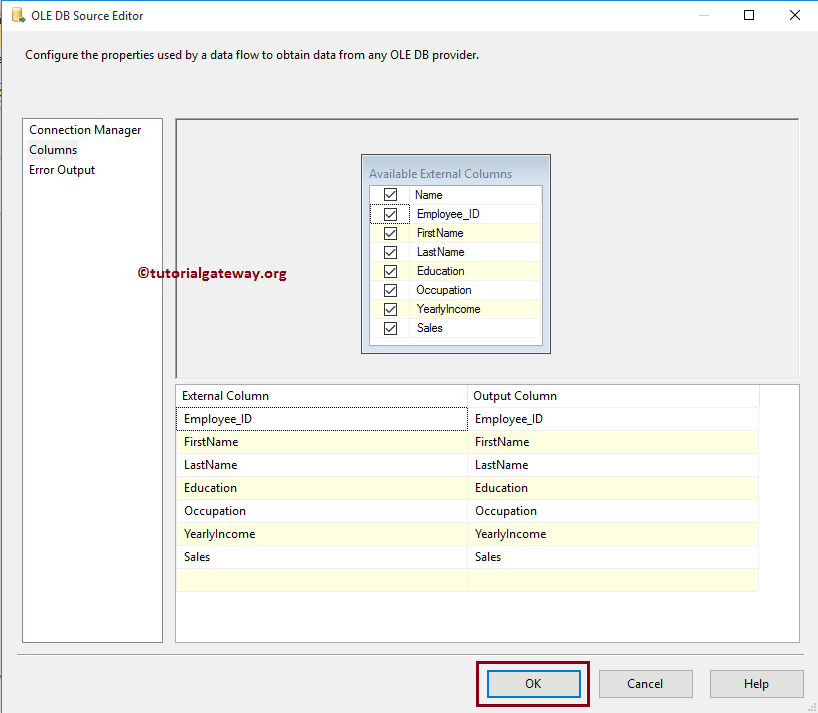
Click OK to close the OLE DB source and Drag the Lookup Transformation.

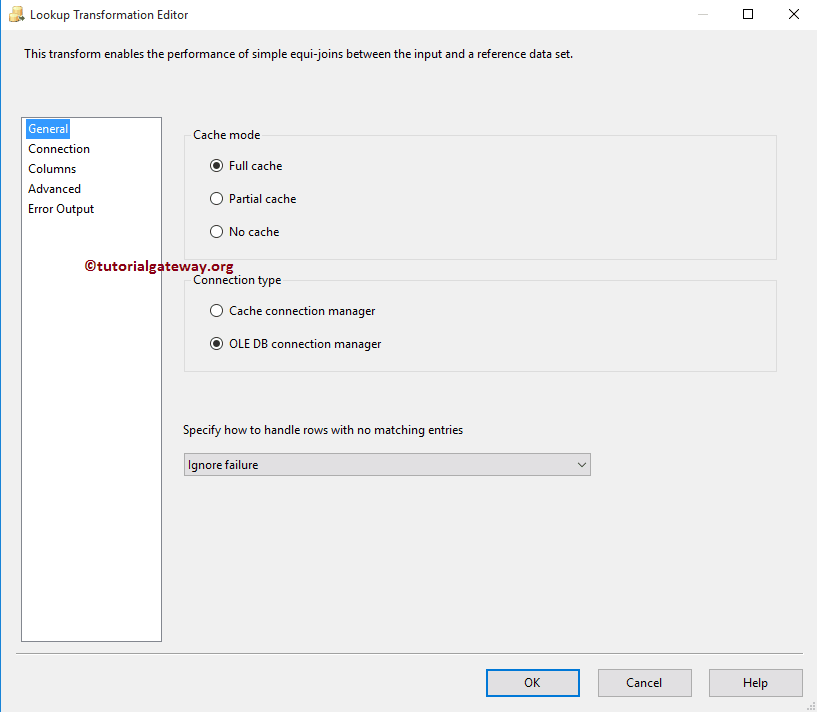
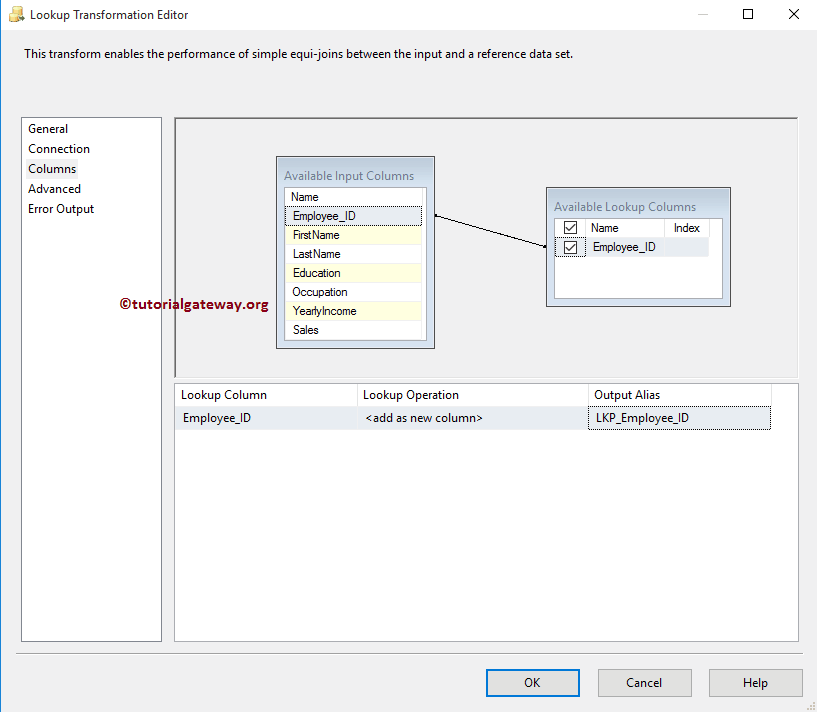
STEP 5: Double click on the Lookup Transformation will open the Lookup Transformation Editor to configure the lookup table (reference table). Within the General Tab, under “Specify how to handle rows with no matching entries”, Change the default Fail Component to Ignore Failure option.
TIP: Please refer Lookup article to understand the properties present and Lookup Transformation article to understand the configuration settings
STEP 6: Click on the connection Tab to configure the lookup connections settings. If you have already created the OLE DB connection Manager, then select from the list otherwise, Click the New button and set it. Here we chose the existing one, which is pointing to Database.
Next, we are using the SQL Query as the lookup table because we require only one column to lookup (i.e., Employee_ID), so we are using the query as shown below.

STEP 7: Click on the Available Input columns and drag the required column onto the available lookup columns to create a join between the 2 data sets. Employee_ID column in the source data will check against the [Employee_ID] column in the lookup table (Nothing but target table).
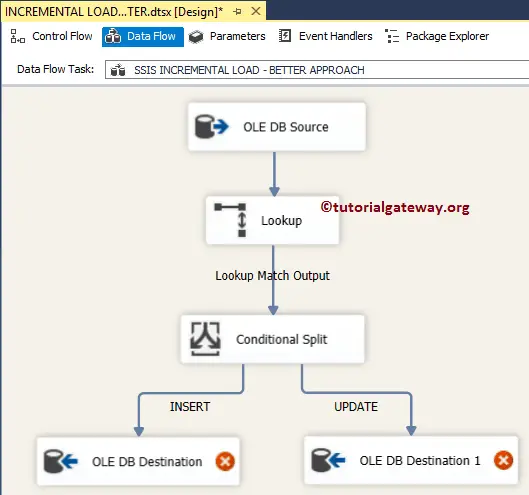
STEP 8: Drag and drop the Conditional Split Transformation and connect the Lookup Match Output as the source to Conditional split

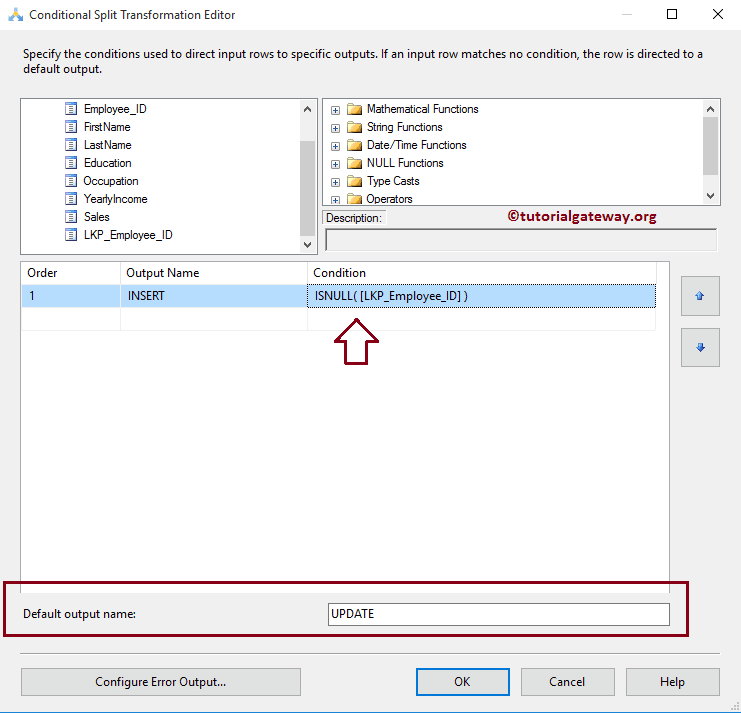
STEP 9: Double-click on it to provide the conditions. The condition we used in this SSIS incremental load example is ISNULL (LKP_Employee_ID). It means the conditional split verify whether the lookup employee ID is Null or Not
- If the LKP_Employee_ID is Null, it means no record exists in the destination table, so we want to insert the new record.
- If the LKP_Employee_ID is not Null, it means there is already a record that exists in the destination table, so we want to update the existing data with new data.
From the below image, you can see that we used 1 condition and one default output in Conditional Split Transformation. So, We get two outputs in total.
STEP 10: Drag and drop two OLE DB Destinations on to the data flow region and then drag the Output Arrow to this new OLE DB Destination. A popup window called Input Output Selection appears helping you in selecting the Input-Output type: either INSERT or UPDATE.
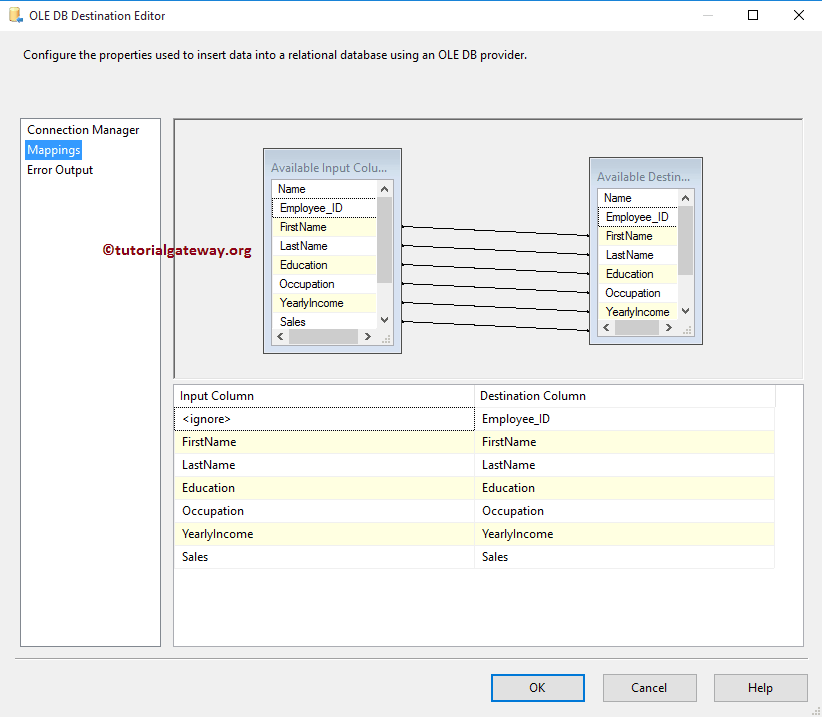
STEP 11: Double click on the first OLE DB Destination will open the OLE DB Destination Editor. Select the OLE DB Connection manager and select [CDC Target] table present in the Database to insert the new records.

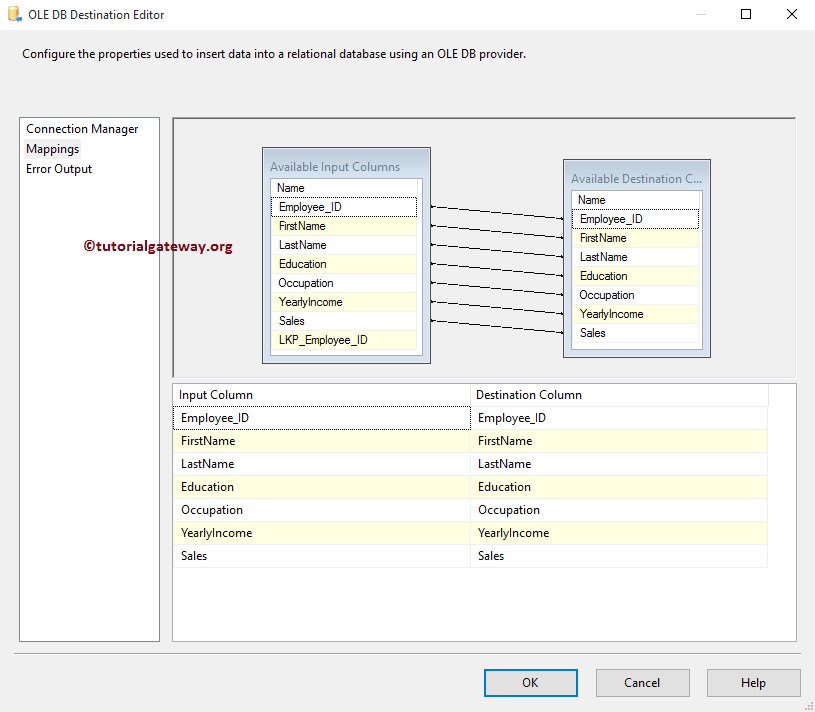
STEP 12: Click on the Mappings tab to verify whether the source columns correctly mapped to the destination columns. If you observe the below image, we are not mapping for the Employee_ID column because it is the Auto-increment Identity column.
STEP 13: Double click on the second OLE DB Destination will open the OLE DB Destination Editor. Select the OLE DB Connection manager and select [CDC_Staging] table present in the Database.
TIP: If you don’t find the table, run the first Execute SQL Task alone to create.
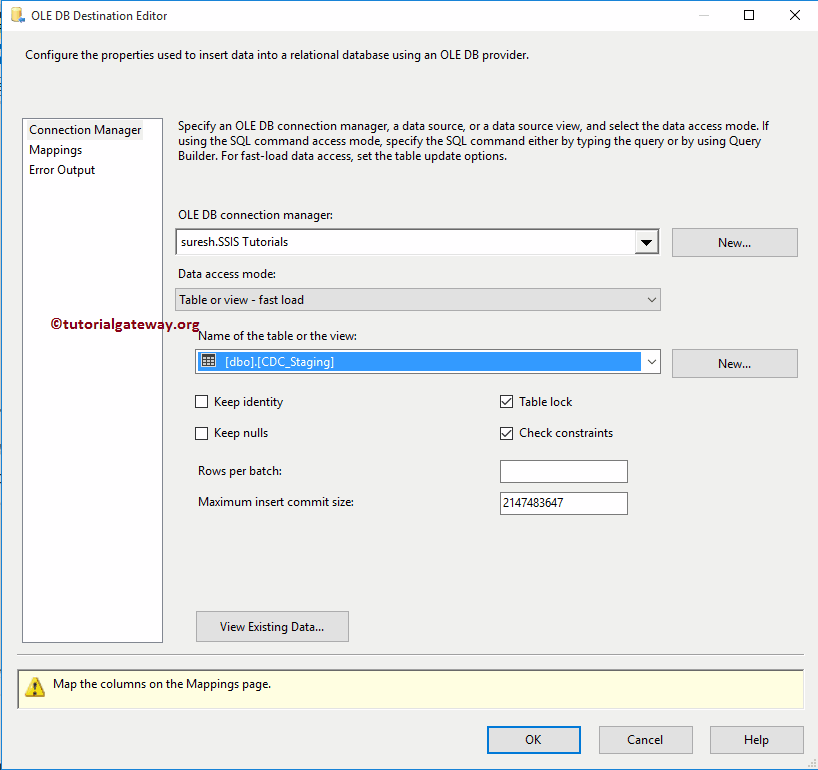
STEP 14: Repeat Step 12
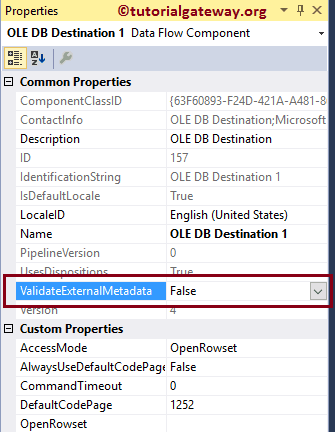
Before we step into the control flow tab, Please change the Validate External Metadata from TRUE to False because we are creating a staging table on the fly (Run time)
STEP 15: Within the Control flow, Double click on the second Execute SQL Task to open task editor. Here, we are updating the [CDC Target] data with staging table data. So, we selected the already created OLE DB Connection Manager pointing to the database. Please click on the browse button beside the SQL Statement property to write the custom statement
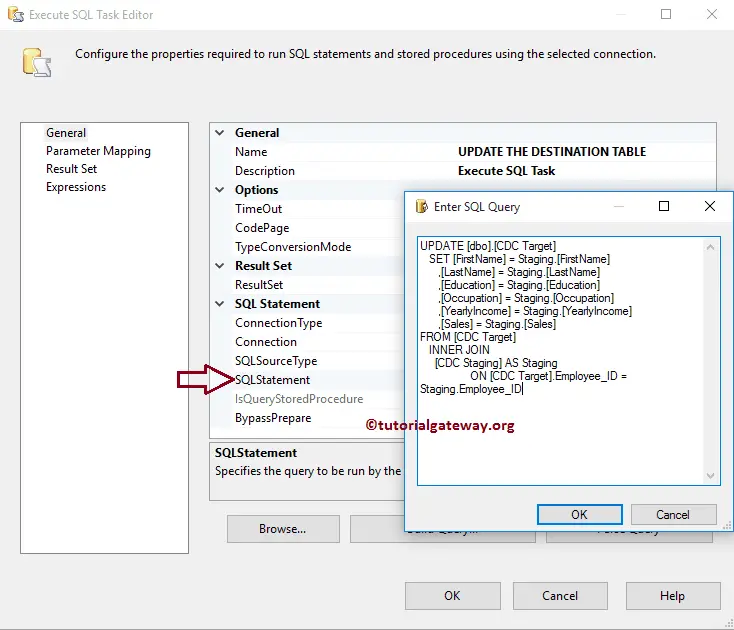
To update the records, SQL Command we use in the above SSIS Incremental Load screenshot is:
UPDATE [dbo].[CDC Target]
   SET [FirstName] = Staging.[FirstName]
      ,[LastName] = Staging.[LastName]
      ,[Education] = Staging.[Education]
      ,[Occupation] = Staging.[Occupation]
      ,[YearlyIncome] = Staging.[YearlyIncome]
      ,[Sales] = Staging.[Sales]
FROM [CDC Target]
   INNER JOIN
     [CDC_Staging] AS Staging
	 ON [CDC Target].Employee_ID = Staging.Employee_ID
Click OK to finish configuring the SSIS Incremental Load package. Let us Run the package
Let us open the SQL Server management studio and check whether we inserted new records and updated old records using the SSIS Incremental load along with staging tables or not.
Comments are closed.