A Conditional Split Transformation in SSIS is just like the IF condition or CASE statement. It checks the given condition. The output will be sent to the appropriate destination path based on the condition result. It has ONE input and MANY outputs.
For example, if we want to store the students in a class with marks greater than 40 in one Table and those who score less than 40 in another table, then we can use this SSIS Conditional Split Transformation to split the data using the condition. Note that Conditional Split is case-sensitive.
Conditional Split Transformation in SSIS Example
STEP 1: Drag and drop the data flow task from the toolbox to control flow and name it Conditional Split Transformation.
Double click on it, and it will open the SSIS data flow tab. For more Transformations >> Click Here.
STEP 2: Drag and drop OLE DB Source from the toolbox to the data flow region. Double click on the OLE DB source in the data flow region will open the connection manager settings and provide space to write our SQL statement.
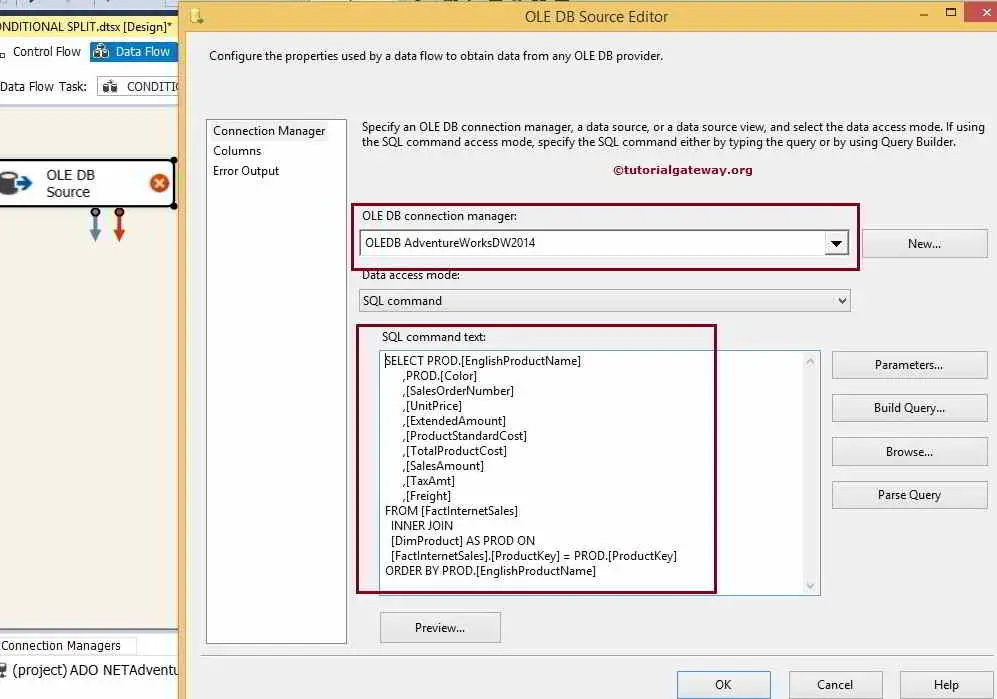
The command used for our SSIS conditional split transformation OLE DB source is
USE AdventureWorksDW2014
GO

SELECT PROD.[EnglishProductName] ,PROD.[Color],[SalesOrderNumber],[UnitPrice],    [ExtendedAmount],[ProductStandardCost],[TotalProductCost],[SalesAmount],[TaxAmt],[Freight]
FROM [FactInternetSales]
INNER JOIN [DimProduct] AS PROD ON [FactInternetSales].[ProductKey] = PROD.[ProductKey]
ORDER BY PROD.[EnglishProductName]
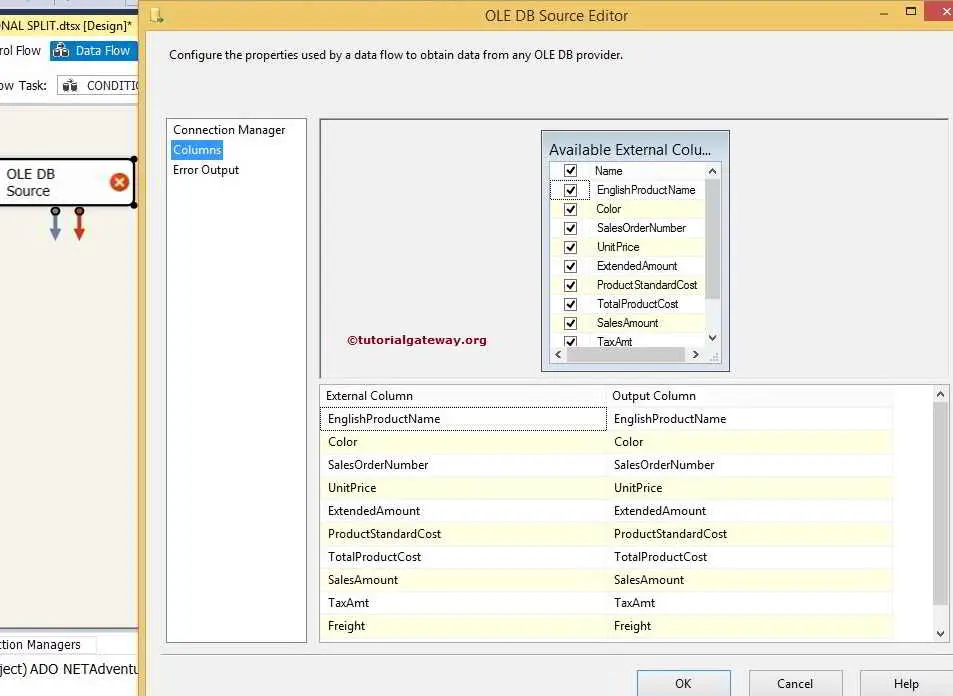
STEP 3: Click on the columns tab to verify the columns. In this tab, we can uncheck the unwanted columns also. Click ok.
Configure SSIS Conditional Split Transformation
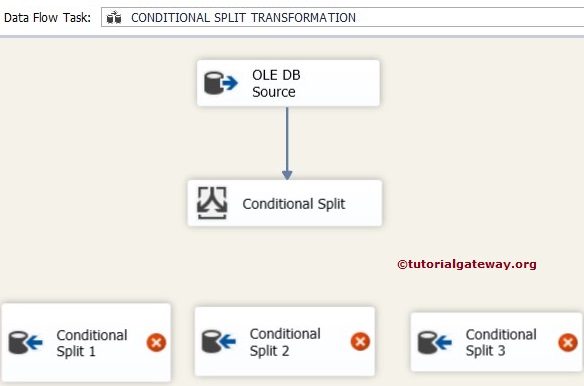
STEP 4: Drag and drop the Conditional Split Transformation from the toolbox to the data flow region and double-click on it to provide the conditions.
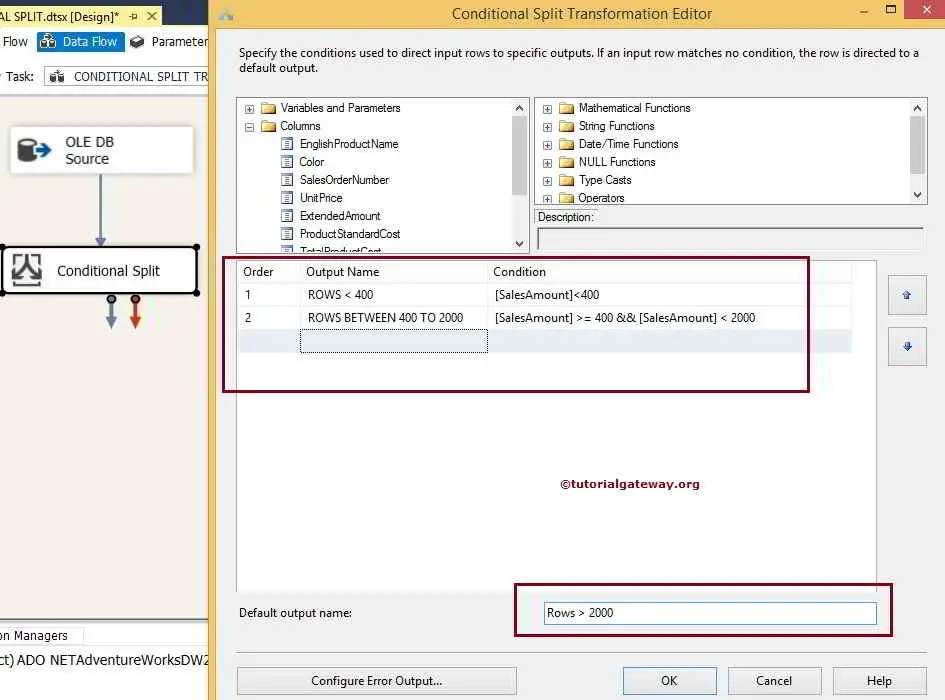
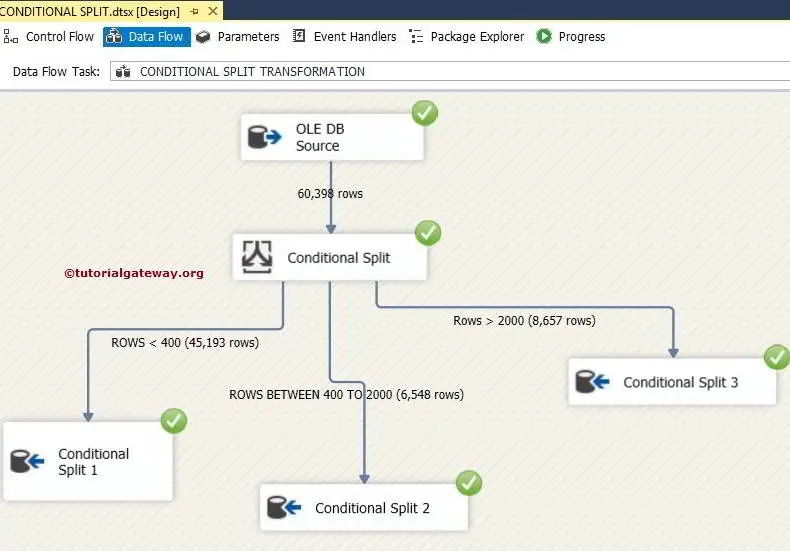
The conditions we used in this conditional split transformation are:
- ROWS < 400: SalesAmount < 400
- ROWS BETWEEN 400 TO 2000: SalesAmount >= 400 && SalesAmount < 2000
- The remaining rows will act as default output, and we named it [Rows > 2000]
From the above, we used two conditions and one default output in Conditional Split Transformation in SSIS. So, We get three outputs in total.
STEP 5: Drag and drop three OLE DB Destinations from the toolbox to the data flow region and rename them as Condition Split 1, Condition Split 2, and Condition Split 3
STEP 6: Drag and drop the arrow from Conditional Split Transformation to OLE DB Destination (Conditional Split 1) will pop up the Input Output Selection window to select the appropriate output. Let us choose the [Rows <400] output as shown below
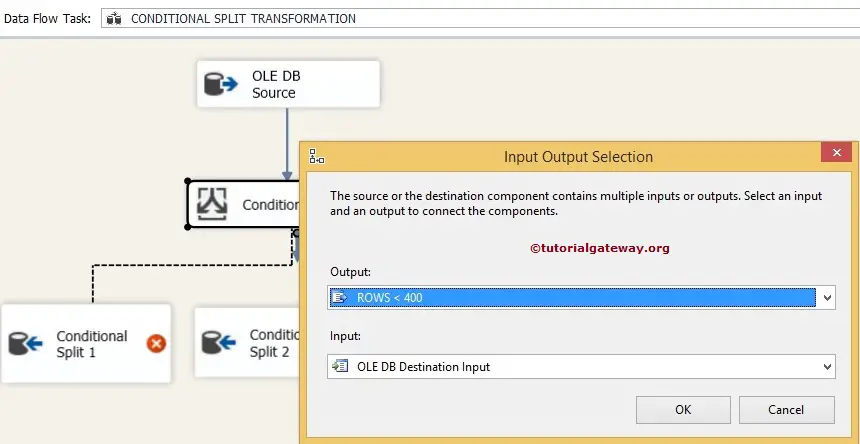
Click ok
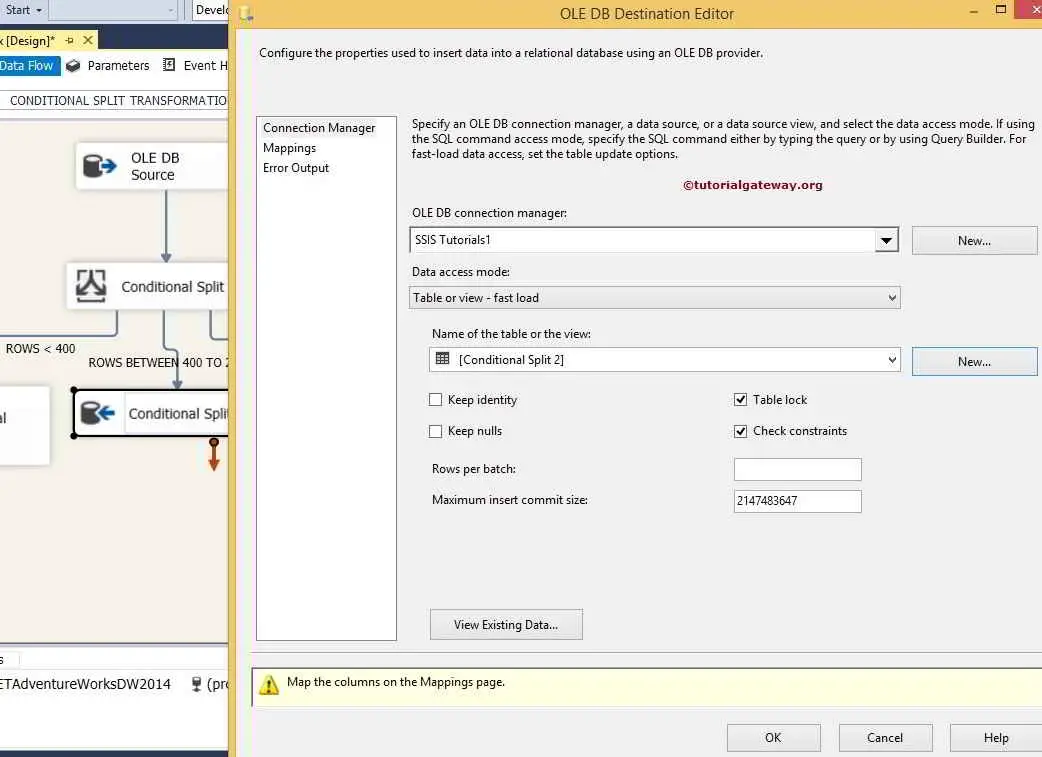
STEP 7: Now, we have to provide the OLE DB Connection Manager and table details of the Destination. So double-click on the Conditional Split one and provide the required information.

From the above screenshot, you can observe that We selected [Conditional Split 1] inside the Database
STEP 8: Click the Mappings tab to check whether the source columns are precisely mapped to the destination columns.
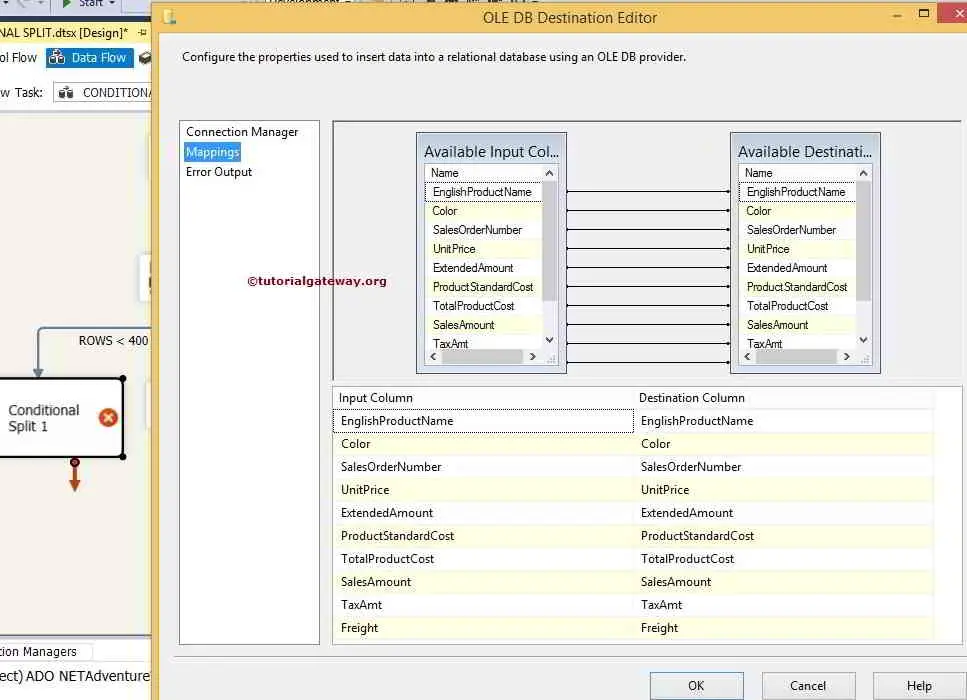
Click ok
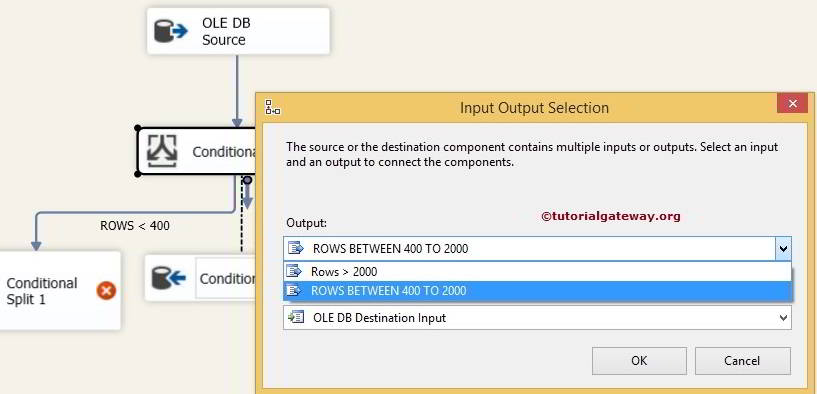
STEP 9: Drag and drop one more arrow from SSIS Conditional Split Transformation to OLE DB Destination (Conditional Split 2). Pop up the Input Output Selection window to select the output. This time, we are going to select [Rows between 400 to 2000] output as shown below
STEP 10: Let us provide OLE DB Connection Manager and table details of the destination for our second output. To do so, double-click Conditional Split 2 and provide the required information.
From the above screenshot, you can observe that We selected the [Conditional Split 2] inside the Database
Repeat STEP 8 and click OK.
STEP 11: Drag and drop one more arrow from the Conditional Split Transformation to OLE DB Dest (Conditional Split 3). Here, we are configuring the default output data. So, Double-click on the OLE DB Destination and provide the information.
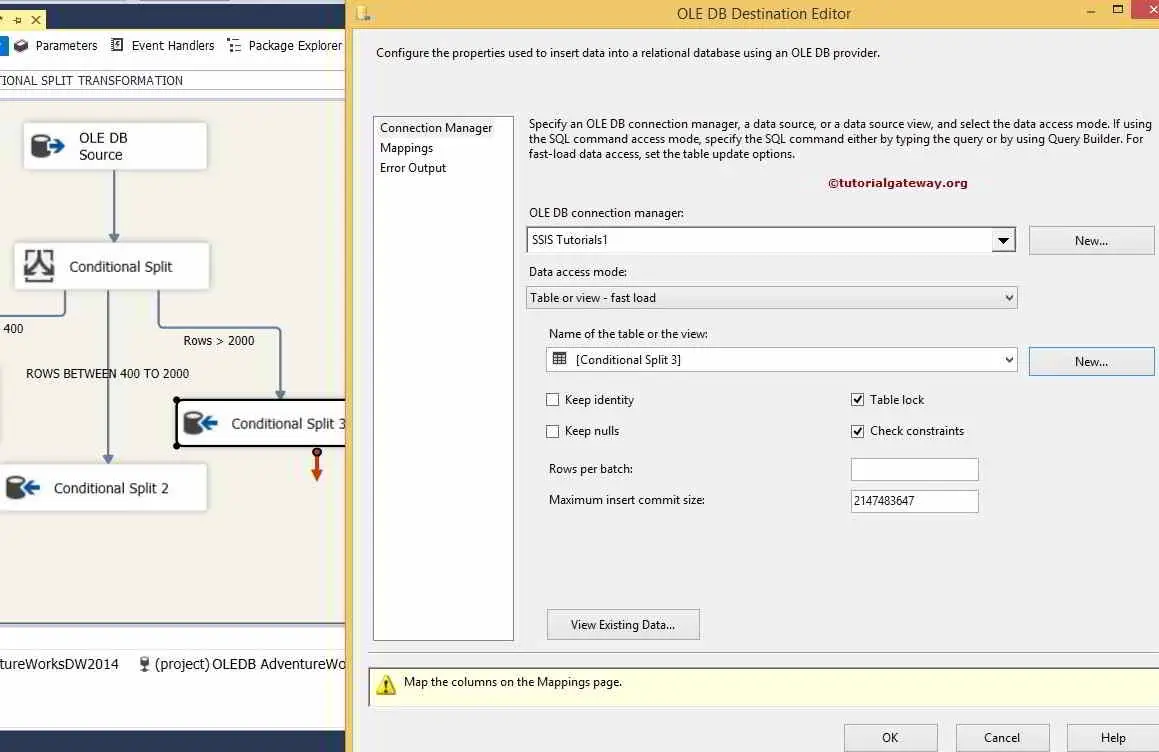
From the above screenshot, you can observe that We selected the [Conditional Split 3] inside the Database
Repeat STEP 8 and click OK.
We finished developing the SSIS conditional split transformation package. It’s time to run this package.
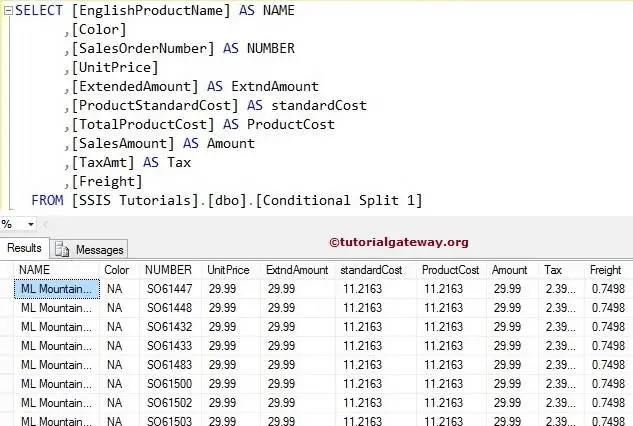
Let’s see the result in the [Conditional Split 1] Table. First, open the Management studio and write the select statement to check the result.
-- Conditional Split Transformation Result
SELECT [EnglishProductName] AS NAME
      ,[Color]
      ,[SalesOrderNumber] AS NUMBER
      ,[UnitPrice]
      ,[ExtendedAmount] AS ExtndAmount
      ,[ProductStandardCost] AS standardCost
      ,[TotalProductCost] AS ProductCost
      ,[SalesAmount] AS Amount
      ,[TaxAmt] AS Tax
      ,[Freight]
  FROM [Conditional Split 1]
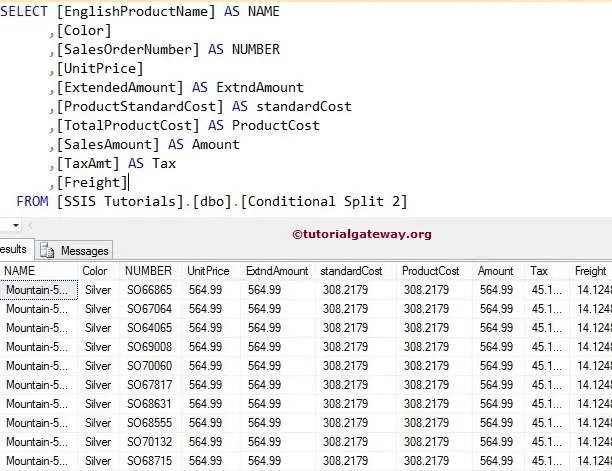
Let’s see the result in the [Conditional Split 2] Table by writing the below select statement to check the result
SELECT [EnglishProductName] AS NAME
      ,[Color]
      ,[SalesOrderNumber] AS NUMBER
      ,[UnitPrice]
      ,[ExtendedAmount] AS ExtndAmount
      ,[ProductStandardCost] AS standardCost
      ,[TotalProductCost] AS ProductCost
      ,[SalesAmount] AS Amount
      ,[TaxAmt] AS Tax
      ,[Freight]
  FROM [Conditional Split 2]
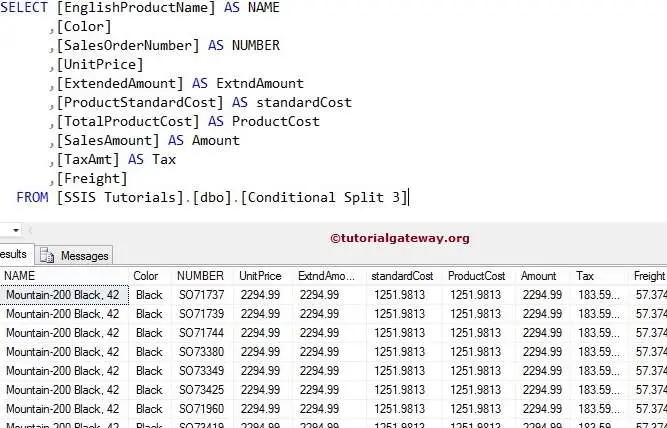
Next, see the result in the [Conditional Split 3] Table. Then, open the Management Studio and write the statement below to check the result.
-- Conditional Split Result
SELECT [EnglishProductName] AS NAME
      ,[Color]
      ,[SalesOrderNumber] AS NUMBER
      ,[UnitPrice]
      ,[ExtendedAmount] AS ExtndAmount
      ,[ProductStandardCost] AS standardCost
      ,[TotalProductCost] AS ProductCost
      ,[SalesAmount] AS Amount
      ,[TaxAmt] AS Tax
      ,[Freight]
  FROM [Conditional Split 3]
Comments are closed.