The Pivot Transformation in SSIS performs pivot operations on input data (Source Data). A Pivot Transformation in SSIS means converting individual row data into separate columns.
We use the SSIS Pivot transformation to present the data in a crosstab or tabular format to understand it better. It will perform row based operations and rotate rows to columns and the corresponding value placed under those columns. If there is no value, it will fill with NULLs.
Here, we will explain Pivot Transformation in SSIS using a simple example so that you can understand it better.
Pivot Transformation is precisely the opposite of Unpivot Transformation. In our previous article, We already discussed Pivot Transformation in SSIS 2008R2. Though the functionality is the same in SSIS 2008R2 and 2014, the Business Intelligence changed the User interface of the Pivot Transformation in SQL server 2012. This modified version makes the developer’s life much more relaxed than the earlier version. Please refer to Pivot Transformation in the 2008R2 section to understand the difference between Pivot Transformation in 2014 and 2008R2.
NOTE: It’s not mandatory, but it is always best practice to use Sort Transformation before Pivot Transformation for the unsorted data. Because sometimes, SSIS Pivot Transformation gives strange results for unsorted data.
Pivot Transformation in SSIS Example
In this SSIS example, we will perform Pivot Transformation on the table below to convert row data (such as calendar years 2011, 2012, 2013, and 2014) into separate columns.
Consider the below data for this example.

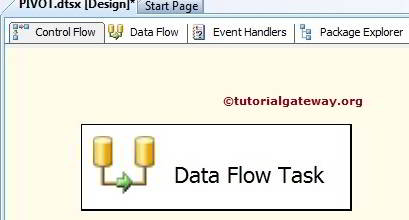
STEP 1: Open BIDS, drop the data flow task from the toolbox to control flow, and rename it PIVOT Transformation in SSIS 2014.
Double click on it, and it will open the data flow tab. For more Transformations >> Click Here.
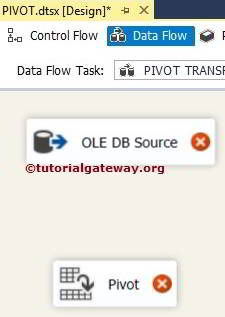
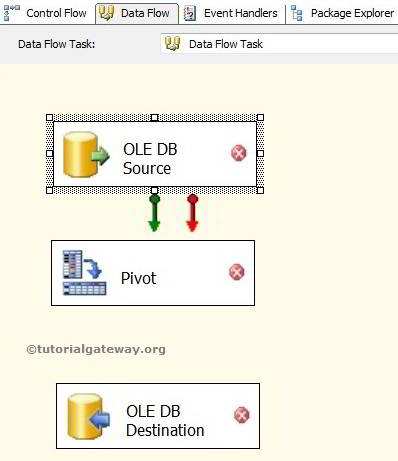
STEP 2: Drag and drop OLE DB Source, Pivot Transformation from the toolbox to the data flow region
STEP 3: Double-clicking the OLE DB source in the data flow region will open the connection manager settings and provide space to write our statement.
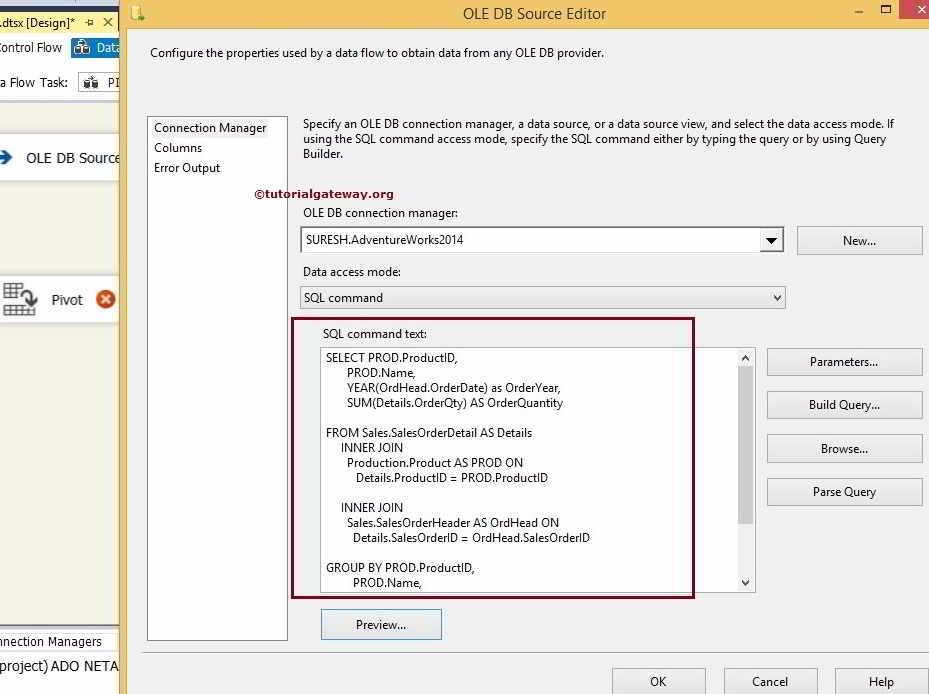
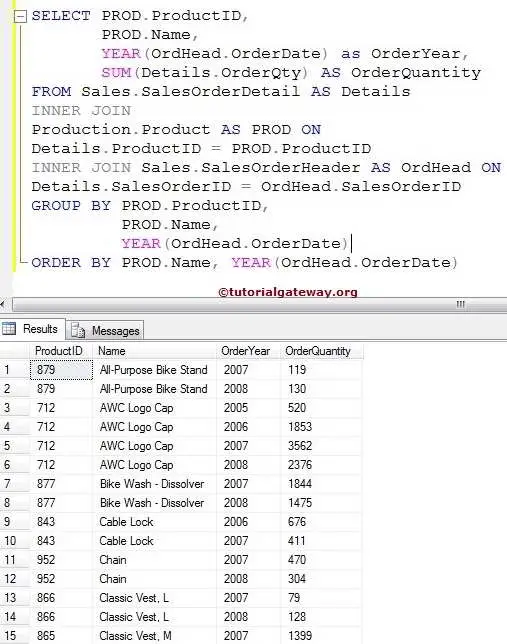
SQL Command we used for SSIS Pivot Transformation is:
SELECT PROD.ProductID,
       PROD.Name,
       YEAR(OrdHead.OrderDate) as OrderYear,
       SUM(Details.OrderQty) AS OrderQuantity
FROM Sales.SalesOrderDetail AS Details
     INNER JOIN
       Production.Product AS PROD ON
          Details.ProductID = PROD.ProductID
     INNER JOIN
       Sales.SalesOrderHeader AS OrdHead ON
         Details.SalesOrderID = OrdHead.SalesOrderID
GROUP BY PROD.ProductID,
         PROD.Name,
         YEAR(OrdHead.OrderDate)
ORDER BY PROD.Name,
         YEAR(OrdHead.OrderDate)
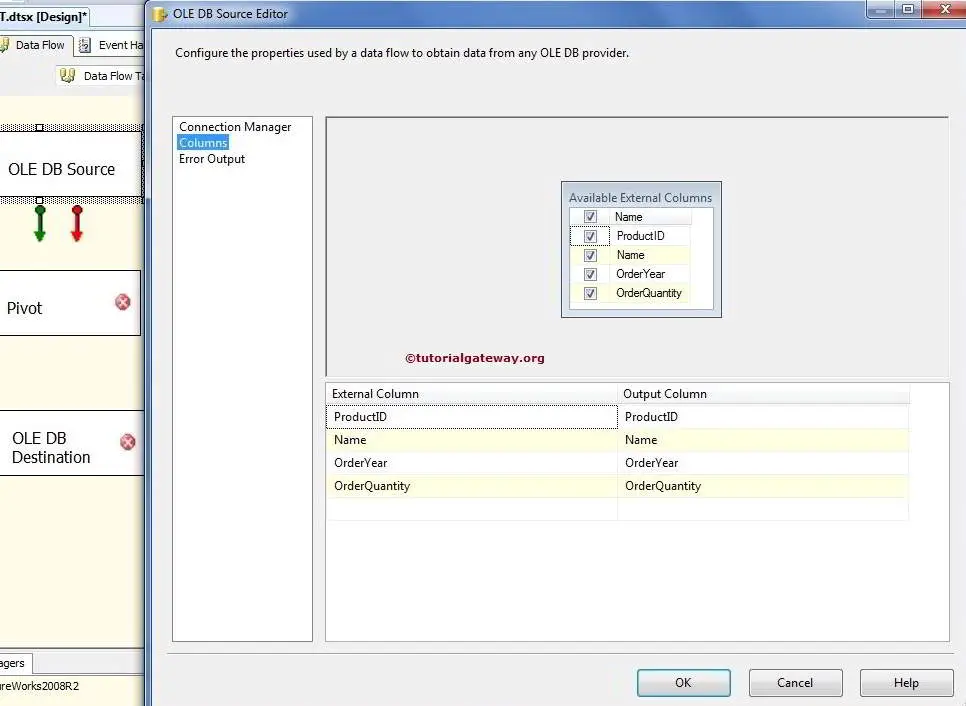
STEP 4: Click on the columns tab to verify the columns. Here, we can uncheck the unwanted columns also.

Click ok and drag the output arrow of the OLE DB Source to the Pivot Transformation to perform pivot transformation on the source data.
Configure SSIS Pivot Transformation
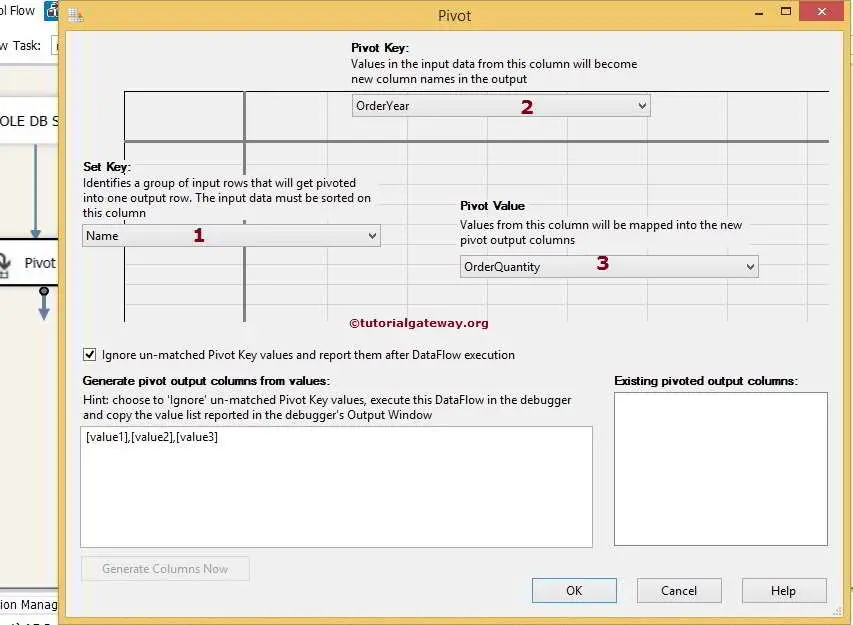
STEP 5: Double Click or edit the Pivot Transformation. It will open the Pivot window, which is slightly different from the Pivot Transformation in SSIS 2008R2.
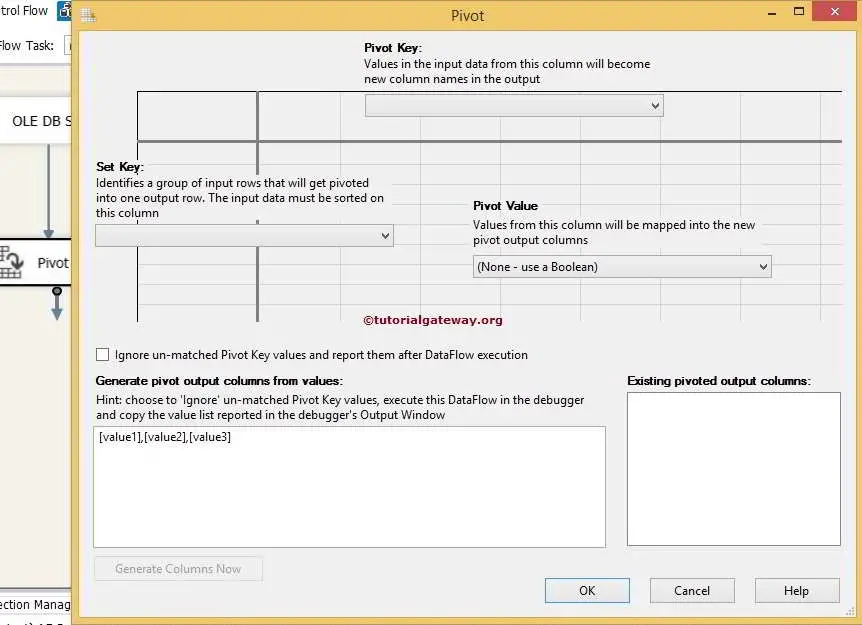
The following table illustrates the values you can use in SSIS Pivot Transformation Editor:
| OPTIONS | DESCRIPTION |
|---|---|
| 0 | Column values will pass through the transformation |
| 1 | Set key. All the columns with the same set key |
| 2 | It’s a Pivot Key (These Column values become the Column names) |
| 3 | It’s a pivot value, and values from this column will be placed in the new columns created by the Pivot Transformation. |
So, in this SSIS Pivot Transformation example:
ProductID = 0
Name = 1 (Set Key)
OrderYear = 2 (Pivot Key)
OrderQuantity = 3 (Pivot Value)
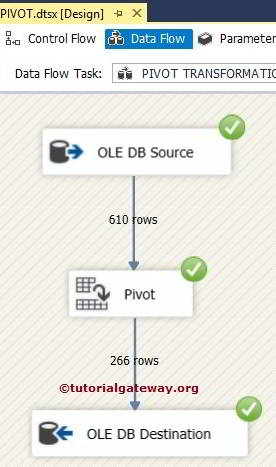
Click ok and run the SSIS Pivot Transformation package. Go to the progress tab and check the column names as shown below.
NOTE: For 3 or 4 columns like this example, we can directly replace the [Value1], [Value2], and so on with the column names, but in real-time, we may deal with 50 years then it is impossible to write those 50 years in the Generate pivot output columns from value region. So, it is always good practice to run the package once and then copy the column names from the progress Tab.
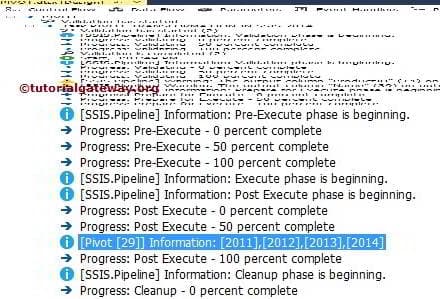
Stop the debugging mode and Copy the selected values.
Generate Columns
Again, double-click on the SSIS Pivot Transformation in the data flow region and paste the column names in the Generate pivot output columns from the value region, as shown in the screenshot below.
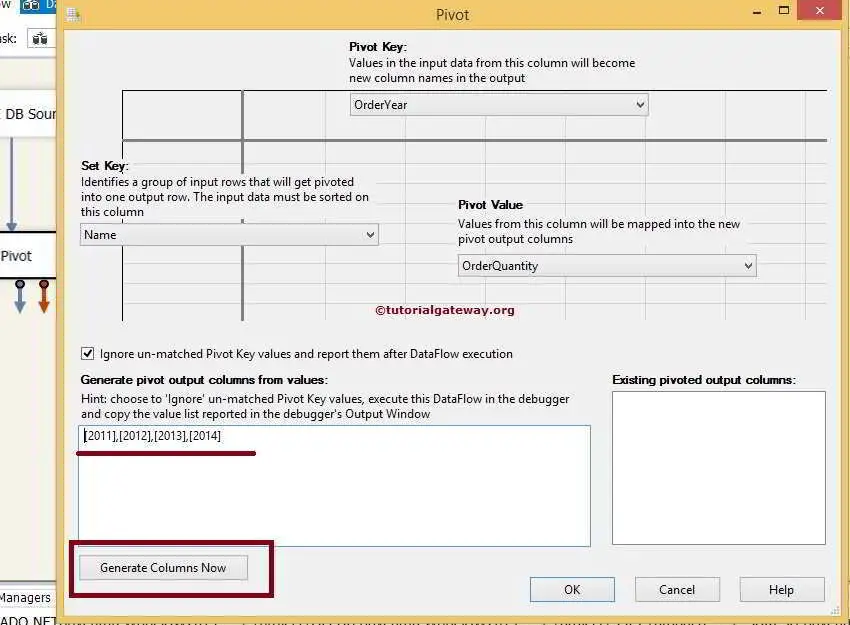
Click on the Generate Columns Now button to generate the pivoted columns. This generated column automatically adds to the Existing Pivoted output Column’s region.
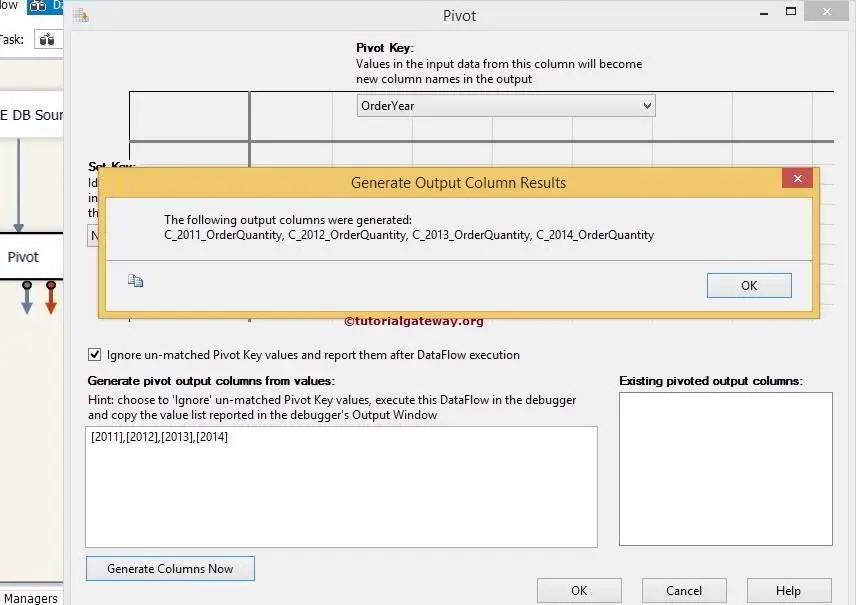
Click ok on the Generate Output Column Results window to generate the output columns with names as shown in the above screenshot.
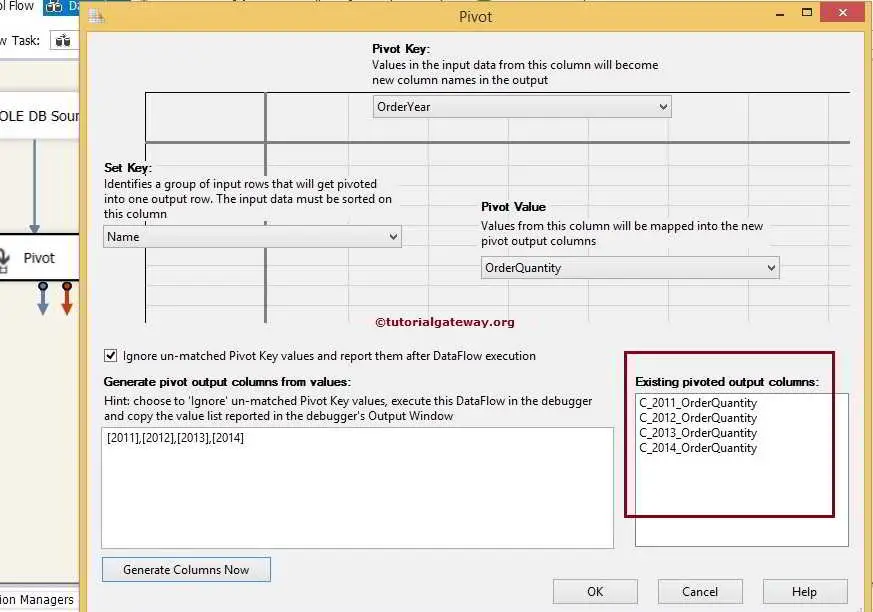
From the above screenshot, if you can observe the Existing Pivoted output Columns region, output columns (C_2011_OrderQuantity, C_2012_OrderQuantity, C_2013_OrderQuantity, and C_2014_OrderQuantity) are generated for the source data.
Click OK.
Now, we have to preserve the output columns in the database. So, Drag and drop the OLE DB Destination from the toolbox to the data flow region. Next, Drag the SSIS Pivot Transformation output arrow into the OLE DB Destination.
Double-click on the OLE DB Destination and provide the required information, such as the SQL Server name, database, and table details of the destination.
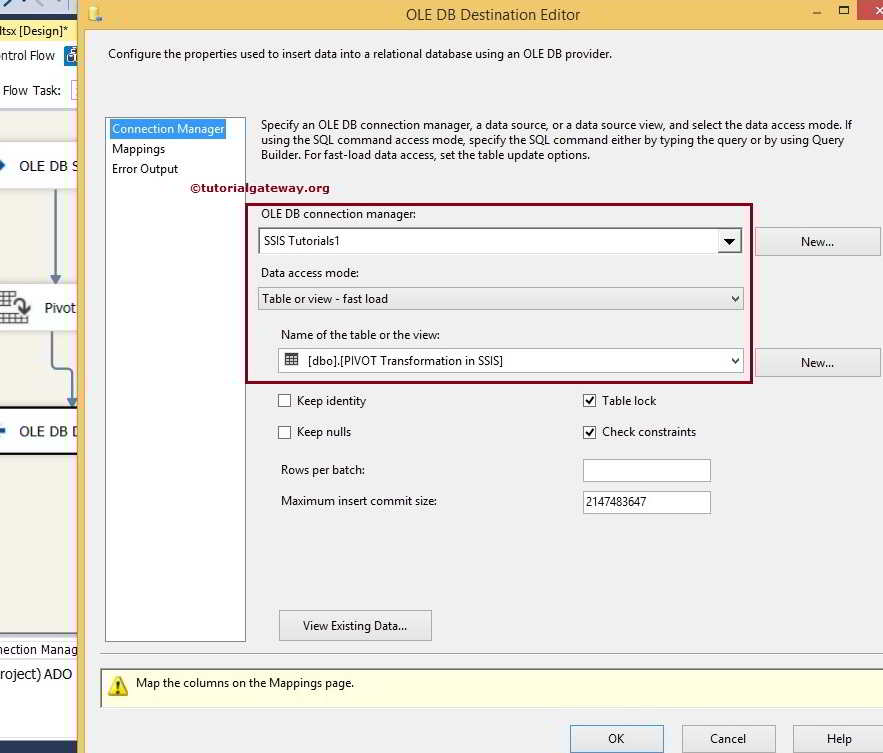
Here, we selected the database as our destination database and the [Pivot Transformation in SSIS] table as our destination table.
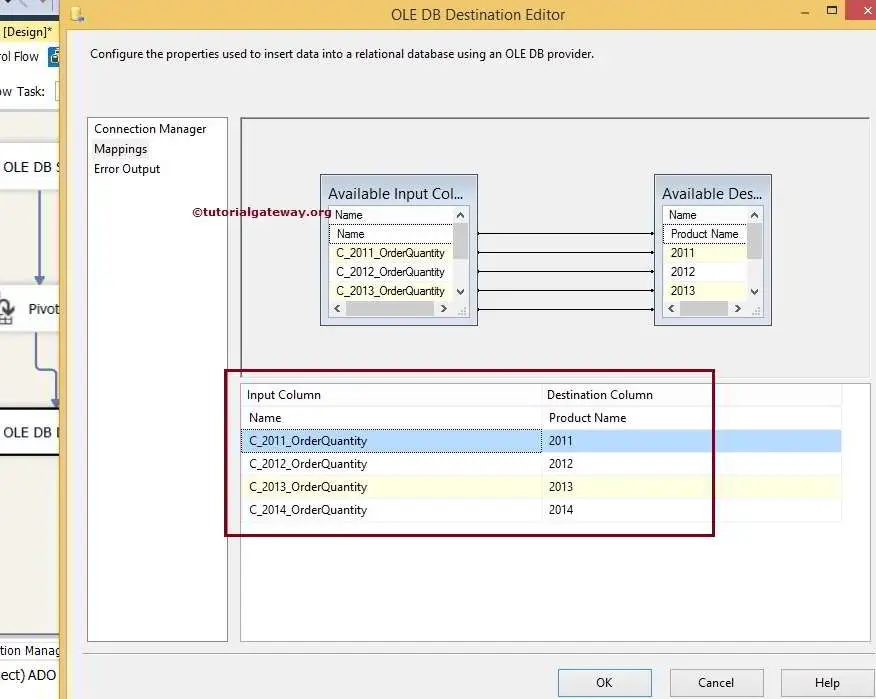
Click on the Mappings tab to check the Pivot Transformation source columns mapped to the destination columns.
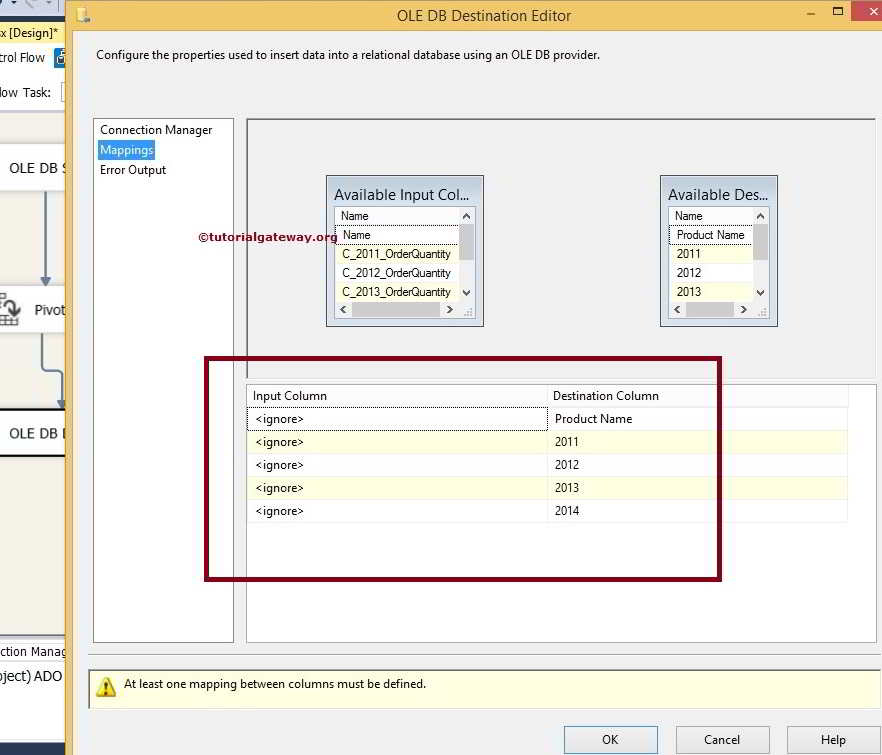
NOTE: If your input & destination column names are the same, the intelligence automatically maps. If there are any changes in the column names (alias or calculated columns), we must map them manually.
As you can observe from the above screenshot, intelligence cannot map independently. So, please map correctly.
Click ok to finish designing the SSIS Pivot Transformation package. Let us run the package.
Pivot Result
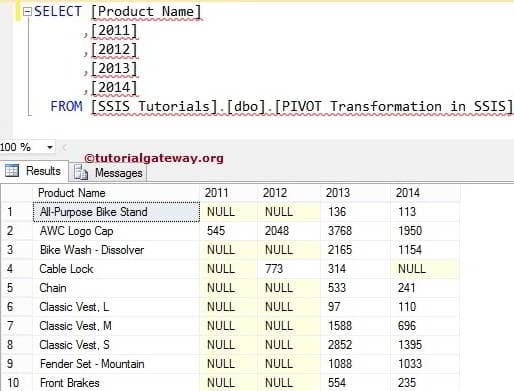
Let’s open the SSMS and write the below query to check the Pivot Transformation results.
SELECT [Product Name]
     ,[2011]
     ,[2012]
     ,[2013]
     ,[2014]
FROM [PIVOT Transformation]
Pivot Transformation in SSIS 2008 R2
Pivot transformation allows you to perform a pivot operation on your input data. Here, we will explain pivot transformation in SSIS 2008R2 using a simple example so that you can understand it better.
Scenario: We want to PIVOT the below table using Pivot transformation in SSIS 2008 R2 for the desired output.
Open BIDS Drag and drop the data flow task from the toolbox to control flow, and rename it as pivot transformation in SSIS 2008 r2.
Double click on it, and the SQL Server Integration Services will open the data flow tab.
Drag and drop OLE DB Source, Pivot transformation, and OLE DB Destination from the toolbox to the data flow region.
Double click on the OLE DB source in the data flow region will open the connection manager settings and provide space to write our statement.
SQL Command we are going to use as our SSIS Pivot Transformation source is:
SELECT PROD.ProductID,
       PROD.Name,
       YEAR(OrdHead.OrderDate) as OrderYear,
       SUM(Details.OrderQty) AS OrderQuantity

FROM Sales.SalesOrderDetail AS Details
     INNER JOIN
       Production.Product AS PROD ON
          Details.ProductID = PROD.ProductID
     INNER JOIN
       Sales.SalesOrderHeader AS OrdHead ON
         Details.SalesOrderID = OrdHead.SalesOrderID
GROUP BY PROD.ProductID,
         PROD.Name,
         YEAR(OrdHead.OrderDate)
ORDER BY PROD.Name,
         YEAR(OrdHead.OrderDate)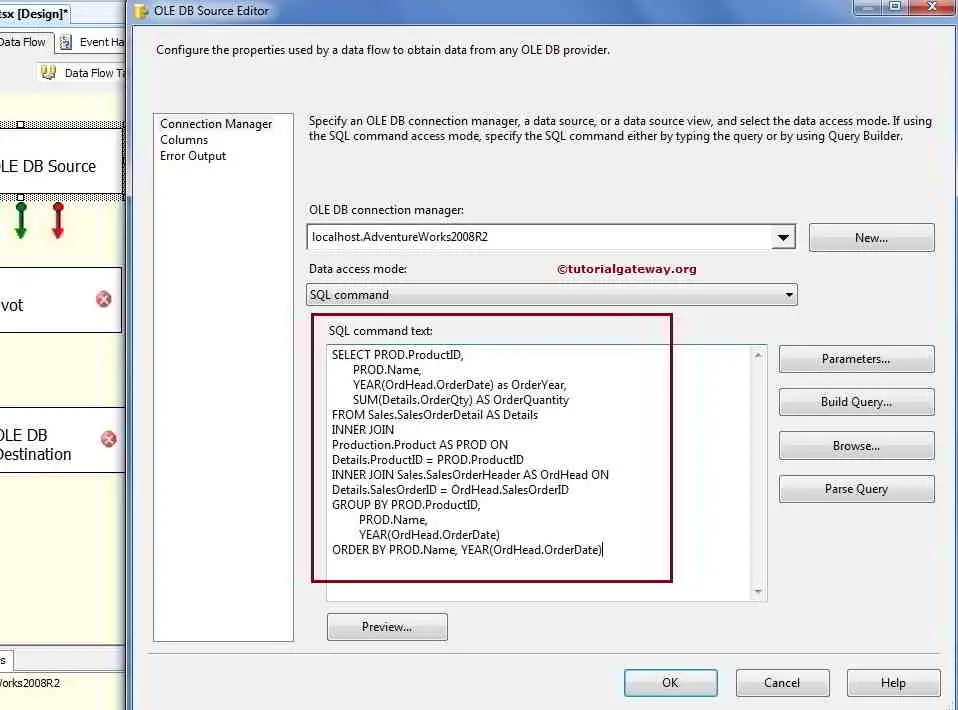
Click on the columns tab to verify the columns. In this tab, we can uncheck the unwanted columns also.
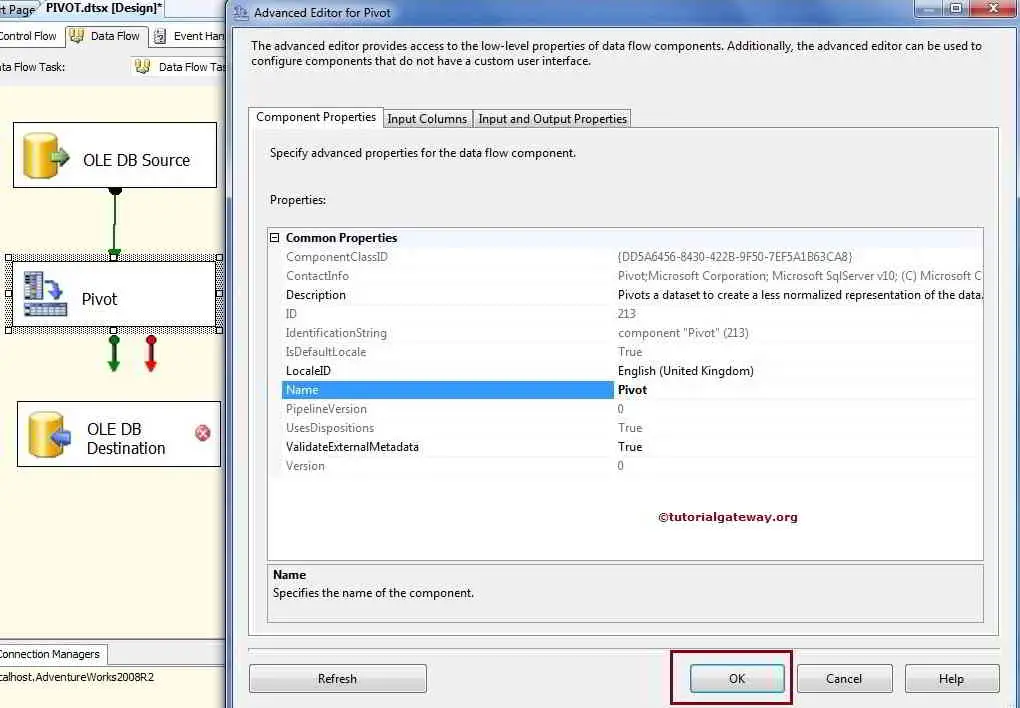
Click OK and edit the Pivot Transformation in SSIS 2008 R2. In the component properties tab, we can change the name, but we will leave it as it is for now.
Go to the input columns tab and select all input columns that we received from the OLE DB Source.
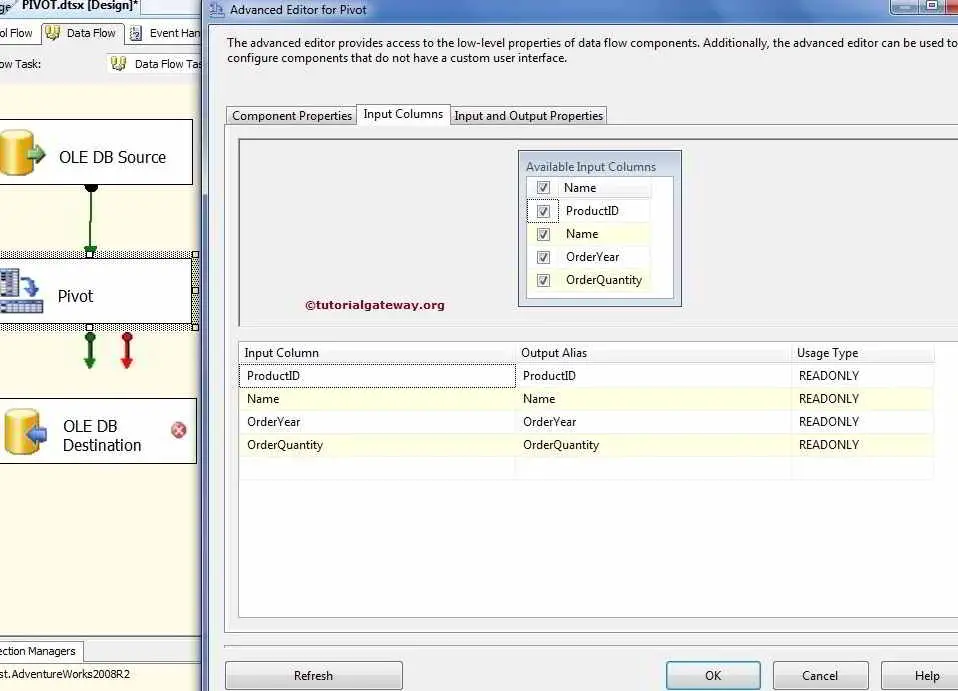
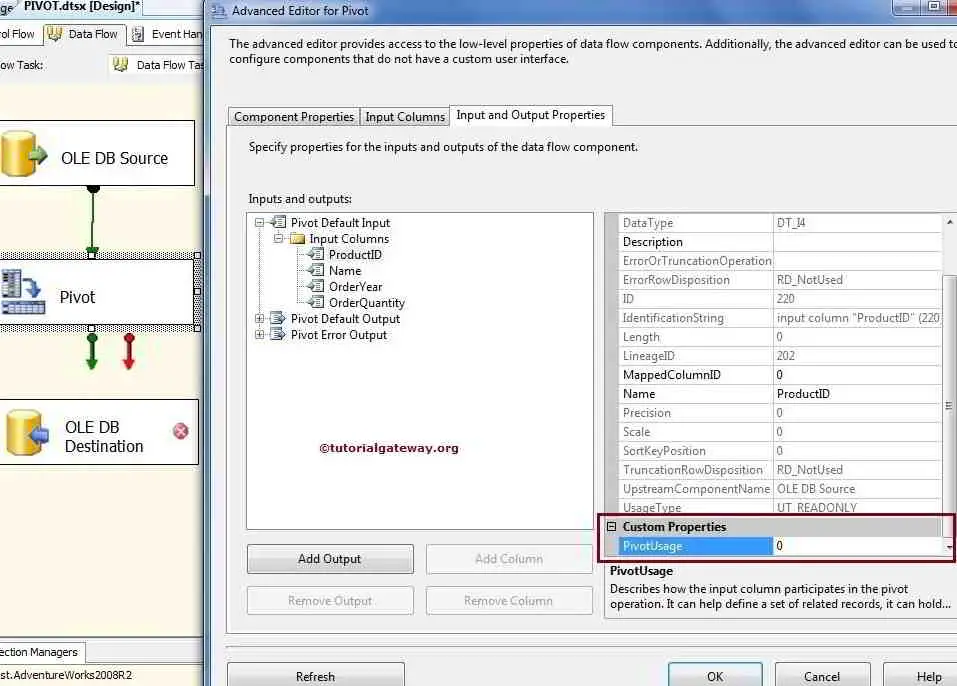
Go to the SSIS Pivot Transformation input and output properties tab, and select pivot default input. Under input columns, you will find all the columns that you selected in the previous tab. The only property you must set for each input column is the PivotUsage.
It describes the values you can use in the PivotUsage property:
| OPTIONS | DESCRIPTION |
|---|---|
| 0 | Column values will pass through the transformation |
| 1 | Set key. All the columns with the same set key |
| 2 | This is a Pivot column (These Column values become the Column names) |
| 3 | Values from this column are placed in the new columns created by the Pivot Transformation |
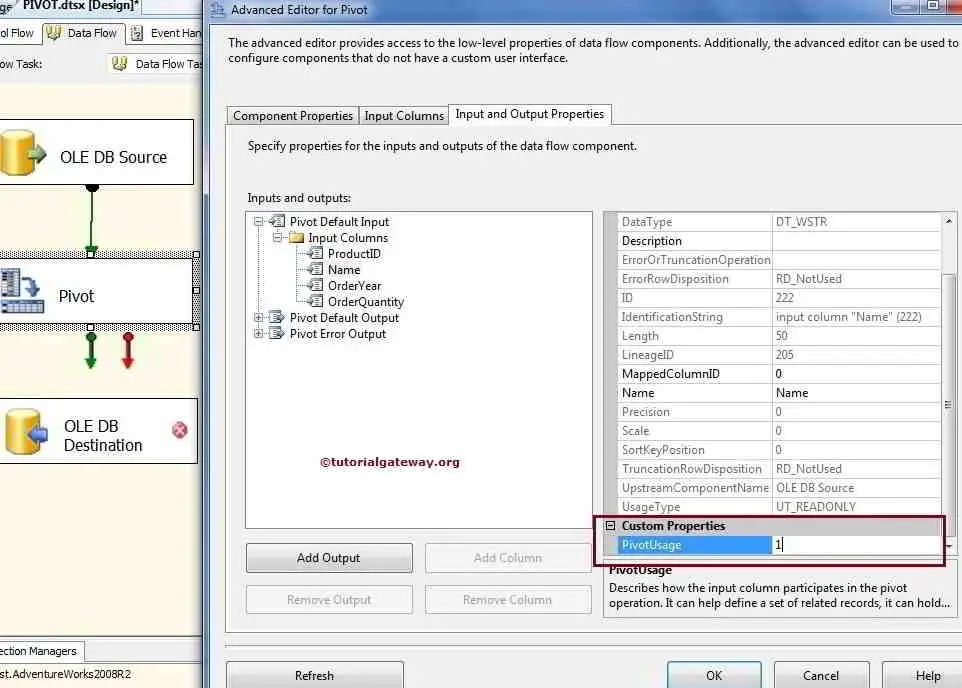
So, in this example, the PivotUsage property for each input column will be as follows:
- ProductID = 0
- Name = 1
- OrderYear = 2
- OrderQuantity = 3
Notice that you must have at least one input column with PivotUsage 2, one input column with PivotUsage 3, and one input column with PivotUsage 0 OR 1, at least in your pivot transformation.
After setting input columns, go to Pivot Default output, and under the output columns, add these columns: ProductID, Name, 2005, 2006, 2007, 2008 using the Add Column button.
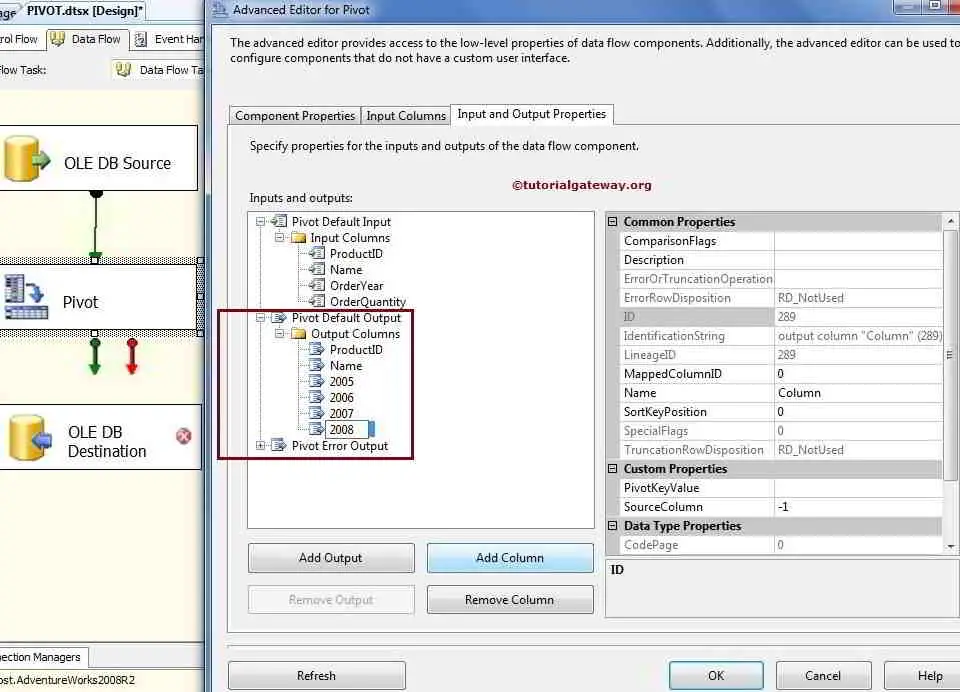
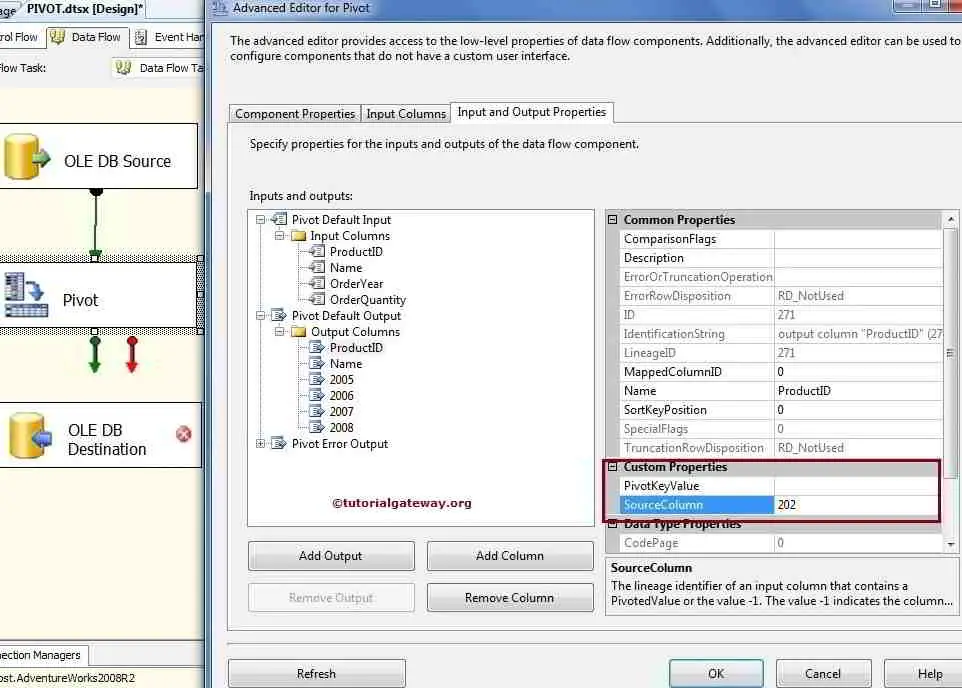
ProductID and Name columns will show the exact values from the ProductID and Name input columns. So, set the SourceColumn property of the ProductID output column to the LineageID of the ProductID input column.
Select ProductID under the input columns and see the lineageID value there.
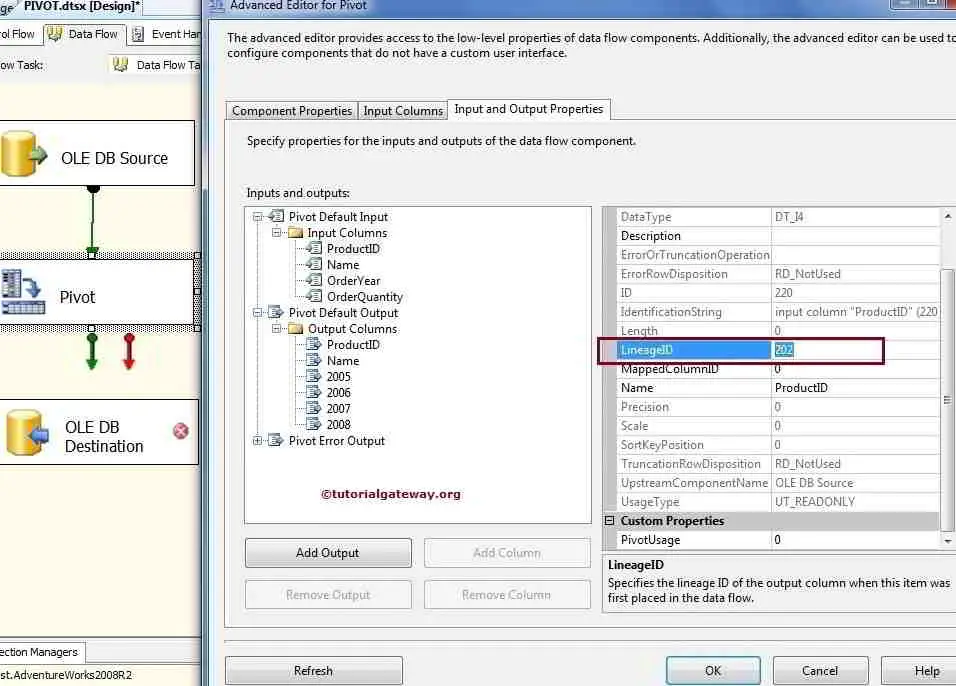
From the above screenshot, you can observe that 202 is the LineageID of the input column. So, Set the SourceColumn property of the ProductID output column to LineageID copied from ProductID (i.e., 202)
Do the same for the name column also.
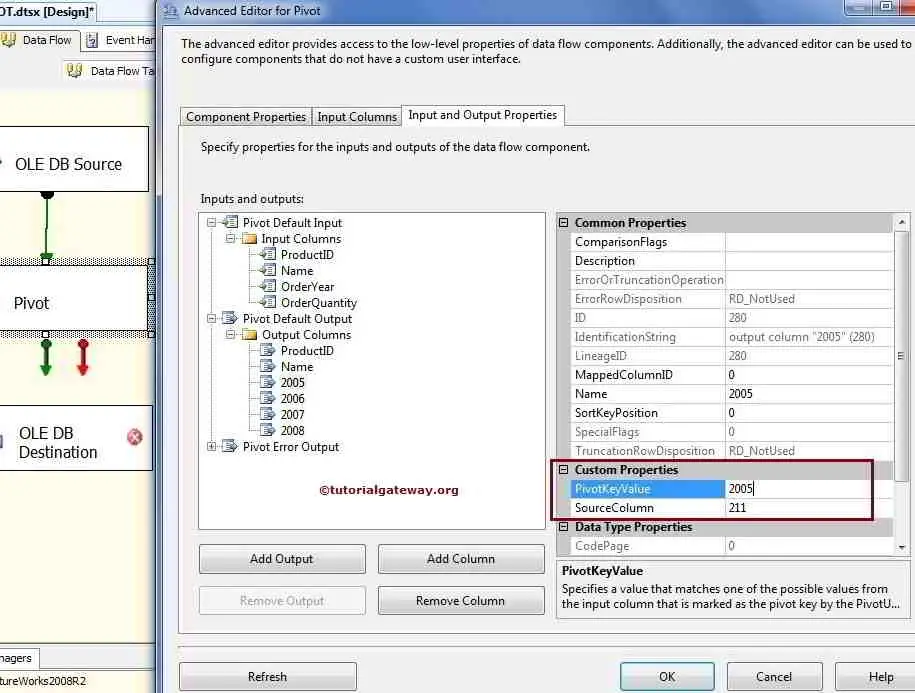
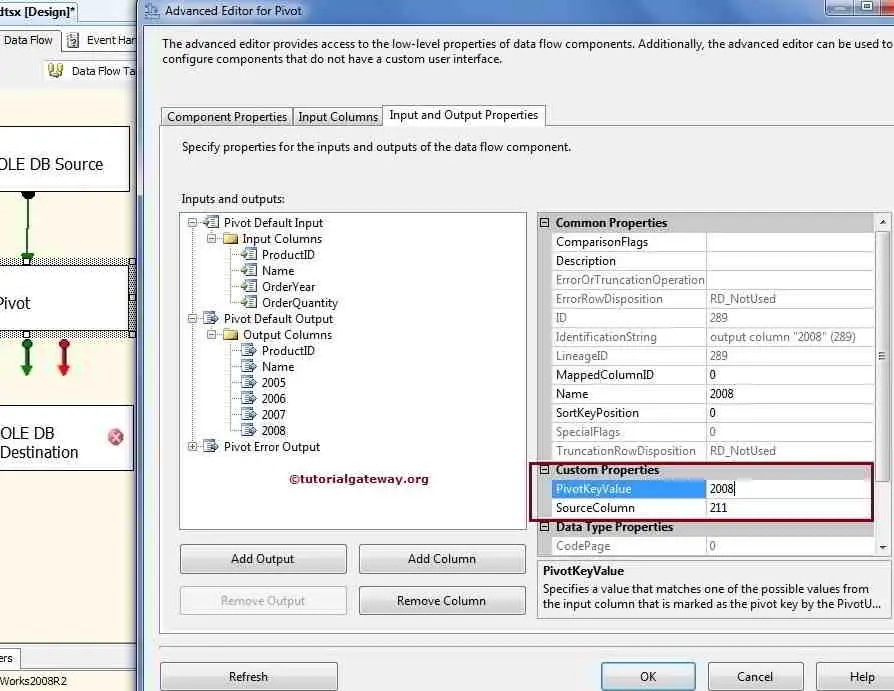
Now, its Pivot columns turn, select 2005 under output columns. These columns show the results for the year 2005, so enter 2005 in the PivotKeyValue property.
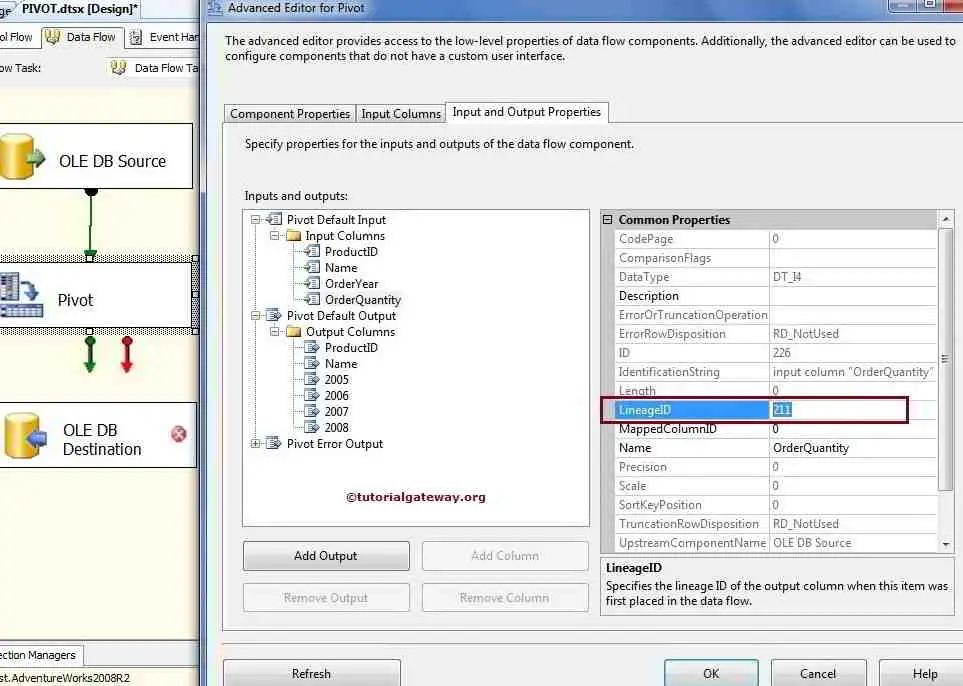
Data for the output columns 2005, 2006, 2007, and 2008 come from the OrderQuantity input column. So, Set the SourceColumn value for the 2005, 2006, 2007, and 2008 output columns with the lineageID of the OrderQuantity input column.
In this example, lineageID of OrderQuantity is 211
So, We set SourceColumn with 211 and PivotKeyValue to 2005 for the 2005 output column
For the 2006 output column, We set SourceColumn with 211 and PivotKeyValue to 2006

Do the same for 2007 also.
For the 2008 output column, We set SourceColumn with 211 and PivotKeyValue to 2008
Destination Table
Next, we have to save the output columns in the database. So, let’s configure the OLE DB Destination. To do so, Double click on the OLE DB Destination and provide the required information, such as the Server name, database, and table details of the destination.
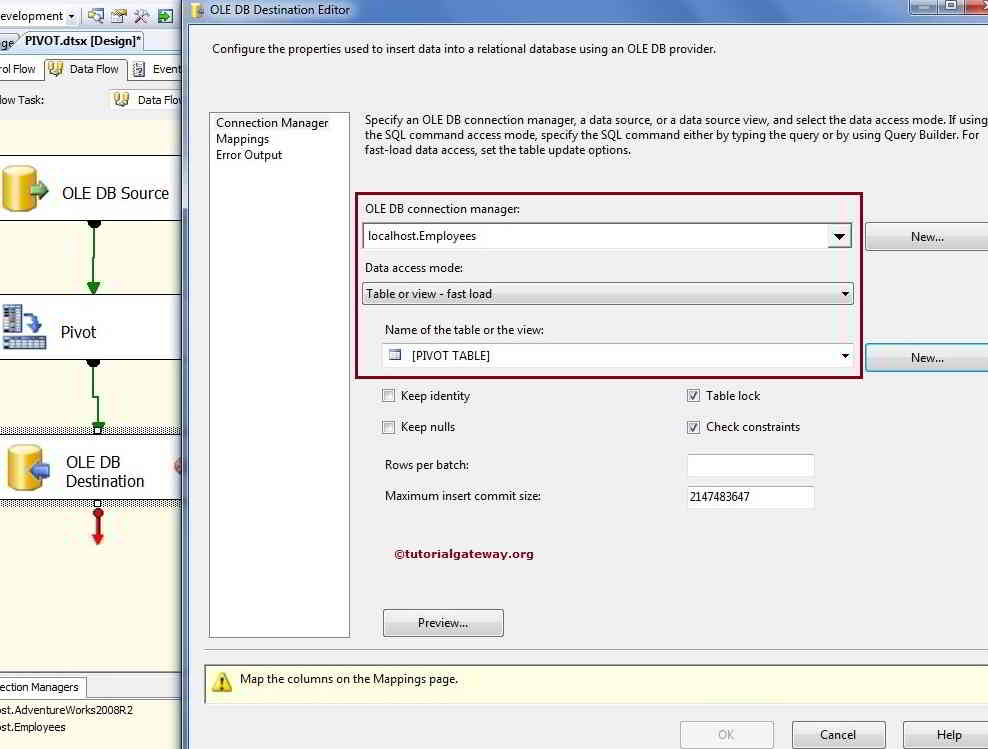
Here, we selected the Employees database as our destination database and [Pivot table] as our destination table.
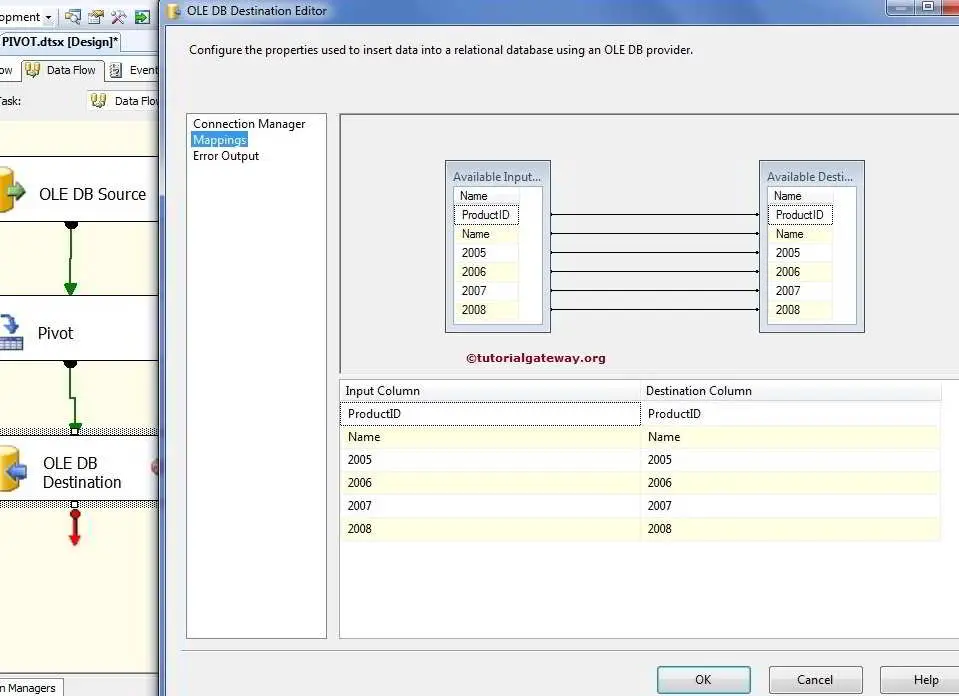
Click on the Mappings tab to check whether the source columns are exactly mapped to the destination columns.
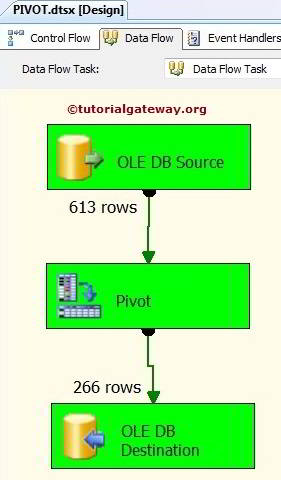
Click OK to finish designing the Pivot Transformation in SSIS 2008 R2 package. Let us run the package.
Let’s open the SSMS and check the Pivot Transformation 2008 results.

Comments are closed.