The UNPIVOT Transformation in SSIS is used to convert the DE Normalized data into a more normalized version, which is similar to SQL UNPIVOT. The UNPIVOT Transformation acts precisely opposite to Pivot.
Please refer to the Pivot Transformation article to understand How to Convert Normalized data to DE Normalized data.
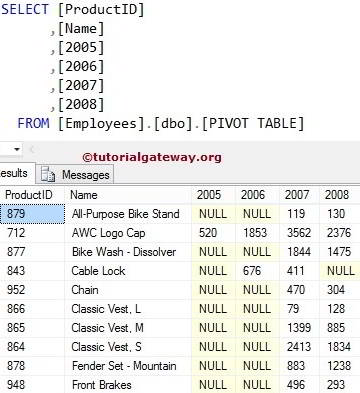
Consider the below data as our SSIS unpivot transformation source data.
UNPIVOT Transformation in SSIS Example
In this SSIS UNPIVOT Transformation example, we will convert the Pivot table present in the Employees database into a regular table.
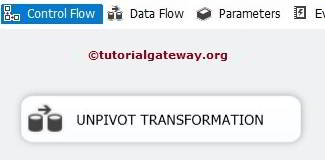
STEP 1: Open BIDS and Drag and drop the data flow task from the toolbox to control flow. Rename it as UNPIVOT Transformation.
Double click on it will open the data flow tab. For more Transformations >> Click Here.
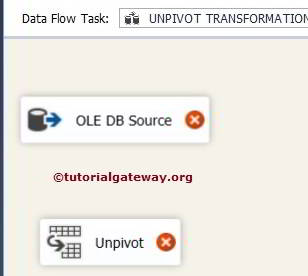
STEP 2: Drag and drop OLE DB Source, UNPIVOT Transformation from the toolbox to the data flow region, as shown in the figure.
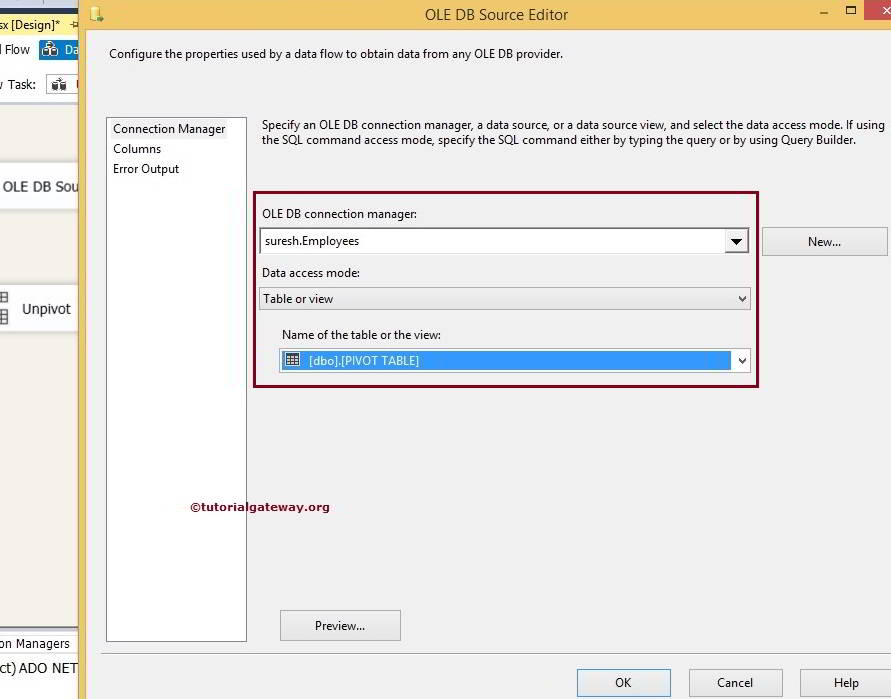
STEP 3: Double-click on the SSIS OLE DB source in the data flow region to open the connection manager settings. It provides space to write our SQL statement. In this example, we will use the PIVOT Table in the Employees Data Base as our source.
STEP 4: Click on the columns tab to verify the columns. In this tab, we can uncheck the unwanted columns.
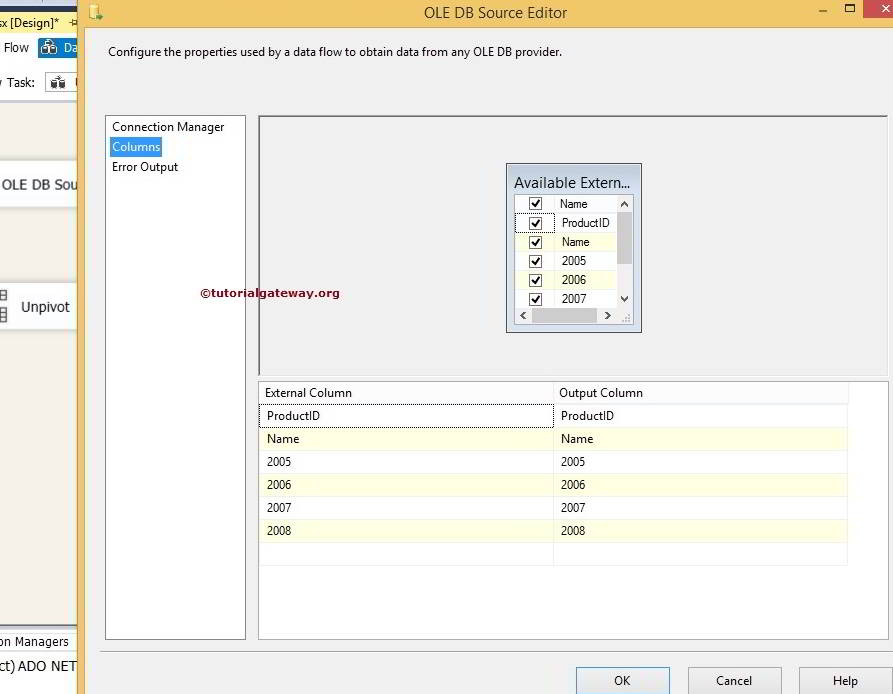
Here, we are selecting ProductID, Name, 2005, 2006, 2007, and 2008
Click ok and drag the blue arrow from the OLE DB Source to UNPIVOT Transformation to perform transformations on the source data.
STEP 5: Double click on the SSIS UNPIVOT Transformation to configure it.
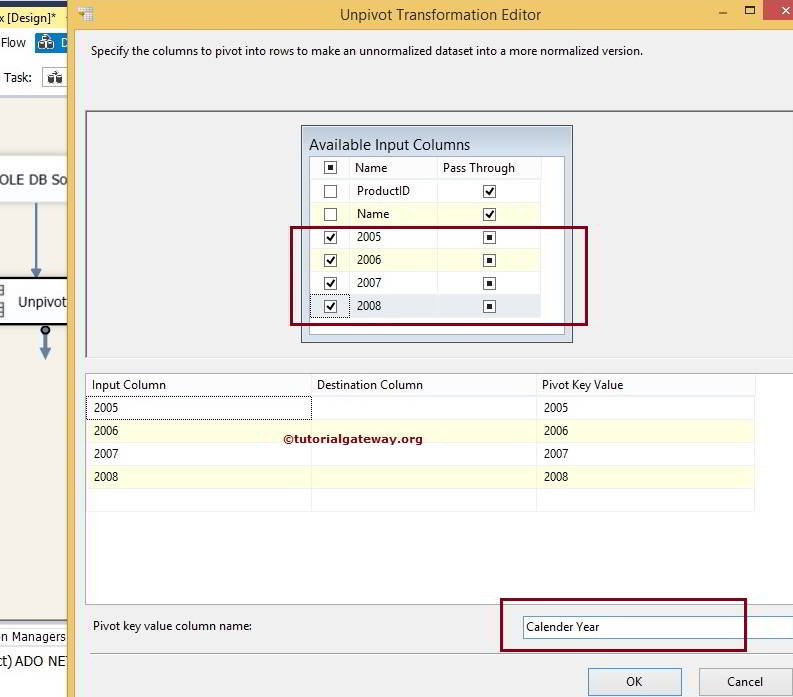
- Available Input Columns: Select the columns you want to UNPIVOT by checking the checkboxes. Don’t forget to select the Pass Through option for the remaining columns. If you miss selecting the Pass Through option, those columns will not be available for the destination. In this SSIS Transformation example, ProductID and Name columns are Pass Through columns, and 2005, 2006, 2007, and 2008 are the columns we want to UNPIVOT.
- Input Column: All the selected columns in the Available Input Columns Option are automatically added to this section. So, the 2005, 2006, 2007, and 2008 columns are the Input Columns.
- Destination Column: Specify the name of the destination column where you want to store the values. Or data inside the Input Columns such as 2005, 2006, 2007, and 2008.
- Pivot Key Value: Specify the name for the pivot value, and these values are stored as column values inside the Calendar Year column (Pivot Key Value Column Name). The default value is the same as the input column. However, you can change as you like. We are okay with the 2005, 2006, 2007, and 2008 values, so we haven’t changed these values.
- Pivot Key Value Column Name: Specify the name you wish to see for the pivot value column. Since our column data is 2005, 2006, 2007, and 2008, we changed the default Pivot Key Value to Calendar Year.
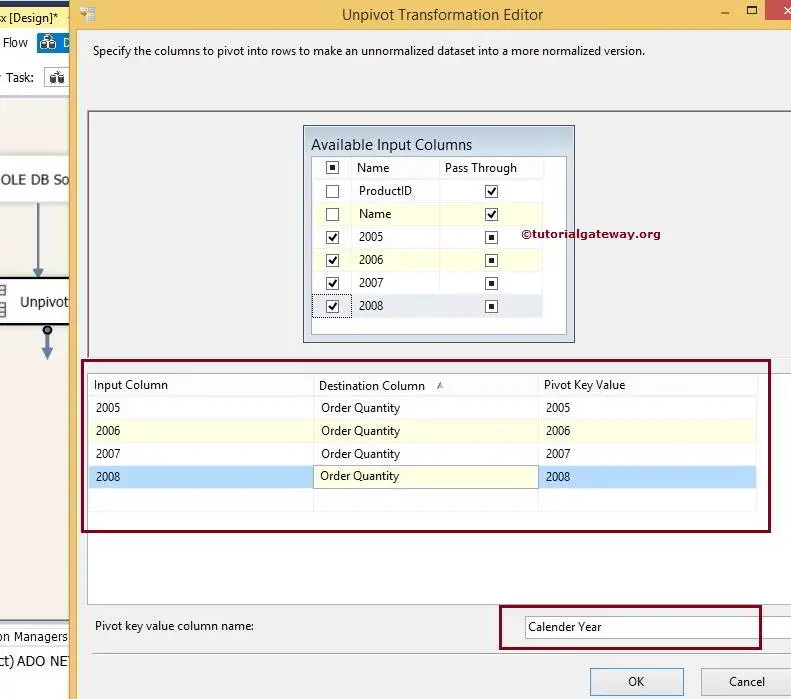
In this SSIS unpivot transformation example, we named the destination column Order Quantity and Pivot Key-value column name as Calendar Year.
STEP 6: Now, we have to provide the Server, database, and table details of the destination. So, double-click on the OLE DB Destination and provide the required information.
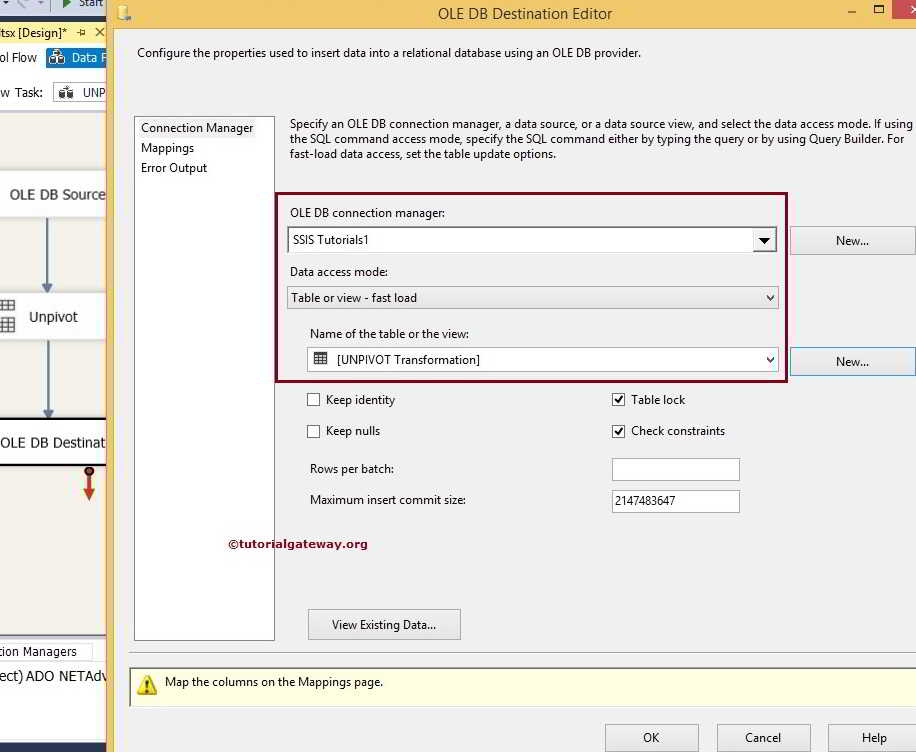
Here, we selected the database as our destination database and the [UNPIVOT Transformation] table as our destination table.
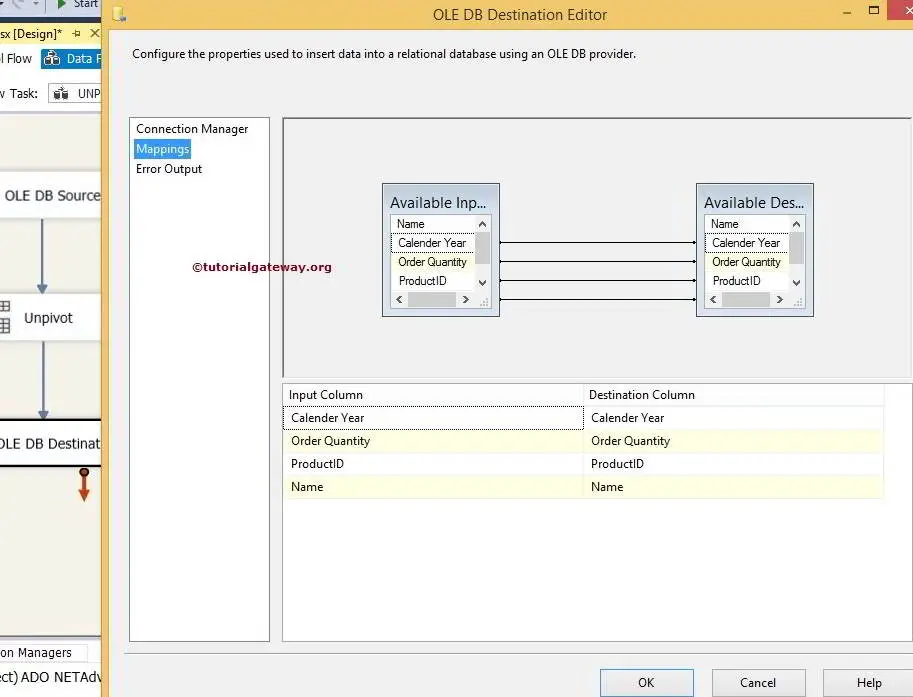
STEP 8: Click on the Mappings tab to check whether the UNPIVOT Transformation source columns are exactly mapped to the destination columns.
Click ok to finish our package designing UNPIVOT Transformation in SSIS. Let us run the package.

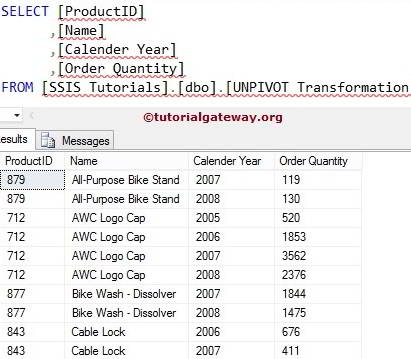
Check the UNPIVOT Transformation results in the Management Studio.
Comments are closed.