Let us see the step-by-step approach to backup SQL Database using the Management Studio and transact Query. For this demonstration, we are going to use Adventure Works.
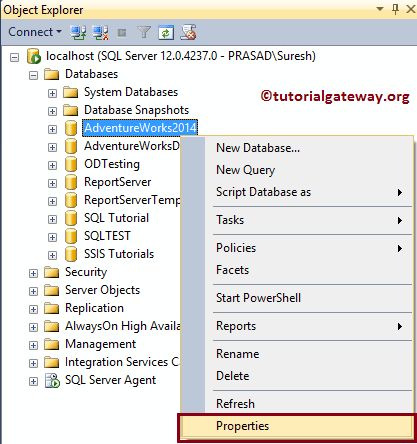
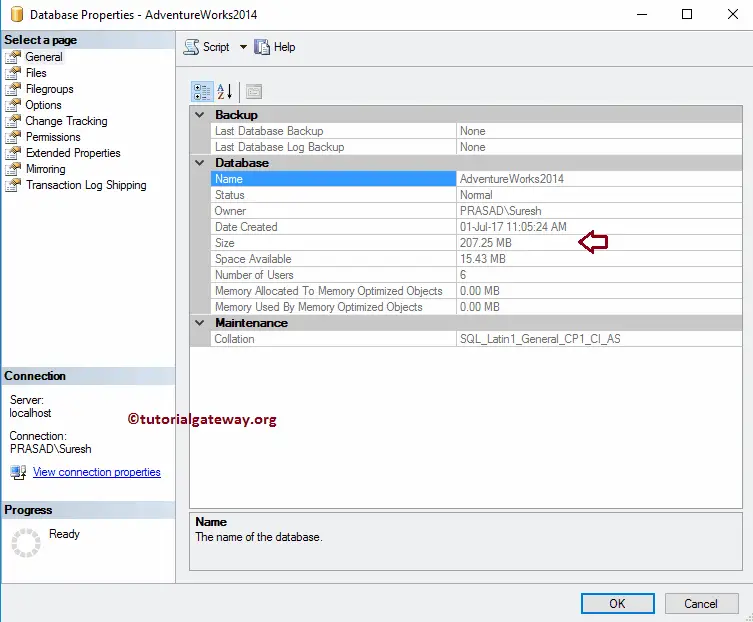
Before we start performing the SQL Server backup, let me show you the actual size of a database. For this, right-click on the Server Adventure Works Database, and select the properties.
It is 207.25 MB. Use this properties window to check the Permissions as well.
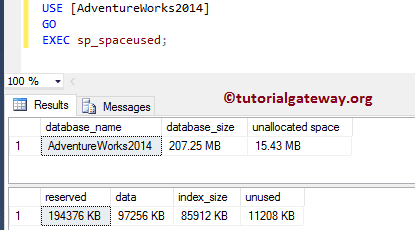
Or you can use this Stored Procedure to check the database size.
USE [AdventureWorks2014]
GO
EXEC sp_spaceused;
Backup SQL Database using transact query
The following examples will help you understand the steps involved in creating database backup files to the file system using the transact queries.
Backup SQL Database to Default Location
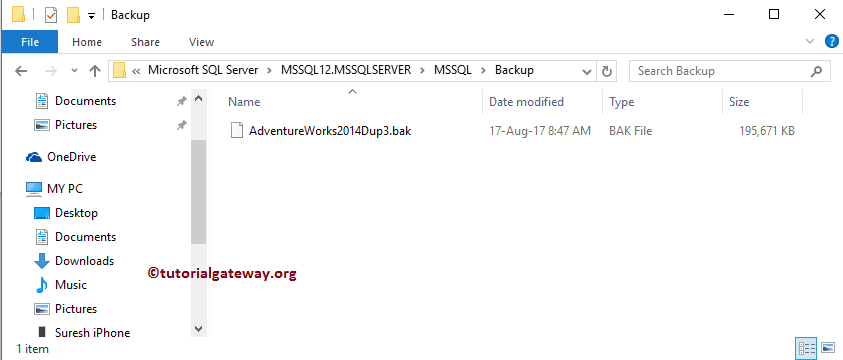
This example will create a backup file to the file system at the default location. And the location is C:\Program Files\ Microsoft …..\Backup. Here, the path may be different for you. It all depends upon the Version and installed location.
BACKUP DATABASE AdventureWorks2014
     TO DISK = 'AdventureWorks2014Dup3.bak'
GO
The above query runs successfully. Please open the local hard drive to see the file.
Backup DB to Custom Location
This example will create a SQL database backup to the Windows file system. Here we are going to use the custom location. Please change the location as per your requirements.
BACKUP DATABASE AdventureWorks2014
     TO DISK = 'D:\1 BACKUPS\AdventureWorks2014Dup4.bak'
GO
See the file in the D folder.

Differential Backup to Custom Location
This example will create a differential backup of the SQL database, and save that bak to the file system custom location.
BACKUP DATABASE AdventureWorks2014
     TO DISK = 'D:\1 BACKUPS\AdventureWorks2014_Differential.bak'
GO
Processed 40 pages for 'AdventureWorks2014', file 'AdventureWorks2014_Data' on file 1.
Processed 1 pages for 'AdventureWorks2014', file 'AdventureWorks2014_Log' on file 1.
BACKUP DATABASE WITH DIFFERENTIAL successfully processed 41 pages in 0.197 seconds (1.625 MB/sec).
See the differential backup database file in the D folder.

Backup Database Using SQL Server Management Studio
Right-click on Adventure Works, select the Tasks option, and then select the Back Up.. option.
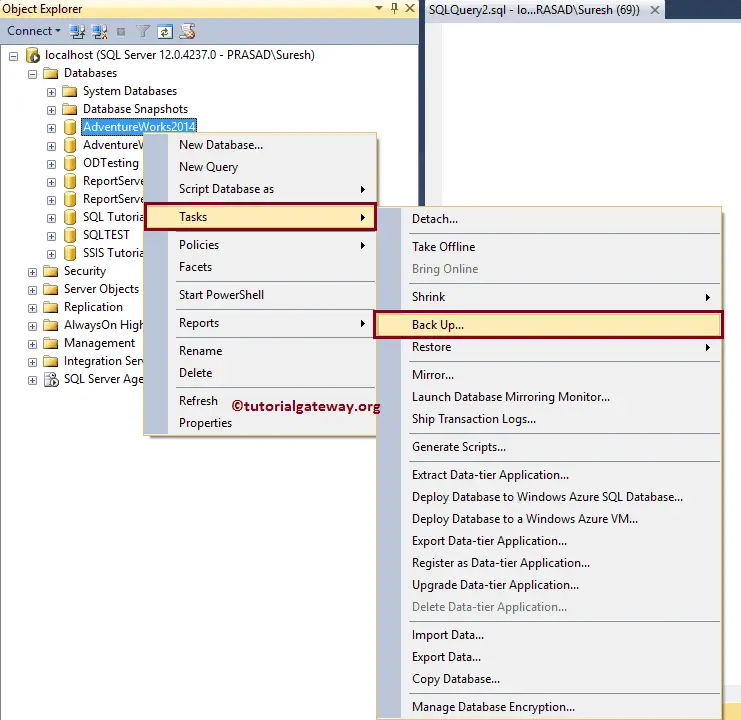
Once you select the Back Up.. option, a new window called Back Up database will open.
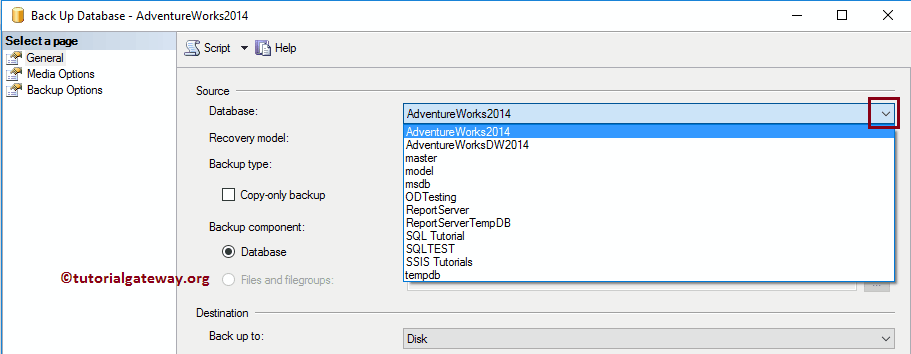
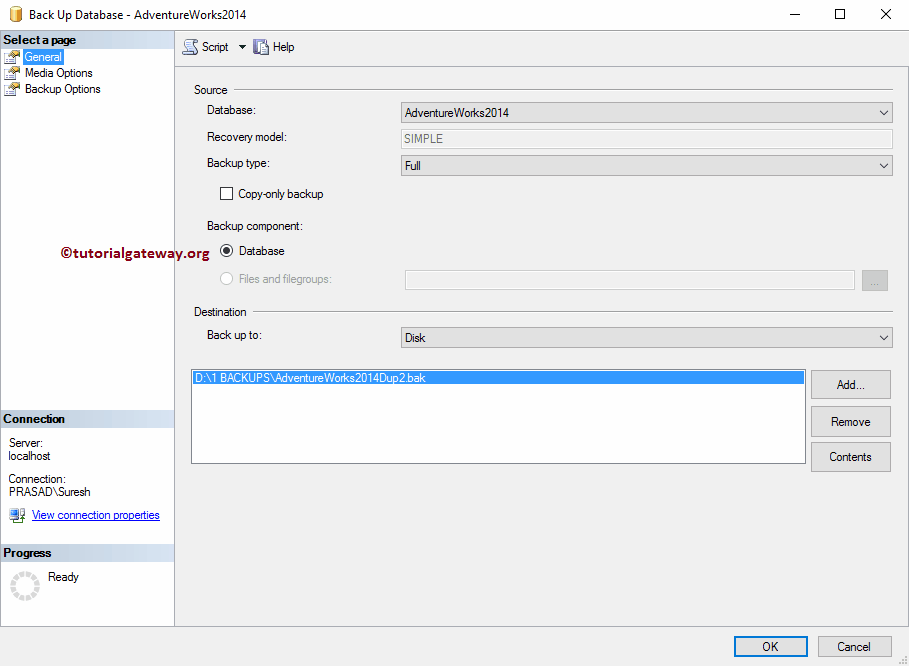
Database: You can use the drop-down list to change the DB that you want to backup at any point in time.
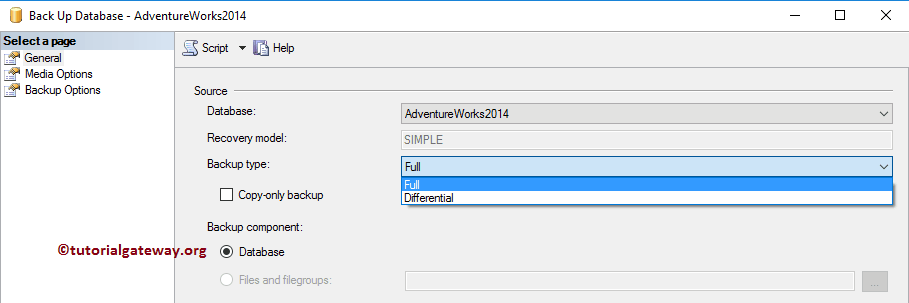
Type: There are two types of SQL Database Backups, and they are Full and Differential. For now, we are selecting the Full.
Back up to: This property has two options: Disk and URL. It means you can save the bak file in either URL (Company Websites), or DISK. For now, we are leaving the default Disk.
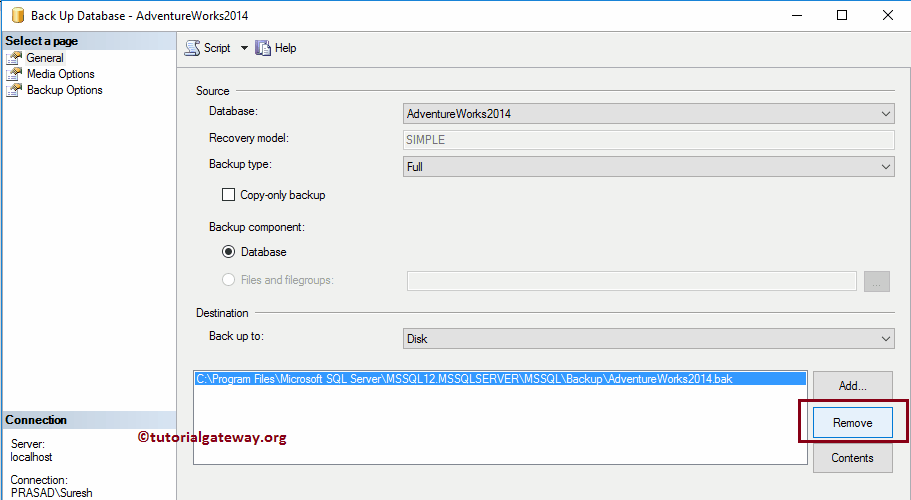
As you can see, SSMS automatically provided the default path as the location to save the bak file. You can use Add, and Remove buttons to add a new path and remove the existing path. First, let me remove the default path by selecting the path and clicking the Remove button.
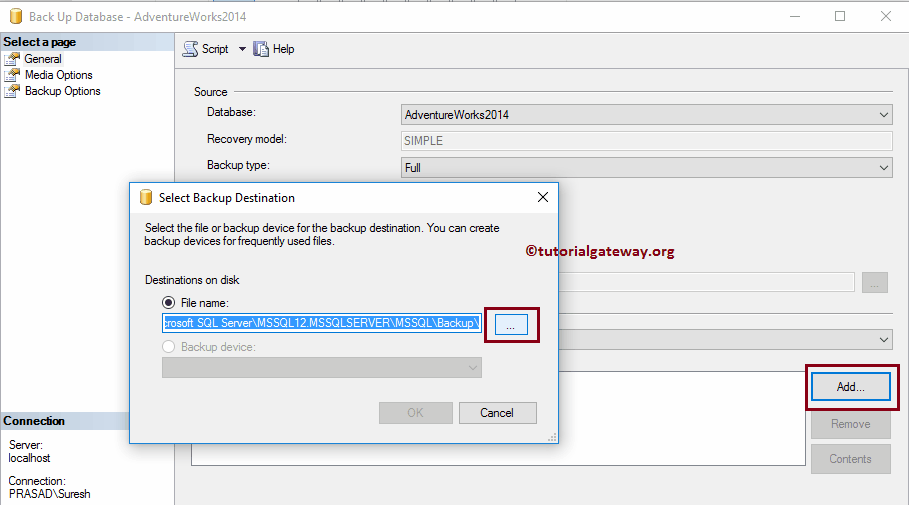
To add a new path, please click on the Add button. By clicking that button, a new window will open. By default, it is pointing to the default SQL Server Database Backup path. Click on the … button to change the destination location.
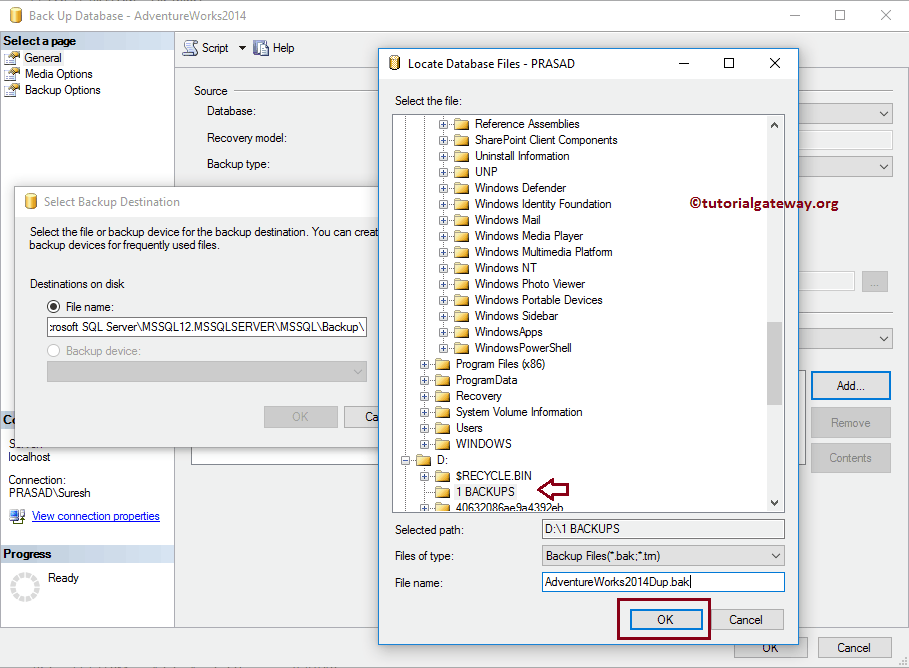
We are selecting the D drive -> 1 BACKUPSFolder -> AdventureWorks2014Dup as the file name
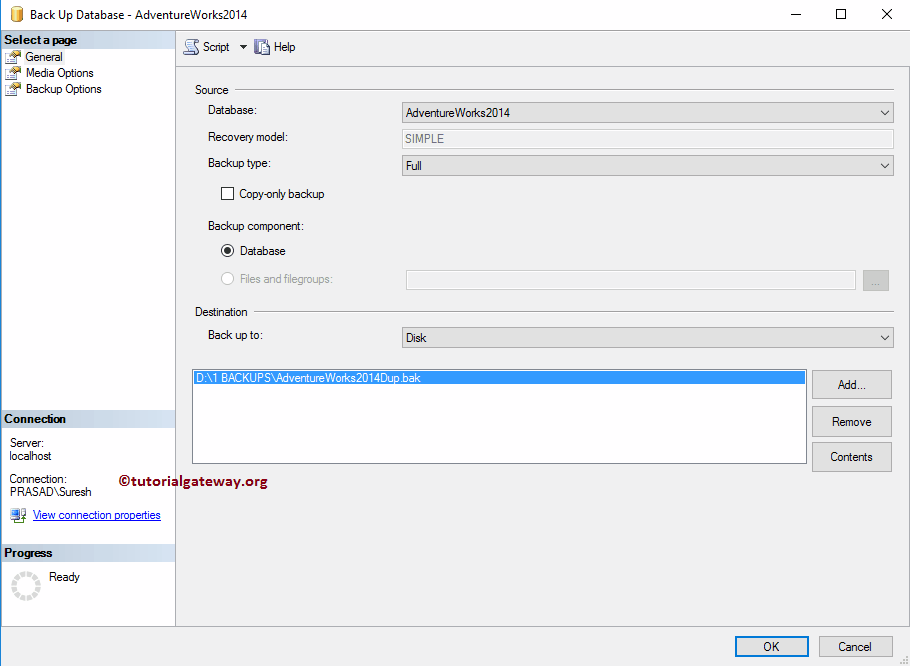
Please cross-check all the fields before we proceed to the next tab.
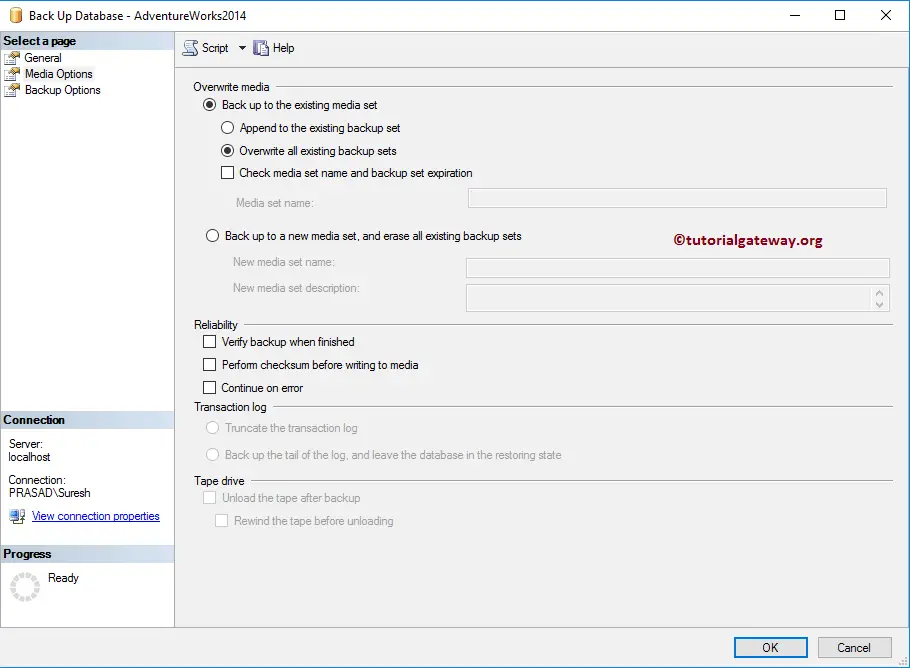
Media Options: Under the Overwrite media section, please change the backup to the existing media set option from Append to the existing set to overwrite all existing ones.
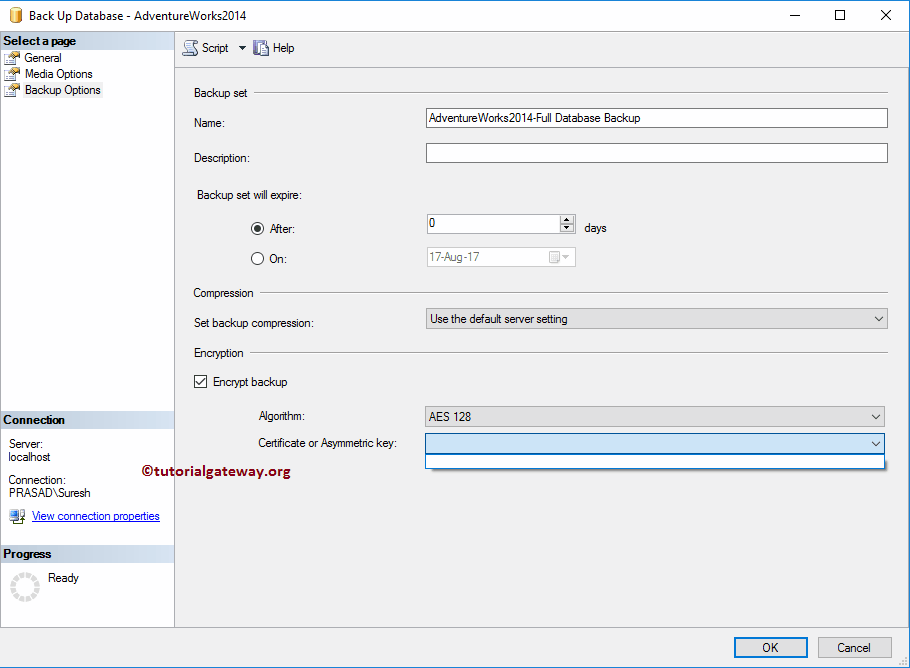
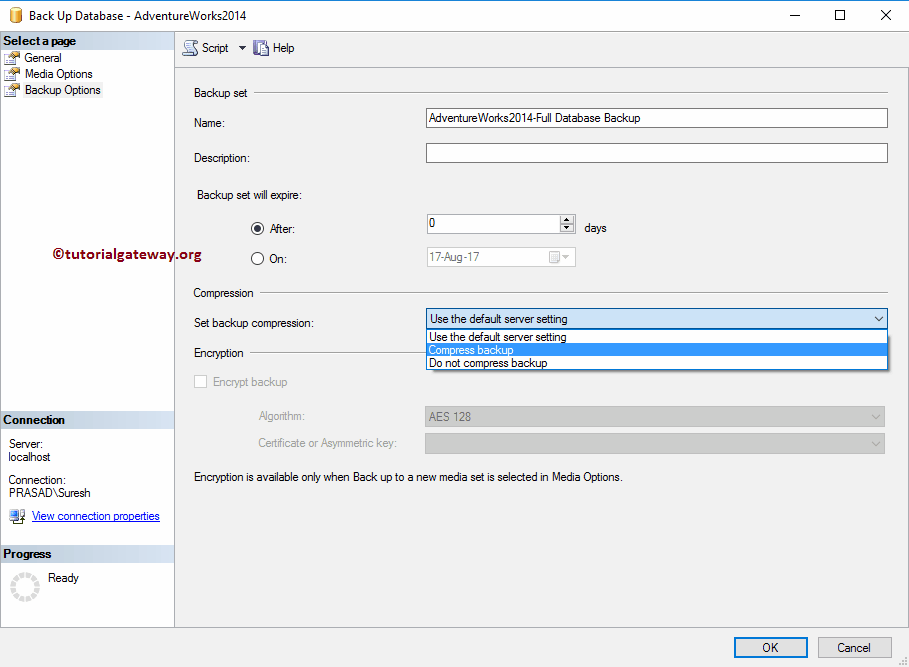
Options: Use this tab, to set the expiry date and time, or to encrypt the bak with custom certificates. If your database size is huge, please select the Compress backup option.
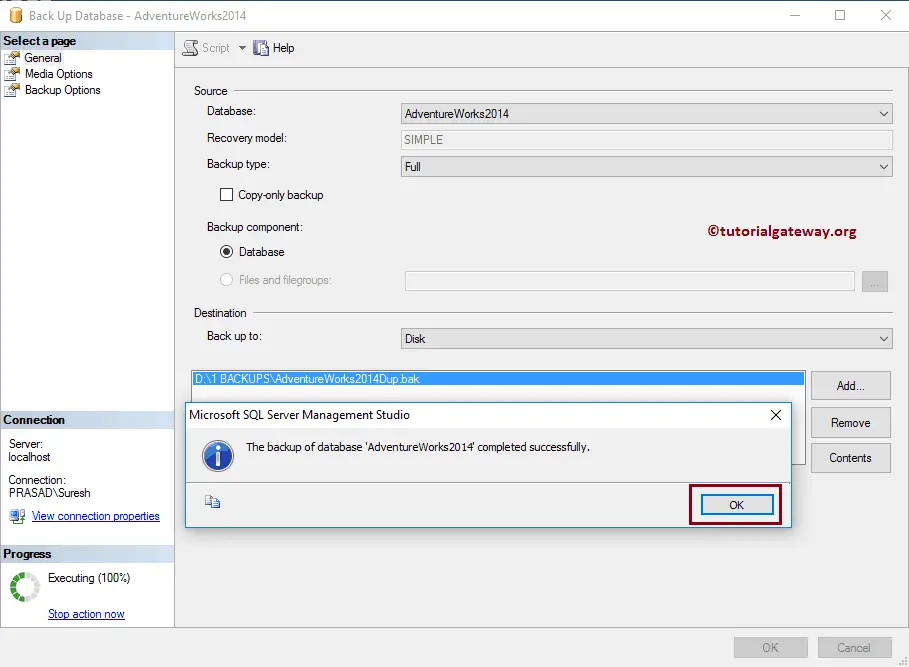
Please click OK to create the Database backup file bak.
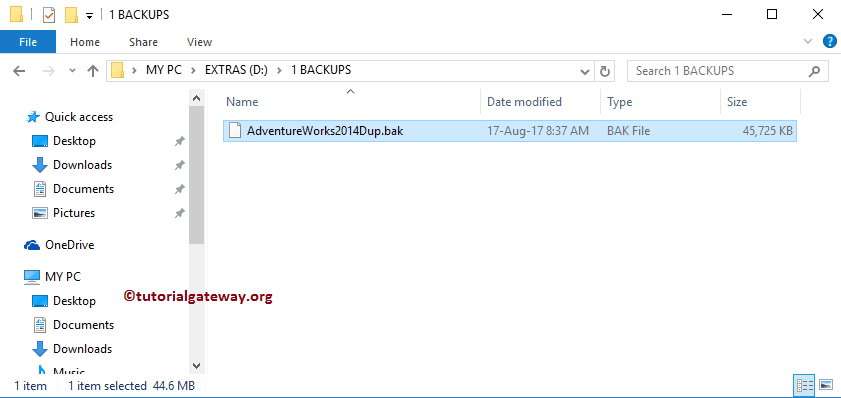
Let me open the folder to see the bak file.
Create an Encrypt Backup of SQL Database
First, let me change the Destination folder and file name to AdventureWorks2014Dup2.
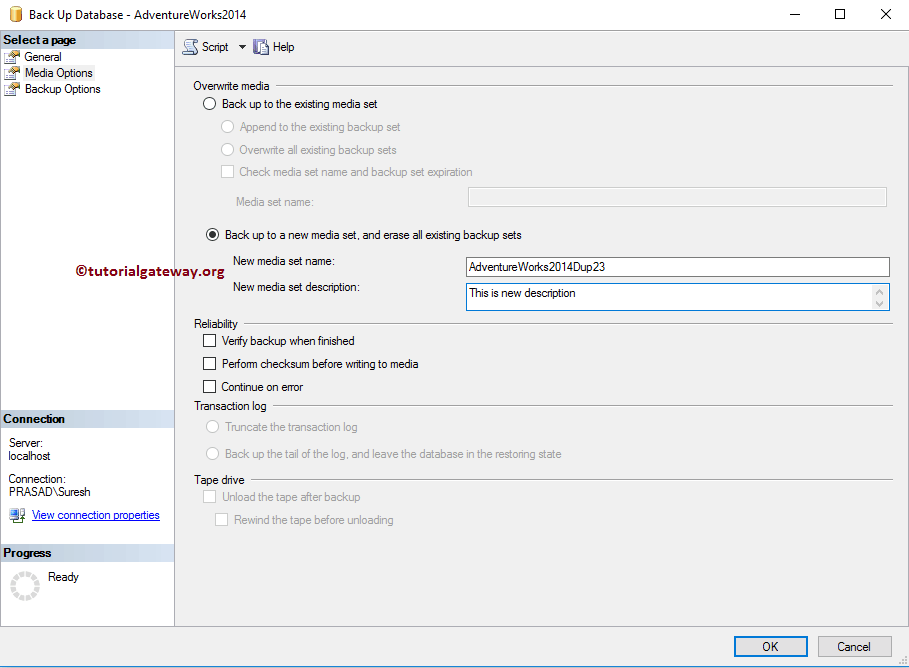
Media Options: To create an encrypted Database backup, you have to select the Back up to a new media set and erase all existing sets option.
- New Media set name: Name of the bak file.
- New media set description: A valid description.
Options: Under the Algorithm property, you can select the Algorithm. We are choosing the AES 256 algorithm.
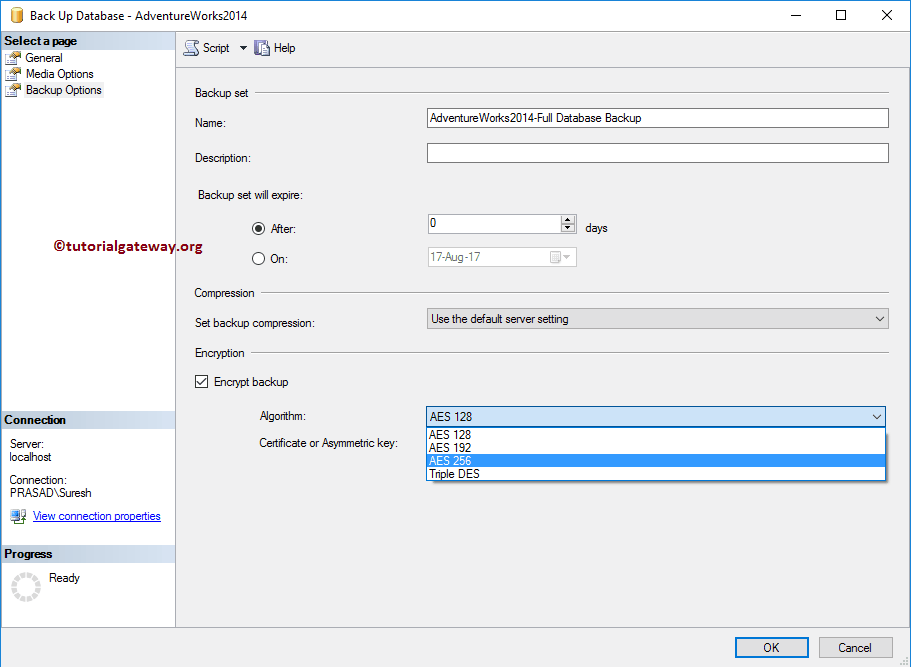
Currently, we don’t have certificates; that’s why it is showing empty. But in real-time, you might have a few certificates to select. Next, click OK to close the backup database window.
