SSIS Data Conversion Transformation is similar to SQL function CAST or CONVERT. So, if you wish to convert the data from one datatype to another, then SSIS Data Conversion is the best bet. But, please ensure that you have compatible data in the column, and don’t forget to change the column length for Varchar and NVarchar datatypes.
Here, we will Export data present in the DimProducts Excel Worksheet to the SQL Server database table by converting the data type from DT_NTEXT to DT_WSTR using SSIS Data Conversion.
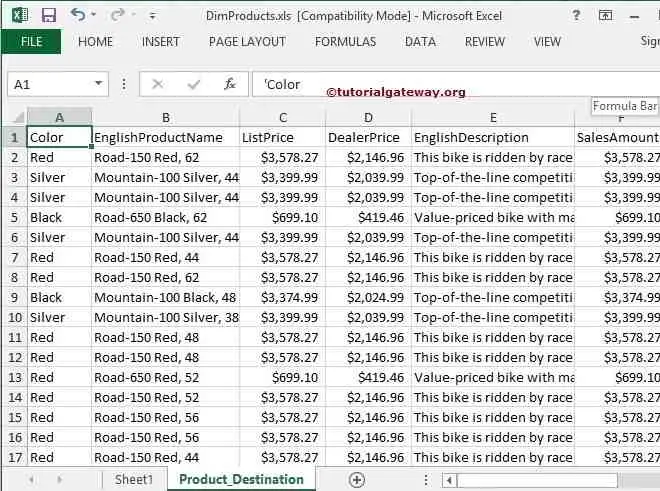
The below image shows the records present in the DimProducts Excel file.
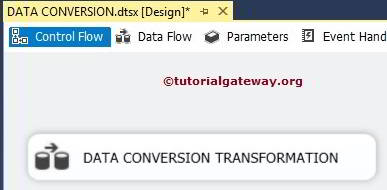
SSIS Data Conversion Transformation Example
STEP 1: Drag and drop the data flow task from the toolbox to control flow and rename it.
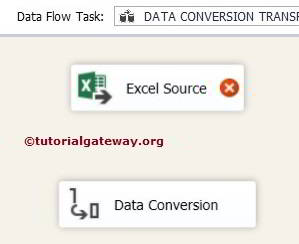
Double click on it, and it will open the data flow tab. Next, drag and drop EXCEL Source and SSIS Data Conversion Transformation from the toolbox to the data flow region.
Please refer to CAST and CONVERT in SQL Server. For more Transformations >> Click Here.
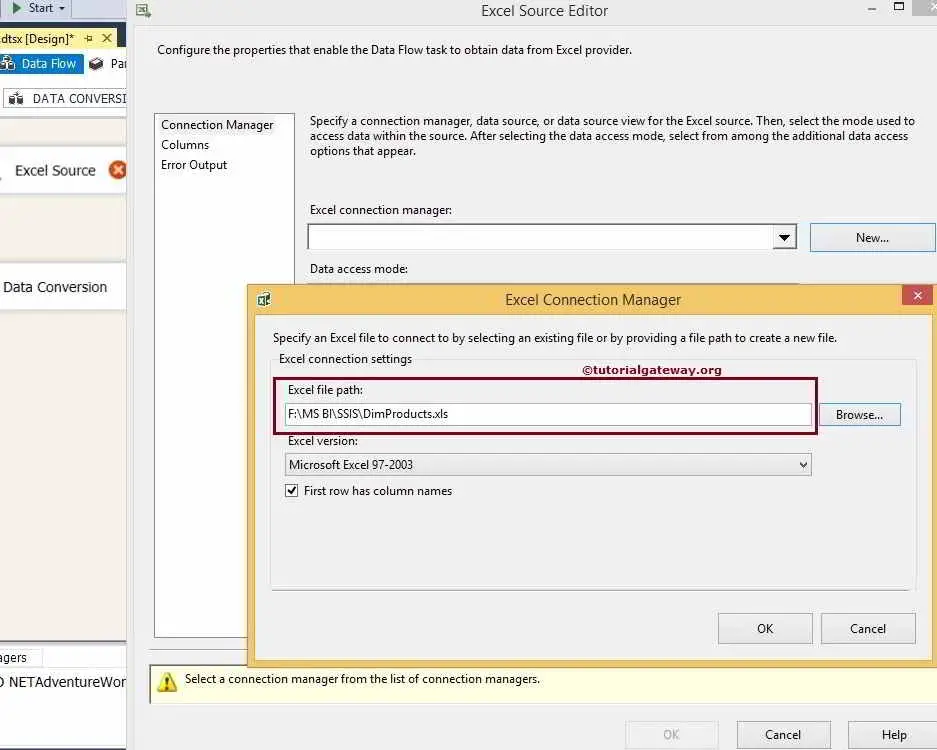
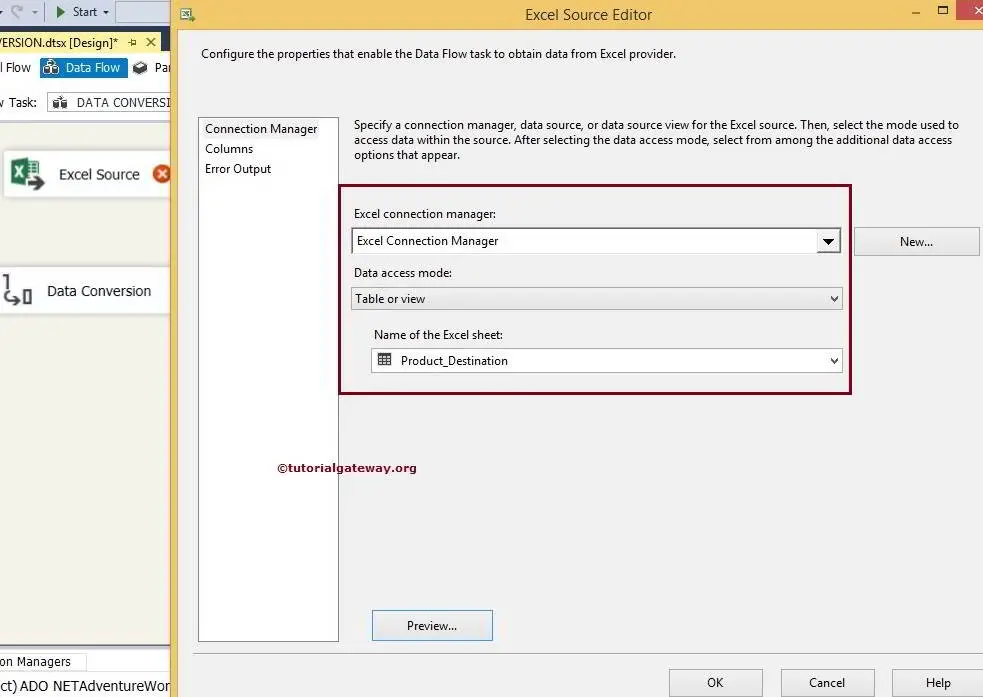
STEP 3: Double-click on the Excel source in the data flow region to open the connection manager settings. It provides an option to select the table holding the source data. We are selecting the DimProducts.xls file present on our local hard drive.
We are choosing the Product Destination table present in DimProducts.xls.
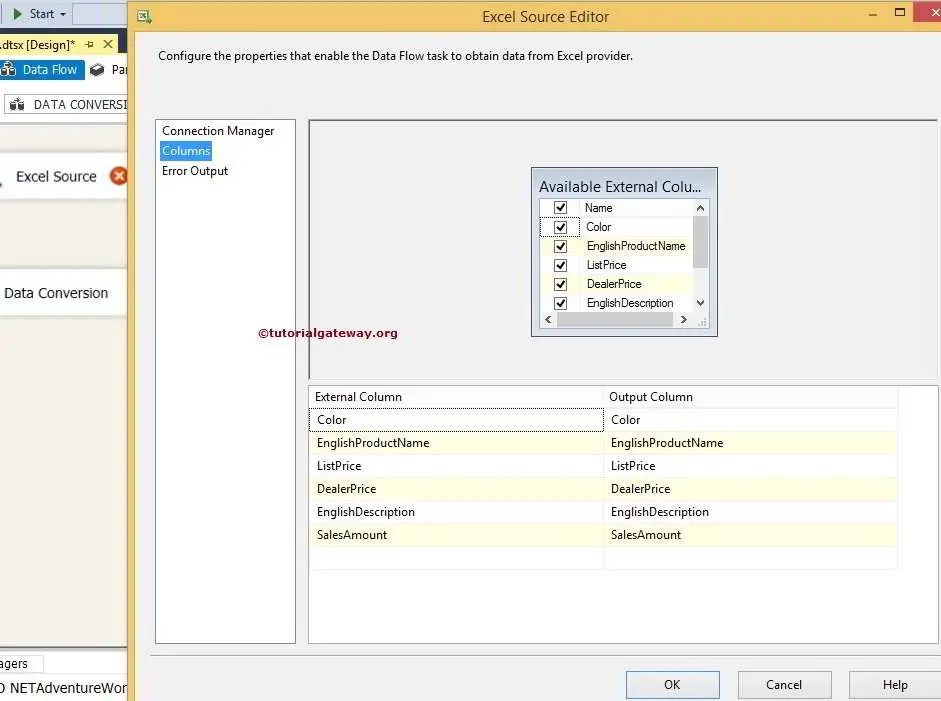
Click on the columns tab to verify the columns. In this tab, we can uncheck the unwanted columns also.
Click ok and drag the blue arrow from Excel Source to SSIS Data Conversion Transformation. It will allow the transformation to use the source data.
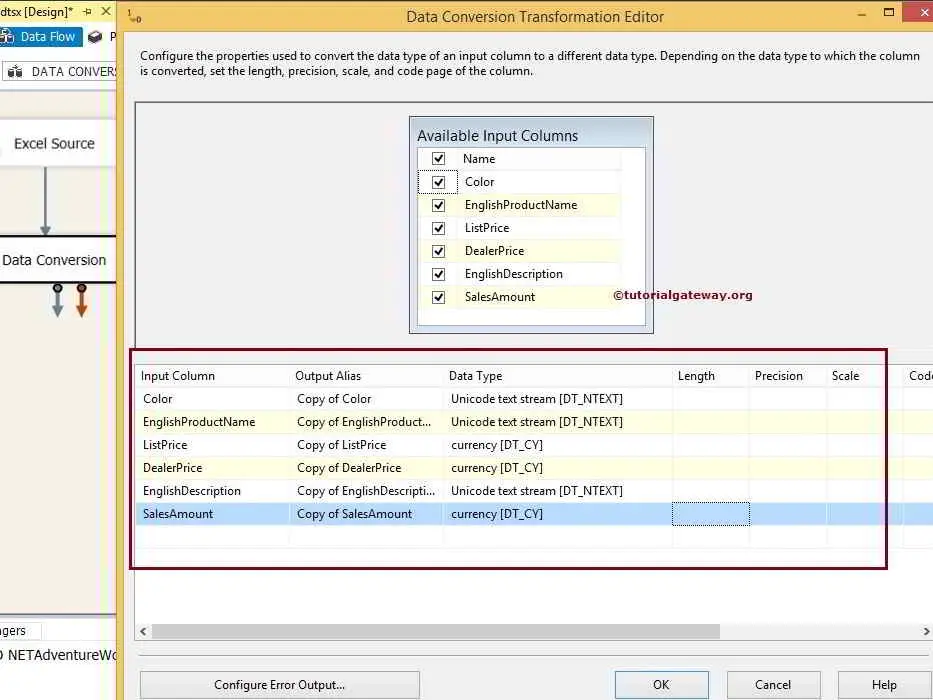
STEP 5: Double click or right-click on the Data Conversion Transformation to edit and convert our source column’s datatype to the required datatype with length. Similarly, you can convert int to string.
We use the table description for the SSIS data conversion destination table.
CREATE TABLE [dbo].[DimProduct]
(
 [ProductKey] [int] IDENTITY(1,1) NOT NULL,
 [EnglishProductName] [nvarchar](50) NOT NULL,
 [Color] [nvarchar](50) NOT NULL,
 [ListPrice] [money] NULL,
 [DealerPrice] [money] NULL,
 [EnglishDescription] [nvarchar](400) NULL,
 [SalesAmount] [money] NOT NULL,

 CONSTRAINT [PK_DimProduct_ProductKey] PRIMARY KEY CLUSTERED
 (
  [ProductKey] ASC
 )
)
GO
We must change our data types before transferring data to the destination table to match Excel columns with the destination table.
NOTE: It is always necessary to convert data types during the transfer from Excel to the SQL server database.
STEP 6: Change the data type from DT_NTEXT to DT_WSTR, and don’t forget to change the length.
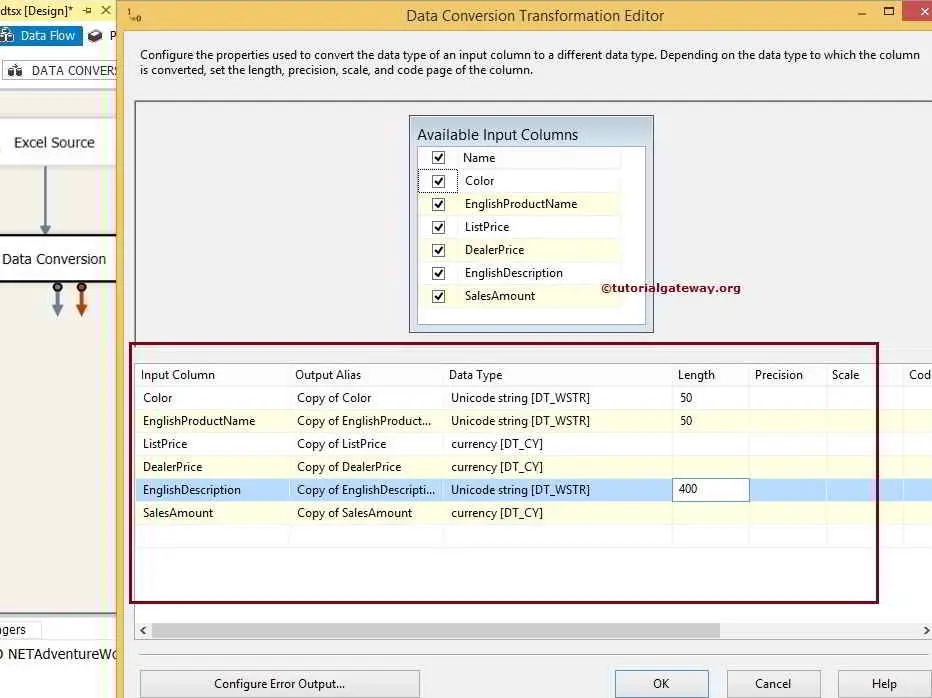
Most of the time, intelligence automatically changes the data type. However, sometimes we have to do it on our own. Click ok
STEP 7: Now, we have to provide the Server, database, and table details of the destination. So, double-click on the OLE DB Destination and provide the required information.
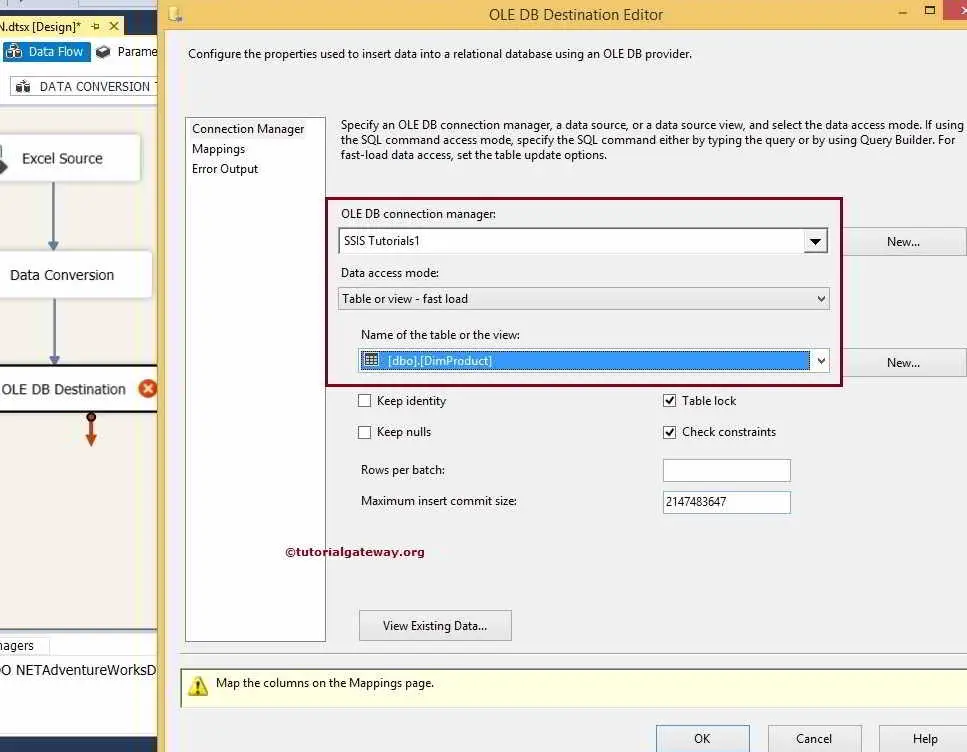
STEP 8: Click on the SSIS Mappings tab to check whether the source columns mapped precisely to the destination columns.
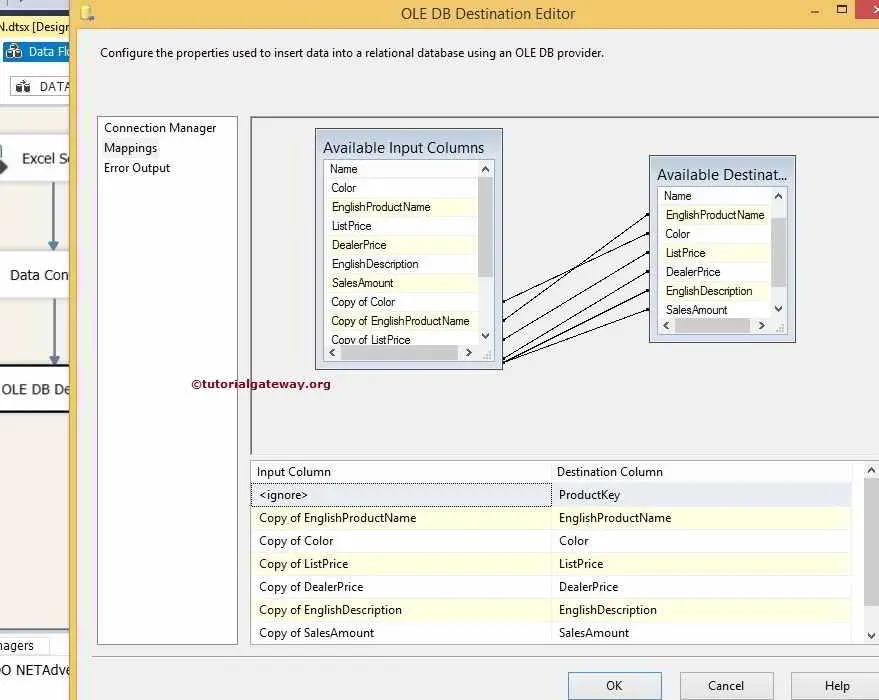
If you forget the conversion, it will fail because of the data conversion from DT_NTEXT to DT_WSTR. Let’s map the correct columns and click OK to finish our SSIS Data Conversion package design. Let us run the package.
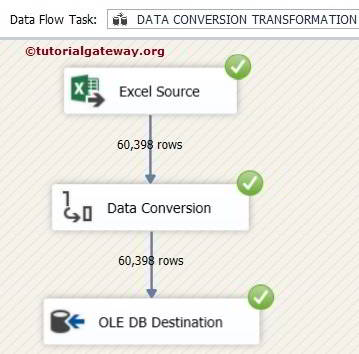
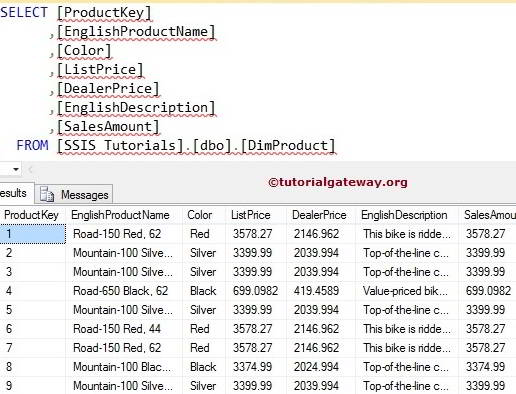
Check the results
Comments are closed.