The Cache Connection Manager in SSIS is used in the Cache Transformation. Lookup Transformation uses this connection manager to perform lookup operations using the cache file.
Cache Connection Manager in SSIS performs 2 operations:
- Cache Connection Manager reads data from the Cache Transformation. And then saves the data in the cache file with an extension of .caw.
- This Transformation reads data from the cache file using Cache Connection Manager.
Please refer to the Lookup Transformation in Full Cache Mode article to understand how to use the Cache file in Lookup Transformation in SSIS.
Configuring Cache Connection Manager in SSIS
In this example, we are going to show how to create or configure Cache Connection Managers in SSIS.
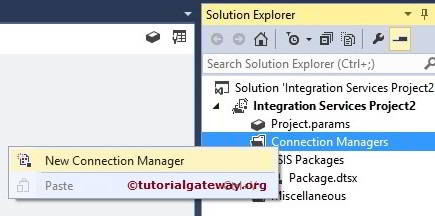
Once you create a new Project, If you look at the Solution Explorer, we have three folders. For now, let’s concentrate on the Connection Managers Folder.

Right-click on the Connection Managers folder present in the solution explorer. Next, select the New Connection Manager option from the context menu.
When you click on the New option, an Add SSIS Connection Manager window opens to select the CACHE connections managers from the list.
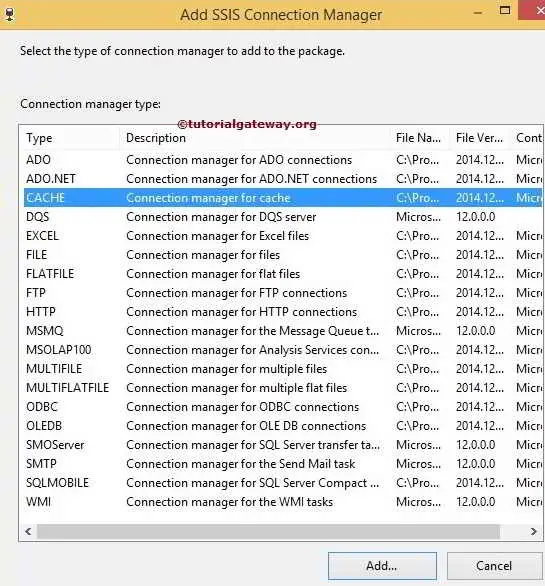
Here we selected the SSIS. Cache connection manager from the list. Once we selected it, another Cache Connection Manager Editor window opened to configure the Cache connection manager.
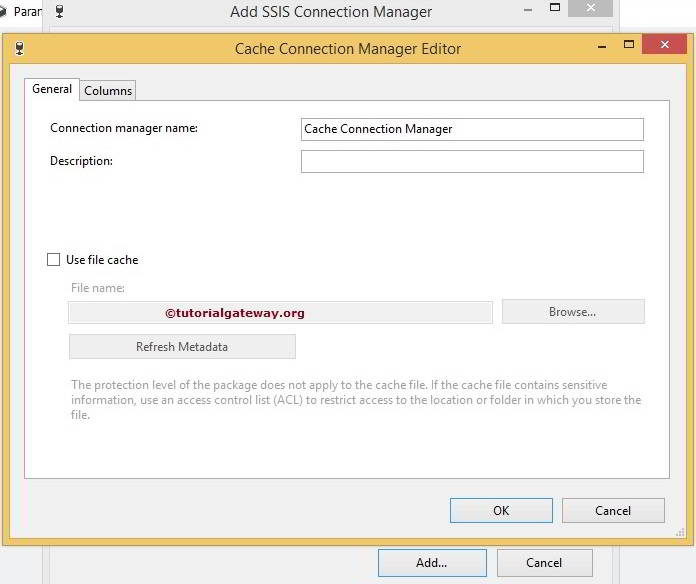
General Tab
The general tab in the SSIS Cache Connection Manager Editor box provides an option: whether you want to save the data into a cache file. Or you want to read the data inside the cache file. Following are the options available in the general tab
- Connection manager name: Please provide the name for the Cache Connection Manager as per the company requirements.
- Description: Please describe the connection. This information will be useful for others to understand what this cache connection is doing.
- Use file cache: Please check mark this option to use the cache file. If you checkmark this option, the browse button and the file box will be opened to browse the required file.
- File name: The Cache File path and the file name will be displayed here. (Or address of the cache file)
- Browse: Once you click on this button, it will open a new window to select the required file name. Either you can choose the already existing cache file, or else you can create a new cache file.
- Refresh Metadata: Deletes the old metadata of the columns and then regenerates new metadata.
From the below screenshot, you can observe that we changed the Name and Description of the Cache Connection Manager. Now, Click on the Browse button to select the Cache file.
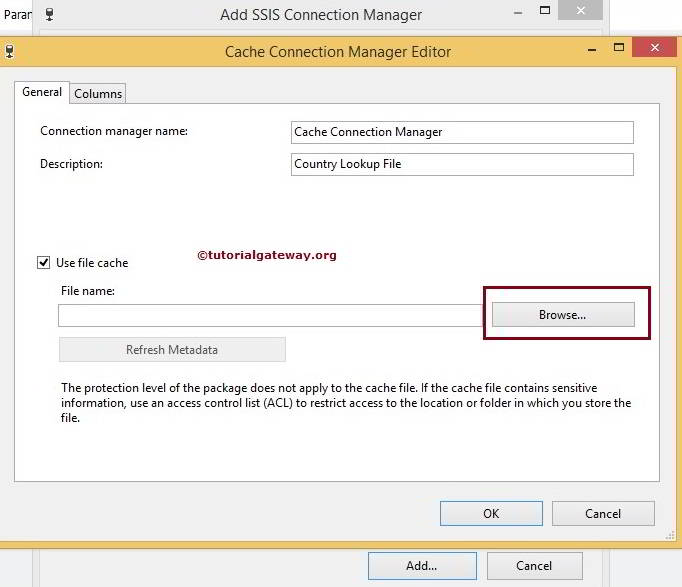
Once you click the Browse button, a new window will open to select the existing cache file or create a new one.
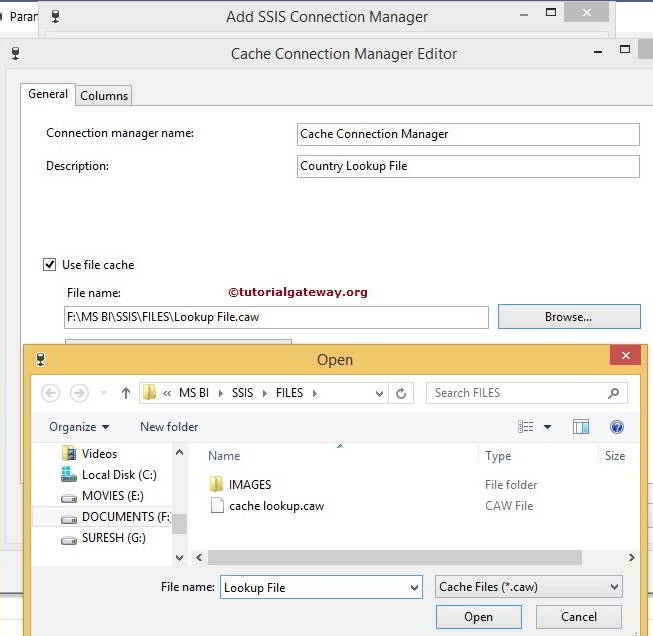
We already have one cache file in the folder from the above screenshot. To create a new one, type the name of the file at Filename as we did above (Lookup File). It will create a new cache file.
Now, Let us see how to select the existing file.
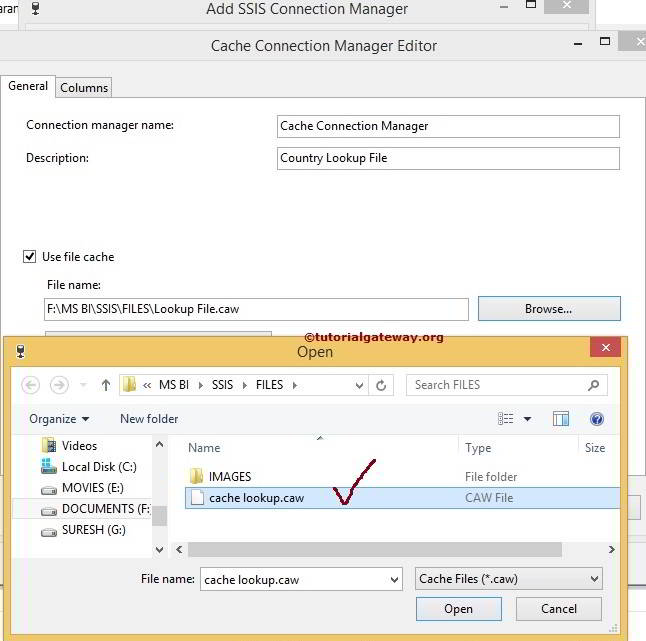
Click on the open button to select the cache lookup.caw file.
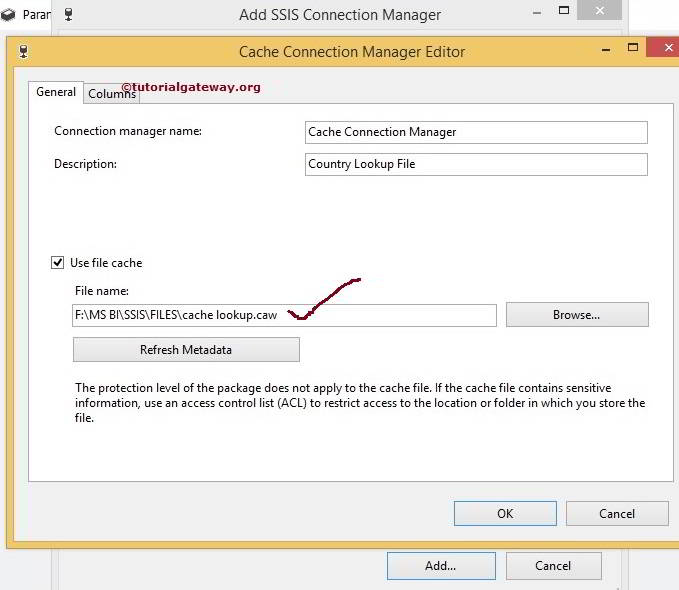
We finished selecting the existing cache file using the SSIS cache connection manager. Now, we have to configure the column tab.
Index Position: We have to specify the index position of each column present in the cache file. The index position will be 0 for all the non-index columns. For all the index columns, an index position is a positive number.
It is the most important property for the Lookup Transformation because Lookup Transformation will perform the lookup on the columns with a positive index. For this example, the Country Name column has unique values. So, we changed the index position to 1 for this column.
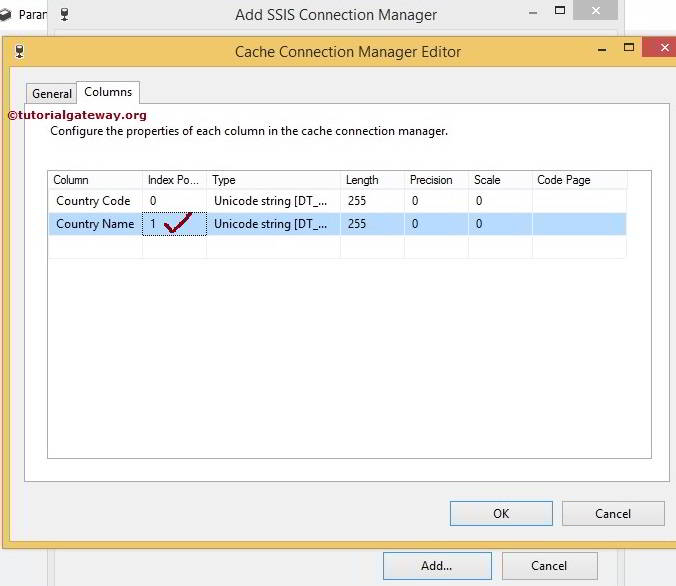
Click the ok button to finish configuring the SSIS Cache Connection Manager.
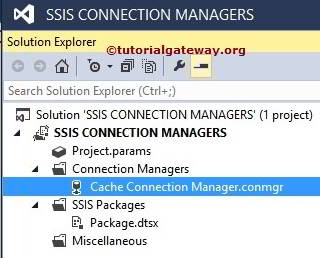
We successfully created a Cache Connection Manager in SSIS from the above image.
