
In this article, we will show you how to import data from flat files of both the Delimited type and Fixed Width type and use them as Flat File source in Informatica Source Analyzer.
Before we start importing data from the flat file into Informatica, let us see the data inside the flat file source. The following screenshot will show you the same, and our task is to import this Comma-delimited text file as the Flat File Source.

Flat File Source in Informatica
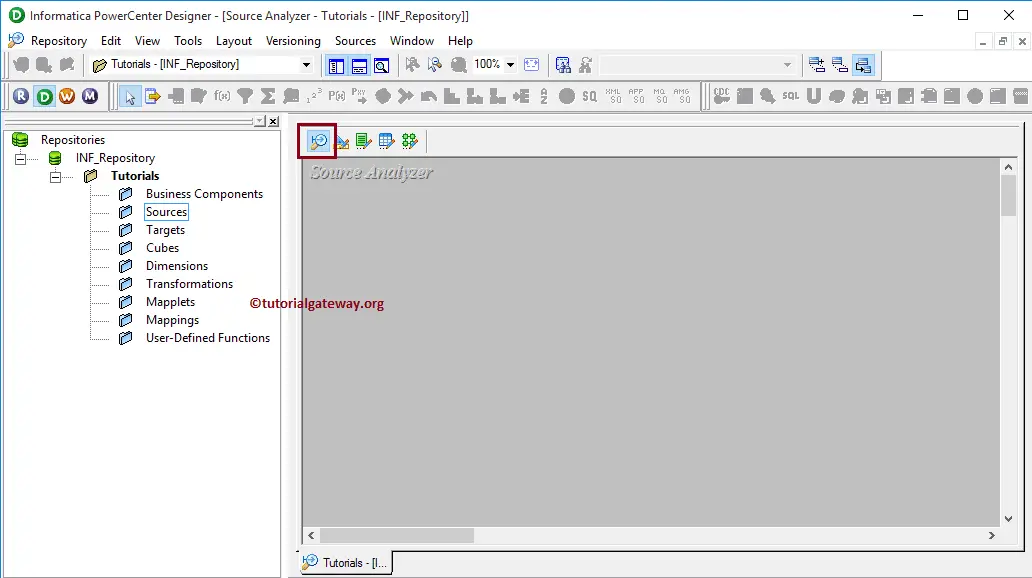
Before we start doing anything, First connect to the repository service with your Admin credentials and then Navigate to Source Analyzer.
NOTE: Source Menu in the Menu bar will be available only when you are in the Source Analyzer section.
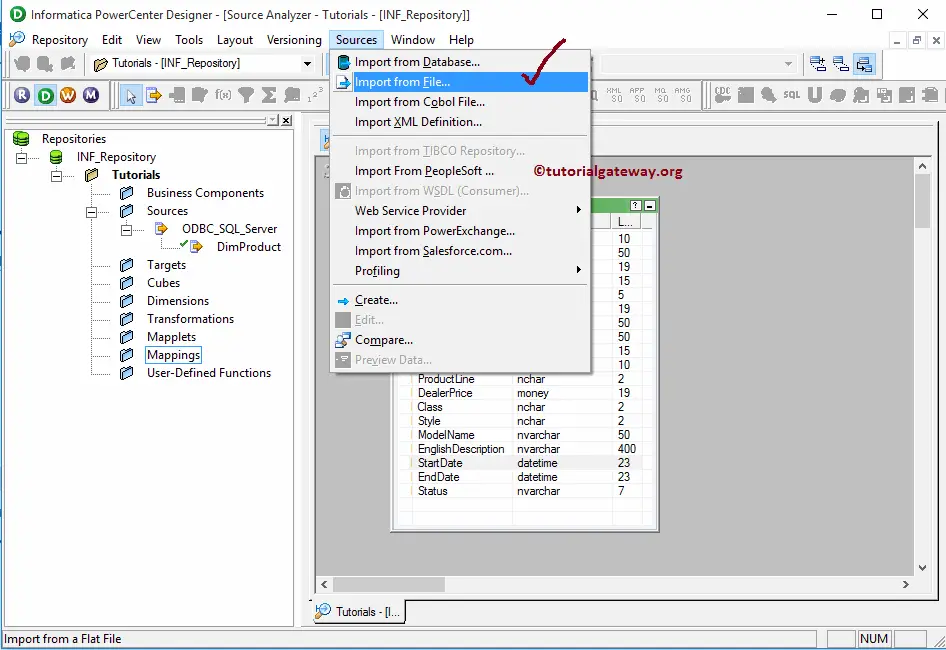
Once you are in Source Analyzer, Please navigate to the Source menu and select the Import from File.. option as shown below. Please refer Source Analyzer article to understand the Source Analyzer.
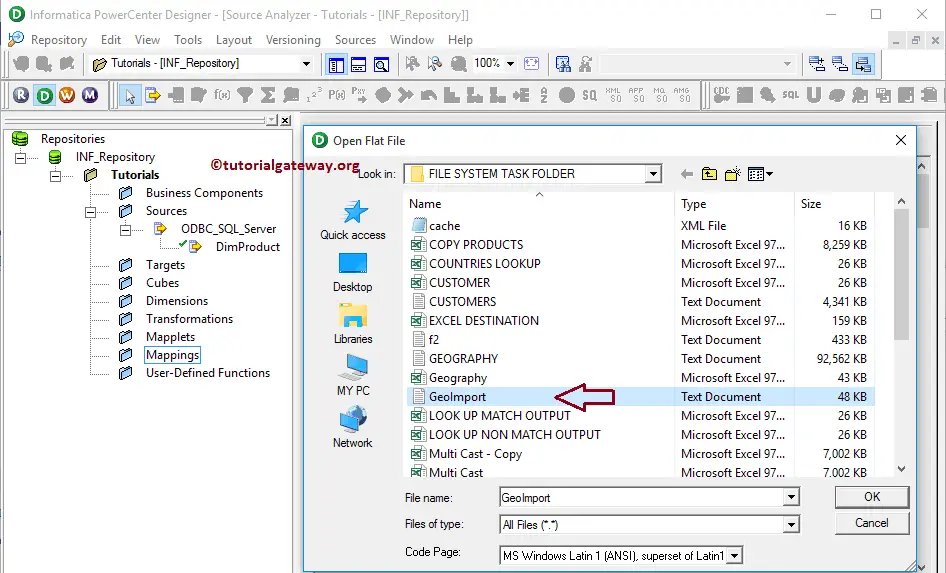
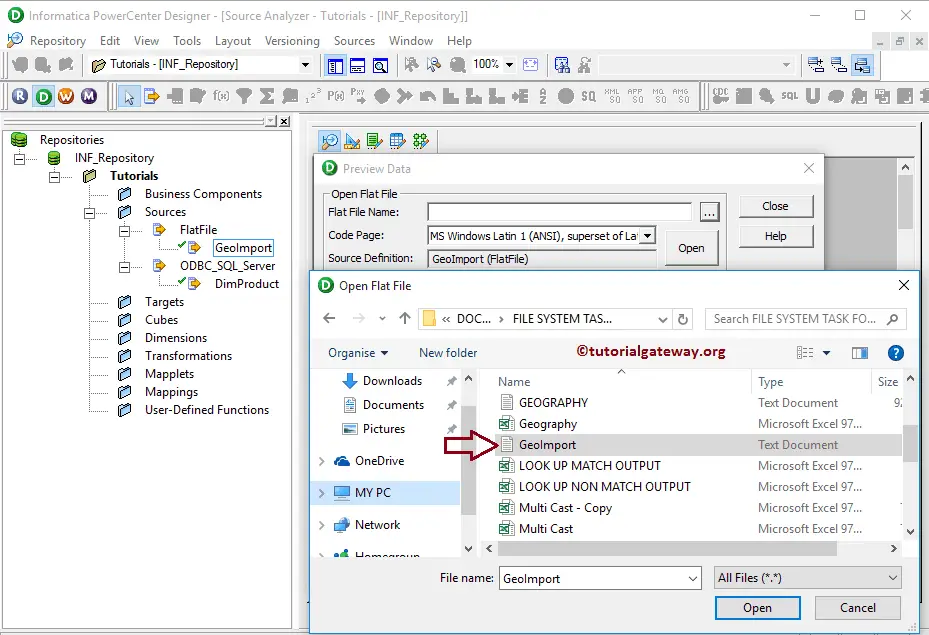
Once you select the Import from File.. option, a new window called Open Flat File will open. Please select the required flat file from your local file system and click the Open button. For this Informatica example, we are choosing the GeoImport.txt file.
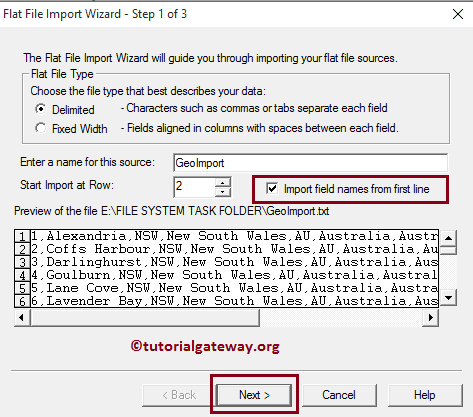
Once you click the Open button, a new pop up window called Flat File Import Wizard will open. This wizard can help us to specify the text format easily.
First, under the Choose the file type that best describes your data section, we have to choose either a Delimited or Fixed Width option. Our text is separated by a comma delimiter, as we showed earlier. So we are selecting a Delimited option.
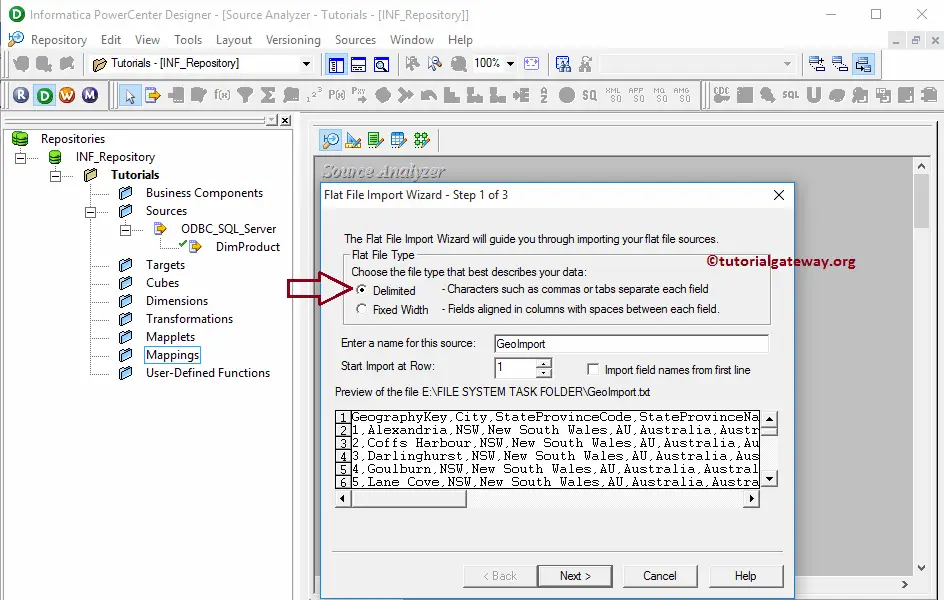
If your flat file contains column names as the first line of data like our example file, then you have to change the Start Import at Row value from 1 to 2; otherwise, keep it as 1. If you forgot to change, then while exporting this data to the database, Typecasting errors will throw.
Import filed names from the first line: This option allows us to import the column names from the first line of a flat file. If your flat file contains column names as the first line of data like our example file then, by selecting this option will import column names, and this automatically changes the Start Import at Row value from 1 to 2
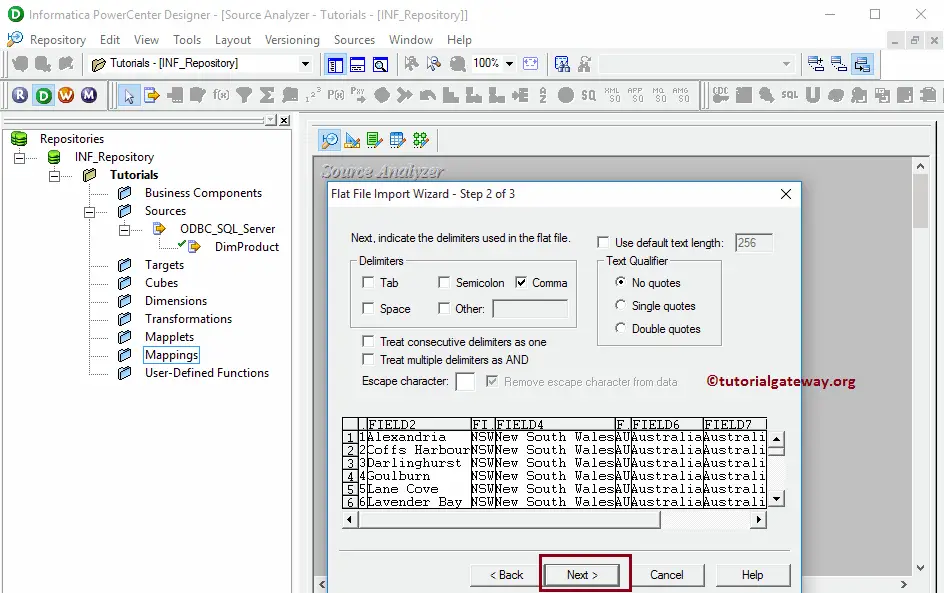
Step 2:
- Under the Delimiter section, choose the delimiter used in this text file. Our text is separated by a comma delimiter, as we showed earlier, so we are selecting Comma.
- Under the Text Qualifier section, we are selecting No quotes because our flat file doesn’t have any citations. Please change as per your requirements.
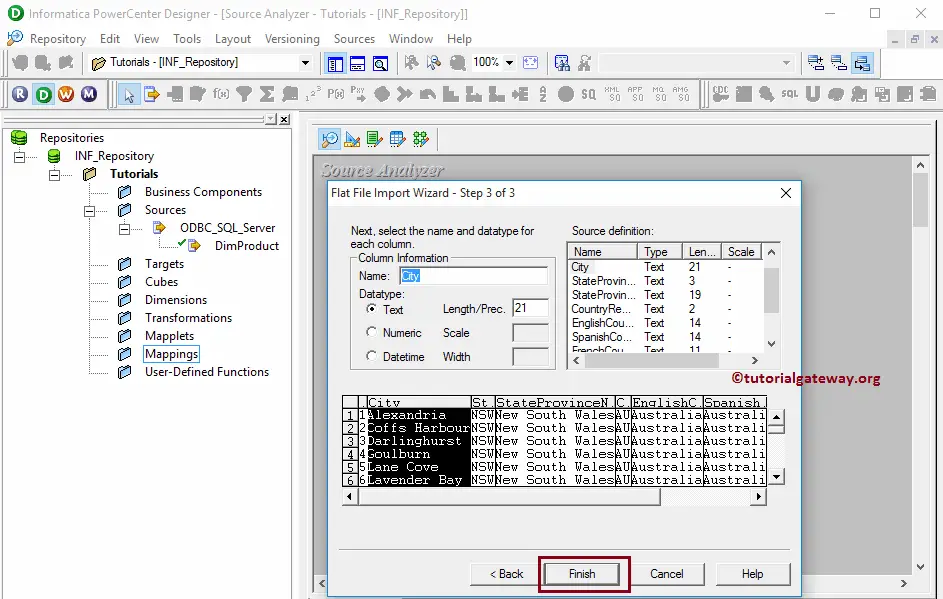
Here, we can edit the Column Name, Data type, Length or Precision, Scale, and Width. In general, we don’t do that, but if you want, you can do it.
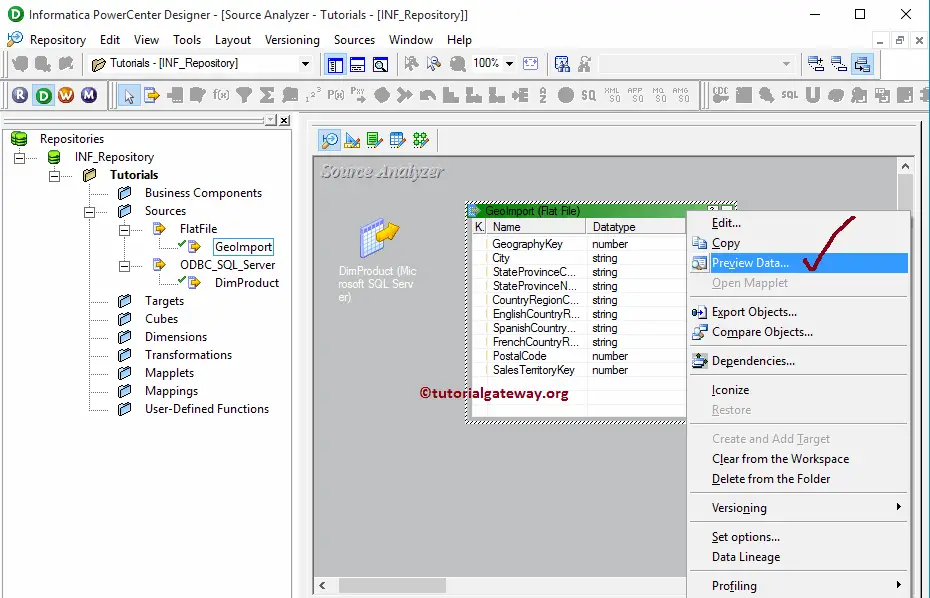
From the below image, under the Source subfolder, you can observe our newly created Flat File source in Informatica and the table definition (Column Names and appropriate data types) inside our workspace.

Preview Data inside Our Flat File in Informatica
Although we created our Flat File source, before we proceed further, we should preview our data. To preview the source data, Right-click on the table definition and select the Preview data.. option from the context menu.
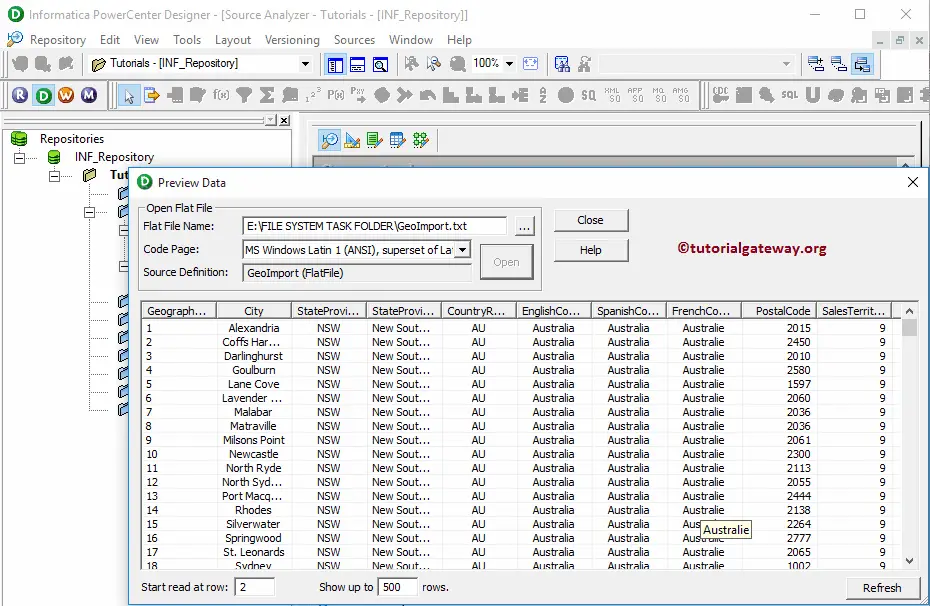
Once you select the Preview data.. option, the Preview data window will be opened. Please select the GeoImport.txt file as a Flat File name from your local file system and click the Open button.
Once you successfully select your file, data inside the flat file (here GeoImport.txt) will be displayed as shown below.
Edit existing Flat File Source in Informatica
Although we chose the GeoImport.txt file as a source definition, there are many situations where we may not require all the columns present in that table. Or we may have to add extra columns.
To resolve these types of situations, we can edit the table. For this, Right-click on the table definition and select the Edit..option from the context menu.
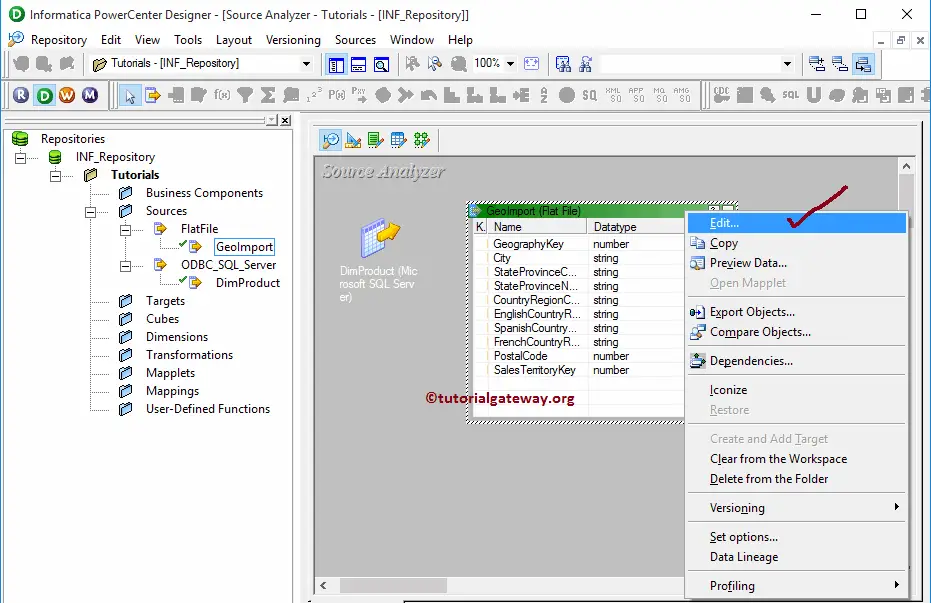
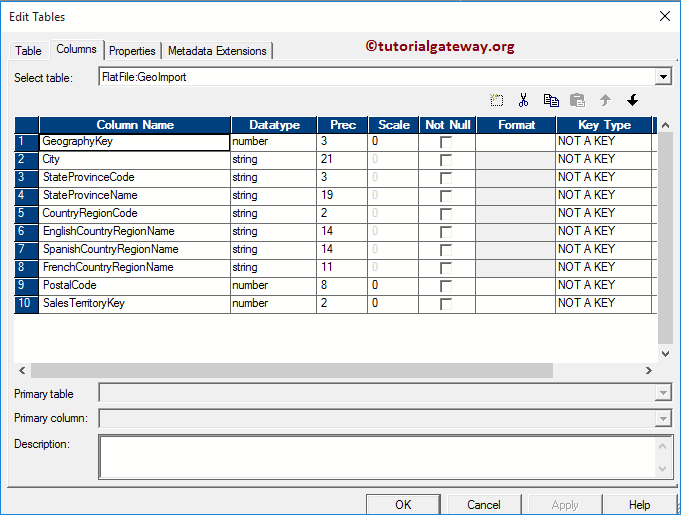
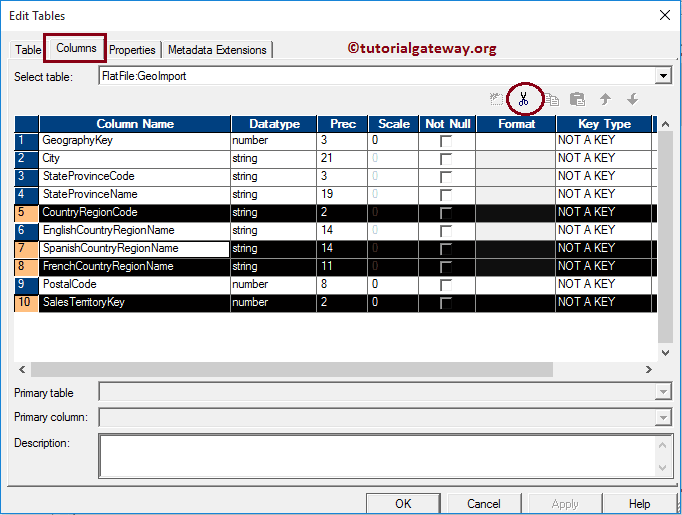
Once you select the Edit.. option, a new window called Edit tables will open. To alter or change the existing table, we have to navigate to Columns Tab.
For example, if you want to add new columns. Then, Please select the first button (before the scissors symbol) and add Column Name, Data Type, Precision (if required), and Scale (if needed). If it is the primary key, then change the Key type to primary and checkmark the Not Null option (if your column doesn’t allow null values)
If you want to delete columns, then select the unwanted columns and click the scissors button. Here we are removing a few columns for the demonstration purpose. Once editing is complete, Click OK to close the Edit tables window
From the below screenshot, you can see we successfully deleted the unwanted columns from our flat file source definition in Informatica.
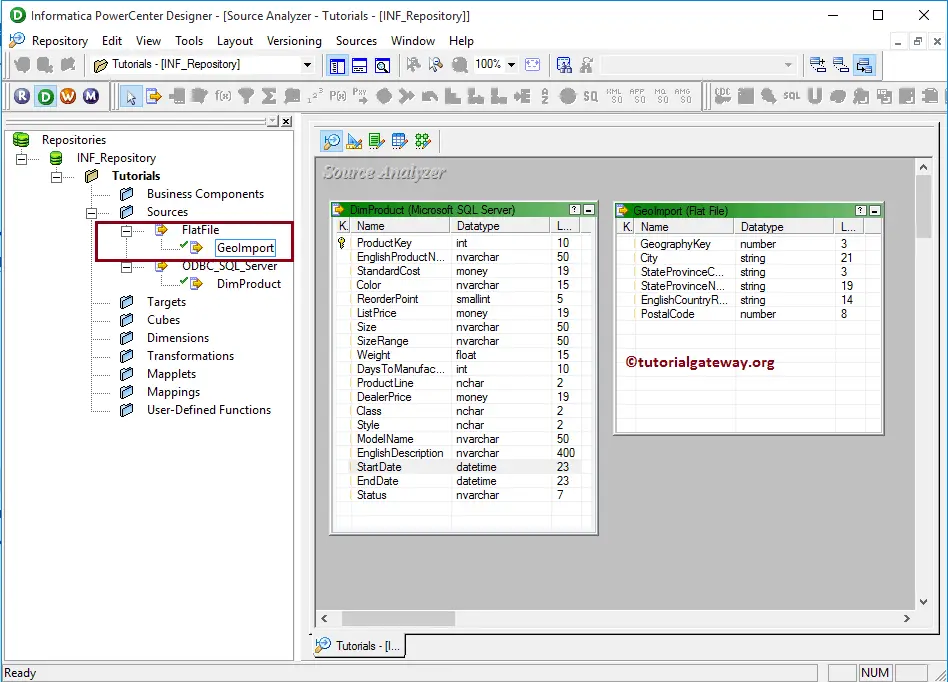
NOTE: We are removing the columns only from the Source Analyzer. It will not reflect the underlying flat file.