In this article, we will show you how to extract Nouns and Noun Phrases using SSIS Term Extraction Transformation. Before reading this article, Please refer to the Term Extraction article for this transformation’s definition and functionality.
TIP: Please refer to the Term Extraction Transformation article to understand the steps in extracting Nouns. And Extract Noun Phrases Using Term Extraction article to follow the steps involved in extracting Noun Phrases from the Source Data in SSIS.
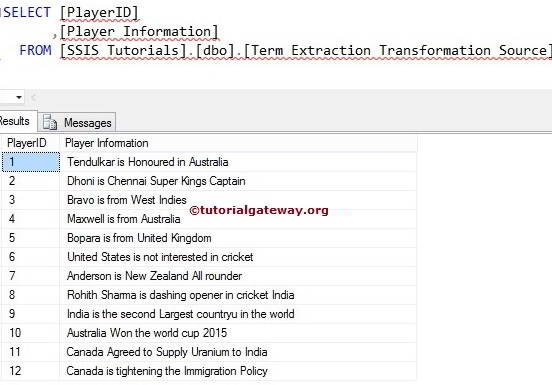
The below screenshot shows our source data.
Configure Term Extraction Transformation in SSIS to Extract Nouns & Phrases
STEP 1: Open BIDS and Drag and drop the data flow task from the toolbox to control flow. Next, rename it as Extracting Nouns and Noun Phrases Using Term Extraction Transformation in SSIS.
Double click on it will open the data flow tab. For more Transformations >> Click Here.
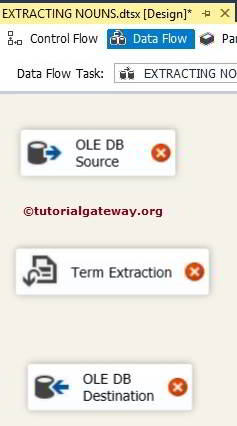
STEP 2: Drag and drop OLE DB Source, Term Extraction Transformation, and OLE DB Destination from the toolbox to the data flow region
STEP 3: Double click on the OLE DB source in the data flow region will open the connection manager settings and provides space to write our SQL statement.
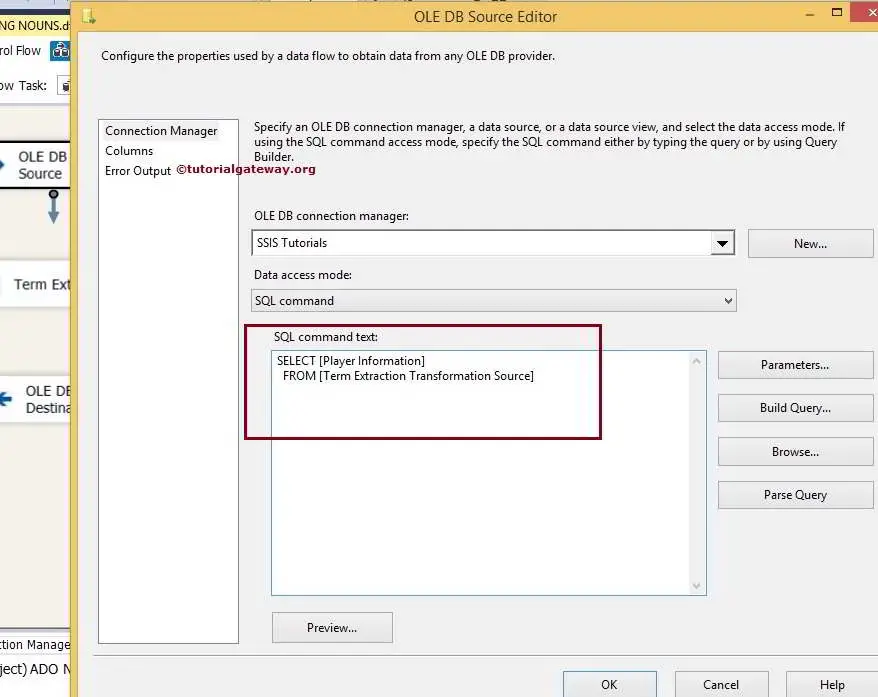
Here we selected the following Database as our source database, and SQL Command we used in the above screenshot is:
SELECT [Player Information]
FROM [Term Extraction Transformation Source]
STEP 4: Click on the columns tab to verify the columns. In this tab, we can uncheck the unwanted columns also.
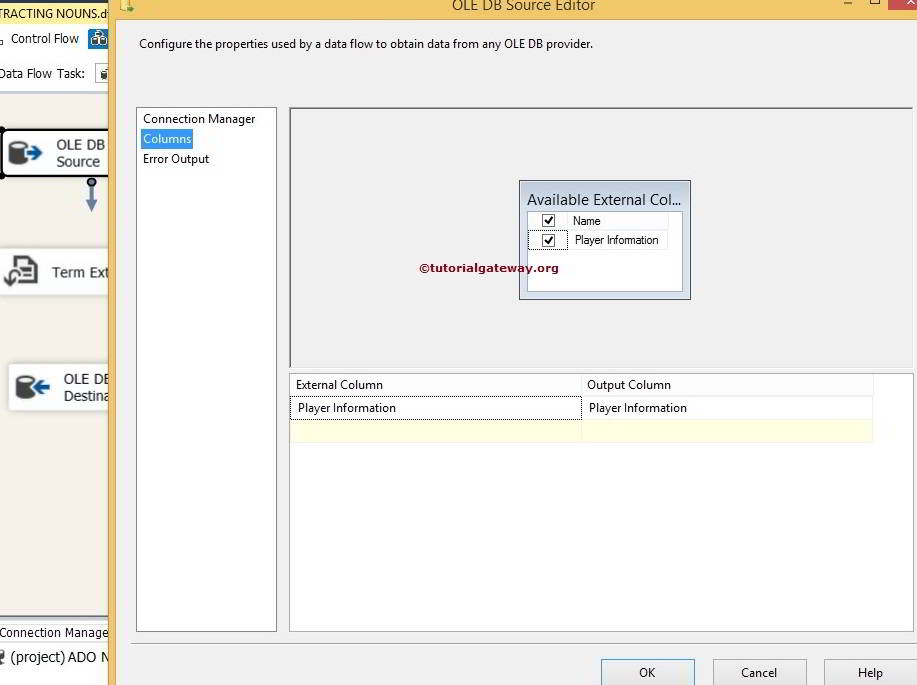
Drag the OLE DB source output arrow onto the Term Extraction Transformation to perform a transformation on the source Data.
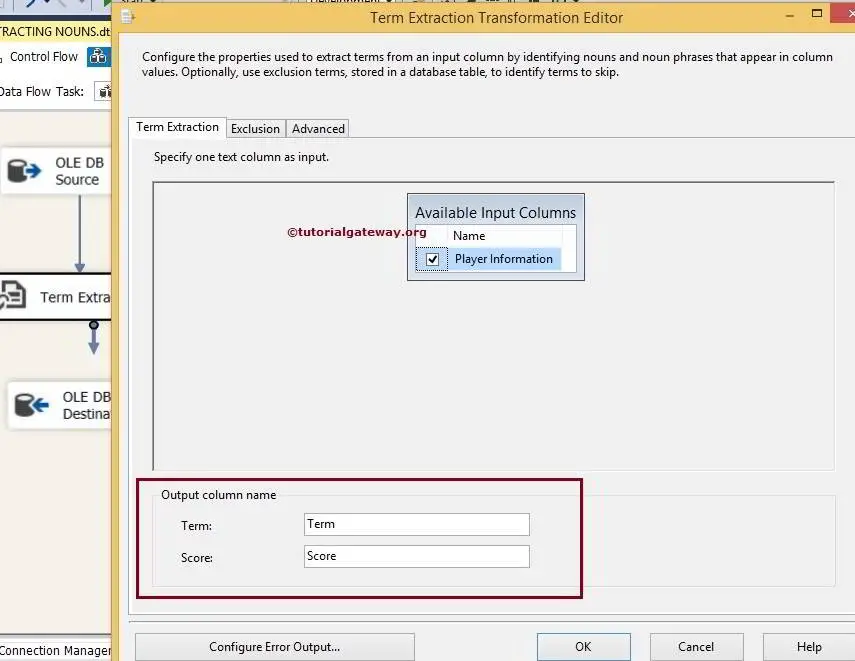
STEP 5: Double click on the Term Extraction Transformation will open the Term Extraction Editor to configure it. Within the Term Extraction tab, choose the column you want to use for the Term Extraction from the available input columns. We left the output column names to default Term and Score.
Exclusion Tab: If you want to exclude specific terms during term extraction, configure this Tab by specifying a column that contains exclusion terms.
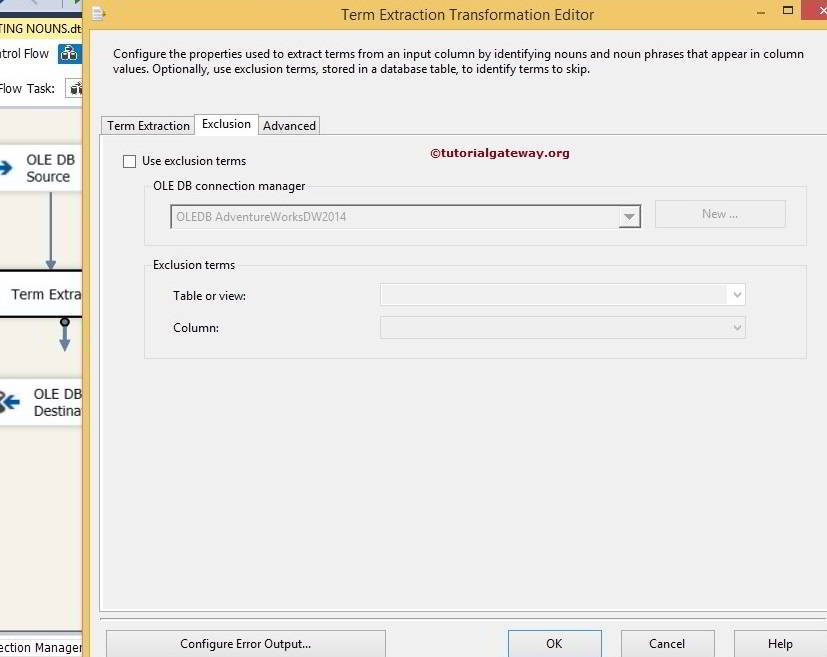
In this SSIS Term Extraction Transformation example, let us leave this because we want to extract all the Noun Phrases from source data.
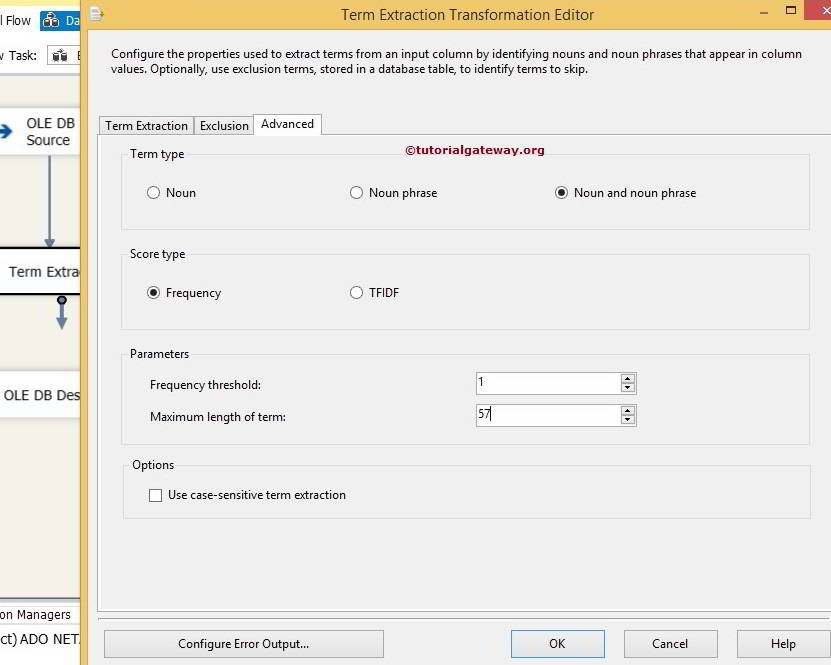
STEP 6: Advanced tab of the Term Extraction Transformation Editor Dialog box tab is important to select Term Type, Source Type, and Frequency Threshold. In this example, we are extracting Nouns and Noun Phrases. So, we chose the Nouns and Noun Phrases option as term type and selected the Frequency Threshold as 1.
Please refer to the Extract Nouns Using Term Extraction Transformation and Exclusion Tab articles to understand extract Nouns from the Source Data and Extract Noun Phrases article to understand, How to extract Noun Phrases from the Data Source.
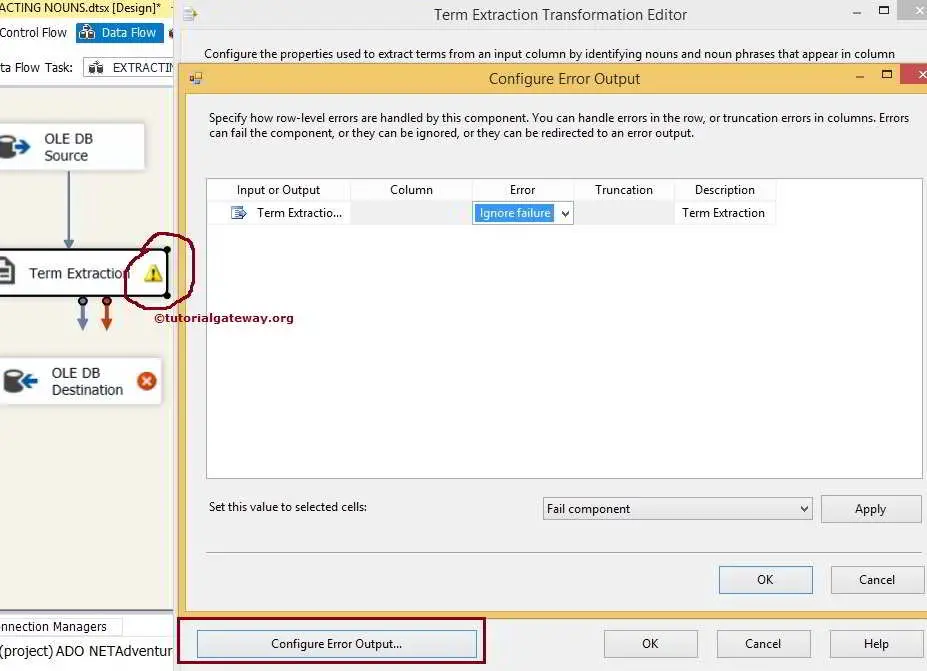
From the below screenshot, you can see there is a warning symbol on the Term Extraction Transformation. It is telling that the error output is not connected. You can remove the warning symbol by configuring the error output of Term Extraction Transformation. So double-click on the Configure Error Output button will open a new window to set the error output.
The default configuration of a Term Extraction Transformation is to redirect error rows. You can get rid of this warning by connecting the error output. Or by changing the default behavior to Ignore the Failure or Fail Component. Let’s change to Ignore Failure.
Click ok to finish configuring the SSIS Term Extraction Transformation to Extract Nouns & Phrases.
STEP 7: Now, we have to provide the Server, database, and table details of the destination. So double-click on the OLE DB Destination and provide the required information.
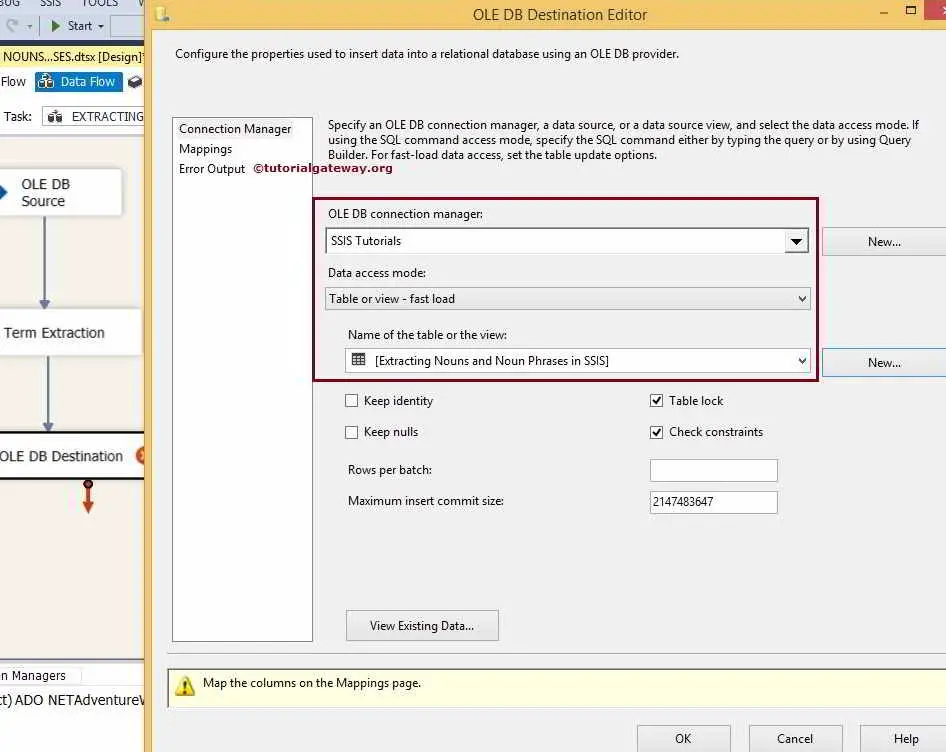
Here we selected the destination data source (localhost as server instance) and [Extracting Nouns and Noun Phrases in SSIS] table as our destination table
STEP 8: Click on the Mappings tab to check whether the source columns are exactly mapped to the destination columns. If not, please assign them to the appropriate destination column.
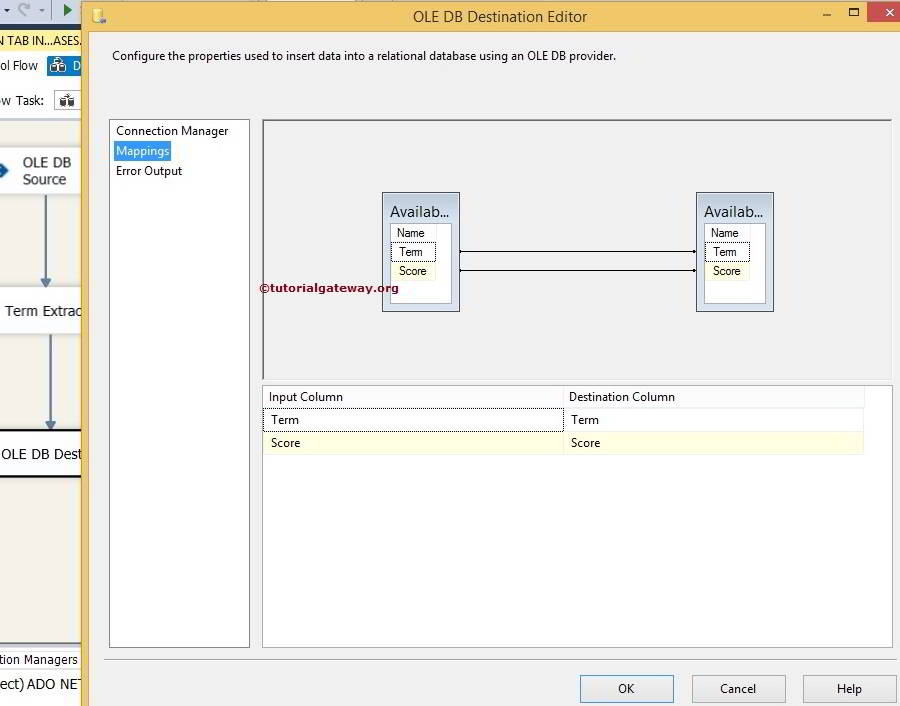
Click ok to finish designing our Extract Nouns and Noun Phrases using the Term Extraction Transformation package. Let us run the package.
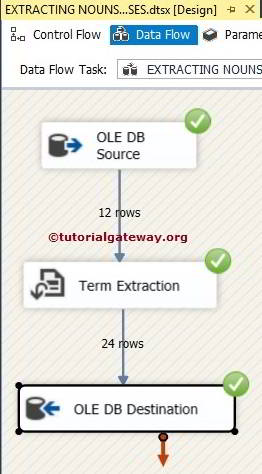
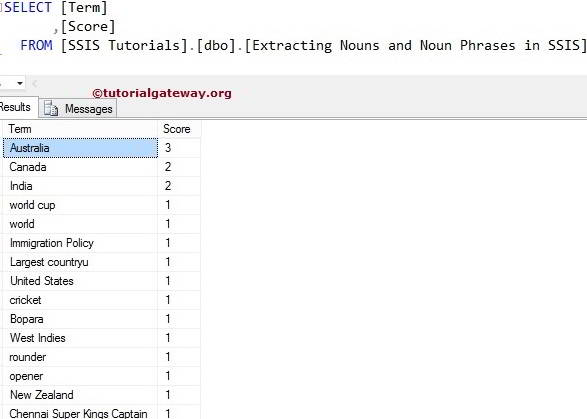
Let’s open the SQL Server Management Studio and check the results.
