In this Talend section, we discuss the Talend rejected rows or capture the failed records into a table or text file. It is crucial to capture the rows that are failed or rejected when the job runs. We can use that log to review and cleanse the data for further action.
In all our Talend previous articles, we always showed you how to load successfully processed data into Tables or text files. We have never revealed to you about the Talend rejected rows or the Error logs, and we cover them here!
To demonstrate the rejected rows, we used the below text file.

Talend Rejected Rows Example
We used tDBConnection and tDBCommit to establish and close the connection with the SQL Database. Next, we used the tFileDelimitedInput to load the above text file into the Talend. Please click on the Edit Schema to add the Column names or use the existing File delimited schema (if any).

Please use the tLogRow and run this job to see the data in the text file. Here, we removed/replaced the tLogRow with tDBOutput because we want to load this text file into the database table. Next, we used the existing connection and placed the Table name.

Click on the Edit Schema to see or change the output columns. If you notice the lengths of the DBOutput columns, they are much shorter to accommodate the text file data. If you are creating a table, then you might change the length to store all the data. However, when we are using an existing table, we have no option to alter the table structure and consider this as our scenario.

Once you run the Talend Rejected Rows job, you can see the Data truncation message six times.

Let me open the Management Studio, and you can see it has four records, and they meet the data length.

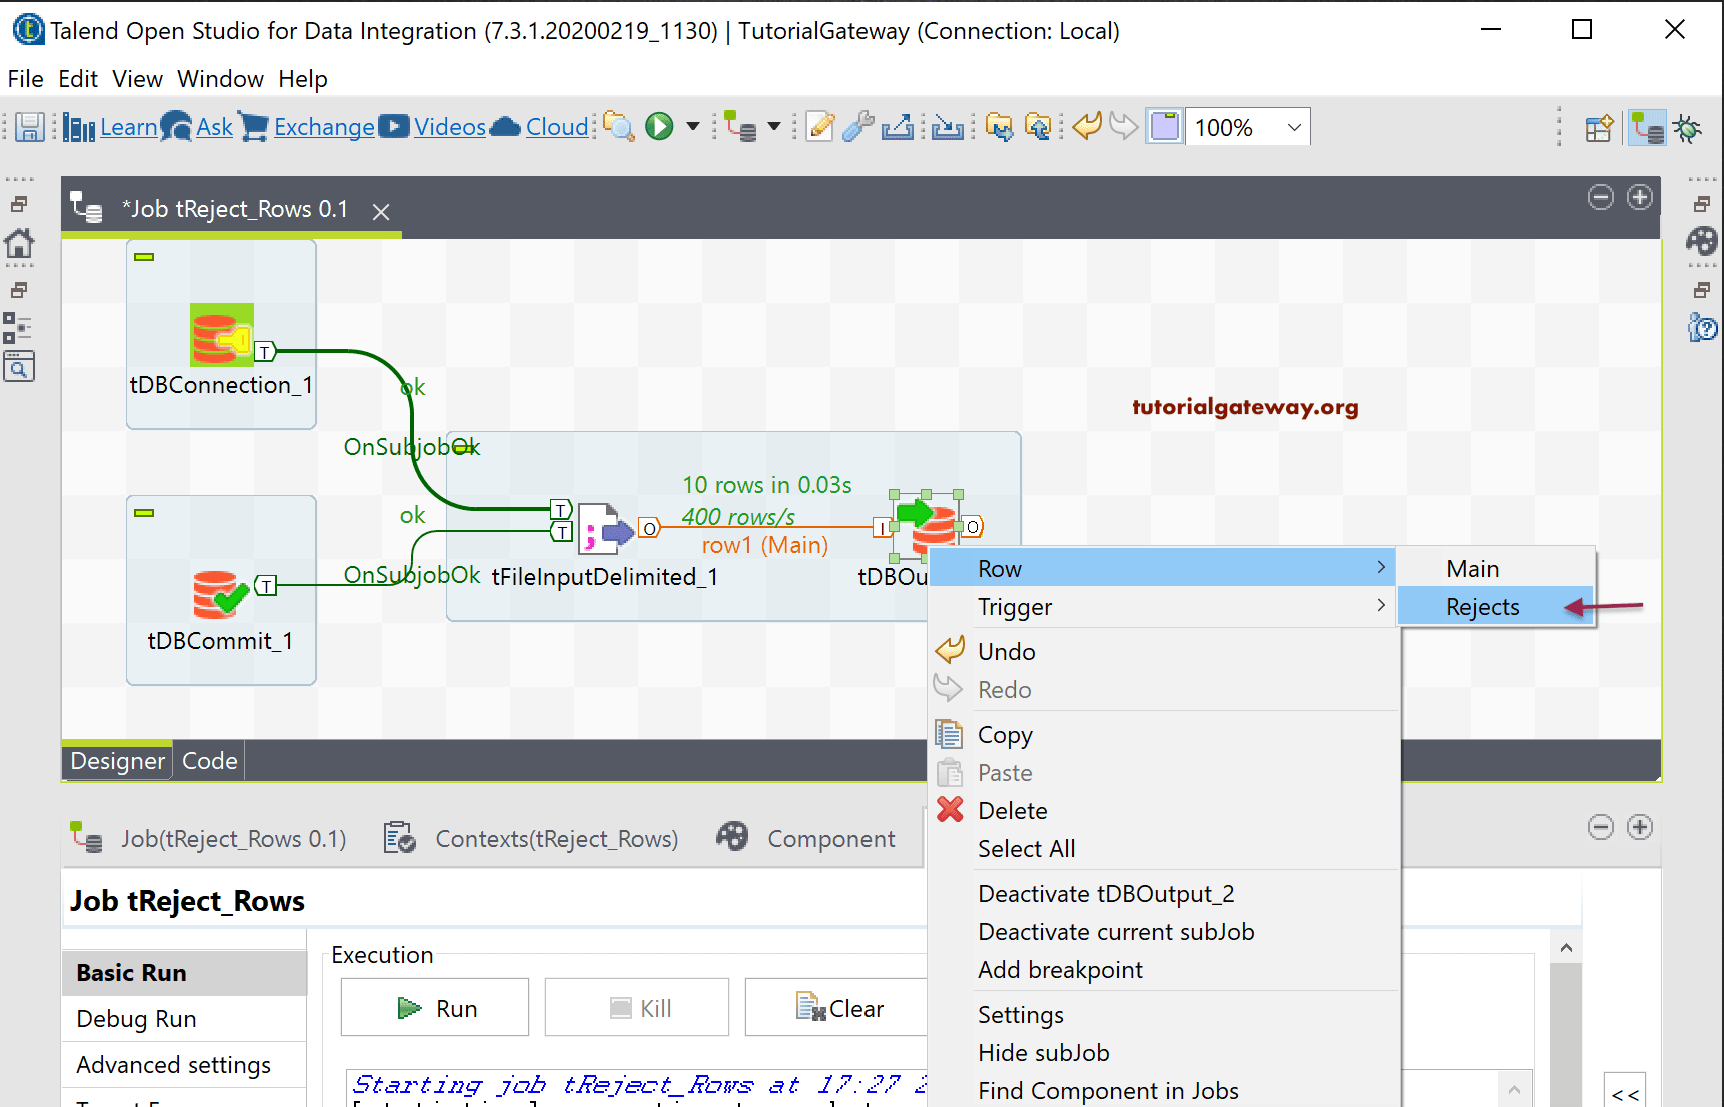
All this time, we are selecting the Row Main option from the context menu. However, we have another option, i.e., Row Rejects, and this is where we capture the Talend Rejected Rows.
Next, we used tMap to process those rejected rows. Then we used tLogRow to display those rejected rows in table format.

Let me open the tMap editor. We added all the rows from the tDBOutput to tMap. If you observe, it has two extra columns error code (error number) and error message.

Once you run this Talend tMap job, you can see all the rejected rows along with the error code and corresponding error message.

We used the tFileDelimitedOutput to save these rejected rows in a text file. Here, we used a comma as the column separator.

Now, you can see all the rejected rows, error codes, and error messages in a text file.

There are some situations where we have to save the rejected rows of all the Talend jobs in a single file or table. In that scenario, we have to use the same schema for all the tables (with different columns). In this situation, we use a single column to hold all the information (columns) of a particular table, a second column for the error code, and a last column for the error message.
Let me open the tMap to concat all the columns in a table and write the following expression. It means EmpID of string type stores all the Employee’s information, and each column is separated by the | symbol.

We store these records in the above-specified text file. So, let me alter the schema and remove the existing text file from the system. Next, please run teh Job to see the result.
Now you can see that our File has three columns, and the EmpID column has all the Employee table columns.
