In this section, we show how to read Excel file in Talend with an example. The following Talend screenshot shows the data inside the Excel file that you want to read.
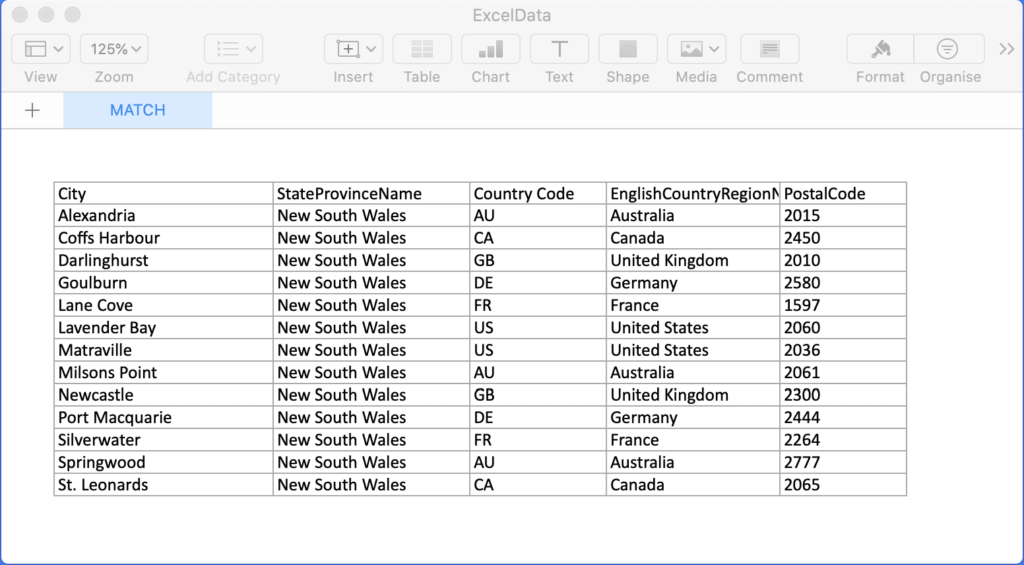
Talend Read Excel File Example
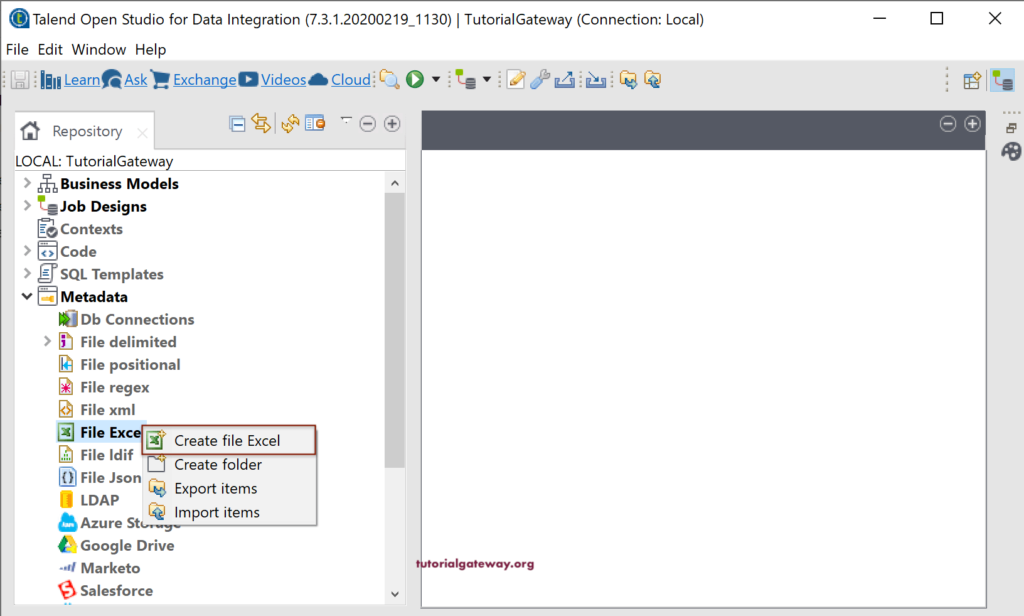
To read an Excel file in Talend, you have to create metadata under the File Excel folder. And to do so, right-click on the File Excel will open the context menu. From it, please select the Create File Excel option or use the export item option to export Excel metadata.
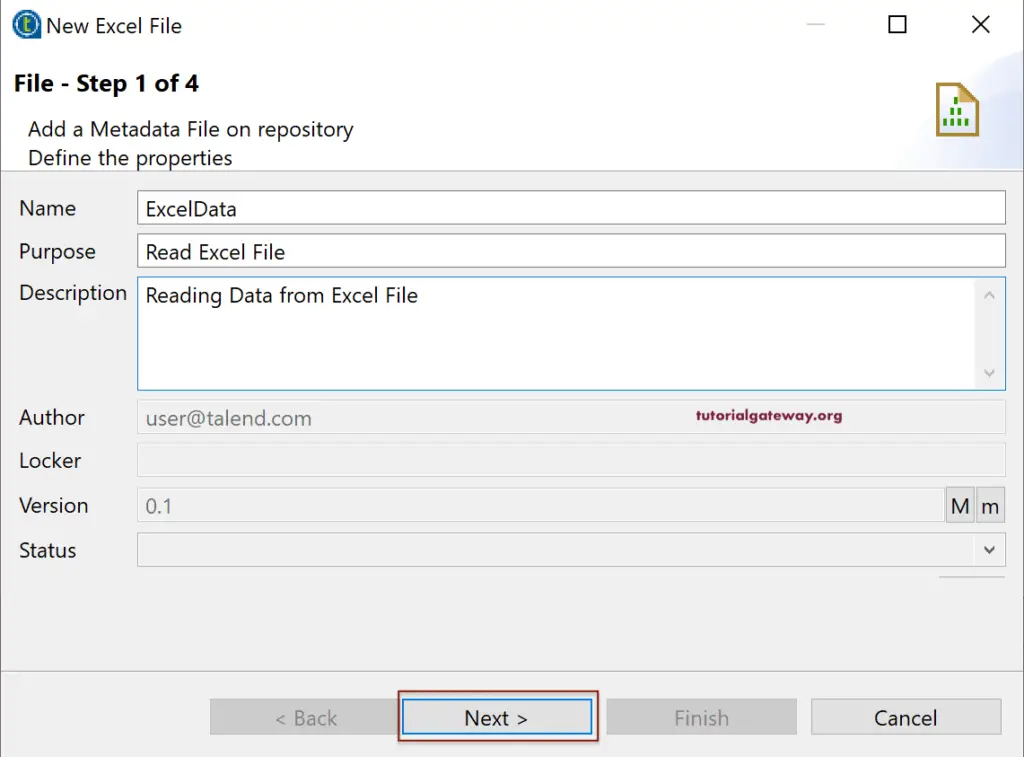
Clicking on the Create File Excel option opens the following New Excel File window. Please fill the File name, the purpose of creating, and a brief description of the data inside the File.
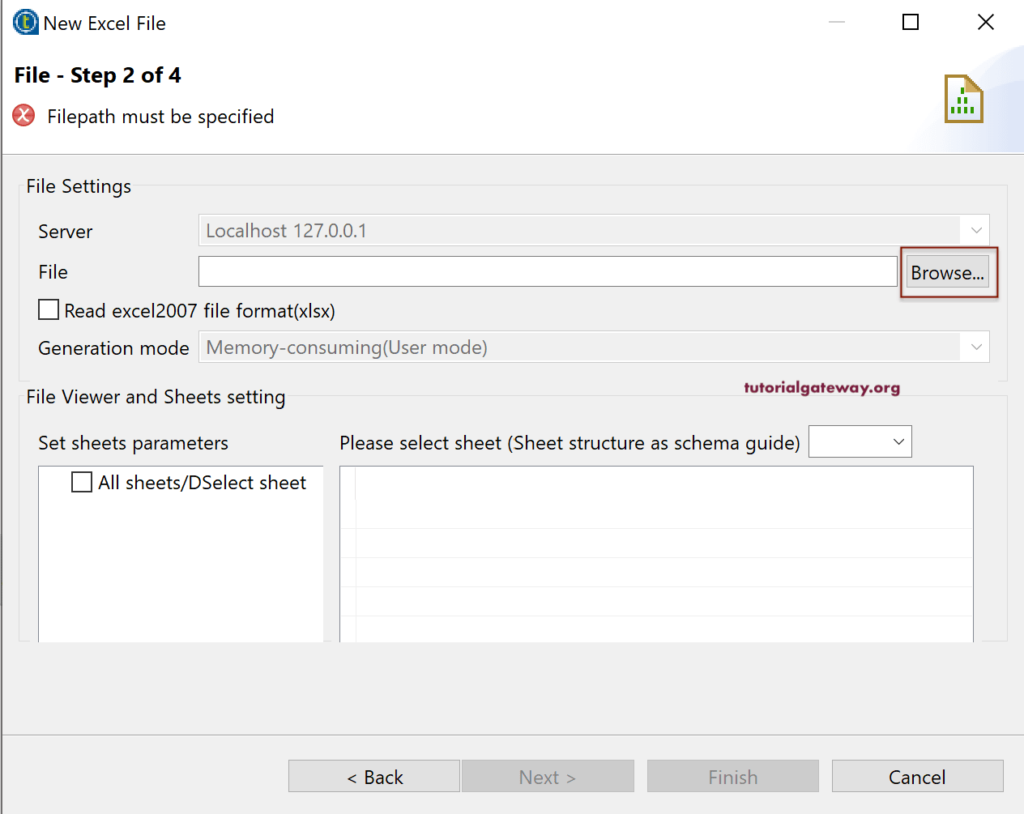
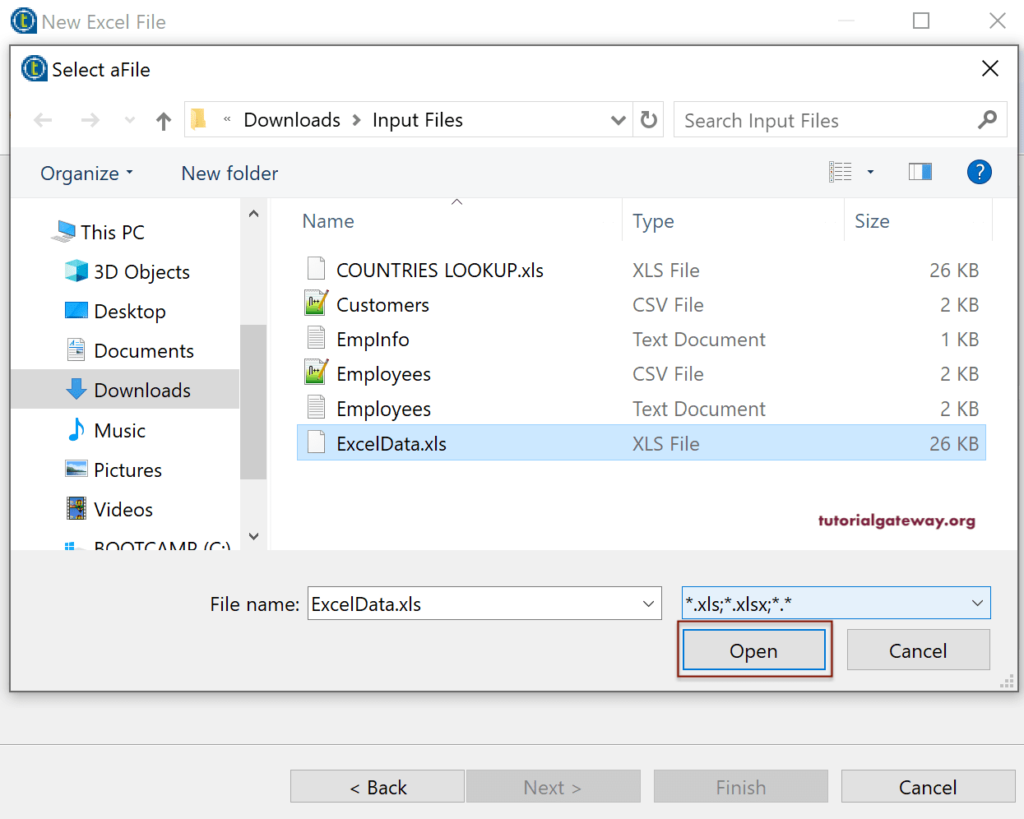
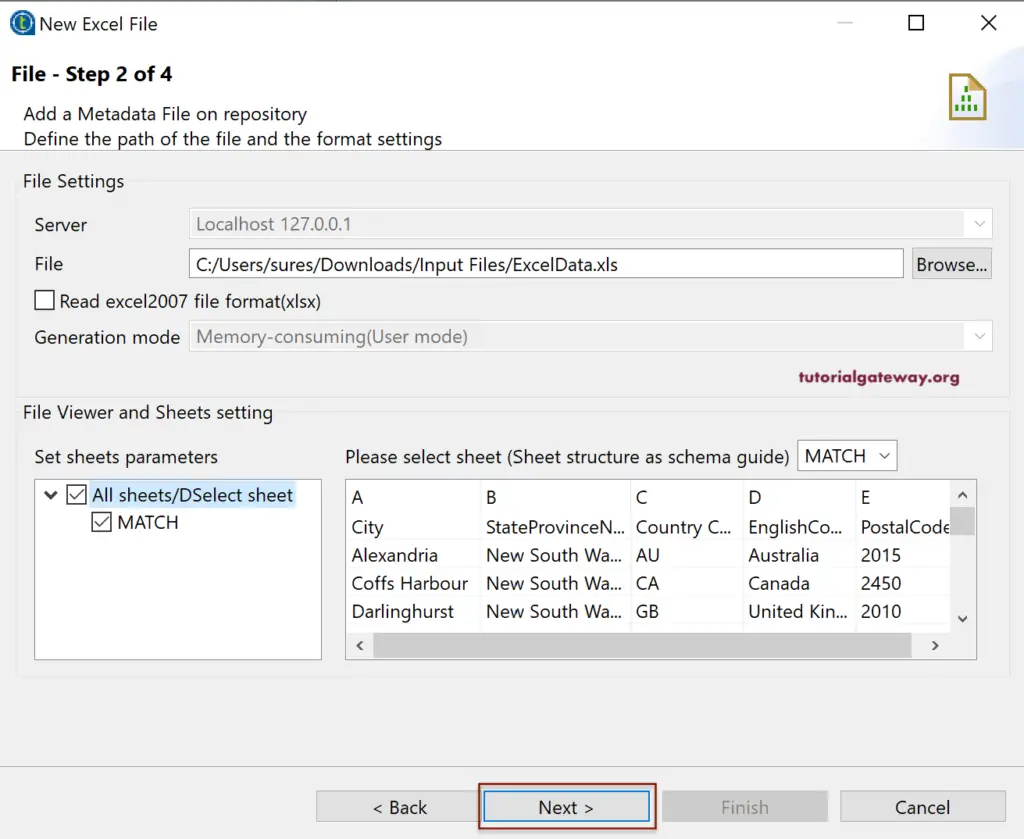
Within Step 2, click the Browse button to choose the Excel file that you want to load into Talend. Remember, if your data or excel file is in 2007 format, checkmark the Read excel2007 file format(xlsx)
Here, we are selecting the ExcelData.xls file.
Once you selected the desired Excel file, you can see the sheet data and the available sheets in the Excel file. Here, you can choose the sheets as per your requirement. Our Excel file has only one sheet, so we selected the same.
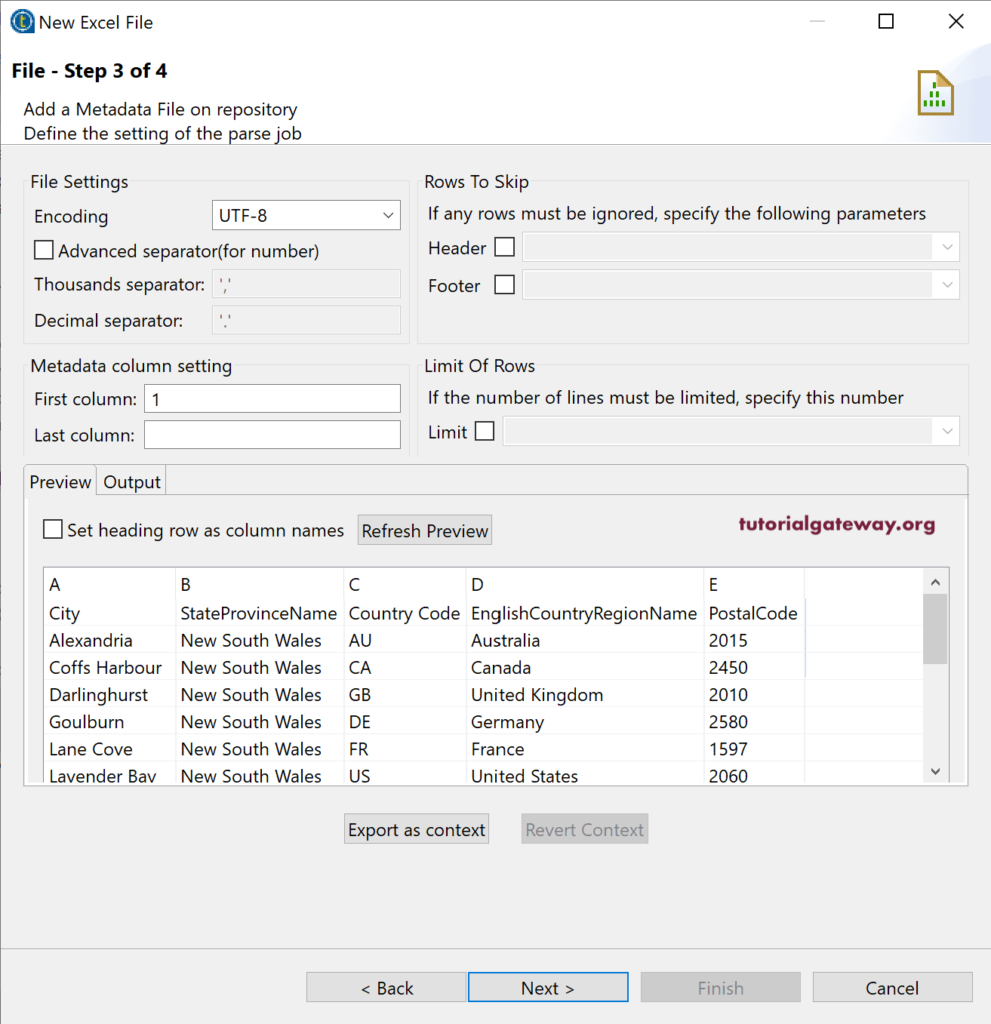
Within Step 3, we have many options.
- File Settings: By default, Talend will select the Encoding; otherwise, select the one from the drop-down. If your excel file has the Thousand or decimal separator, select the checkbox and specify the same.
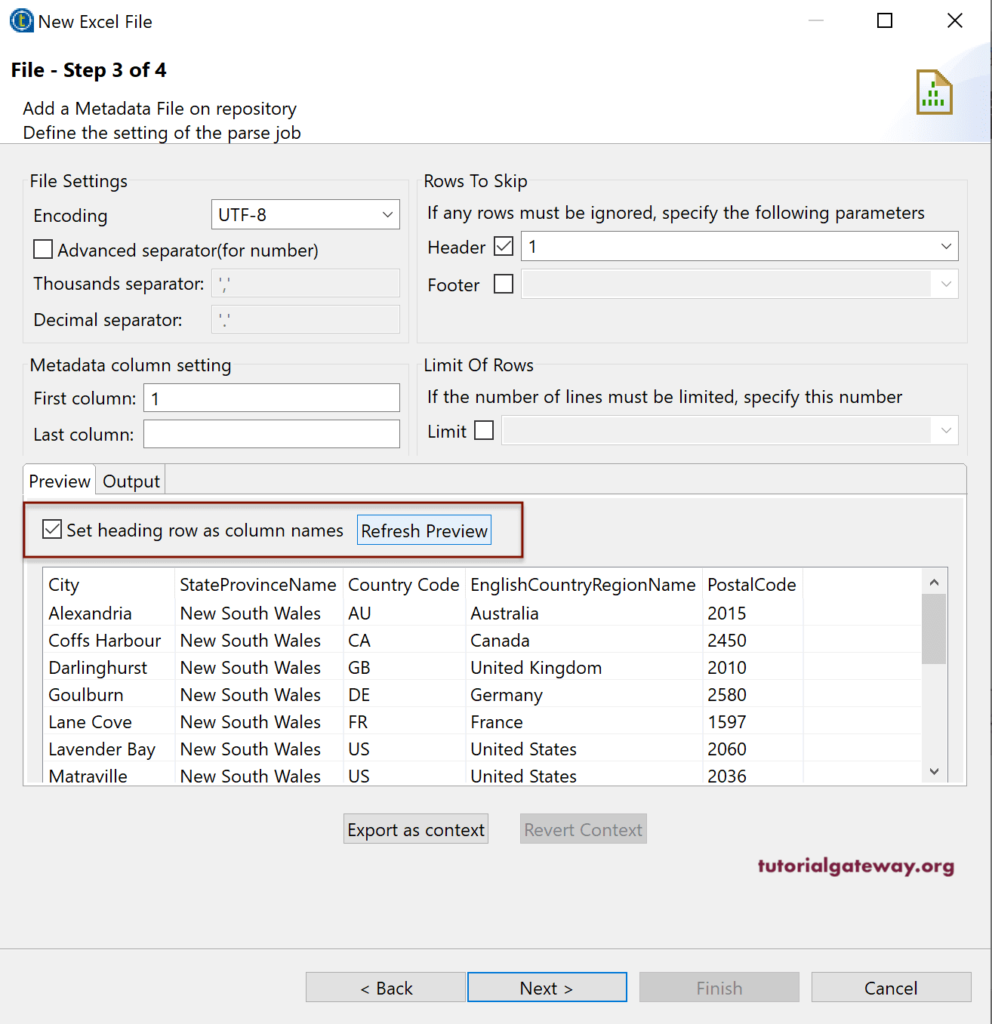
- Rows To Skip: If there are any rows to skip or ignore, you can choose the position (Header rows or Footer rows) and then specify the number of rows you want to skip. For instance, if you have the Column Names in the header, you have to skip the first row (Header = 1). If you have the file information like store details as the Footer, then select the Footer, and skip those rows.
- Metadata column settings: Specify the Metadata information (column names). Please specify whether it is in the First Column or Last Column.
- Limit Of Rows: If your File has millions of records, and you want to limit them to 100,000, use this Limiting option, and specify the number.
Please checkmark the Set heading row as column Names and click Refresh Preview button. We did this because our first column has column names. If you notice the Rows to Skip section, it automatically checkmark the Header option and assigned 1 to it.
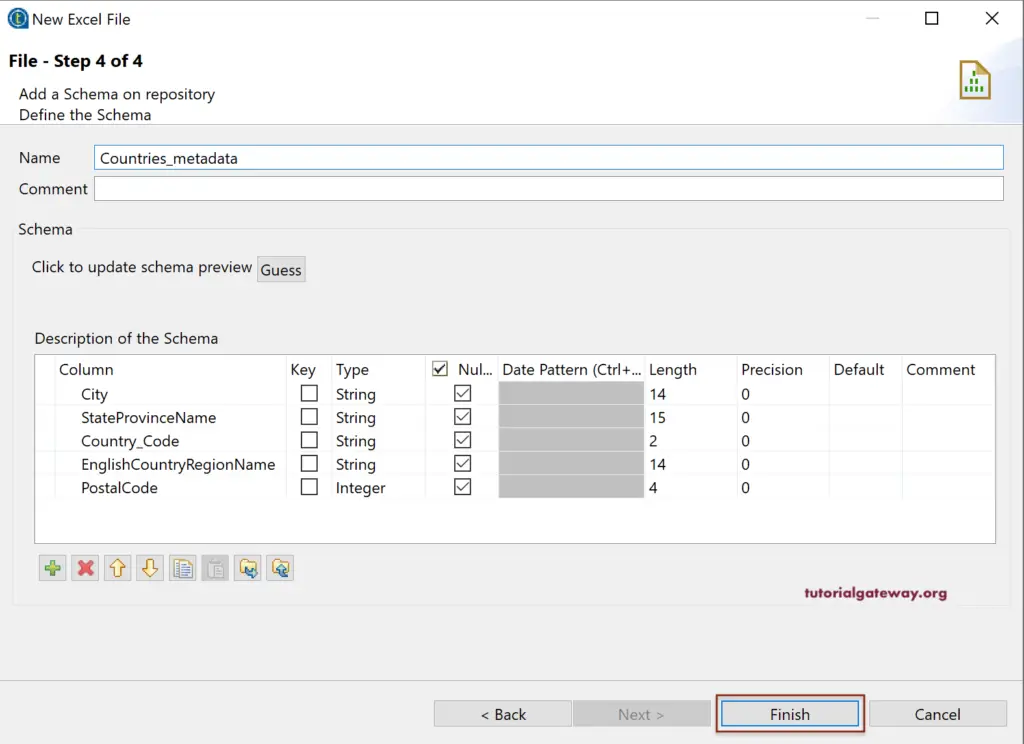
Within Step 4, assign the unique name to this Excel metadata. Next, check the Data type, length, and data patterns (if any) and click the finish button.
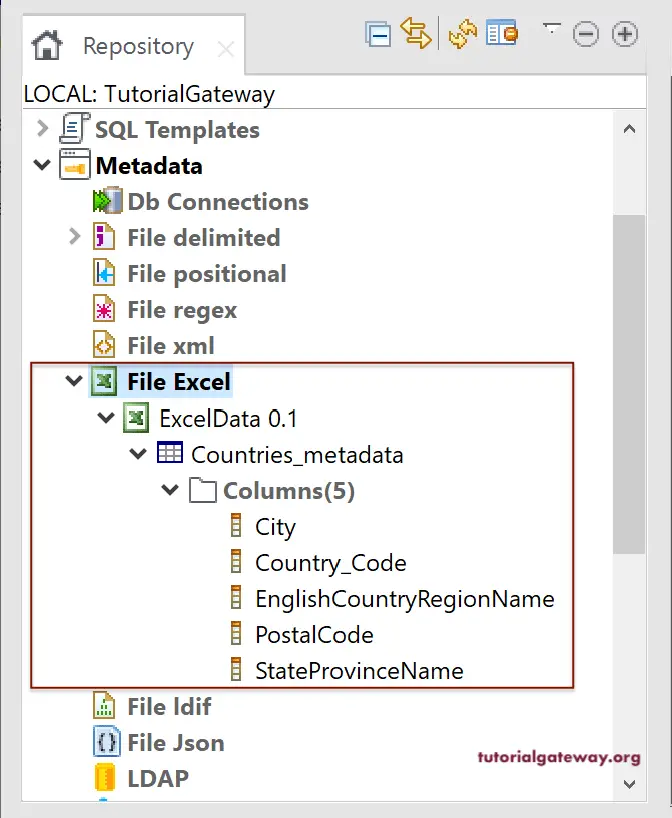
Now, you can see the Excel metadata under the File Excel folder.
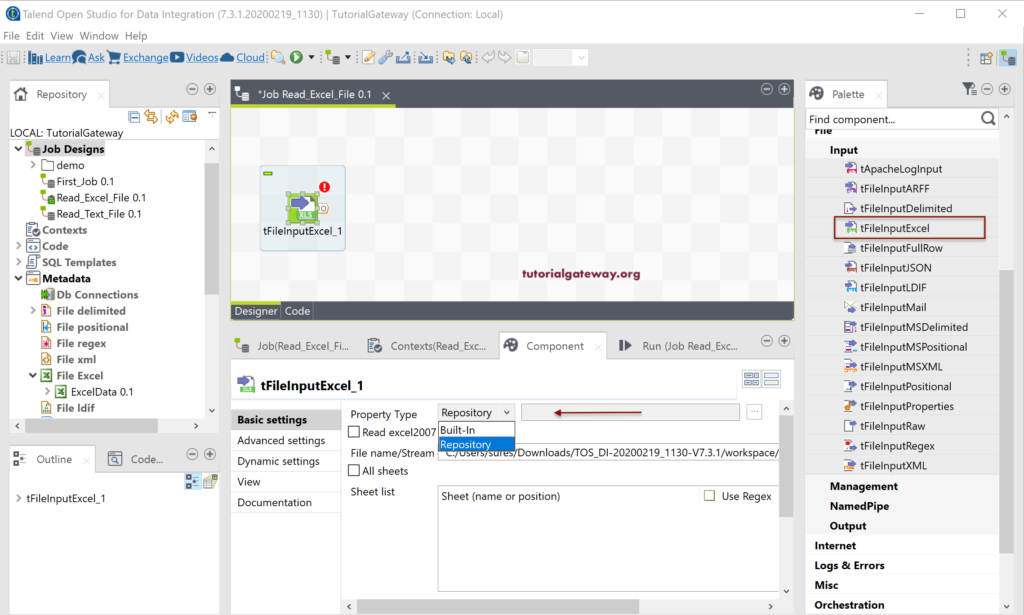
There are two ways to use this excel data in the Talend job. The first one is drag and drop the tFileInputExcel and select the Property type as Repository.
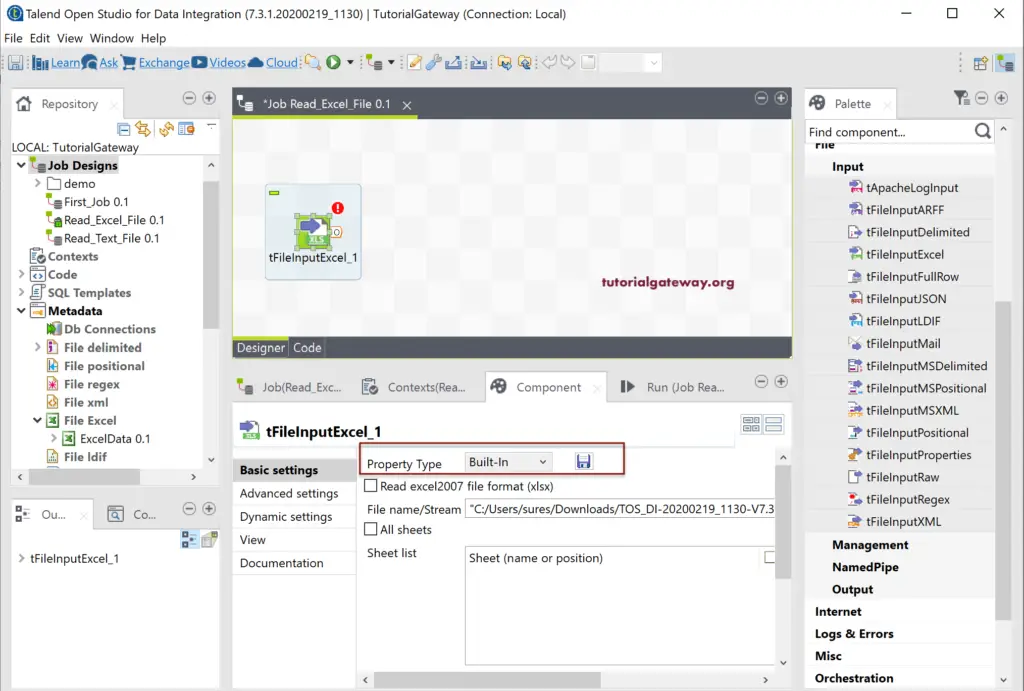
If the Property Type is built-in, then you have to select the excel file manually. This process is for reading excel file in Talend without creating Metadata.
The ideal approach is using Talend Metadata that we created previously. So, drag and drop the ExcelData from the File Excel folder into the Job design.
It will open the following window. If you are using this Metadata as an Input, then select tFileInputExcel, and to use it as an output (destination file) select the tFileOutputExcel.
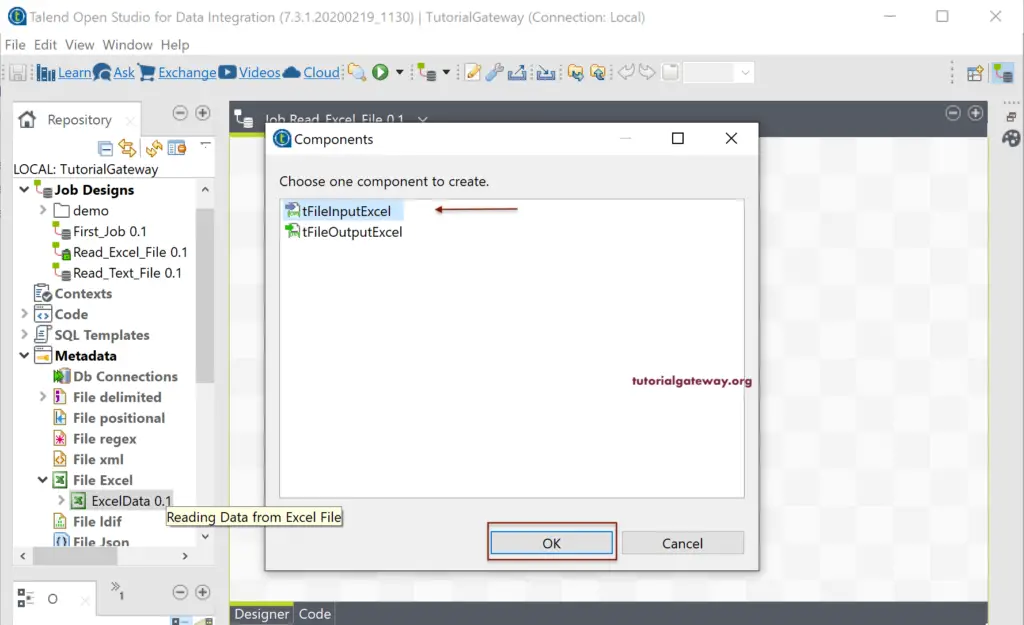
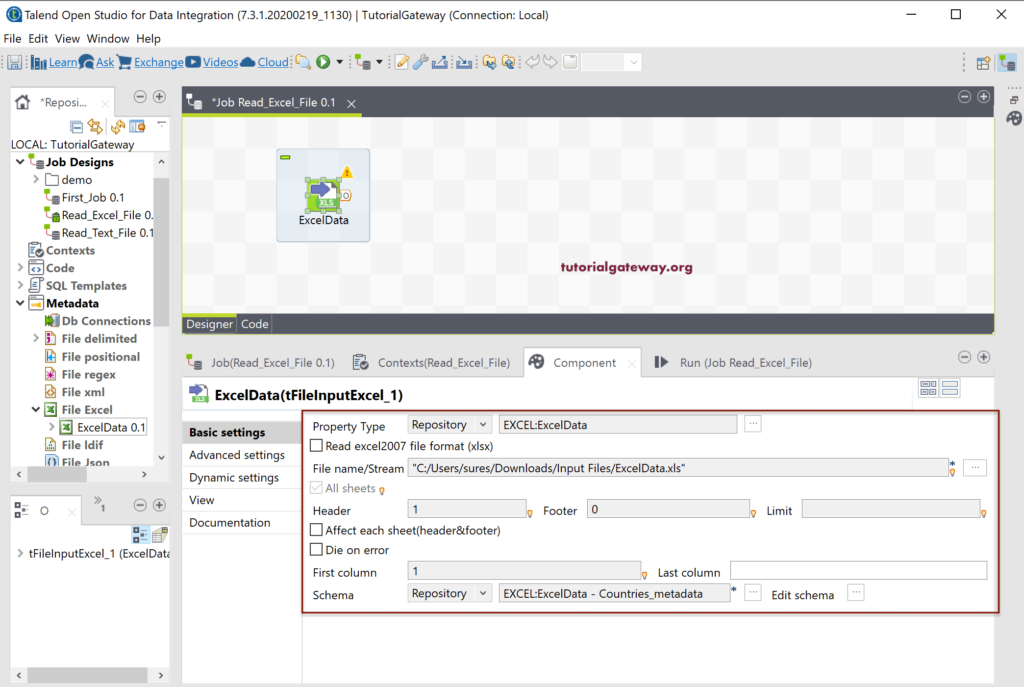
Now, you can see that the properties in the tFileInputExcel Component tab have filled with the metadata information.
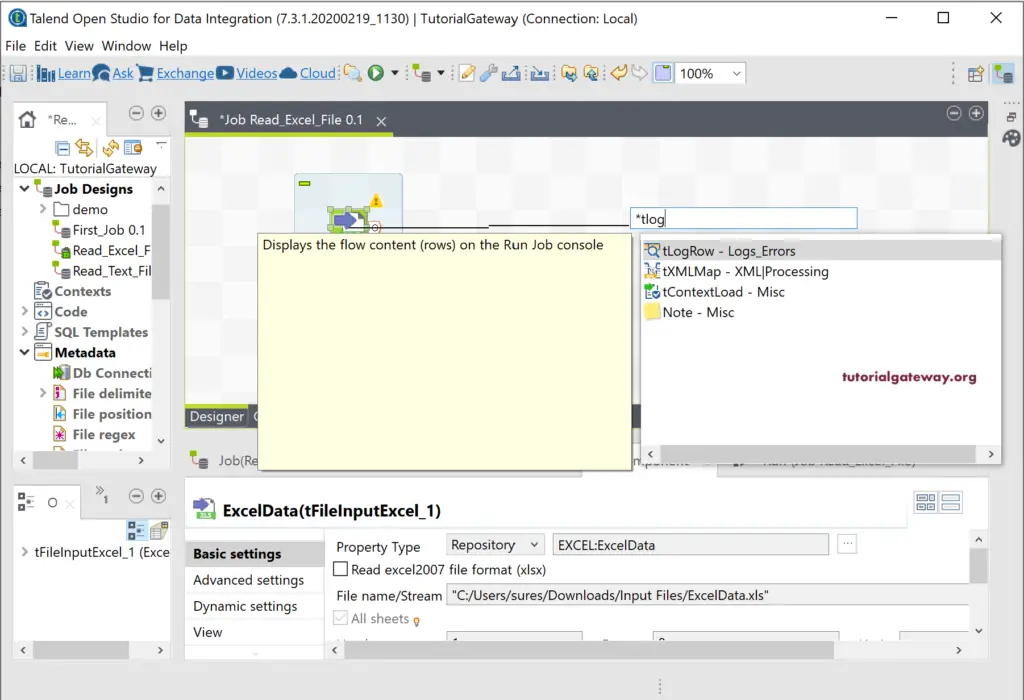
Here, we want to display the excel file output in tLogRow. So, drag the Main row from the Talend tFileInputExcel, and drop it on empty space. It will automatically open a textbox to type the field name. Here, we typed the tLog, and it was showing all the possible matches.
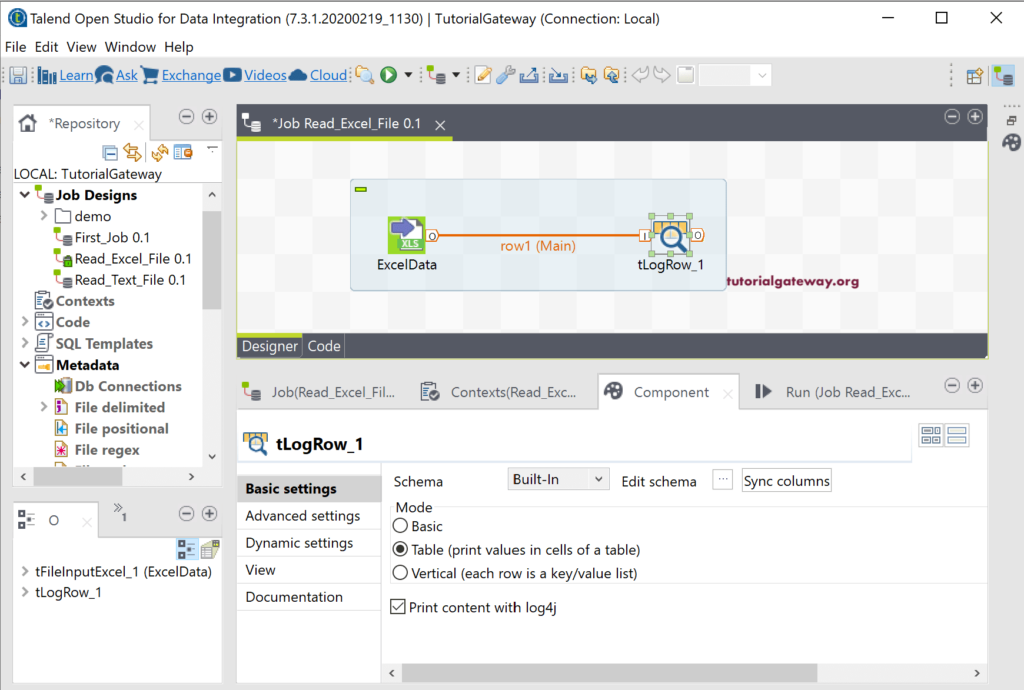
Here, we selected the Table preview for tLogRow.
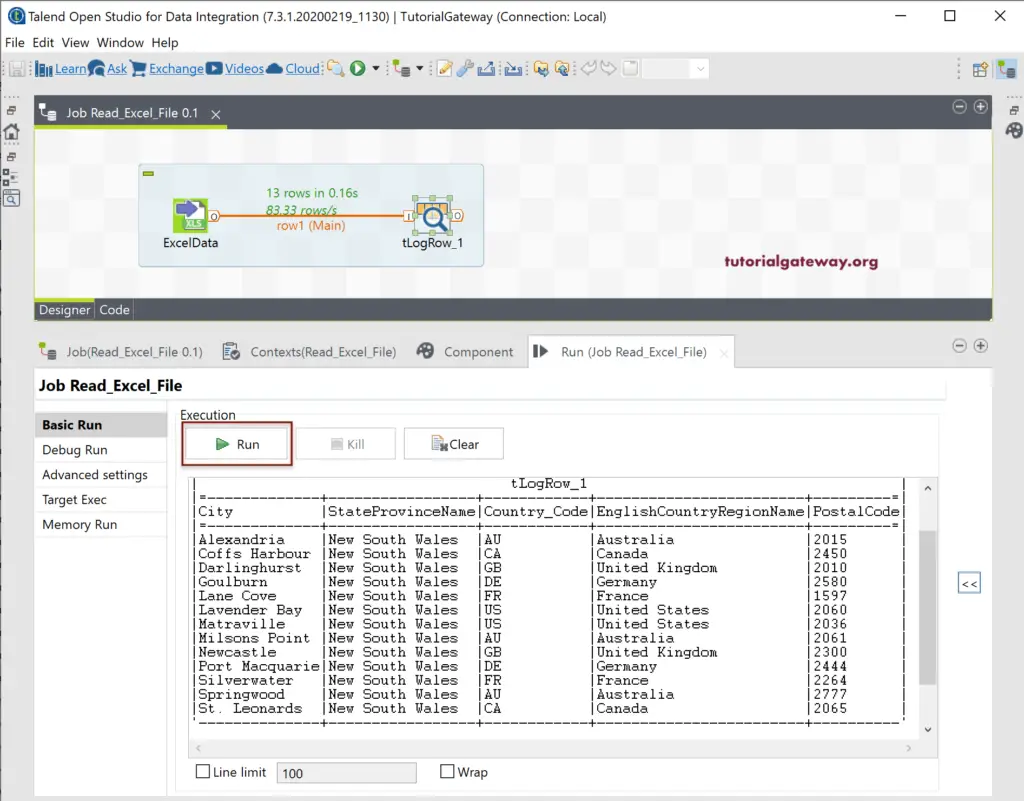
Let us run the Talend read Excel File job.
And you can see the result.
Please refer to load data from Excel to Database article to load this File into a Database.
