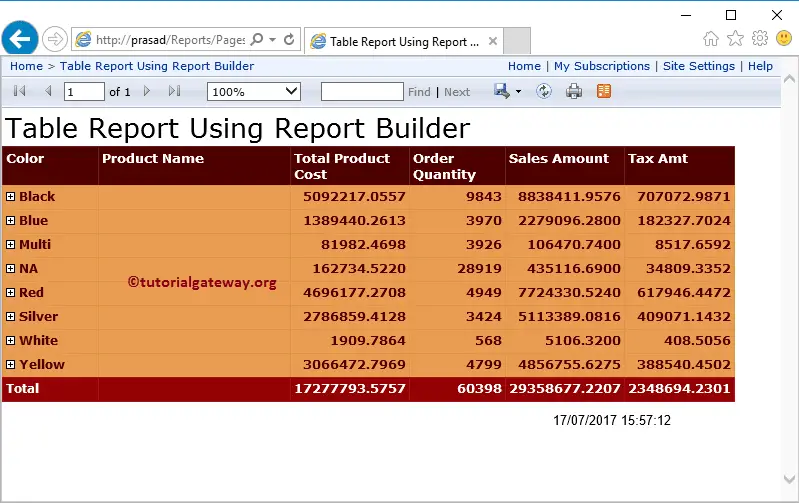
In this article, we will show you how to create a New Report in SSRS Report Builder Wizard. Or we can say the steps involved in creating New Table or Matrix report using SSRS Report Builder.
For this Create a New Report in SSRS Report Builder Wizard, we are going to use the Stored Procedure that we created in our previous Posts. The below screenshot will show you the data that we are going to use in this stored procedure:
TIP: If you want to create a custom Stored Procedure, then I suggest you refer Stored Procedure article that we mentioned in SQL Server Tutorial.
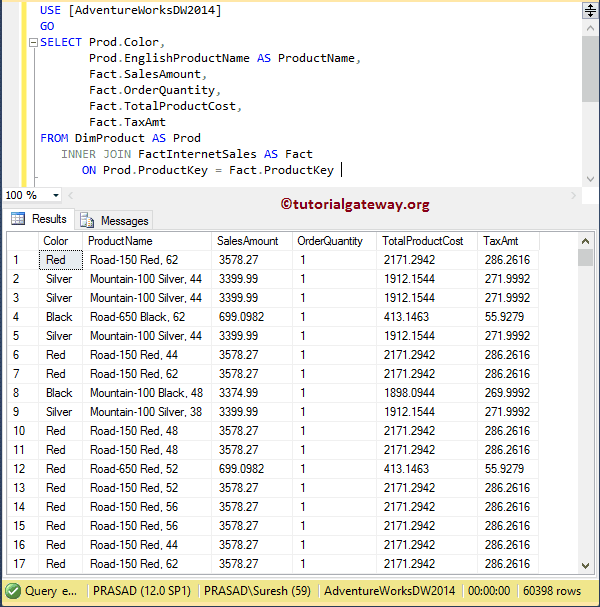
Now, Let me write a query to create a Stored Procedure on Adventure Works DW:
USE [AdventureWorksDW2014]
GO

IF OBJECT_ID ( 'SP_ProductSales', 'P' ) IS NOT NULL
    DROP PROCEDURE SP_ProductSales;
GO

CREATE PROCEDURE [dbo].[SP_ProductSales]
AS
BEGIN
      SET NOCOUNT ON;
	  SELECT Prod.Color,
             Prod.EnglishProductName AS ProductName,
             Fact.SalesAmount,
	         Fact.OrderQuantity,
             Fact.TotalProductCost,
             Fact.TaxAmt
       FROM DimProduct AS Prod
         INNER JOIN FactInternetSales AS Fact
            ON Prod.ProductKey = Fact.ProductKey
END
GO
To create a New SSRS Report, we have to open the report builder. To do this, Please open your report manager and click on the Report Builder button as shown in the below screenshot
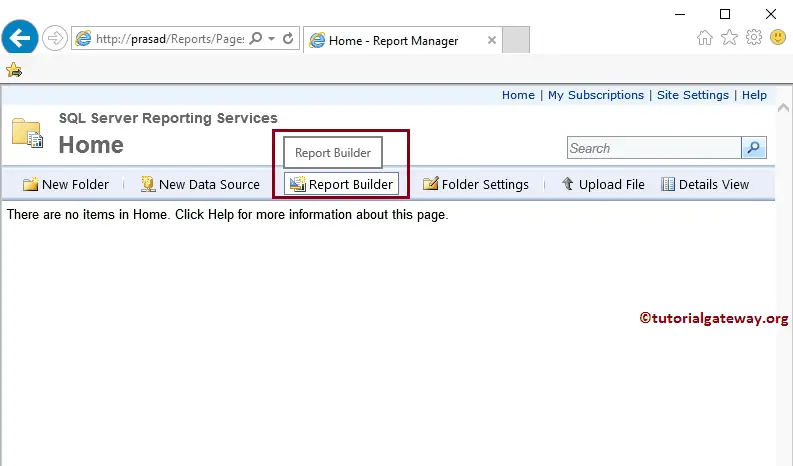
Once you click on the Report Builder button, the SQL Server Report Builder will be opened with a starting page, as shown in the below screenshot.
Create a New Report in SSRS Report Builder Wizard
In this example, we want to create a new report in SSRS Report Builder wizard so Please select the New Report tab, and then select the Table or Matrix Wizard option as we have shown below
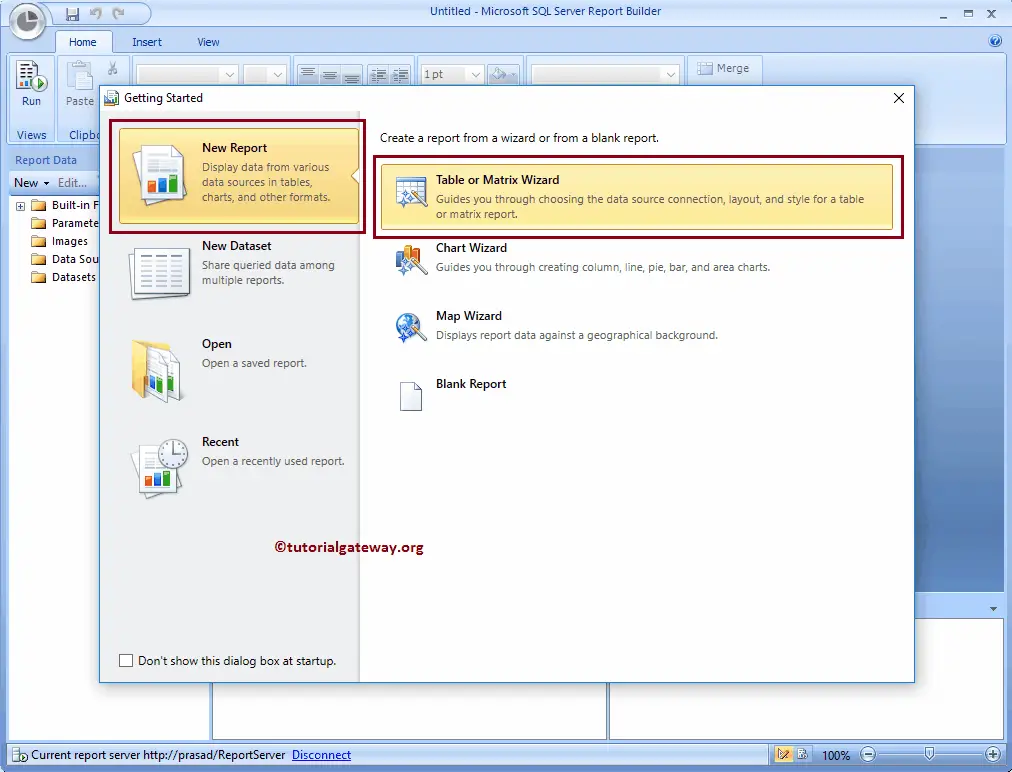
After you select the Table or Matrix Wizard option, a new window called New Table or Matrix will open, as we have shown below. If you had any existing data sets or Shared datasets in your Report Server, then use the first option.
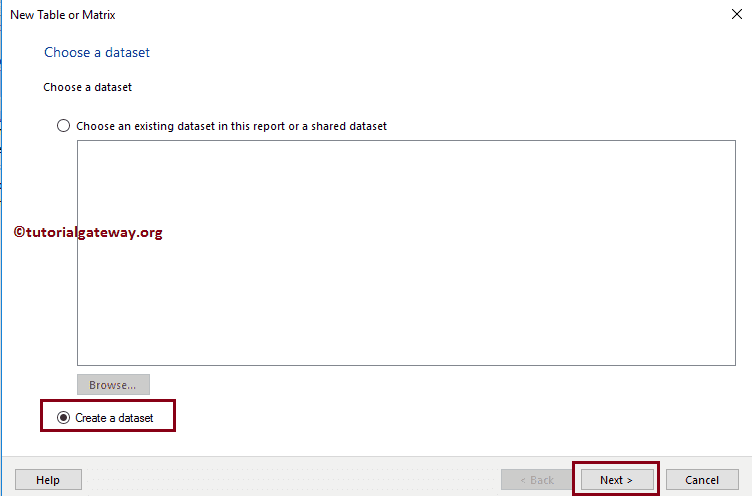
For now, we are selecting the second option. I suggest you refer to the Create a New dataset in Report Builder article. It has all the information to help you understand the steps involved in creating the shared dataset.
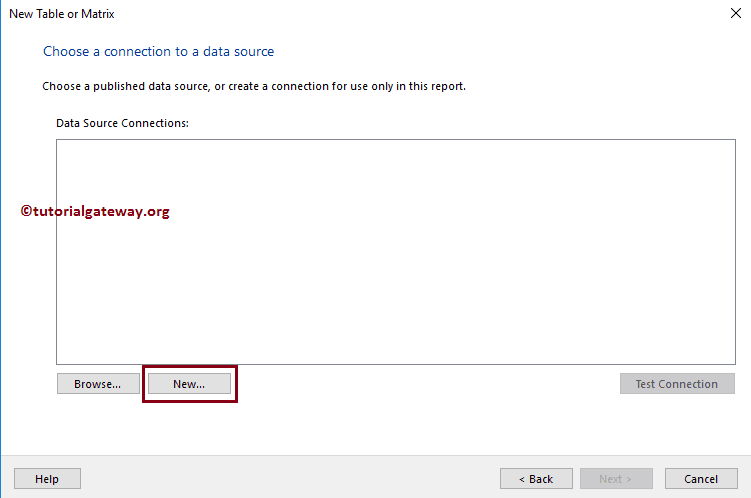
Next, we have to create a Data Source (Connection to Database). If you had any existing Data Sources or Shared Data Sources, then you can select them by clicking the Browse button. Here we will create a new Data Source.
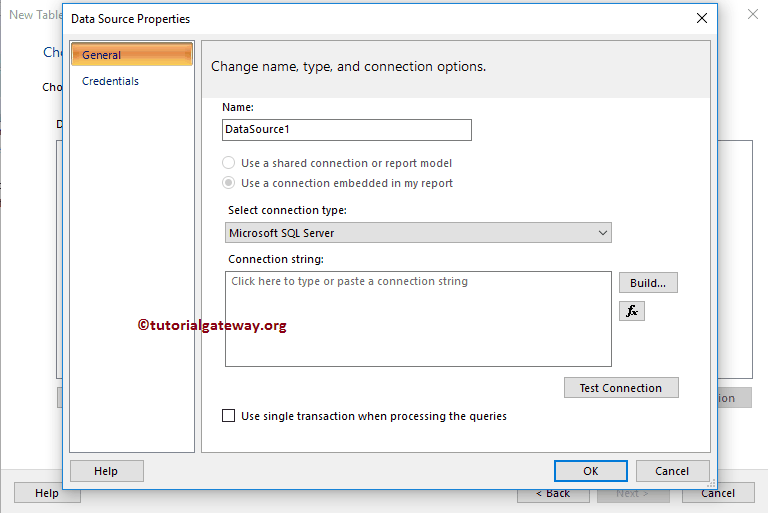
Once you click on the New button, the following window will be opened to write the connection string
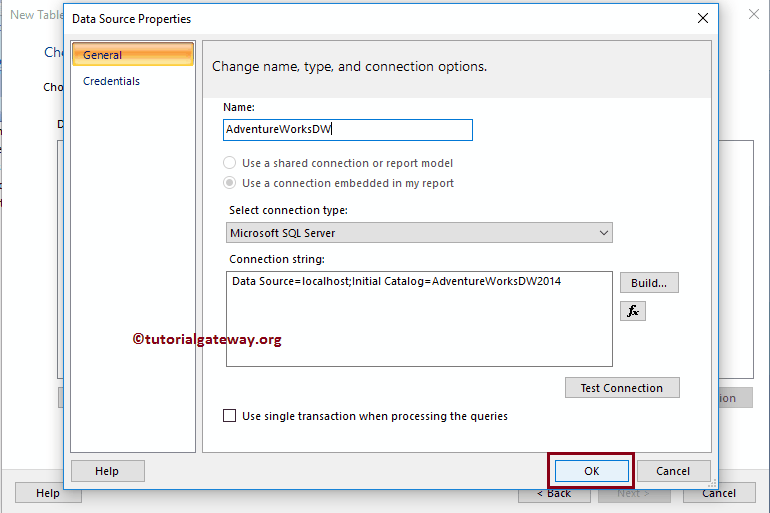
We changed the Data Source name to AdventureWorksDW, and also hard coded the connection string.
If you find any difficulty in writing the connection string, click on the Build button. And the Report Builder will create a Connection String for you.
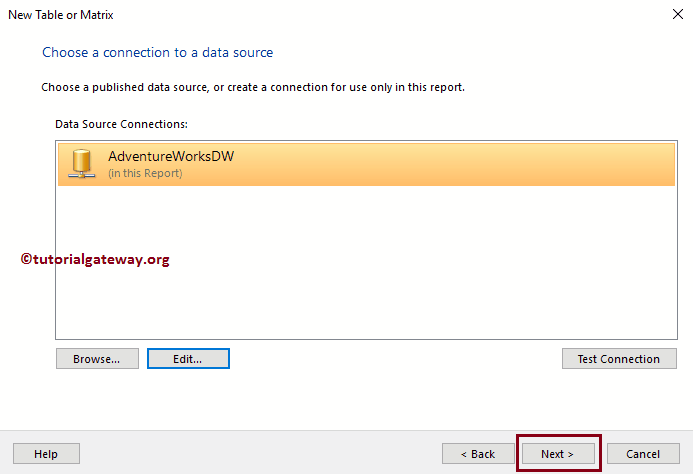
Please select the newly created Data Source and click the next button.
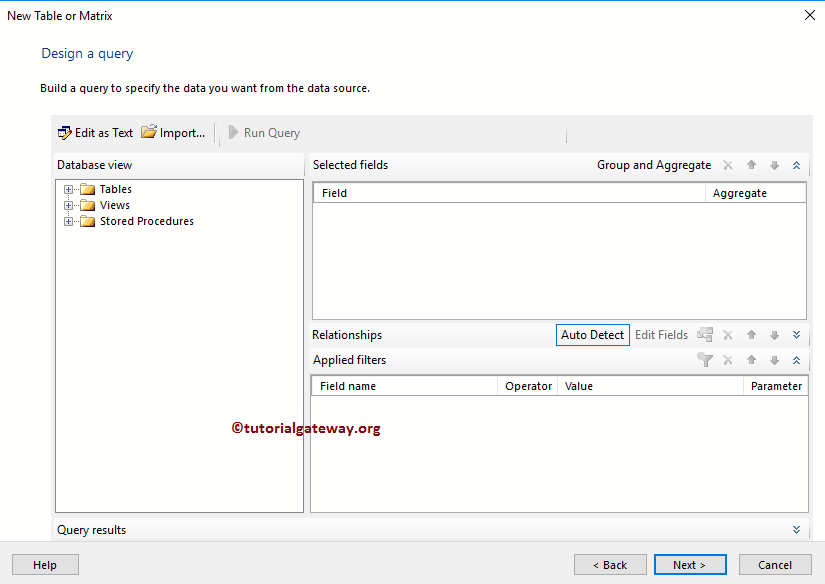
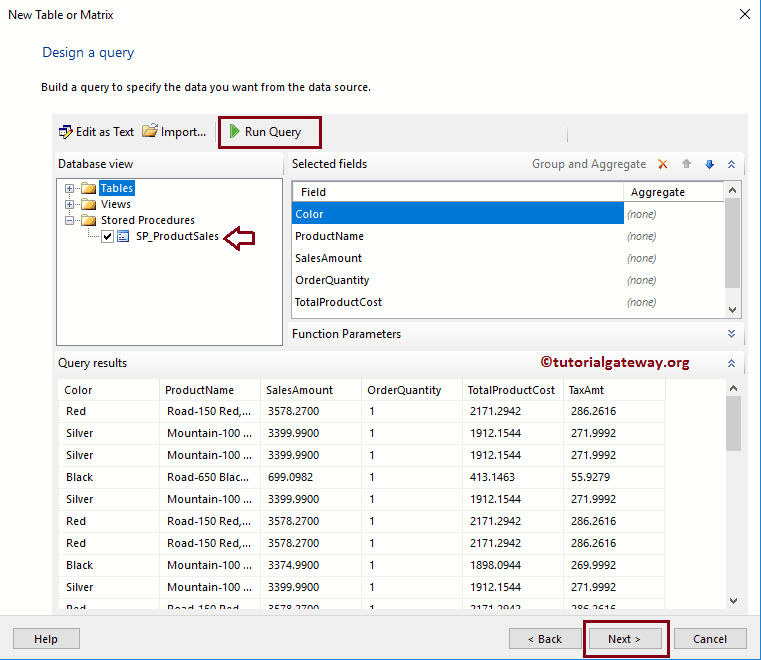
Design a Query window: Use this window to create a dataset for your report. We explained each step involved in this query designer to Create a New dataset in the report Builder article. For now, we are selecting the Stored procedure that we created earlier.
Run the query to check the data returned by the Store procedure
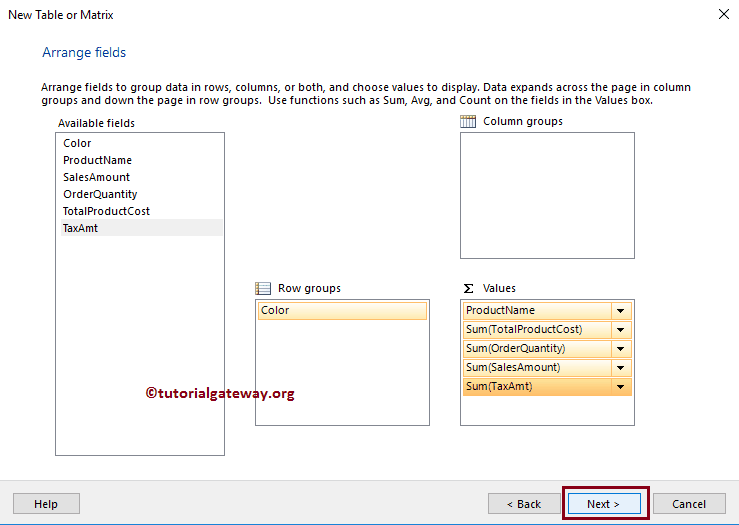
Next, we have four sections:
- Available Fields: List all the available columns in our dataset.
- Row groups: If you want to use any Column to use as the Row group, add that column name to this section
- Values: All the column names that you want to use in the table will place in this section.
- Column groups: If you want to use any Column to use as a Column group, add that column name to this section
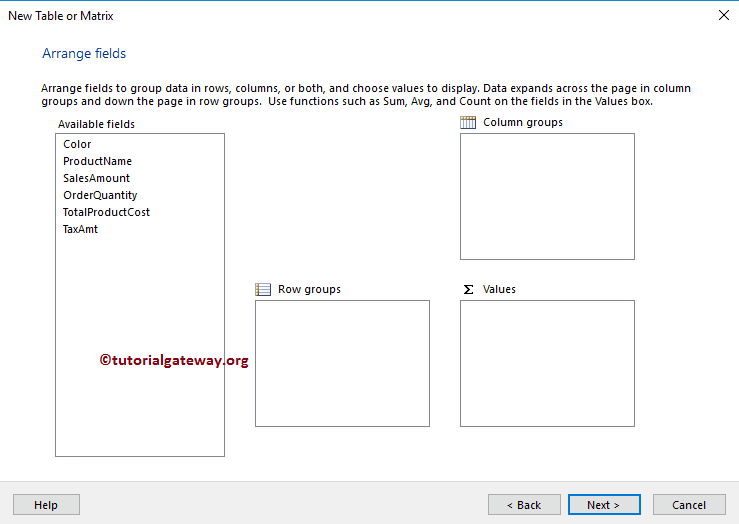
We are adding the Color to the Row Group, and the remaining Columns to Values. I suggest you to refer Add Row Groups and Column Groups article to understand the Grouping functionality.
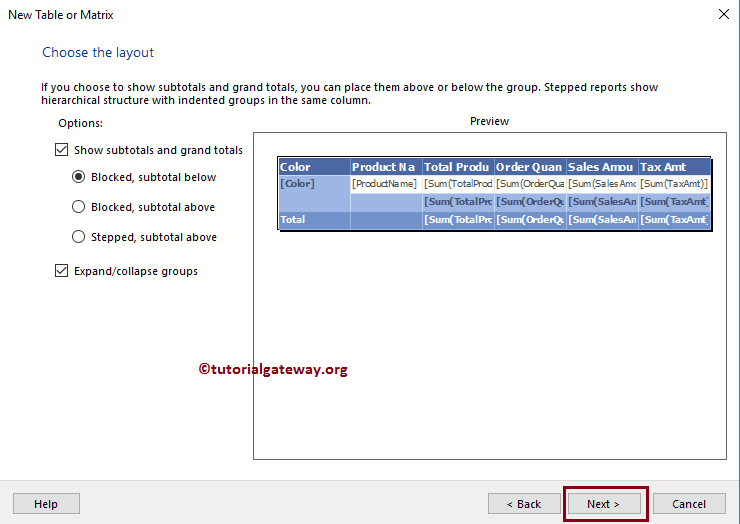
Choose the layout: For now, we are leaving the default settings to create a New Report in SSRS Report Builder Wizard.
- Show subtotals and Grand Total: If you want to show the subtotal and the grand total in your report, select this option.
- Expand/Collapse groups: Enable or disable the Drill Down functionality.
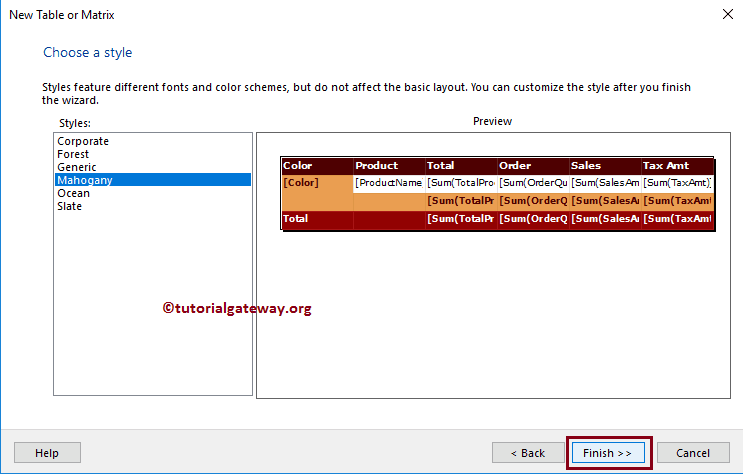
Please choose the layout from the existing templates.
Now you can see the auto-generated report.
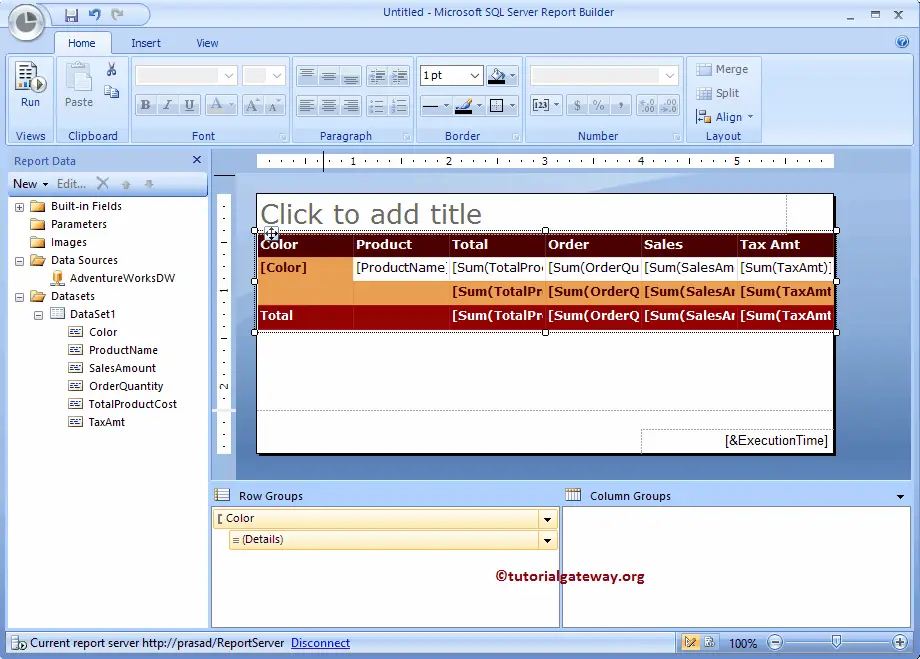
Remove the extra space around the table report, and click the Run button
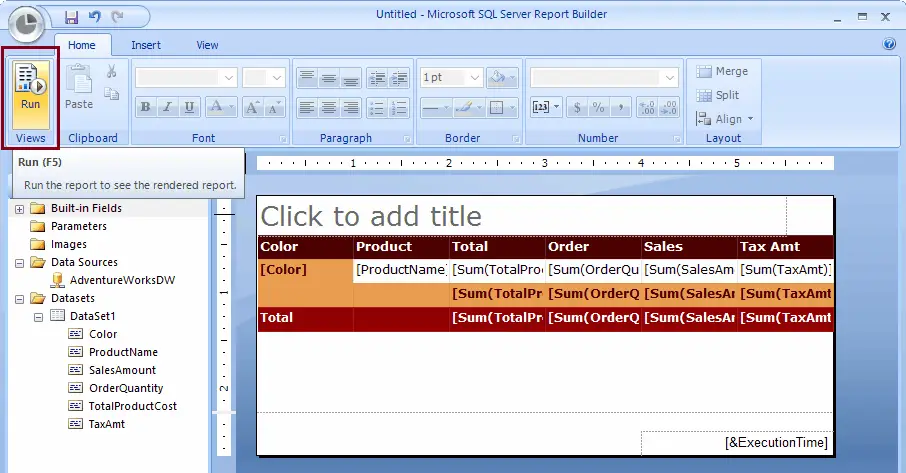
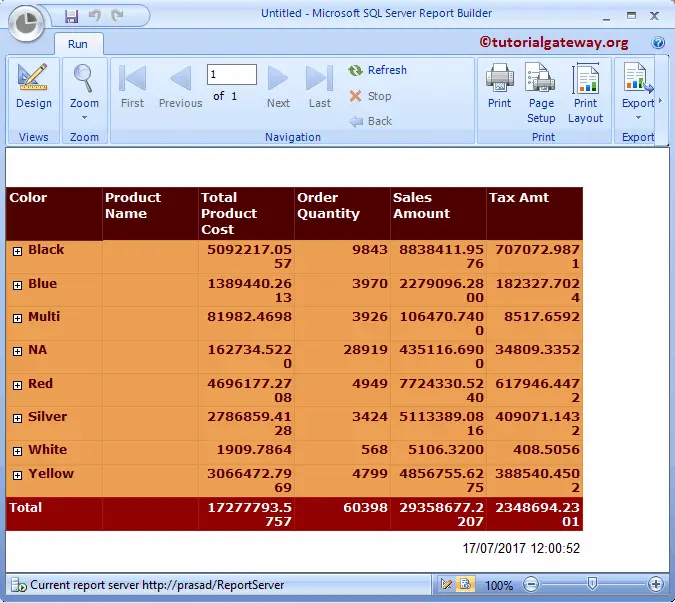
Once you click the Run button, the following report will generate. From the below screenshot, you can see that the report is showing the Drill Down Functionality. We already explained this concept in the Drill Down Reports article.
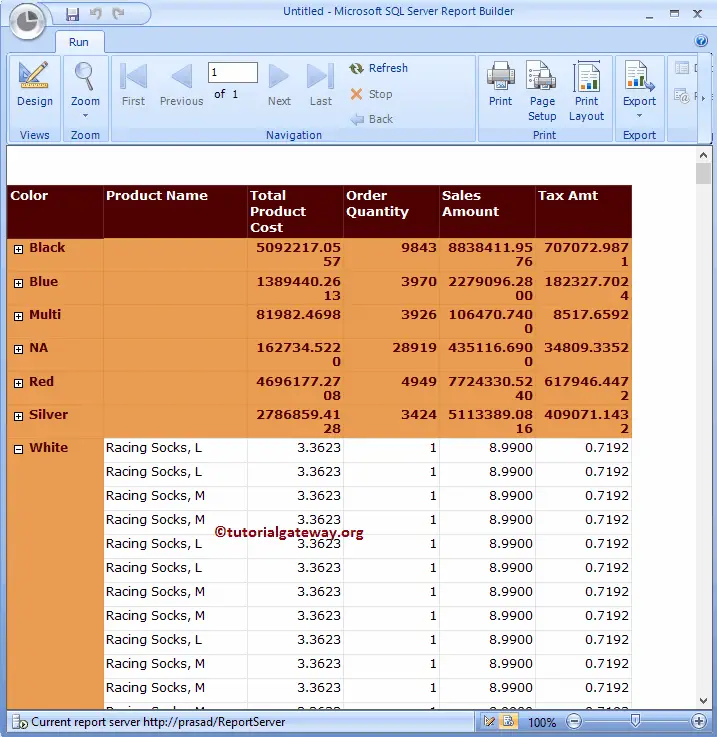
Try to expand every + button beside the color.
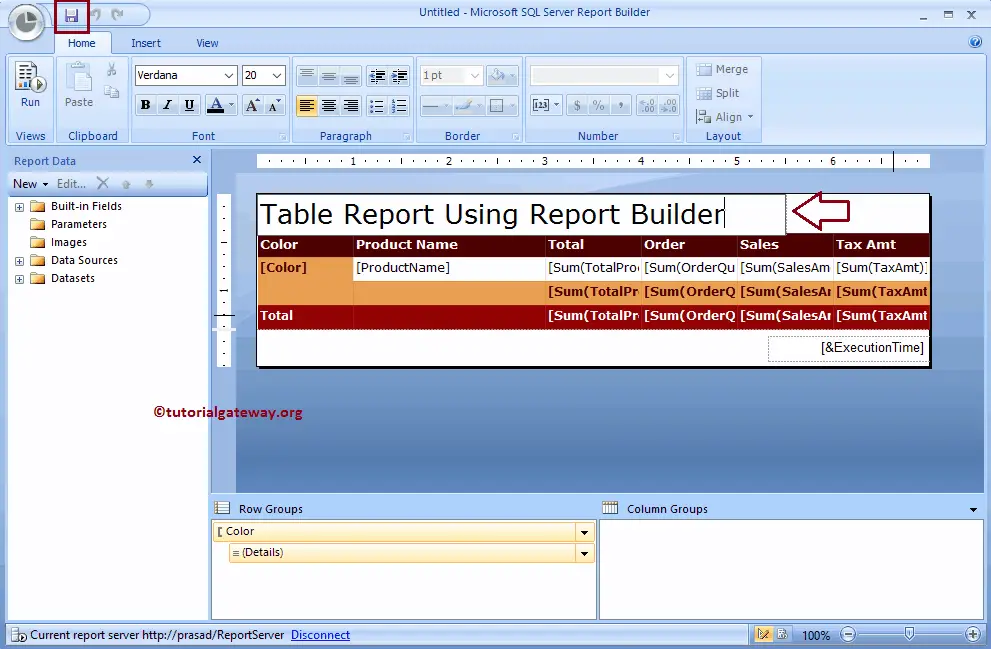
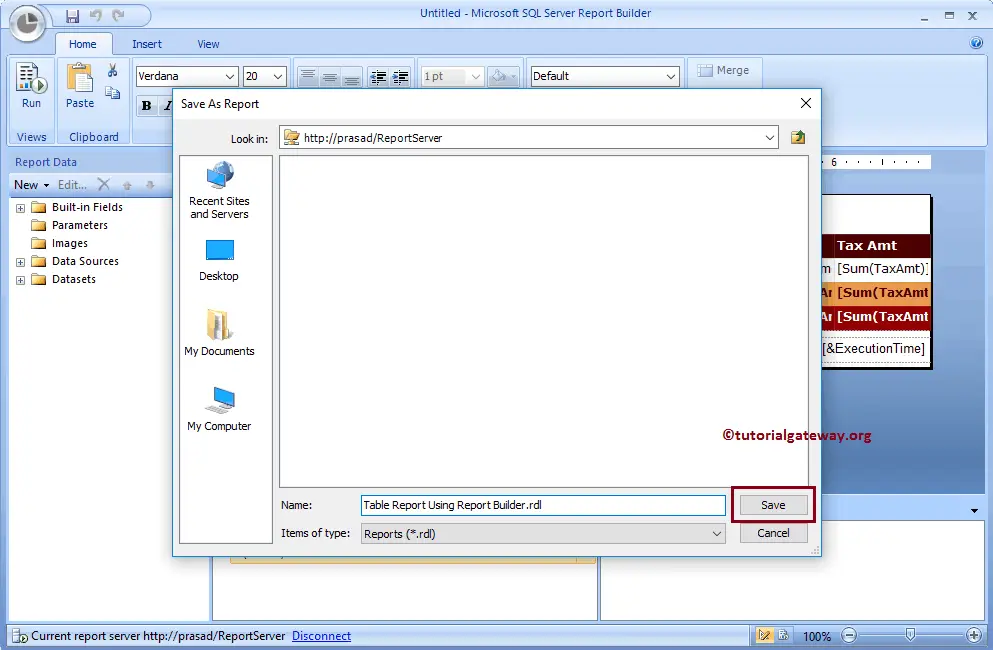
Let me change the newly created report name to Table Report using SSRS Report Builder wizard and click on the Save button to save the report in the report server.
After you click on the Save button, a new window called Save As Report will open. Here you have an option to select the local file system or the Report Server. Here, we are choosing the Report Server
Let me open my Report Server to show the newly created Table Report
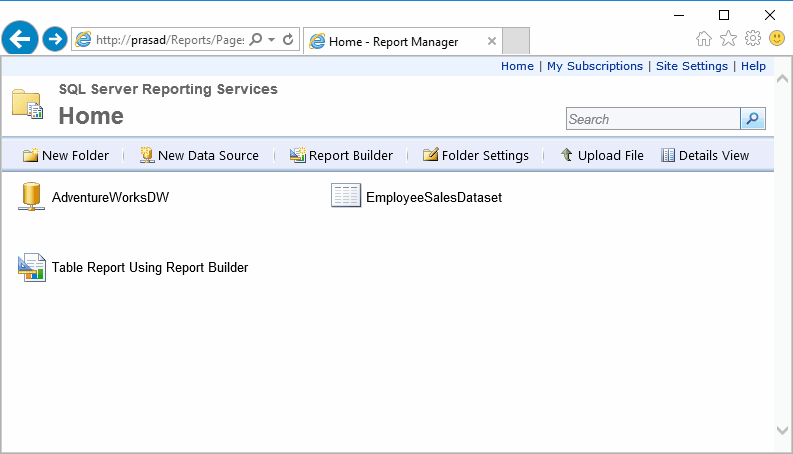
If you want to see the report preview or Run the report, then you don’t have to access the Report Builder or BIDS. Just click on the report will run the report. Let me select the report that we saved previously and click on it
Now you can see the report inside the Report Server.
