The Matrix in R is the most two-dimensional Data structure. In Matrix, data is stored in rows and columns, and we can access the element using both the row index and column index (like an Excel File). Let us see how to Create a Matrix, How to Access and manipulate the elements and how to perform Arithmetic Operations with example
The syntax of the Matrix in R Programming is as shown below.
Matrix_Name <- matrix(data, nrow, ncol, byname, dimnames)
If you observe the above syntax, data is a Vector, and
- nrow is the number of Rows you want to create. For example, nrow = 3 will create an R Matrix of 3 Rows.
- ncol: Number of Columns you want to create. For example, ncol = 2 will create a Matrix of 2 Columns.
- byrow: It is FALSE by default. If it is TRUE, then the elements will be arranged in Rows.
- dimnames: It is useful for changing the default Row and Column names to more meaningful names.
Create Matrix in R
In this example, we will create a Matrix of 12 elements. The most traditional way to create a Matrix is
A <- matrix(c(1:12), nrow = 3, ncol = 4)
print(A)

# Elements are arranged sequentially by column.
B <- matrix(c(1:12), nrow = 3, ncol = 4, byrow = FALSE)
print(B)

# Elements are arranged sequentially by row.
D <- matrix(c(1:12), nrow = 3, ncol = 4, byrow = TRUE)
print(D)
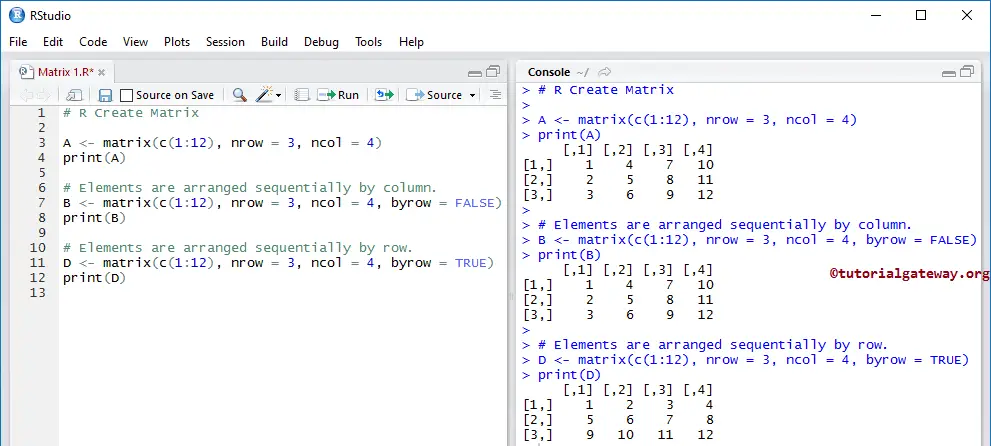
It creates a Matrix of 12 elements arranged in three rows and four columns.
A <- matrix(c(1:12), nrow = 3, ncol = 4)
As you see, the elements are arranged column-wise. To show the same, we explicitly specified the byrow argument.
B <- matrix(c(1:12), nrow = 3, ncol = 4, byrow = FALSE)
Let us change the byrow option from FALSE to TRUE to arrange the elements by Row wise.
D <- matrix(c(1:12), nrow = 3, ncol = 4, byrow = TRUE)
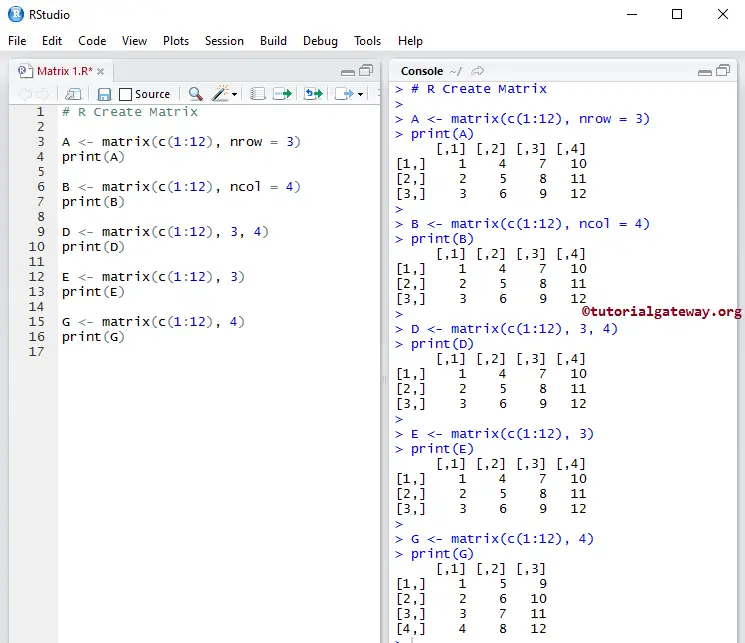
A Simple Approach to Create Matrix in R
It is not always required to specify nrow and ncol in R Programming.
# It will create a Matrix of 3 Rows and the remaining items will be arranged Accordingly
A <- matrix(c(1:12), nrow = 3)
print(A)

# It will create 4 Columns and the remaining (row) items will be arranged Accordingly
B <- matrix(c(1:12), ncol = 4)
print(B)

# It will create 3 rows and 4 Columns
D <- matrix(c(1:12), 3, 4)
print(D)

# It will create a 3 rows
E <- matrix(c(1:12), 3)
print(E)

# It will create 4 Rows. To create 4 Columns you have to specify ncol = 4 explicitly
G <- matrix(c(1:12), 4)
print(G)
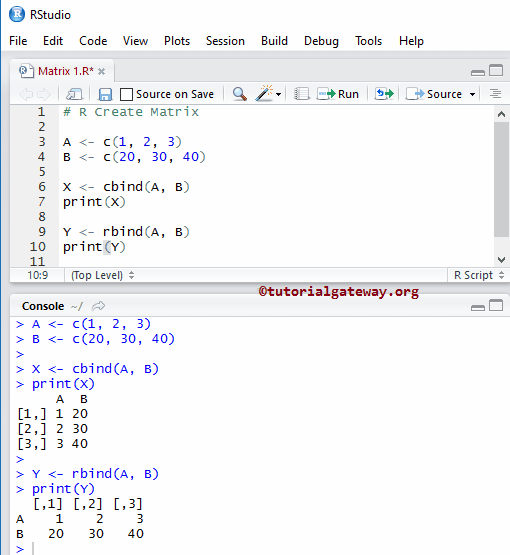
Create a Matrix using cbind and rbind
This example shows another way of creating a Matrix in the programming. cbind is used for binding vectors in Columns, and the rbind is used for binding vectors in Row wise
A <- c(1, 2, 3)
B <- c(20, 30, 40)

X <- cbind(A, B)
print(X)

Y <- rbind(A, B)
print(Y)
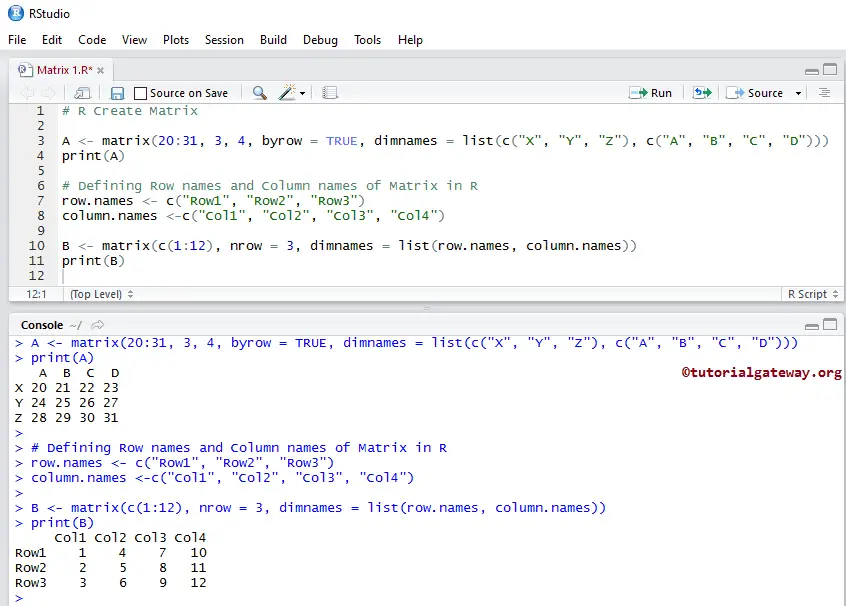
Define Row names and Column names for the matrix in R
We will replace the default names of the Rows and Columns or define new names for the Rows and Columns in a matrix. We can achieve the same using dimnames as: x <- matrix(1:12, 4, 3, dimnames = list(rowNames, columnNames)
A <- matrix(20:31, 3, 4, byrow = TRUE, dimnames = list(c("X", "Y", "Z"), c("A", "B", "C", "D")))
print(A)

# Defining names
row.names <- c("Row1", "Row2", "Row3")
column.names <-c("Col1", "Col2", "Col3", "Col4")

B <- matrix(c(1:12), nrow = 3, dimnames = list(row.names, column.names))
print(B)
Matrix with Recycling elements
The above examples are working fine because we specify exact elements in Rows and columns, such as 12 elements arranged in 3 rows and 4 columns. What will happen if we specify a smaller number of elements?
A <- matrix(c(44: 46), nrow = 3, ncol = 3)
print(A)

B <- matrix(c(44: 46), nrow = 3, ncol = 3, byrow = TRUE)
print(B)
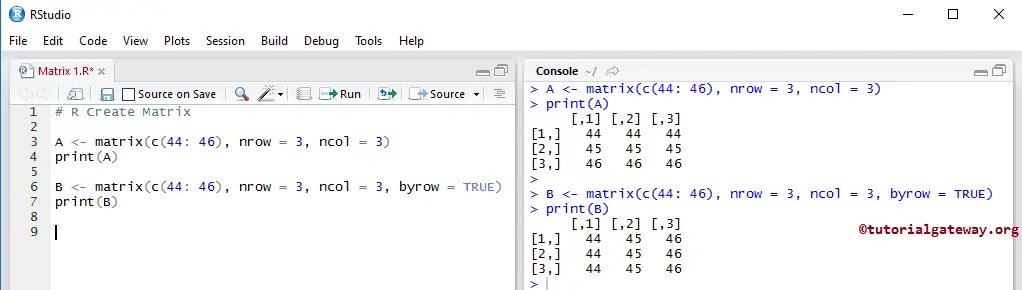
It creates a Matrix of 12 items arranged in three rows and four columns. Here 44, 45, and 46 will be repeated until it is finished creating a 3*4.
A <- matrix(c(44: 46), nrow = 3, ncol = 3)
Here, 44, 45, and 46 are arranged column-wise. To change the recycling style, we changed the byrow option from FALSE to TRUE. This will arrange the elements by Row wise.
B <- matrix(c(44: 46), nrow = 3, ncol = 3, byrow = TRUE)
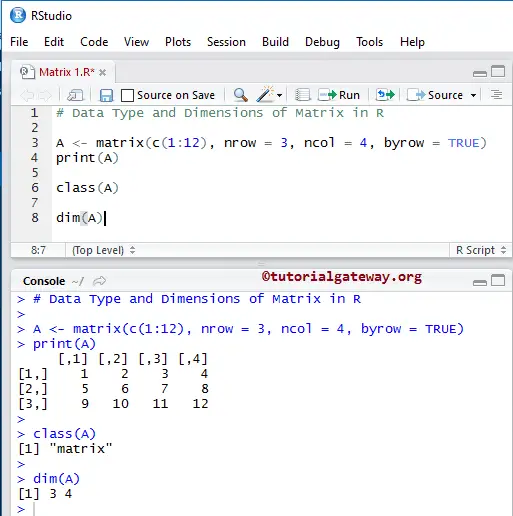
Important Function for Matrix
In this Programming, the Class function will define its type, and the dim function will return the dimensions of the Matrix.
# Data Type and Dimensions

A <- matrix(c(1:12), nrow = 3, ncol = 4, byrow = TRUE)
print(A)

class(A)

dim(A)
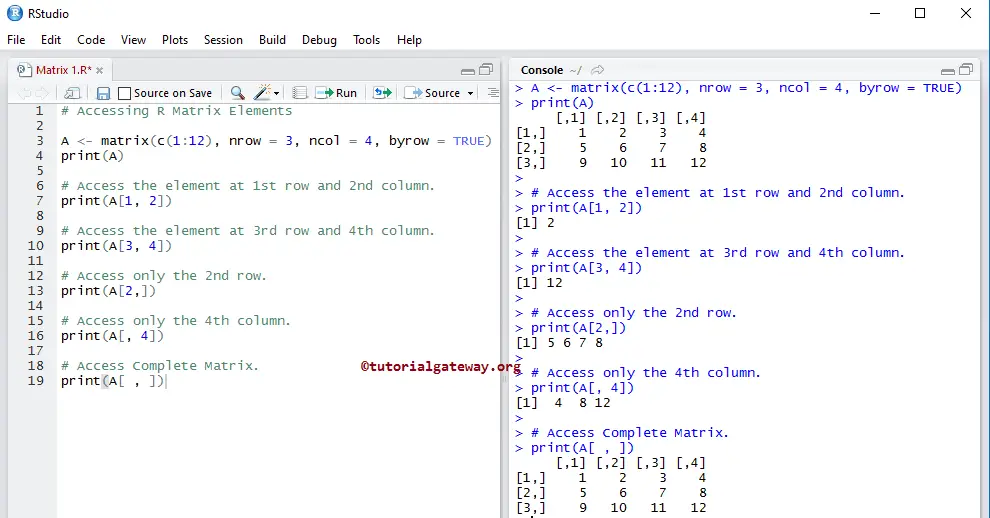
Accessing R Matrix Elements
We can use the index position in this programming to access the Matrix elements. Using this index value, we can change every element. Index starts at 1 and ends at n, where n is the row or column size.
For example, we declare a 6 * 4, which means it will store 6 row elements and 4 column elements. To access or alter 1st value, use Matrix.name[1, 1], to access or alter 2nd row 3rd column value, use Matrix.name[2, 3] and to access the 6th row 4th column, then use Matrix.name[6, 4].
# Accessing Items

A <- matrix(c(1:12), nrow = 3, ncol = 4, byrow = TRUE)
print(A)

# Access the Items at 1st row and 2nd column.
print(A[1, 2])

# Access the items at 3rdrow and 4thcolumn.
print(A[3, 4])

# Access only the 2ndrow.
print(A[2,])

# Access only the 4th column.
print(A[, 4])

# Access All
print(A[ , ])
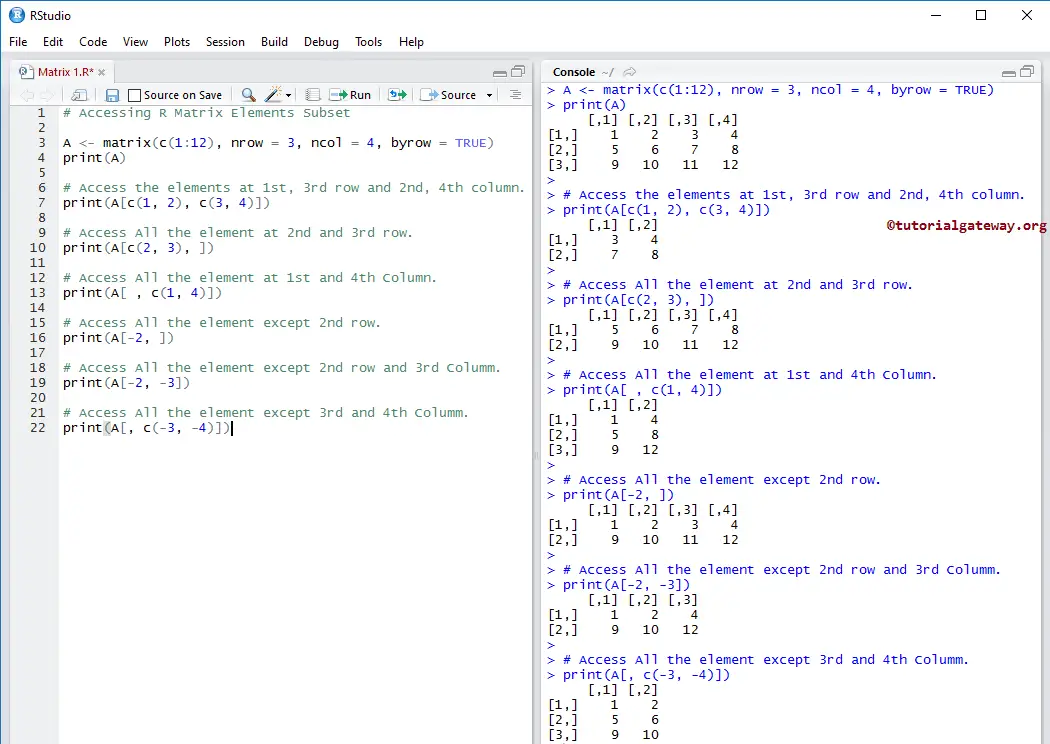
Accessing the Subset of a Matrix
Here, we show how to access a subset of multiple items from it. For this, we use the Vector. A negative index position is used to omit those values
# Accessing Items Subset

A <- matrix(c(1:12), nrow = 3, ncol = 4, byrow = TRUE)
print(A)

# Access the Items at 1st, 3rd row and 2nd, 4th column.
print(A[c(1, 2), c(3, 4)])

# Access All the element at 2nd and 3rd row.
print(A[c(2, 3), ])

# Access All the element at 1st and 4th Column.
print(A[ , c(1, 4)])

# Access All the element except 2nd row.
print(A[-2, ])

# Access All the items except 2ndrow and 3rdColumn.
print(A[-2, -3])

# Access All the element except 3rd and 4th Column.
print(A[, c(-3, -4)])
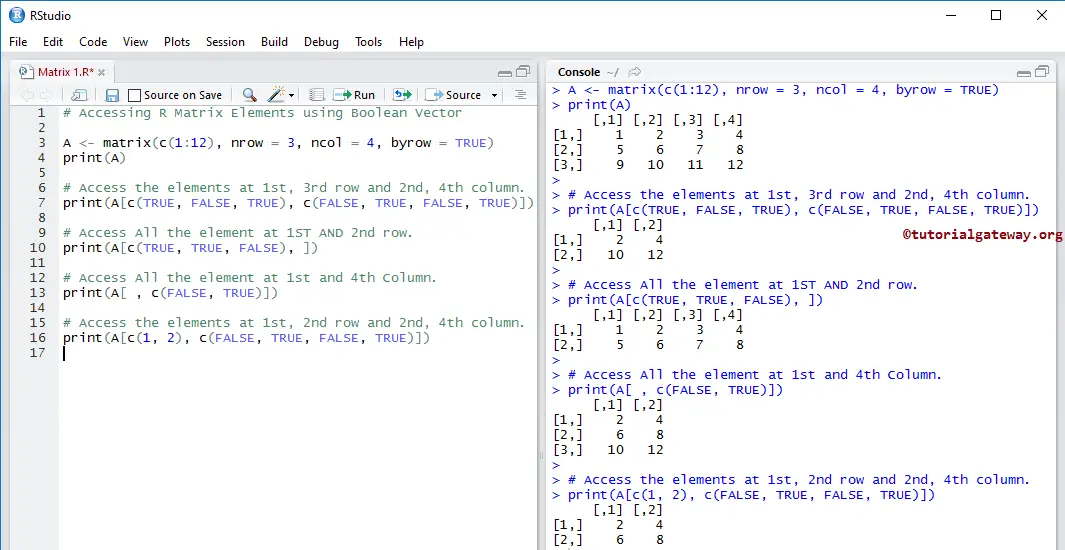
Accessing Matrix Elements using Boolean Vector
In this example, we declared a Boolean vector. We used those Boolean values as the index position to access the R Matrix elements. Here, TRUE means access to the value, and FALSE means omit.
# Accessing Elements using Boolean Vector

A <- matrix(c(1:12), nrow = 3, ncol = 4, byrow = TRUE)
print(A)

# Access the elements at 1st, 3rd row and 2nd, 4th column.
print(A[c(TRUE, FALSE, TRUE), c(FALSE, TRUE, FALSE, TRUE)])

# Access All the element at 1ST AND 2nd row.
print(A[c(TRUE, TRUE, FALSE), ])

# Access All the element at 1st and 4th Column.
print(A[ , c(FALSE, TRUE)])

# Access the elements at 1st, 2nd row and 2nd, 4th column.
print(A[c(1, 2), c(FALSE, TRUE, FALSE, TRUE)])
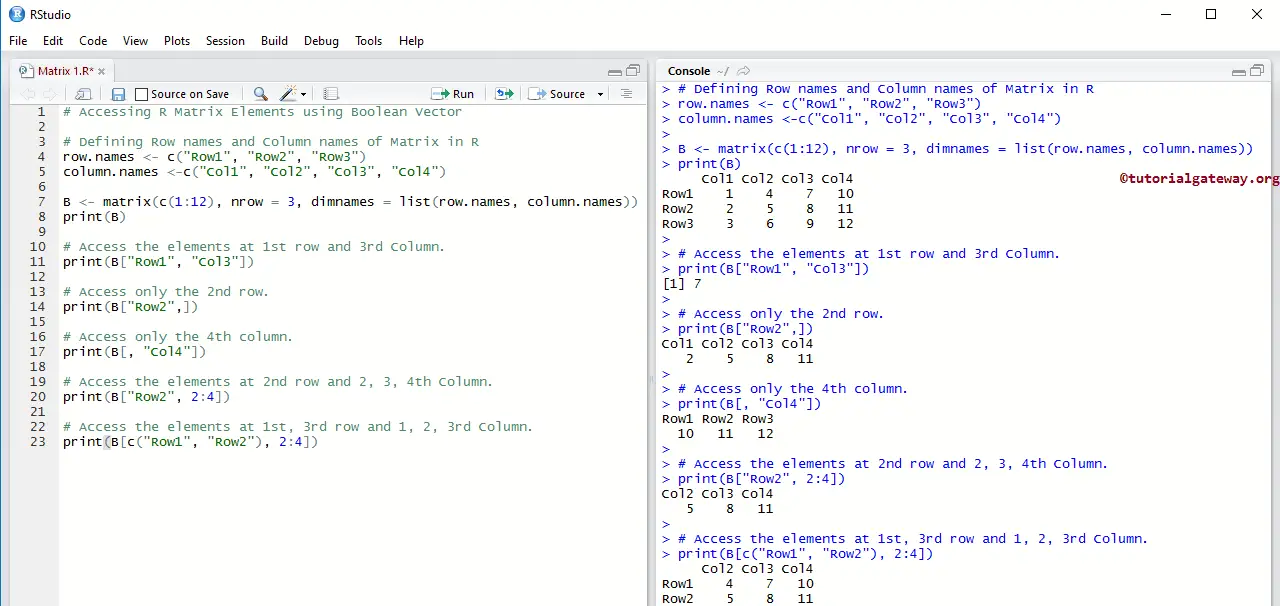
Accessing R Matrix Elements using Character Index
It shows how to access the Matrix elements using Character Vectors Index values. Here, we assigned the Row names and column names that can help us to extract the items using the Row names as the Index values.
# Accessing Elements using Char Index

# Defining Row names and Column names of Matrix in R
row.names <- c("Row1", "Row2", "Row3")
column.names <-c("Col1", "Col2", "Col3", "Col4")

B <- matrix(c(1:12), nrow = 3, dimnames = list(row.names, column.names))
print(B)

# Access the elements at 1st row and 3rd Column.
print(B["Row1", "Col3"])

# Access only the 2nd row.
print(B["Row2",])

# Access only the 4th column.
print(B[, "Col4"])

# Access the elements at 2nd row and 2, 3, 4th Column.
print(B["Row2", 2:4])

# Access the elements at 1st, 3rd row and 1, 2, 3rd Column.
print(B[c("Row1", "Row2"), 2:4])
Modify Matrix Elements
In the programming, We can use the index position to modify the elements in a Matrix. For example, if we declare a 3 * 4 that stores 12 elements (3 rows and 4 columns). To access or alter the 1st value, use MatrixName[1, 1]. To access or alter the 2nd row 3rd column value, use MatrixName[2, 3].
# Modifying

A <- matrix(c(1:9), nrow = 3, ncol = 3)
print(A)

A[2, 2] <- 100
print(A)

A[A < 5] <- 222
print(A)
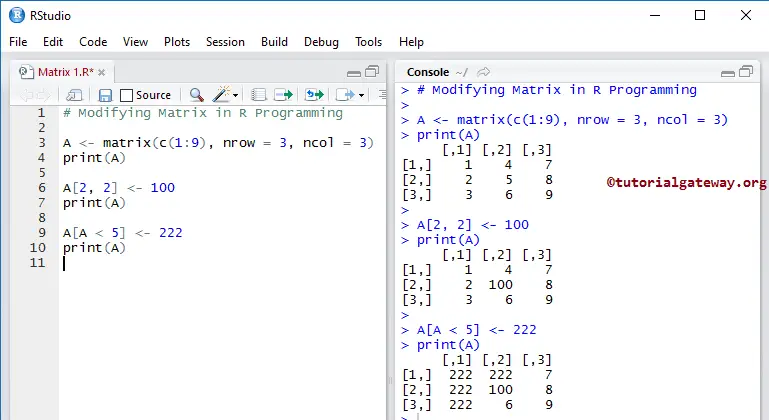
It will assign 100 to the item at position 2nd row and 2nd column.
A[2, 2] <- 100
It assigns 222 to all the elements whose values are less than 5. Here A < 5 will check whether the elements in A is less than 5 or not, and if the condition is true, then that item will be replaced by 222.
A[A < 5] <- 222
Matrix Addition and Subtraction
Using Arithmetic Operators to perform arithmetic operations on Matrix in R programming.
# Addition and Subtraction

# Create 2x3 matrices.
a <-  matrix( c(15, 34, 38, 44, 75, 93), nrow = 2)
b <-  matrix( c(10, 20, 30, 40, 50, 60), nrow = 2)

print(a)
print(b)

# Adding two
print(a + b)

# Subtraction One from another
print(a - b)
Here, a + b means (15 + 10, 34 + 20, 38 + 30, 44 + 40, 75 + 50, 93 + 60)

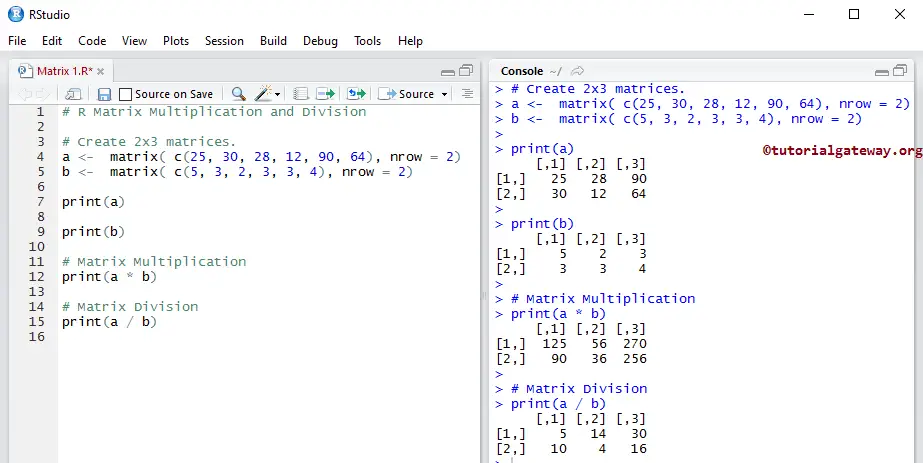
Matrix Multiplication and Division
We use Arithmetic Operators to perform Matrix multiplication and Division. First, we declared a and b of two rows and three columns.
Next, we performed matrix multiplication and Division on them. Here a * b means (25 * 5, 30 * 3, 28 * 2, 12 * 3, 90 * 3, 64 * 4), and a / b means (25 / 5, 30 / 3, 28 / 2, 12 / 3, 90 / 3, 64 / 4)
# Multiplication and Division

# Create 2x3 matrices.
a <-  matrix( c(25, 30, 28, 12, 90, 64), nrow = 2)
b <-  matrix( c(5, 3, 2, 3, 3, 4), nrow = 2)

print(a)
print(b)

# Multiplication
print(a * b)

# Division
print(a / b)