
The Expression Transformation in Informatica is a passive transformation that is used to perform non-aggregate calculations on the source data. It means you can use this Informatica Expression transformation to perform calculations on a single row. For example, you are trimming the extra spaces, data conversions, string manipulations, etc.
The following are some of the operations achieved by the expression transformation in Informatica :
- Using this expression transformation in Informatica, we can test the data before passing it to another transformation or target table using conditional statements IIF
- Data Manipulation: We can manipulate the data using built-in functions. For example, String Concatenation, Trimming the extra spaces using LTRIM and RTRIM, Rounding the values, etc.
- Data Conversion: Converting the existing data to a required form using TO_DATE, TO_DECIMAL, etc.
- Manipulating Date value: Extracting date part, calculating the date differences, etc.
- Perform Arithmetic and logical operations.
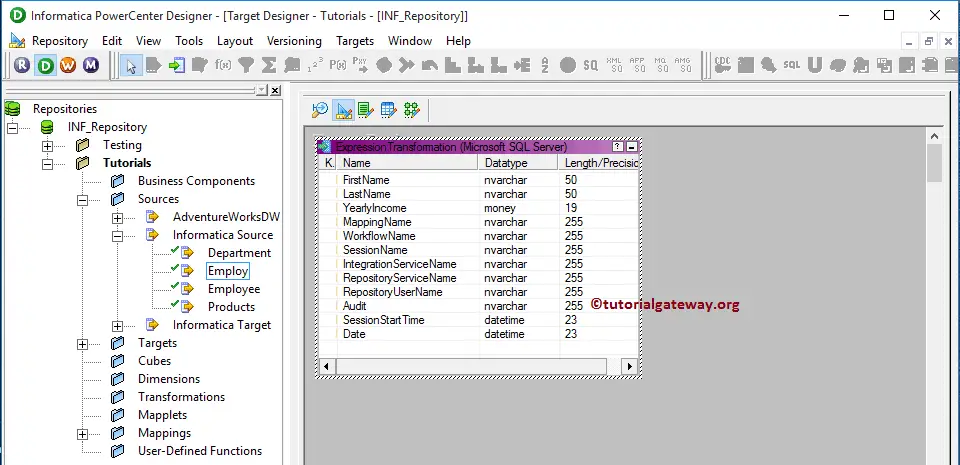
This example explains the steps to configure the Expression Transformation in Informatica to store the Audit information. For this example, we are going to use the below show data.
In real-time, this audit information will be very helpful in checking the session time, Mapping Name, Workflow Name, Session Name, Integration Service Name, Repository Service Name, Repository User Name, Source Table Name, Session Start Time, and System Date.
Configure Expression Transformation in Informatica
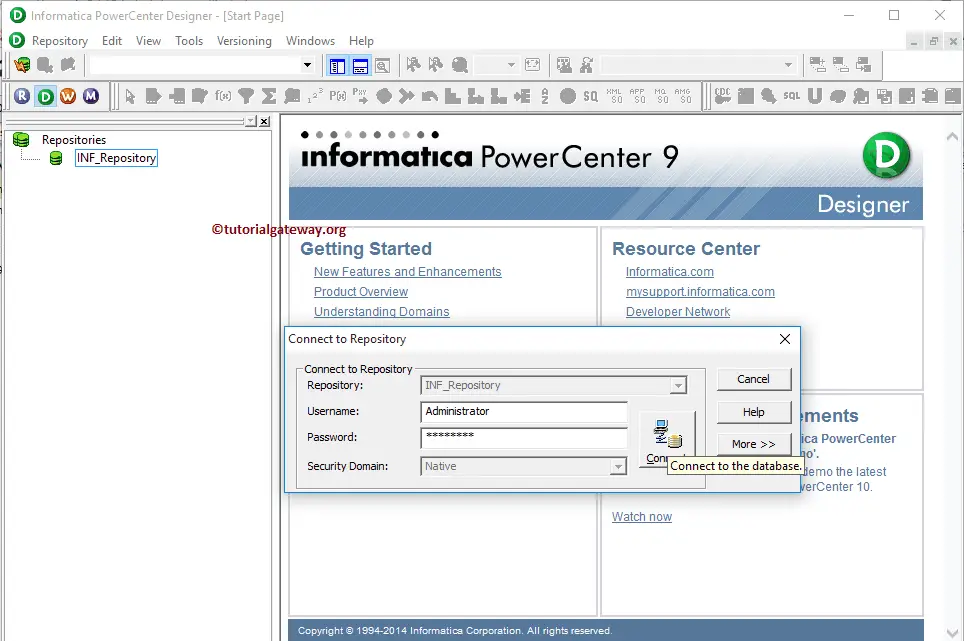
In this example, Our task is to load [First Name], [Last Name], and [Yearly Income] from the above source to the target table along with Audit Information. Before we start configuring the Expression transformation in Informatica, First connect to the repository service.
To connect with the Informatica Repository service, we have to provide the Admin Console Username and Password you specified while installing the Server. Next, click on the Connect button.
Create Informatica Expression Transformation Source Definition
Once you connect, Please navigate to Source Analyzer and define your Sources. In this Informatica expression transformation example, we are using the [Employ] table from the SQL Server database as our source definitions. Please refer Database Source article for the source definition.
Create Informatica Expression Transformation Target Definition
Please navigate to Target Designer and define the Informatica Expression Transformation Target. In this example, we are using the already created SQL table (Expression Transformation) as our target definition. Please refer Create Target table using the Source Definition article
Create Expression Transformation in Informatica Mapping
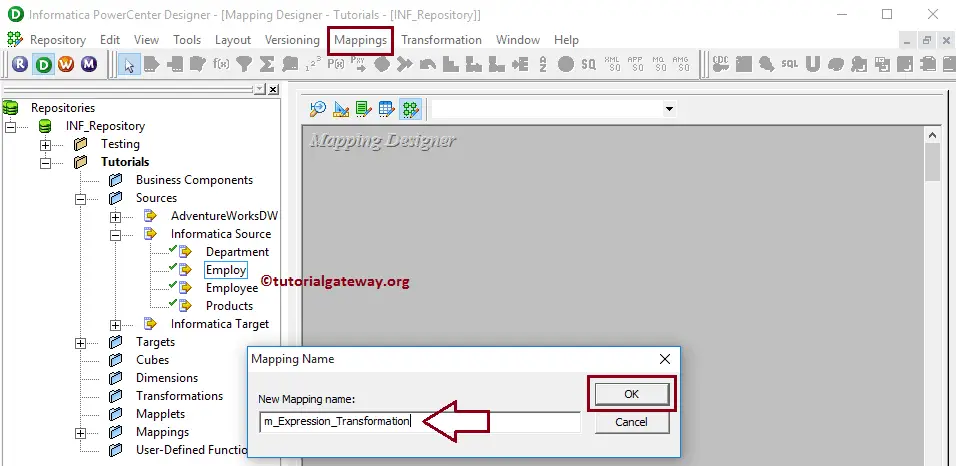
To create new Informatica Expression Transformation mapping, Please navigate to the Mappings menu and select the Create.. option. It opens the Mapping Name window to write a unique name (m_Expression_Transformation) and then click the OK button.
Next, Drag and drop the [Employ] source definition from the Sources folder to the mapping designer. Once you drag the source, the PowerCenter designer will automatically create the default transformation called the source qualifier.
Creating Expression Transformation in Informatica
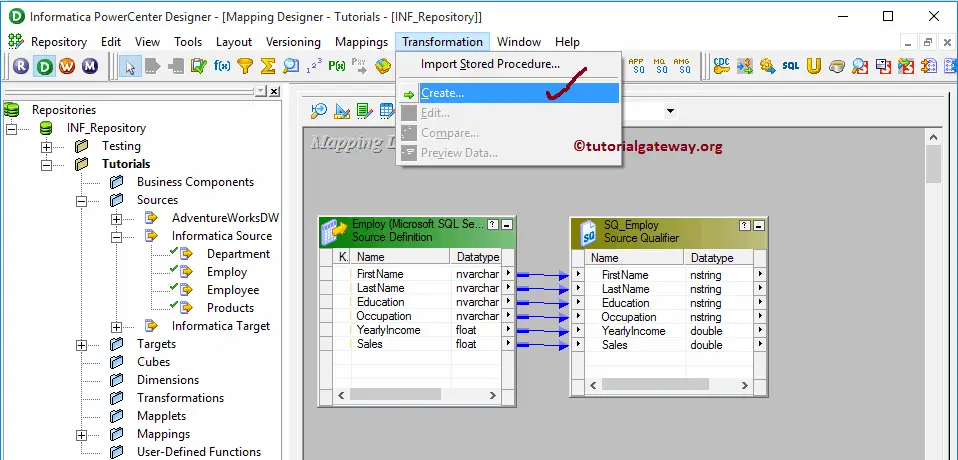
To create Expression Transformation in Informatica, Please navigate to the Transformation menu and select the Create.. option.
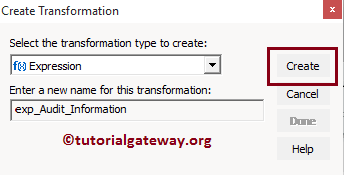
Once you click on the Create.. option, Create Transformation window will open. Please select the Informatica Expression Transformation and specify the unique name (exp_Audit_ Information) and then click on Create button.
Once you click on the Create button, Expression Transformation will add to the mapping designer. Please connect the Source definition with the transformation.
From the below screenshot you can observe that we are adding [First Name], [Last Name] and [Yearly Income] to the expression transformation

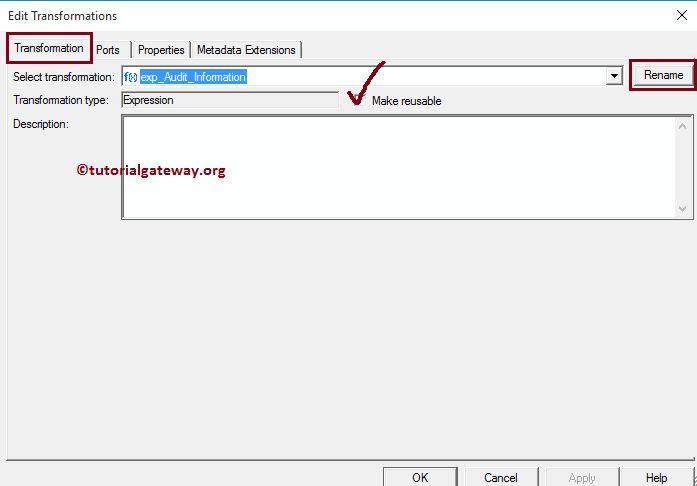
Double click on the Informatica Expression transformation to write the custom expressions. From the below screenshot, you can see the list of available properties in the Transformation tab:
- Select Transformation: By default, it will select the transformation you clicked on.
- Rename: This button will help you to rename the Expression transformation to a more meaningful name.
- Make Reusable: If you checkmark this option, this transformation will become a reusable transformation.
- Description: Please provide a valid description.
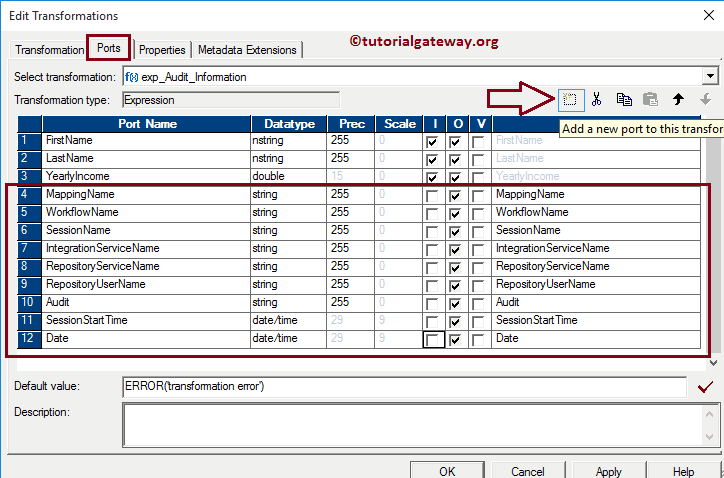
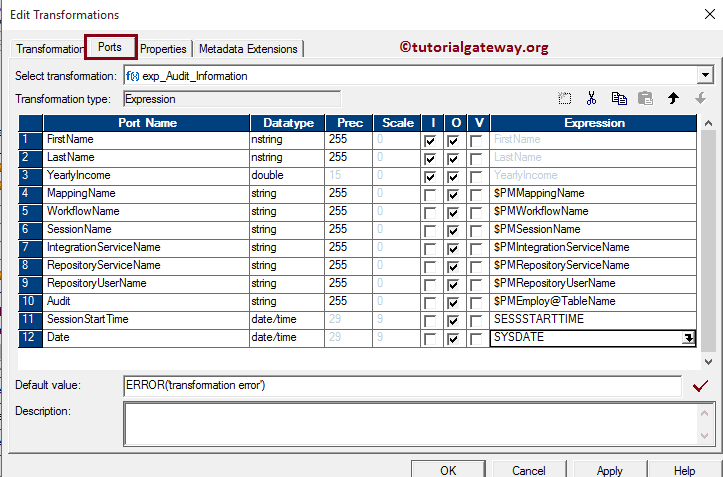
The below screenshot will show you the list of available options in the Informatica Expression Transformation Ports tab:
- Port Name: List of available column names. By clicking the New column button, you can add new columns, and by clicking the scissors button, you can delete the unwanted columns.
- I: Columns that are check-marked under this section are the expression transformation Input columns.
- O: Columns that are check-marked under this section are the expression transformation Output columns. If you unchecked any column, then that column will not be available to load in a target table.
- V: Please check mark this if it is variable
From the screenshot below, we added 9 new columns using the New Port button.
We are going to use these new columns to store the Audit information such as Mapping Name, Workflow Name, Session Name, Integration Service Name, Repository Service Name, Repository User Name, Source Table Name, Session Start Time, and System Date.
TIP: All these new columns are output ports only. So, please checkmark O
Let us write the custom expression to get the information we required. To do this, click on the arrow button beside the Mapping Name
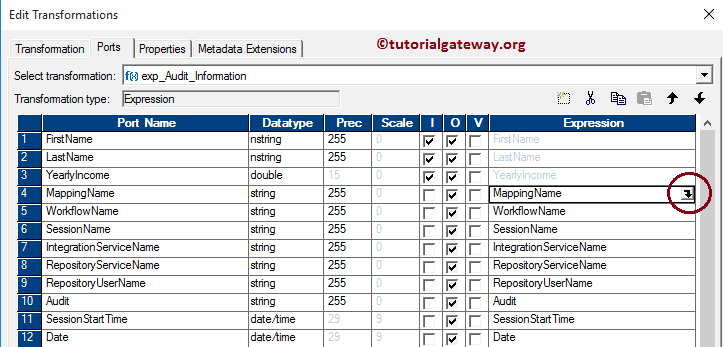
It opens the Expression Editor to write a custom expression. Here, we want the Mapping Name. So, please go to the Variables Tab and select one of the Built-in Variables called $PMMappingName.
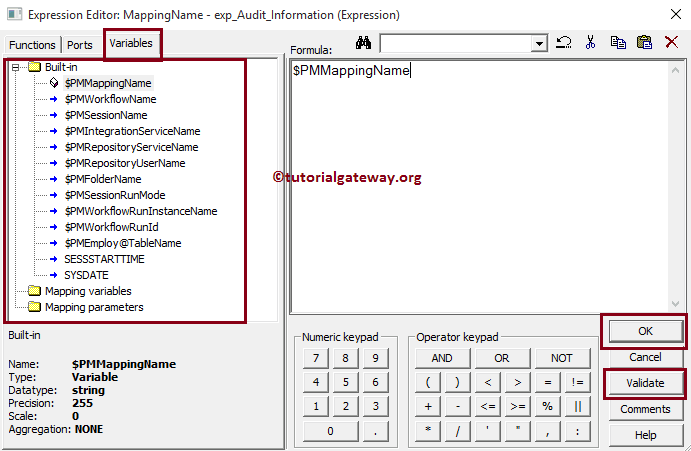
Please add the appropriate built-in variables for the remaining fields in Informatica expression transformation.
- Workflow Name: $PMWorkflowName
- Session Name: $PMSessionName
- Integration Service Name: $PMIntegrationServiceName
- Repository Service Name: $PMRepositoryServiceName
- Repository User Name: $PMRepositoryUserName
- Source Table Name: $PMEmploy@TableName
- Session Start Time: SSSSTARTTIME
- System Date: SYSDATE
Once you finish configuring the expressions of Informatica expression transformation. Click OK to close the transformation window. Next, Drag and drop the target definition (expression transformation) from the Targets folder to the mapping designer. Next, connect the expression transformation with the target definition using the Autolink.. option.
Let us validate the mapping by going to the Mapping Menu bar and selecting the Validate option.
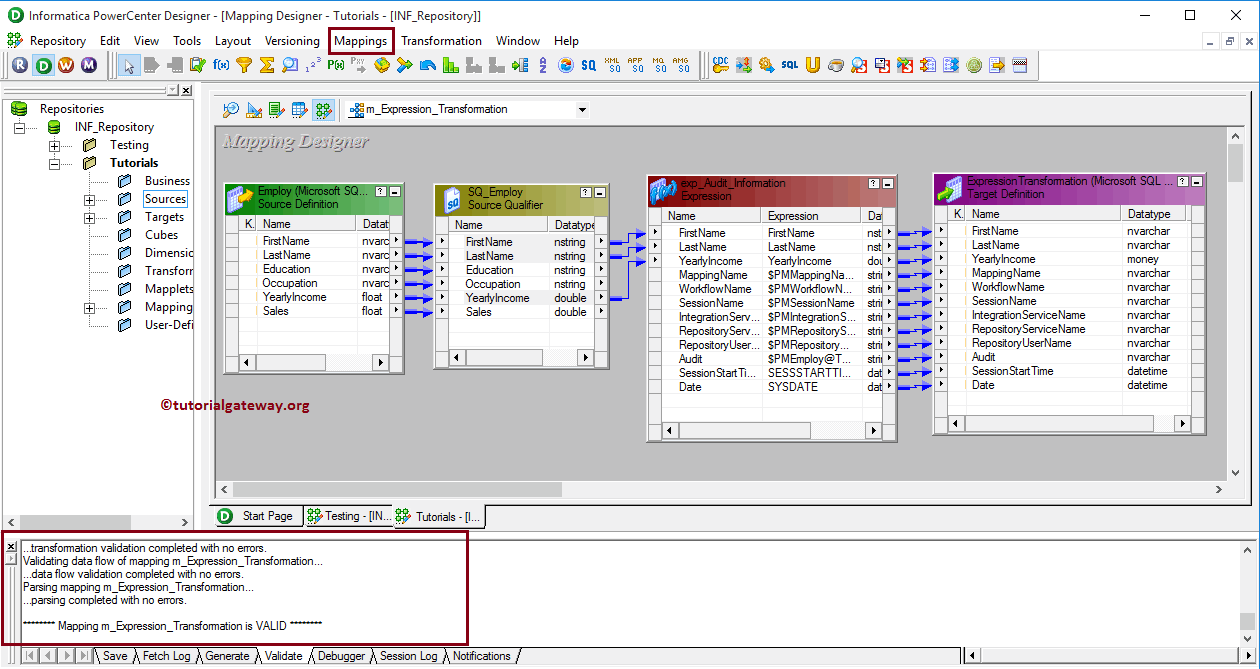
From the above screenshot, you can observe that Our Mapping is a valid one.
Create a Workflow for Expression Transformation in Informatica
Once we finish creating the Mapping, we have to create the workflow for it. PowerCenter Workflow manager provides two approaches to creating a workflow.
In this Informatica Expression Transformation example, we will create the Workflow manually. Once we have created the workflow, our next step is to create a session task for our mapping.
Step 4(a):
There are two types of sessions:
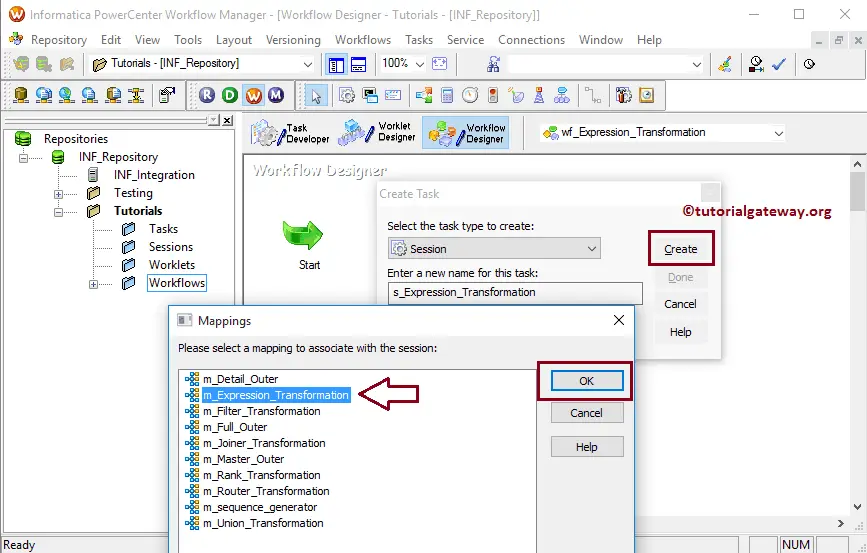
For this Informatica Expression Transformation example, we are going to create Non-reusable Session. Please navigate to Tasks Menu and select the Create option to open the Create Task window. Here you have to select the Session as Task type (default) and enter a unique name (S_Expression_Transformation) for the session.
Once you click on the Create button, a new window called Mappings will open. Here you have to choose the mapping you want to associate with this session.
From the below screenshot, you can observe that we are selecting the mapping (m_Expression_Transformation) that we created earlier (in Step 3).
Double click on the Session Task to configure it. Although we have to set Sources, targets, and some common properties, we are not going to explain them here. We strictly recommend visiting the Sessions article to understand the features.
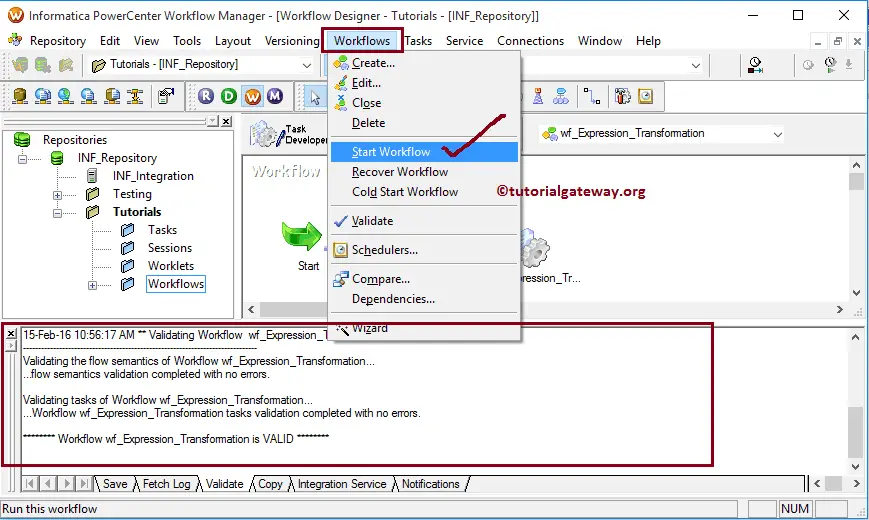
From the below screenshot, you can observe that the Expression Transformation in Informatica workflow is a valid one. Now, let us start the Workflow by selecting the Start Workflow option in the Workflows menu.
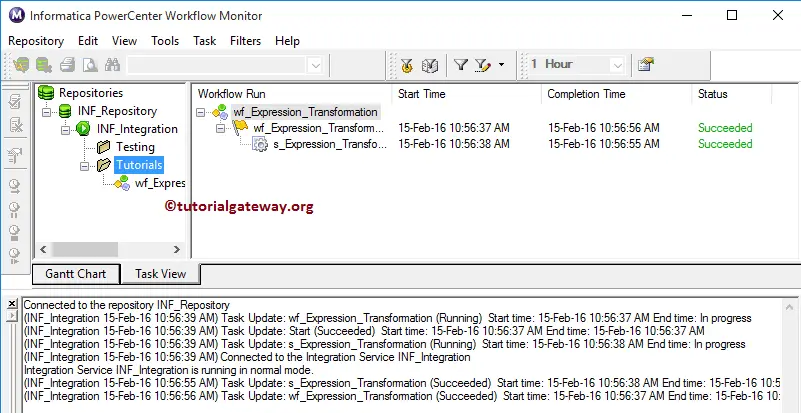
Once you select the Start Workflow option, the PowerCenter Workflow monitor opens to monitor the workflow. From the below screenshot, see our Informatica Expression Transformation workflow executed without any errors.
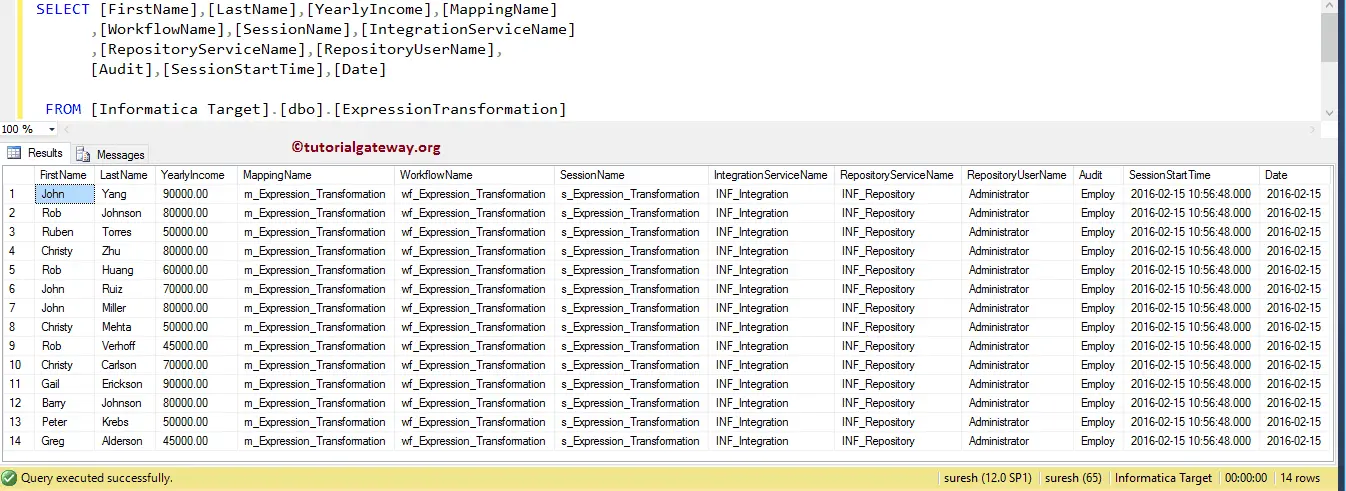
Let us open the SQL Server Management Studio to check whether we successfully stored the Audit Information using the Expression Transformation in Informatica or not.
Comments are closed.