In this article, we will show you the steps involved in connecting Tableau to Microsoft Analysis Services. Also, how to use the data present in Cubes as Tableau Data Source with an example.
Steps involved in Connecting Tableau to Microsoft Analysis Services
If you have not started the Tableau yet, Double click on the Tableau desktop to open. Once it is open, it looks like below screenshot
First, Under the Tableau Connect to a Server section, Please select the Microsoft Analysis Services Option
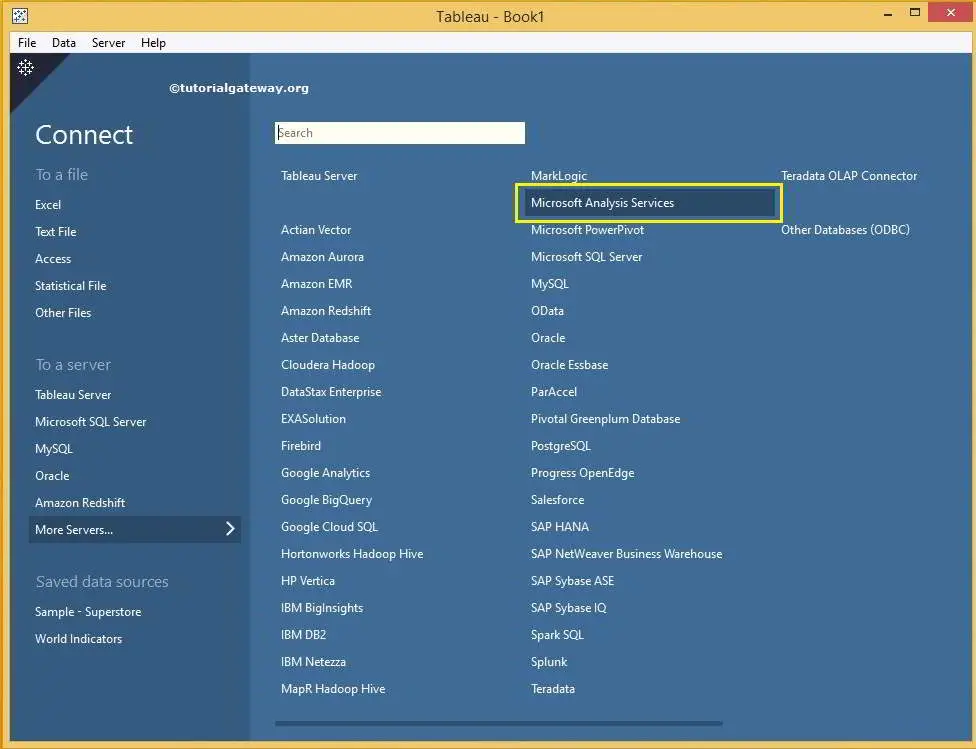
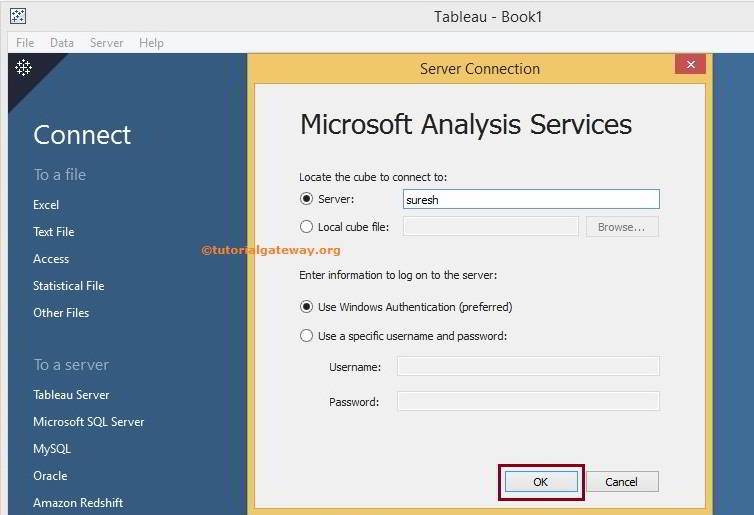
Once you selected the Microsoft Analysis Services Option, a new window will open to configure the Server Connections.
- Server: Please specify the instance name to connect with Microsoft Analysis Services.
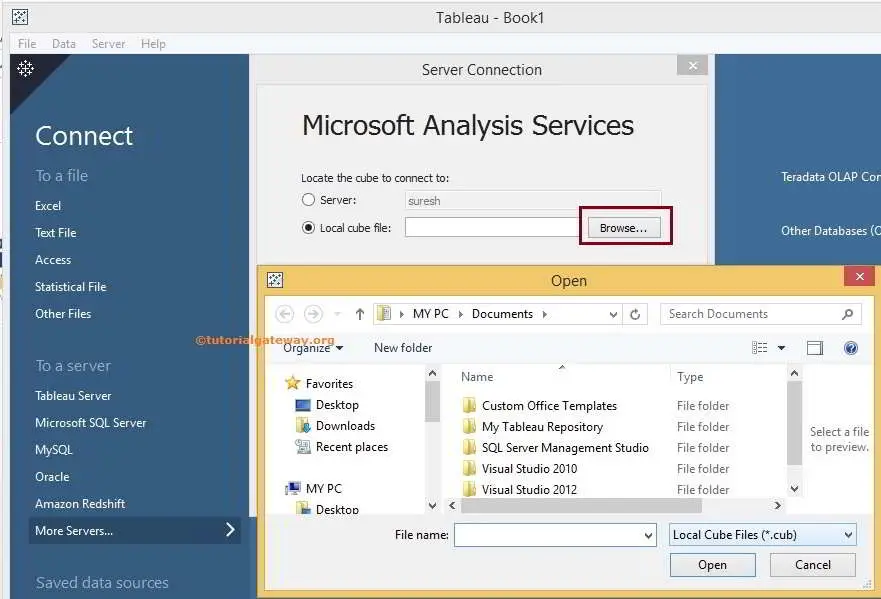
- Local Cube File: If the Cube file is in your file system, and select this option.
- Enter information to log on to the server: Use this section to decide how you want to connect with Microsoft Analysis Services. If you’re going to use the current windows login credentials, then select Use Windows Authentication option. Otherwise, please select Use specific Username and Password option, and specify the credentials (Username and Password) to access the SQL Server.
For now, we just used our own instance and clicked on OK button
If you want to choose the cube file from the local hard drive, then select the Local Cube File option. Once you selected this option, the Browse button will enable us to navigate the entire file system, as shown below. You can download this Cube from the Microsoft official Download Center.
After you click the OK button, the below screenshot will appear. Please understand the following option before you start creating a report
- This section will display the Instance name we used to connect with the Microsoft Analysis Services.
- Select a Database: This section will display the list of Microsoft Analysis Services Databases available for that instance.
- Select a Cube: This section will display the list of Cubes present in selected Microsoft Analysis Services Database.
- This region displays the Measures and Dimensions available in the selected cube.
Under the Database section, We have to select the required Database available in that Instance. In this example, We have only one Database so, we are choosing an AdventureWorksDW2014 Multidimensional database.
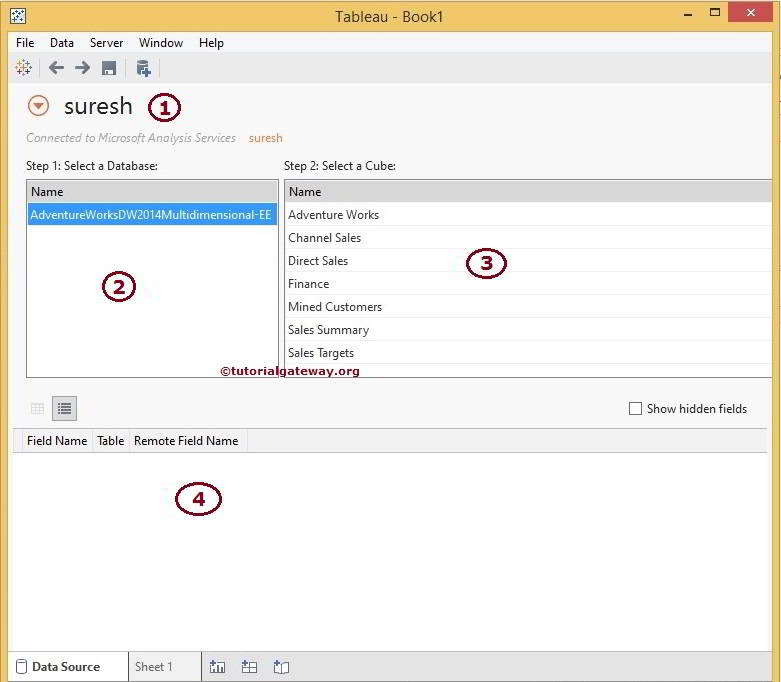
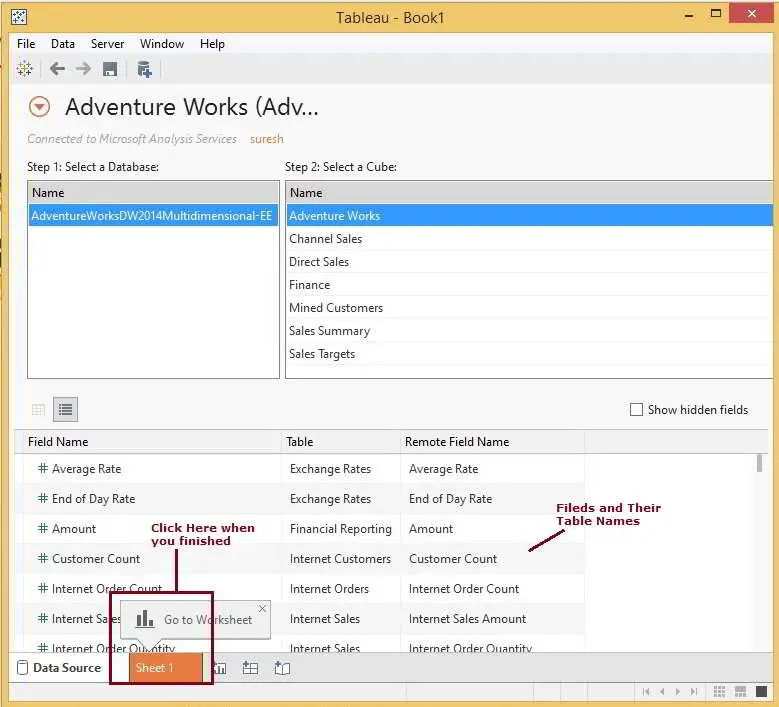
Under the Select a Cube section, We have to select the required Cube available in the selected database. In this example, We are choosing the Adventure Works Cube. Once you selected the required Cube, Region 4 will display the Measures and Dimensions available in that cube.
NOTE: Do not worry about the Cubes, Dimensions, etc. Try to understand the procedure to connect Microsoft Analysis Services from Tableau. However, if you are excited to learn, Please read our SQL Server Analysis Services and the Power BI Tutorial
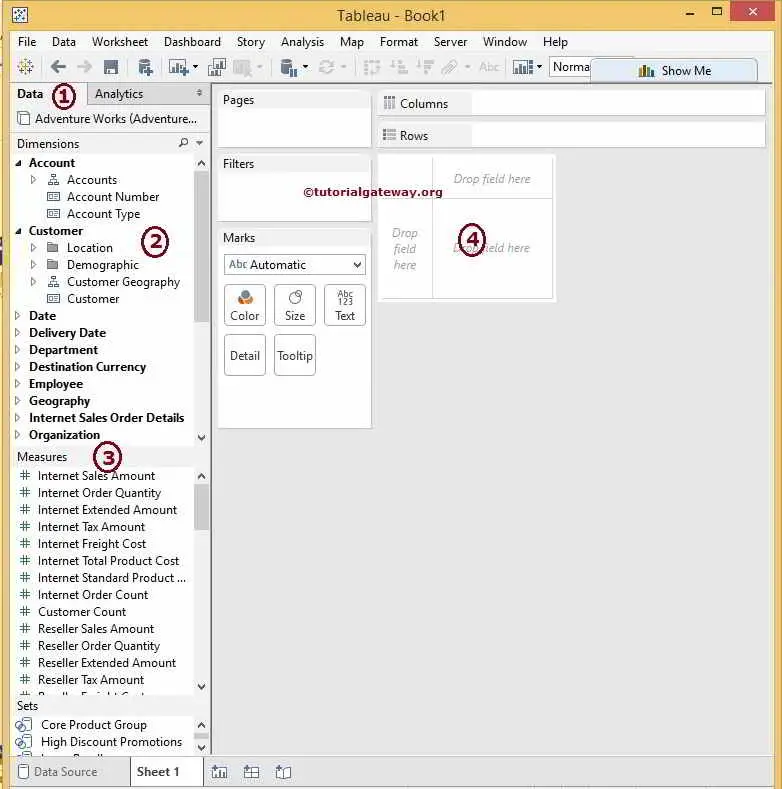
Once you finished reviewing the data, click on Sheet 1 to design the Tableau Report
- Data: This will display the list of currently connected data Sources. We have only one at this time. Otherwise, it will show all the data sources available.
- Dimensions: All the Dimensions, Natural Hierarchies and User hierarchies we created in SQL Server Analysis Services will place under the Dimensions section
- Measures: You can place columns with Numeric data or Metric values under the Measures section
- It is where we design our Tableau reports by dragging Measures and Dimensions